
Some ideas for storing Christmas Decorations.
Christmas is over, the New Year is almost here, and in the days ahead it will be time to take down the holiday decorations. In this blog post I’m covering the different ways that I safely put away my favorite and cherished ornaments, so they are in perfect condition for next years use .
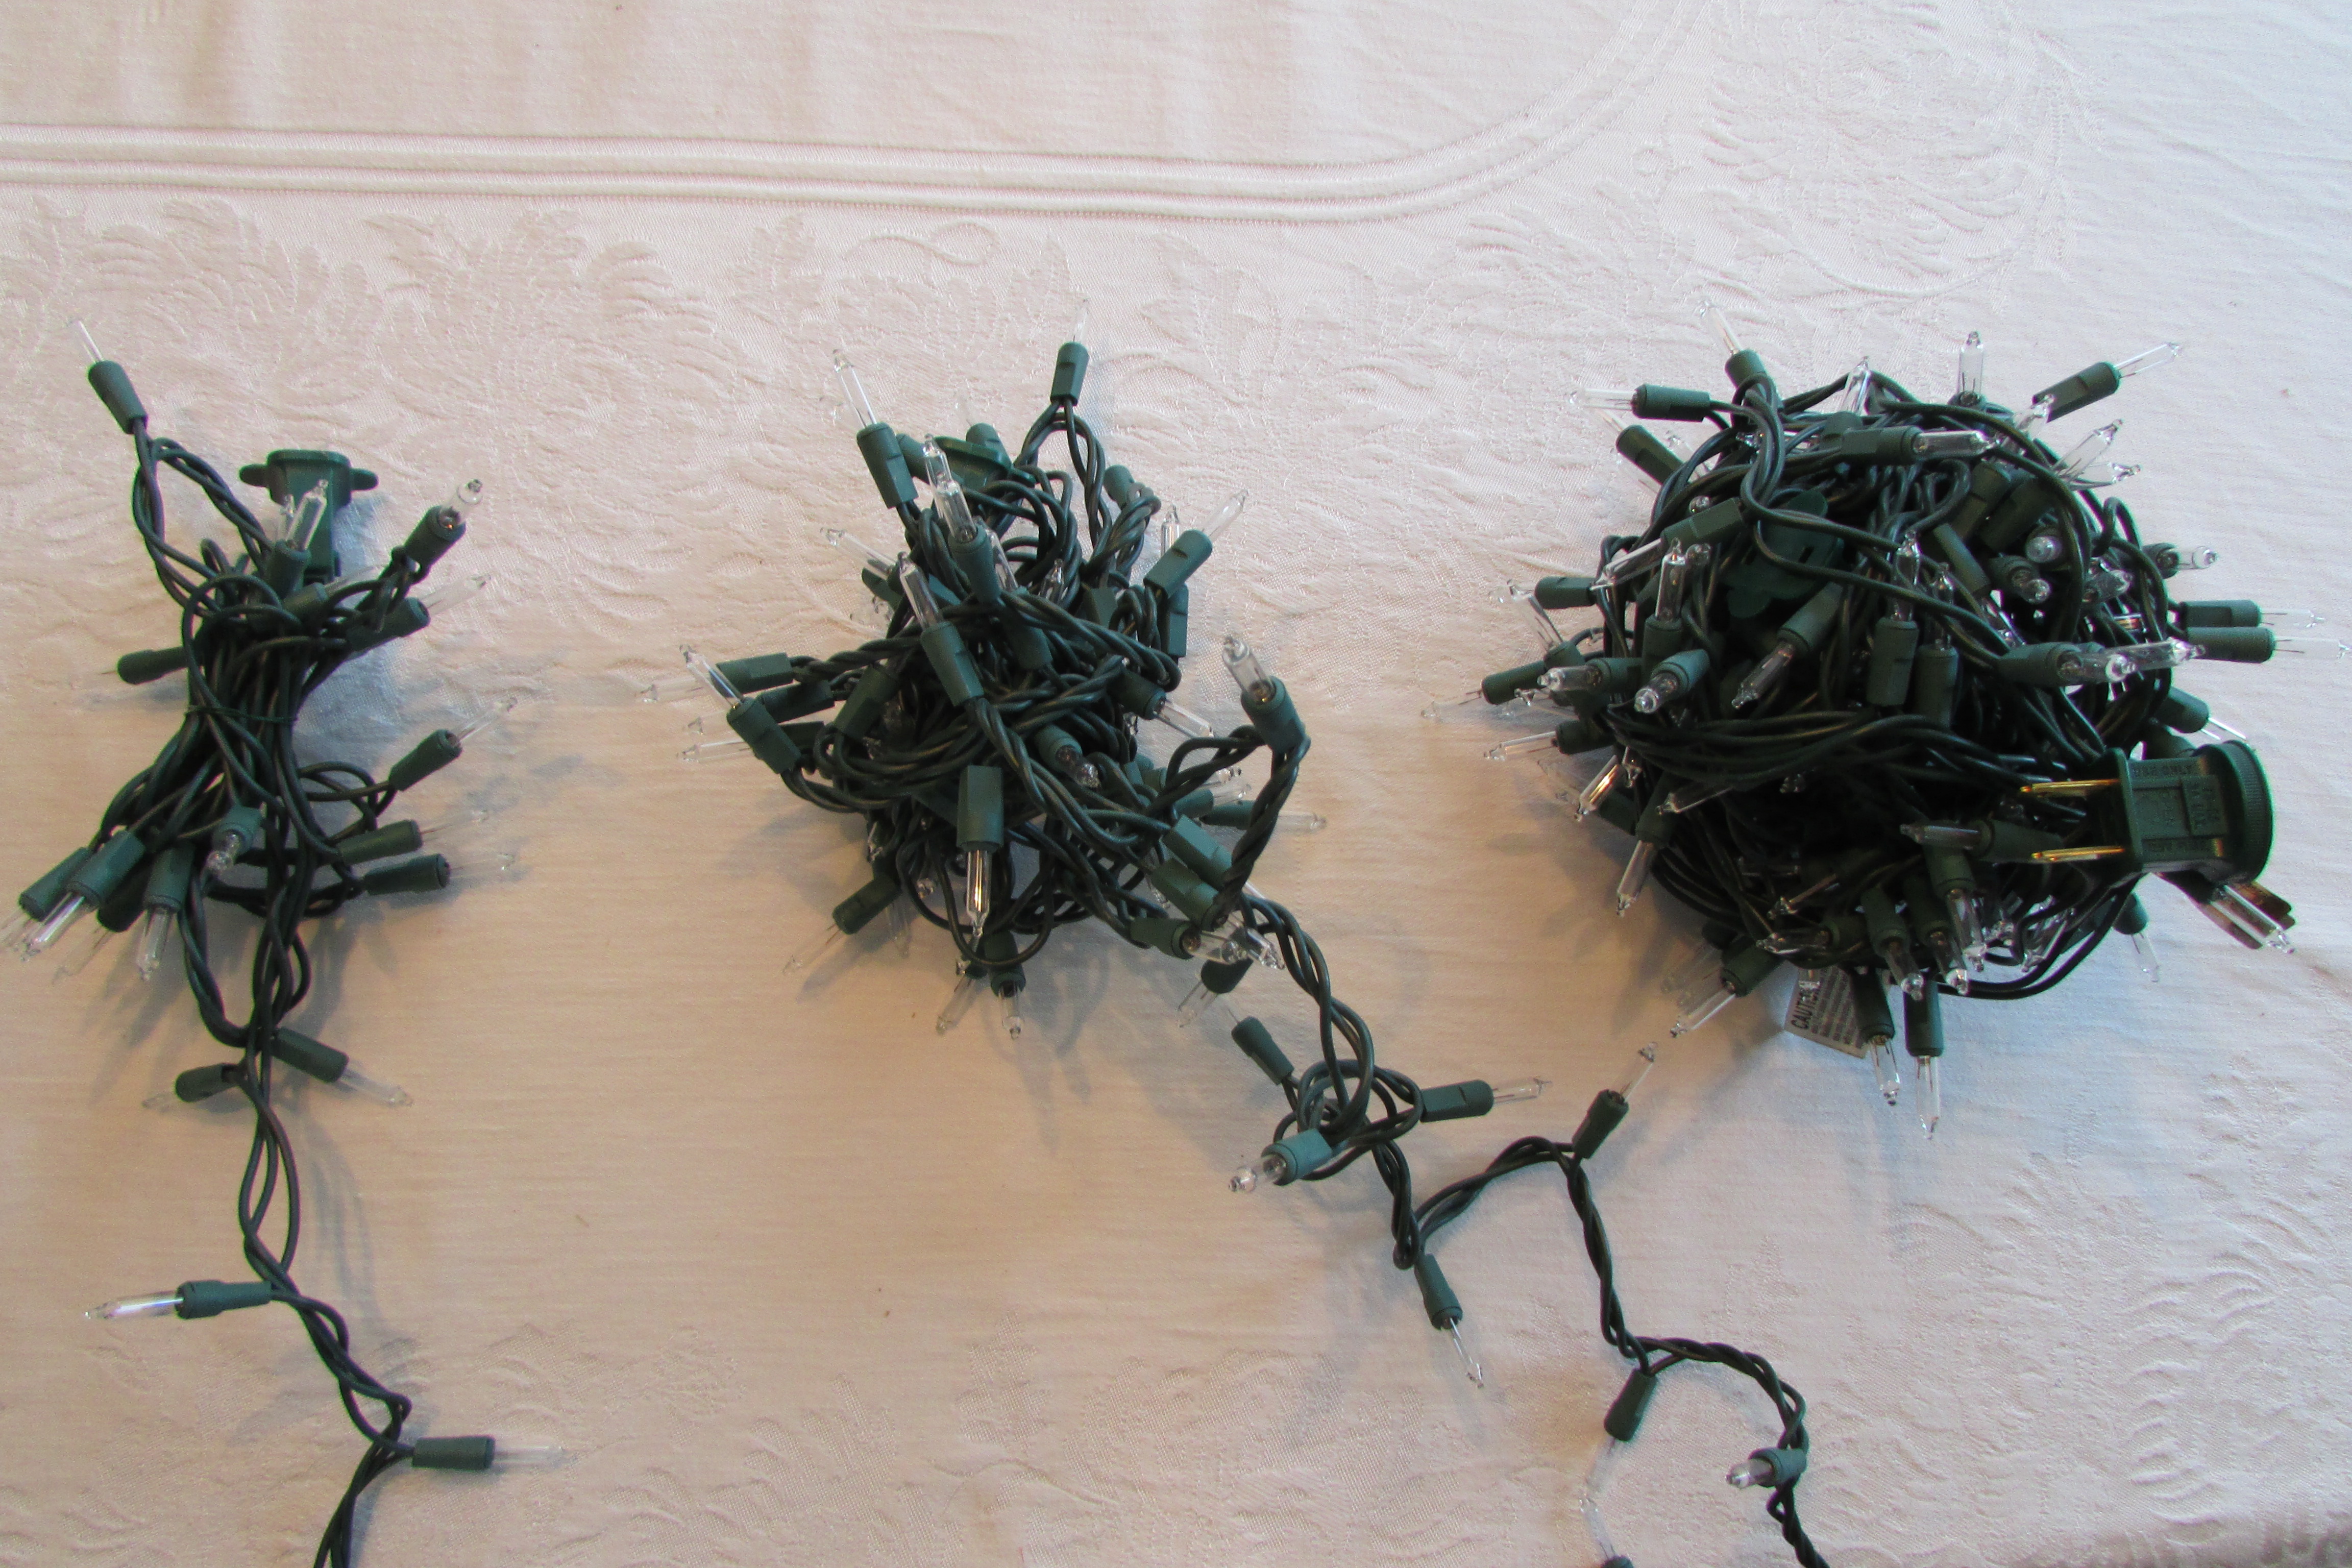
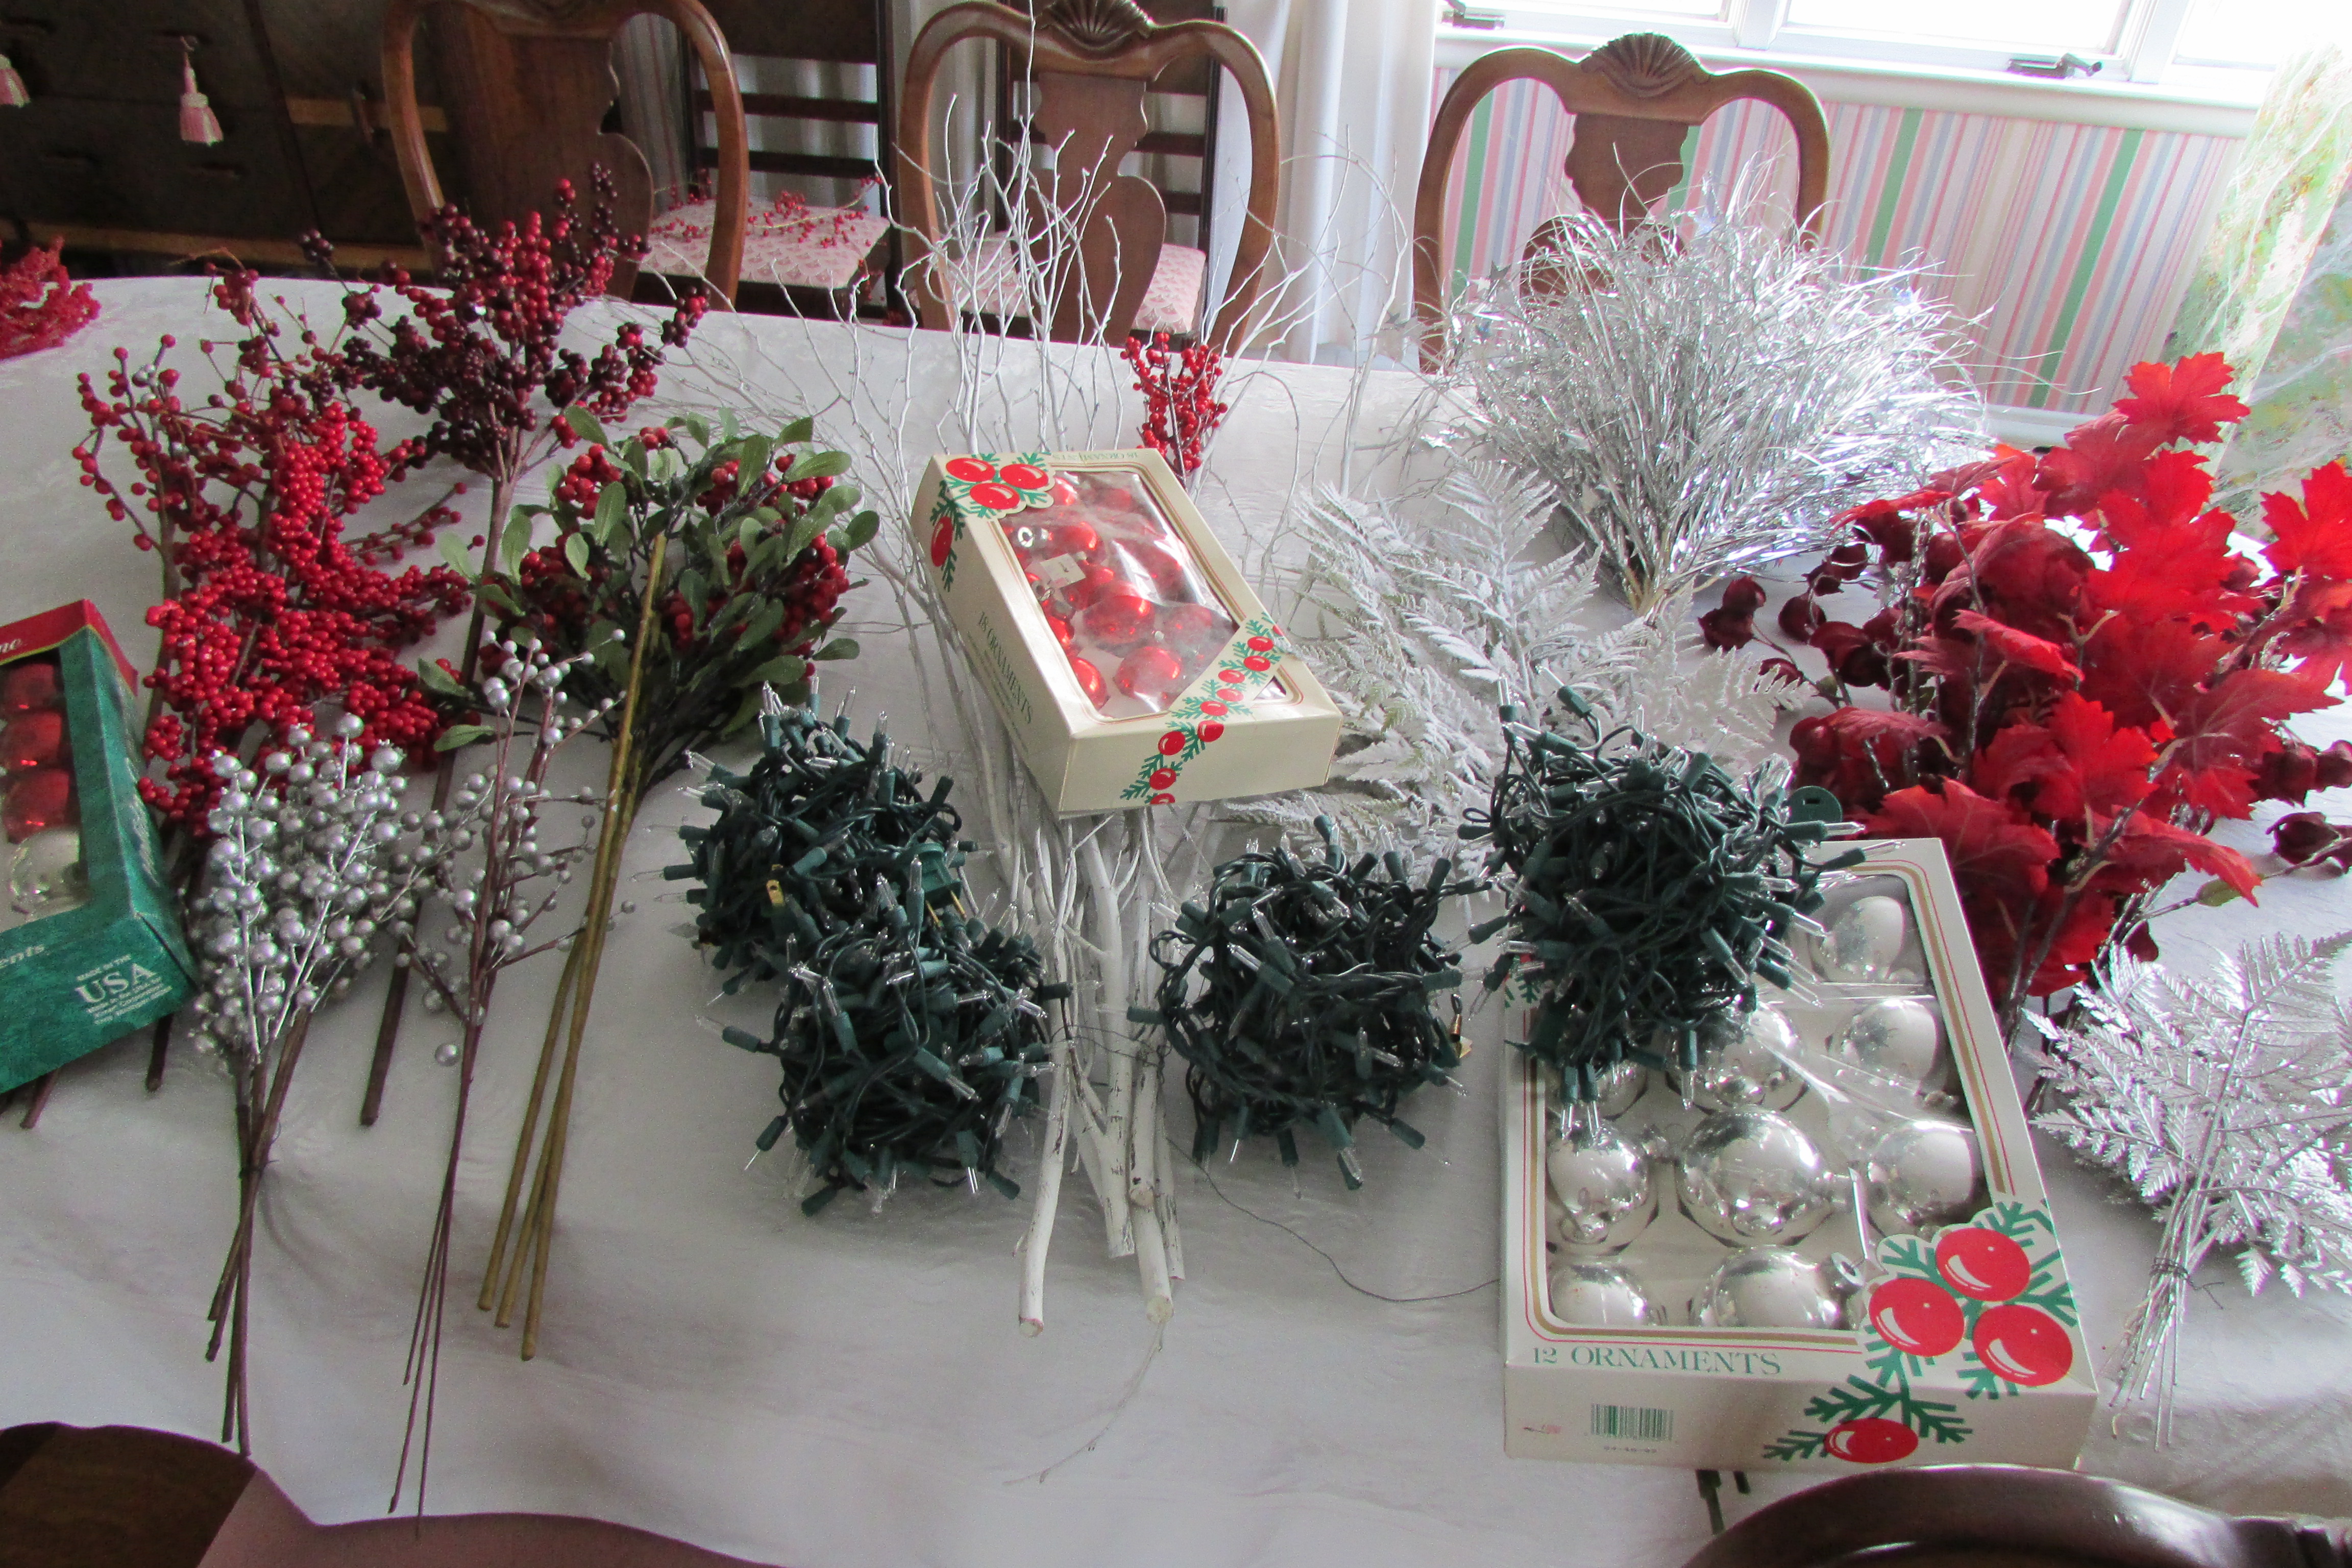
Putting away Christmas Lights, so they are not tangled when next needed, is an easy thing to do. Look at the above photo, it shows three different stages of how I form, then store my lights in a ball shape. First take the end of your string of lights that does not have the plug on it (as seen in the photo on the left side), and start folding your lights back and forth (about five or six times). Secondly, take your string of lights and cross over the clump of lights that you have just make and start winding your lights around and around to start forming a ball (as seen in the second example in the above photo). Continue winding you lights around each other until you end up with the plug on top, as seen in the third example. At that point, you can then tuck the end of the plug under your light’s electrical wire to hold it in place. Next year, before using your lights again, plug them in, as the plug is right on top; if your ball of lights is completely lit, you are ready to decorate. Store your balls of Christmas lights in cardboard boxes, bushel baskets or plastic storage boxes, the choice is yours.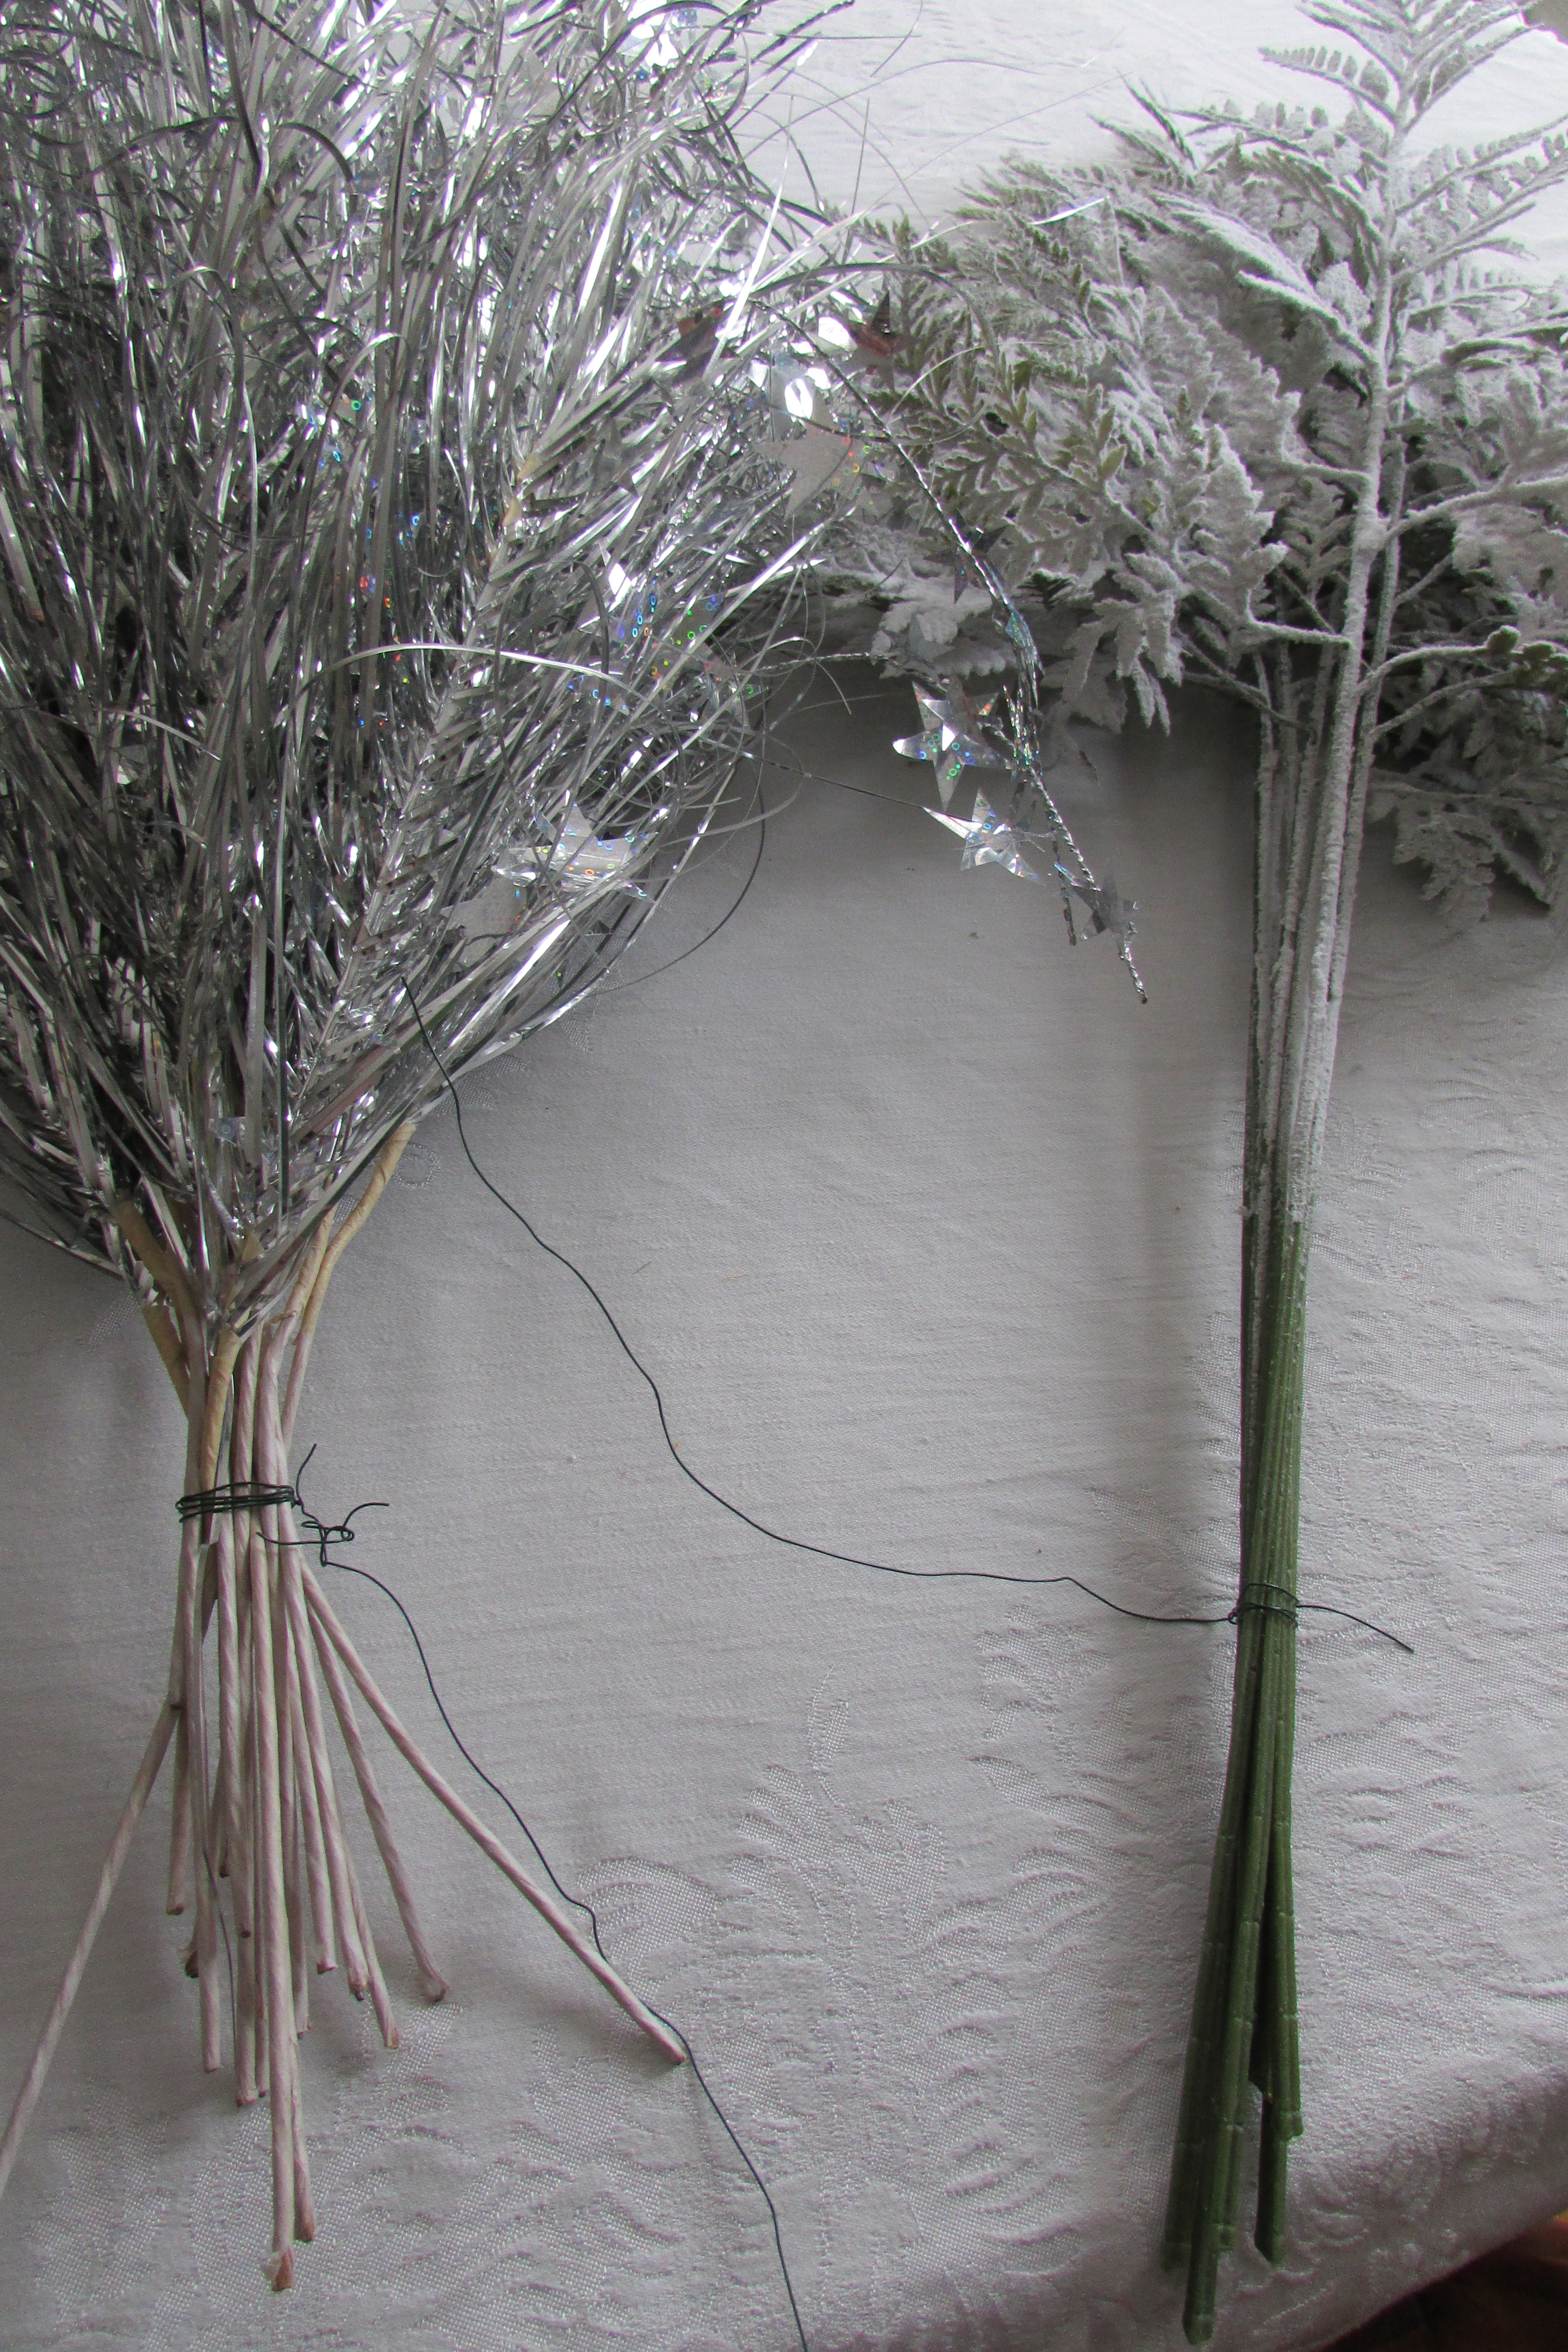 Storing long stem silk flowers and decorative foliage is quite simple. First make clumps of the different kinds of things that your will be storing and lash them together, as seen in the above photo and leave about 12 extra inches of florist wire as a tail.
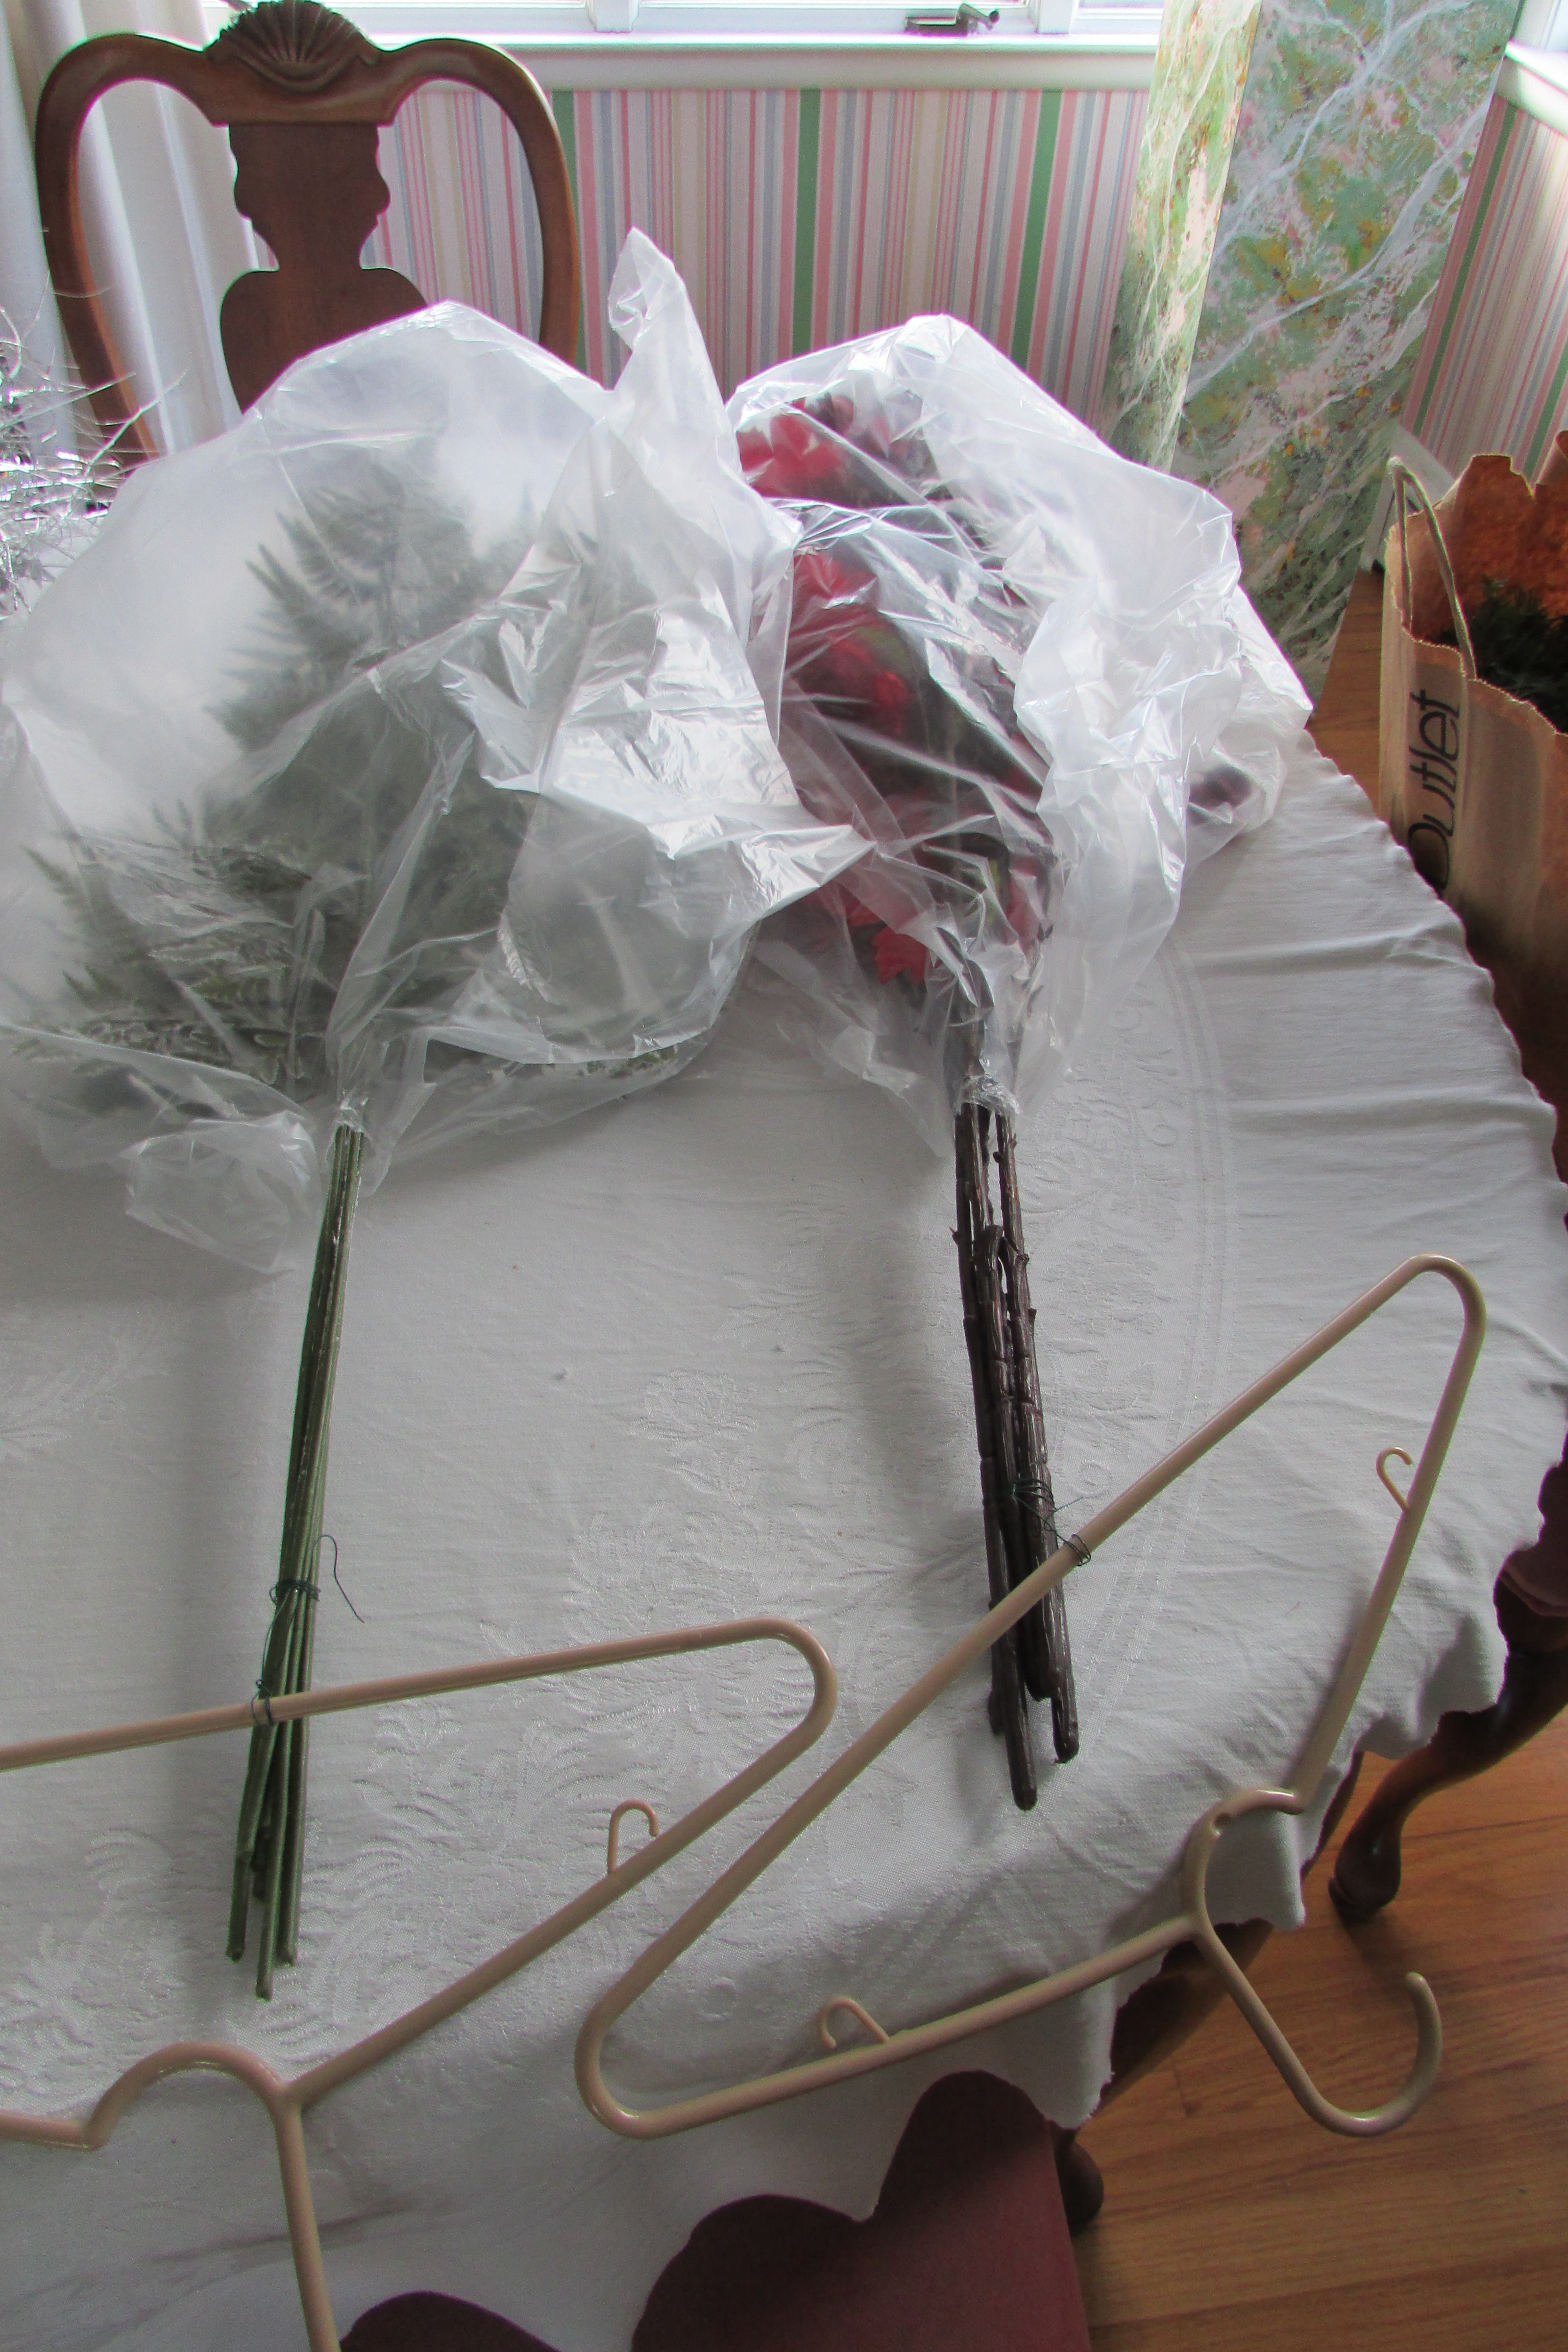 Next take a plastic kitchen trash bag and cut a small hole in its bottom. Pass the stems of your silk flowers through the hole and then take your tail of florist wire and lash it to a hanger; your silk flowers are now ready to be hang upside down from a pole. If you will be hanging your flowers from an attic or cellar rafter, make your tail of florist wire a bit longer so you have enough wire to twist around a nail that your hammered there.
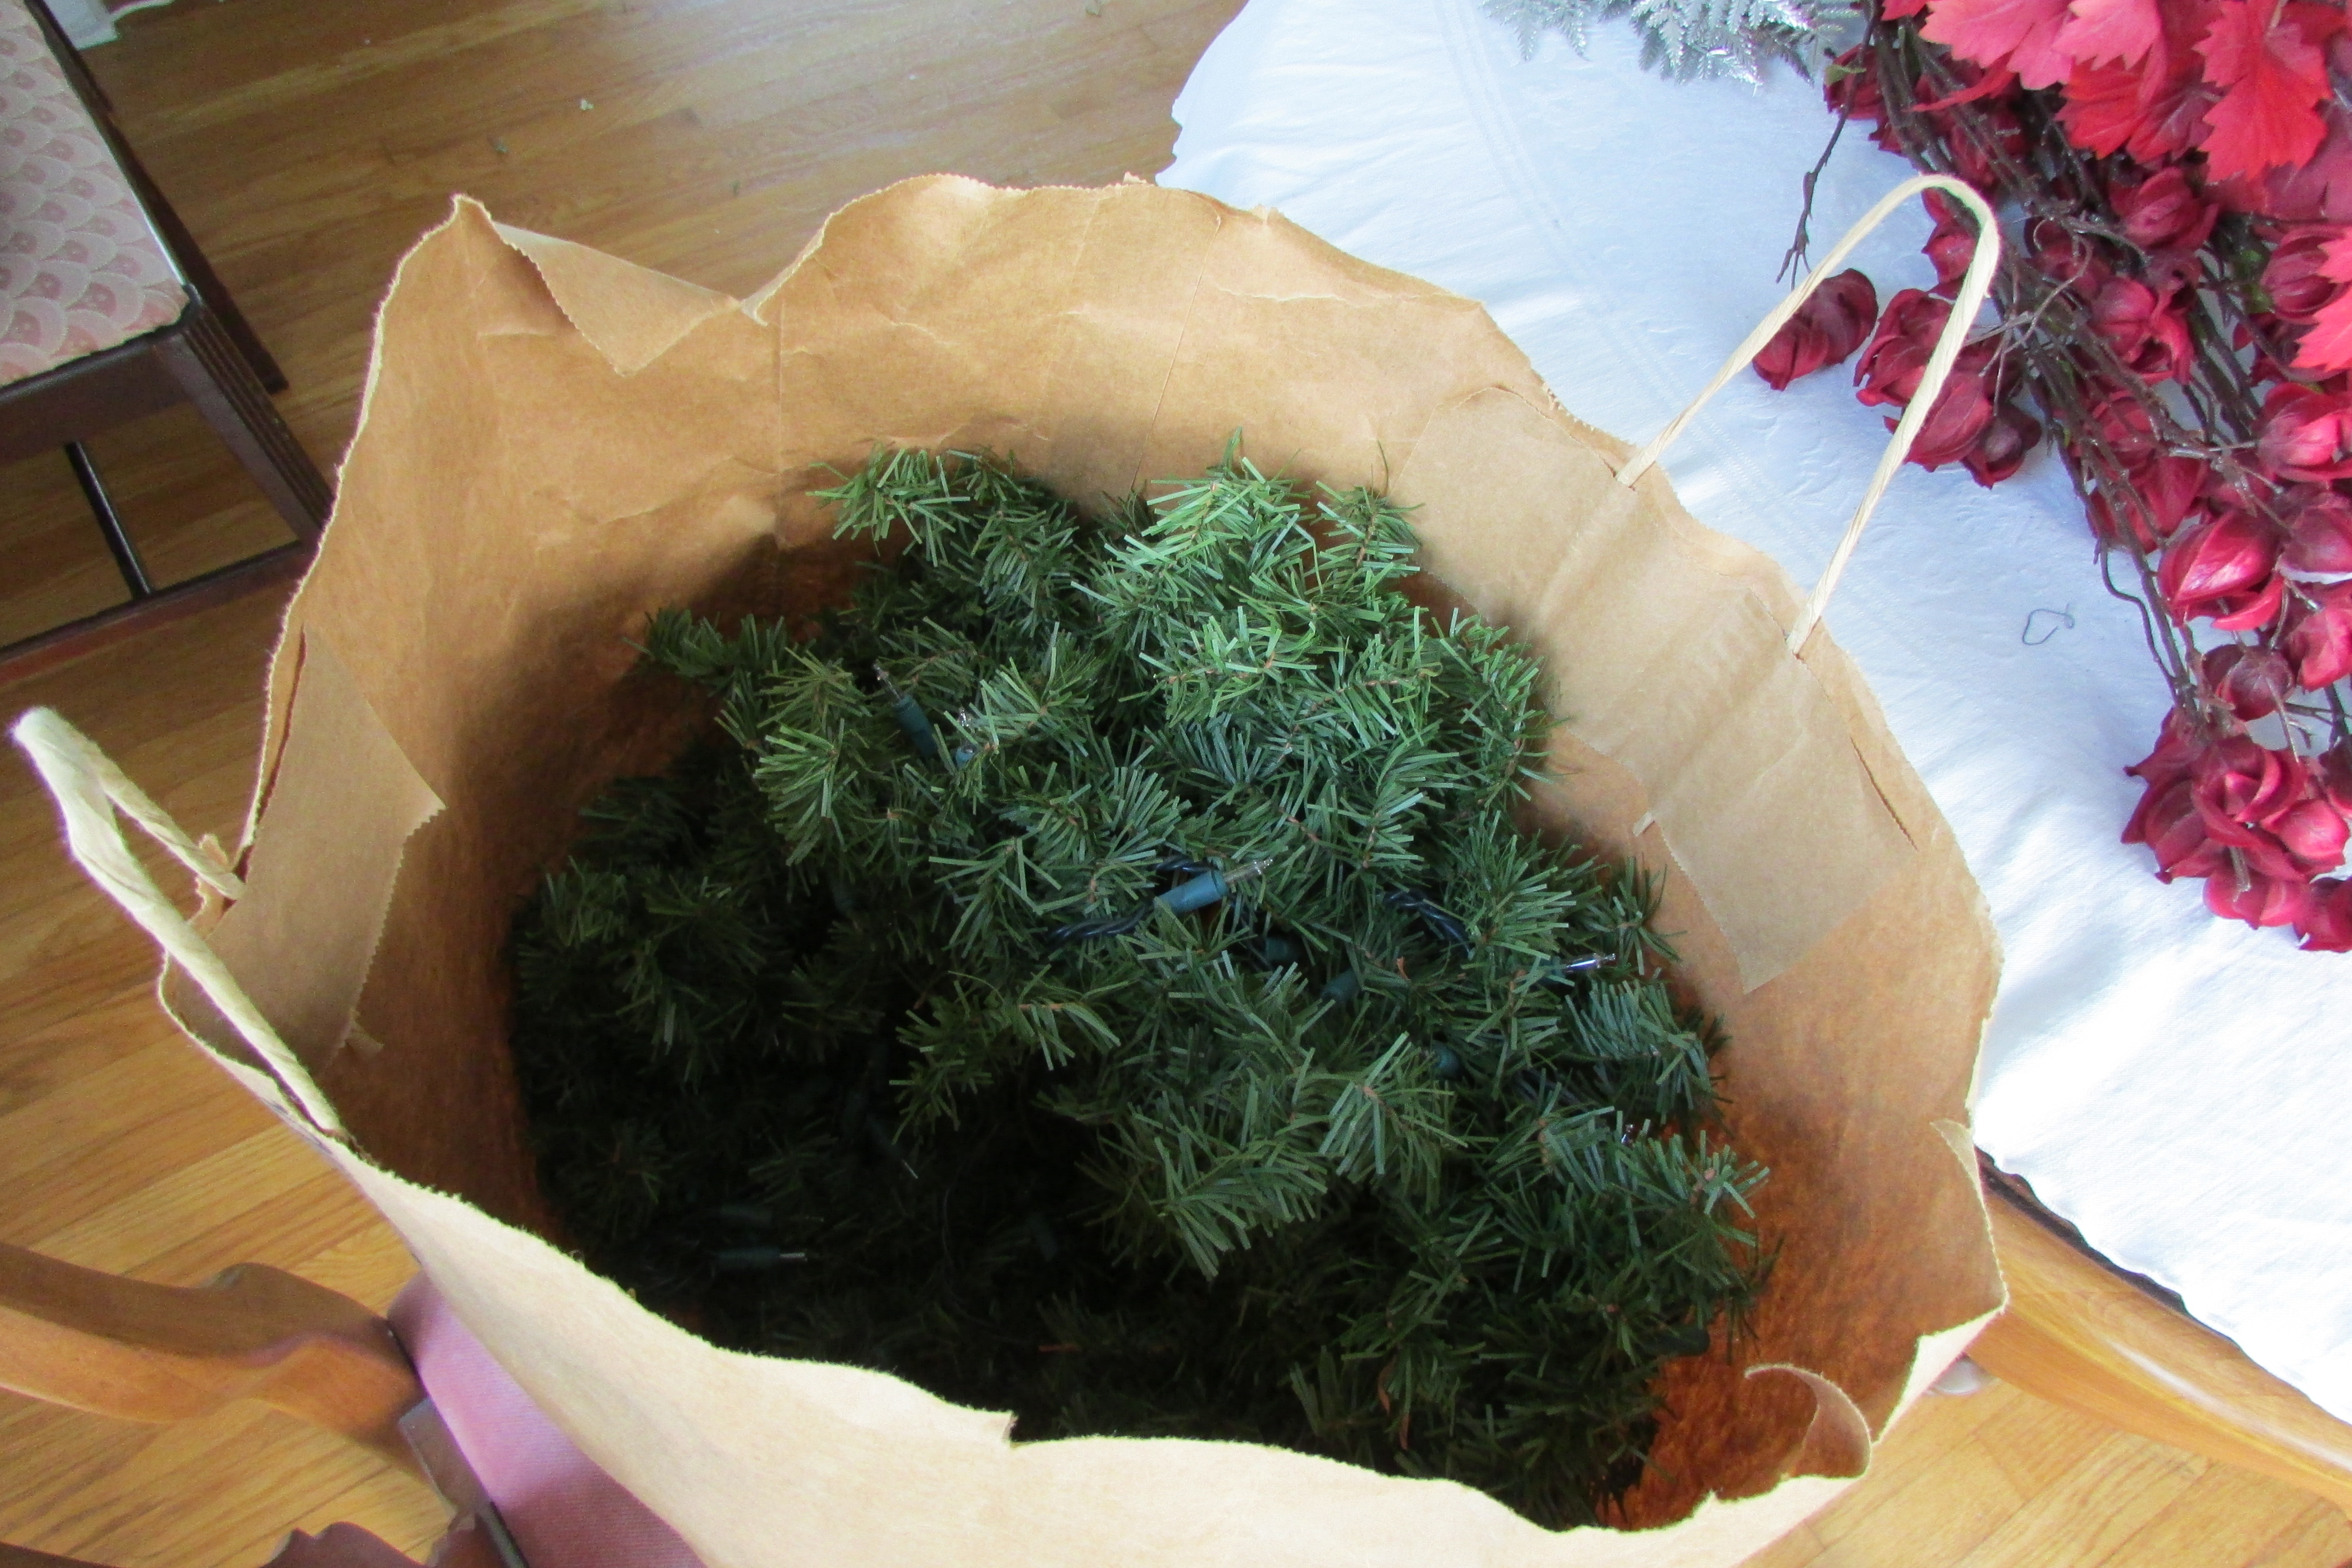 To store a garland that decorated a fireplace or staircase, just put it in a large paper or plastic bag with two handles, cover it with a sheet or two of newspaper to keep any dust off, then pass a plastic hanger through its two handles, and it is ready to hang up.
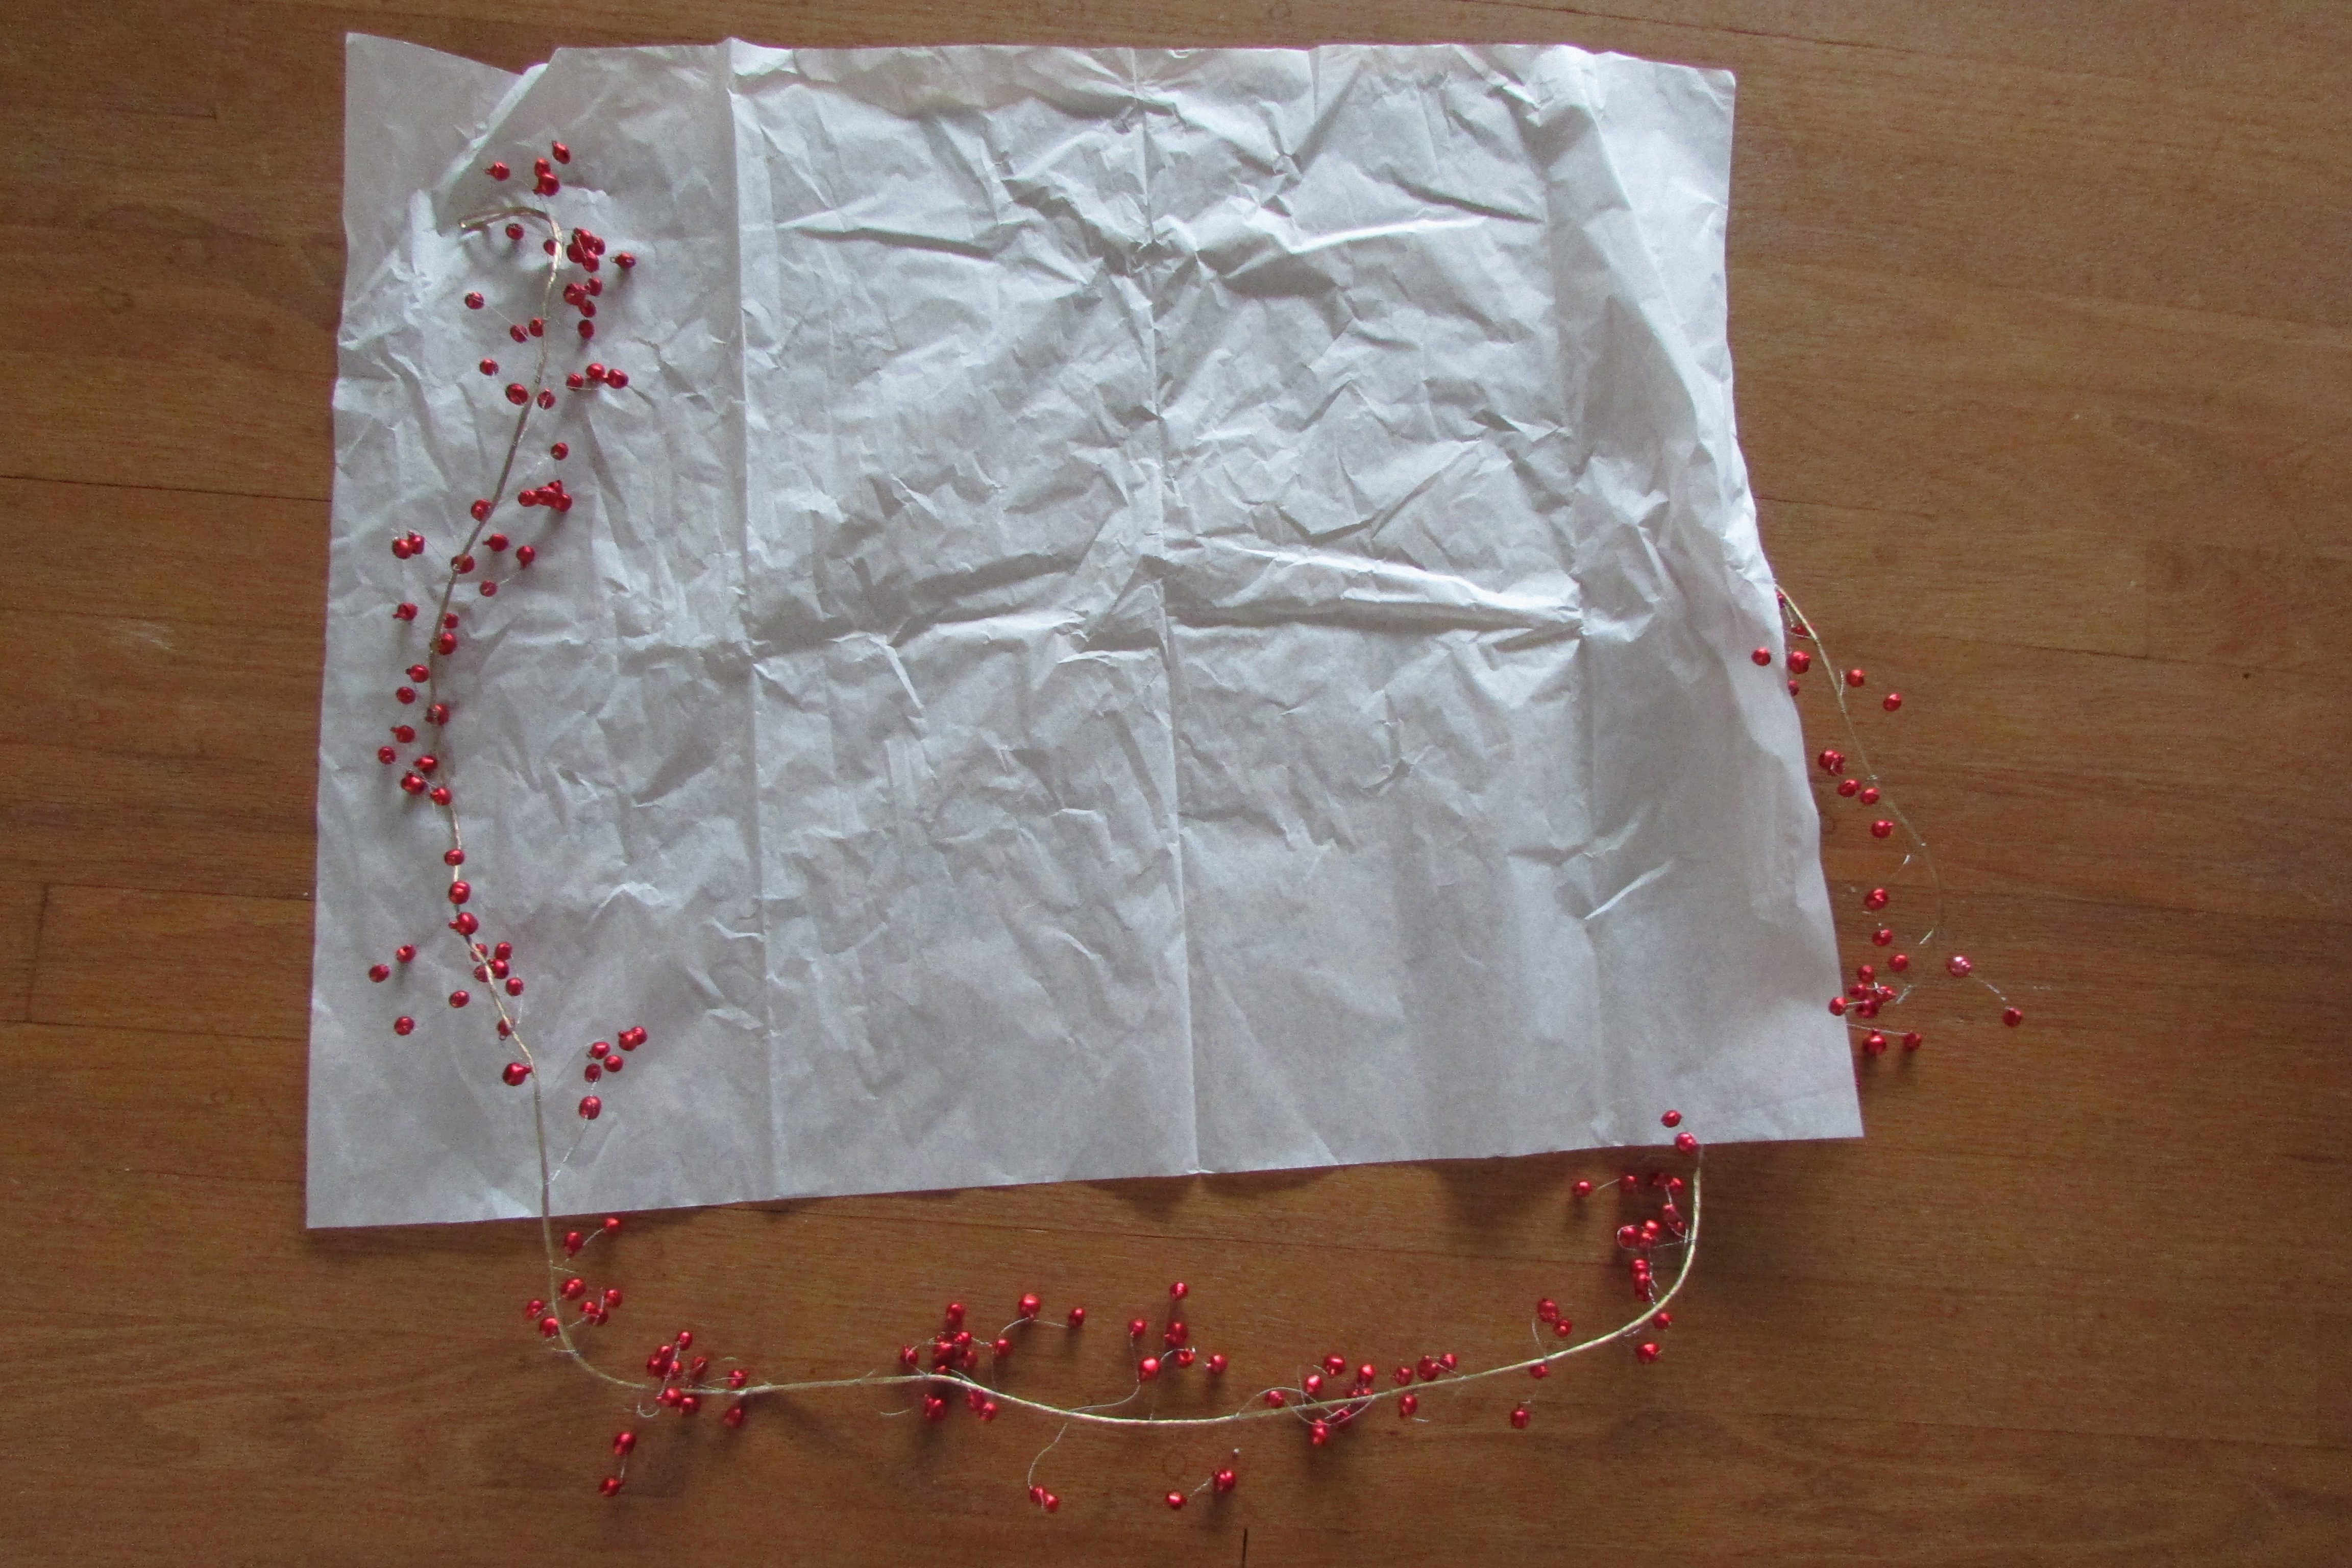
If you have delicate bead, or as in my case bell garland, that is composed of many pieces that could easily become tangled when stored, take a piece of tissue paper and place the beginning end of your garland at one side (as seen in the above photo). Next take your tissue paper and bring it up and over the first part of your of garland, then tuck it under the garland and roll it a bit. After that take the next part of your garland and bring it up into the tissue paper and then roll the tissue paper around it until it is covered. Continue “S ing” your garland through the paper, and rolling until you have completely covered it for storage. If needed, at the end tape the tissue paper together to keep everything in place.
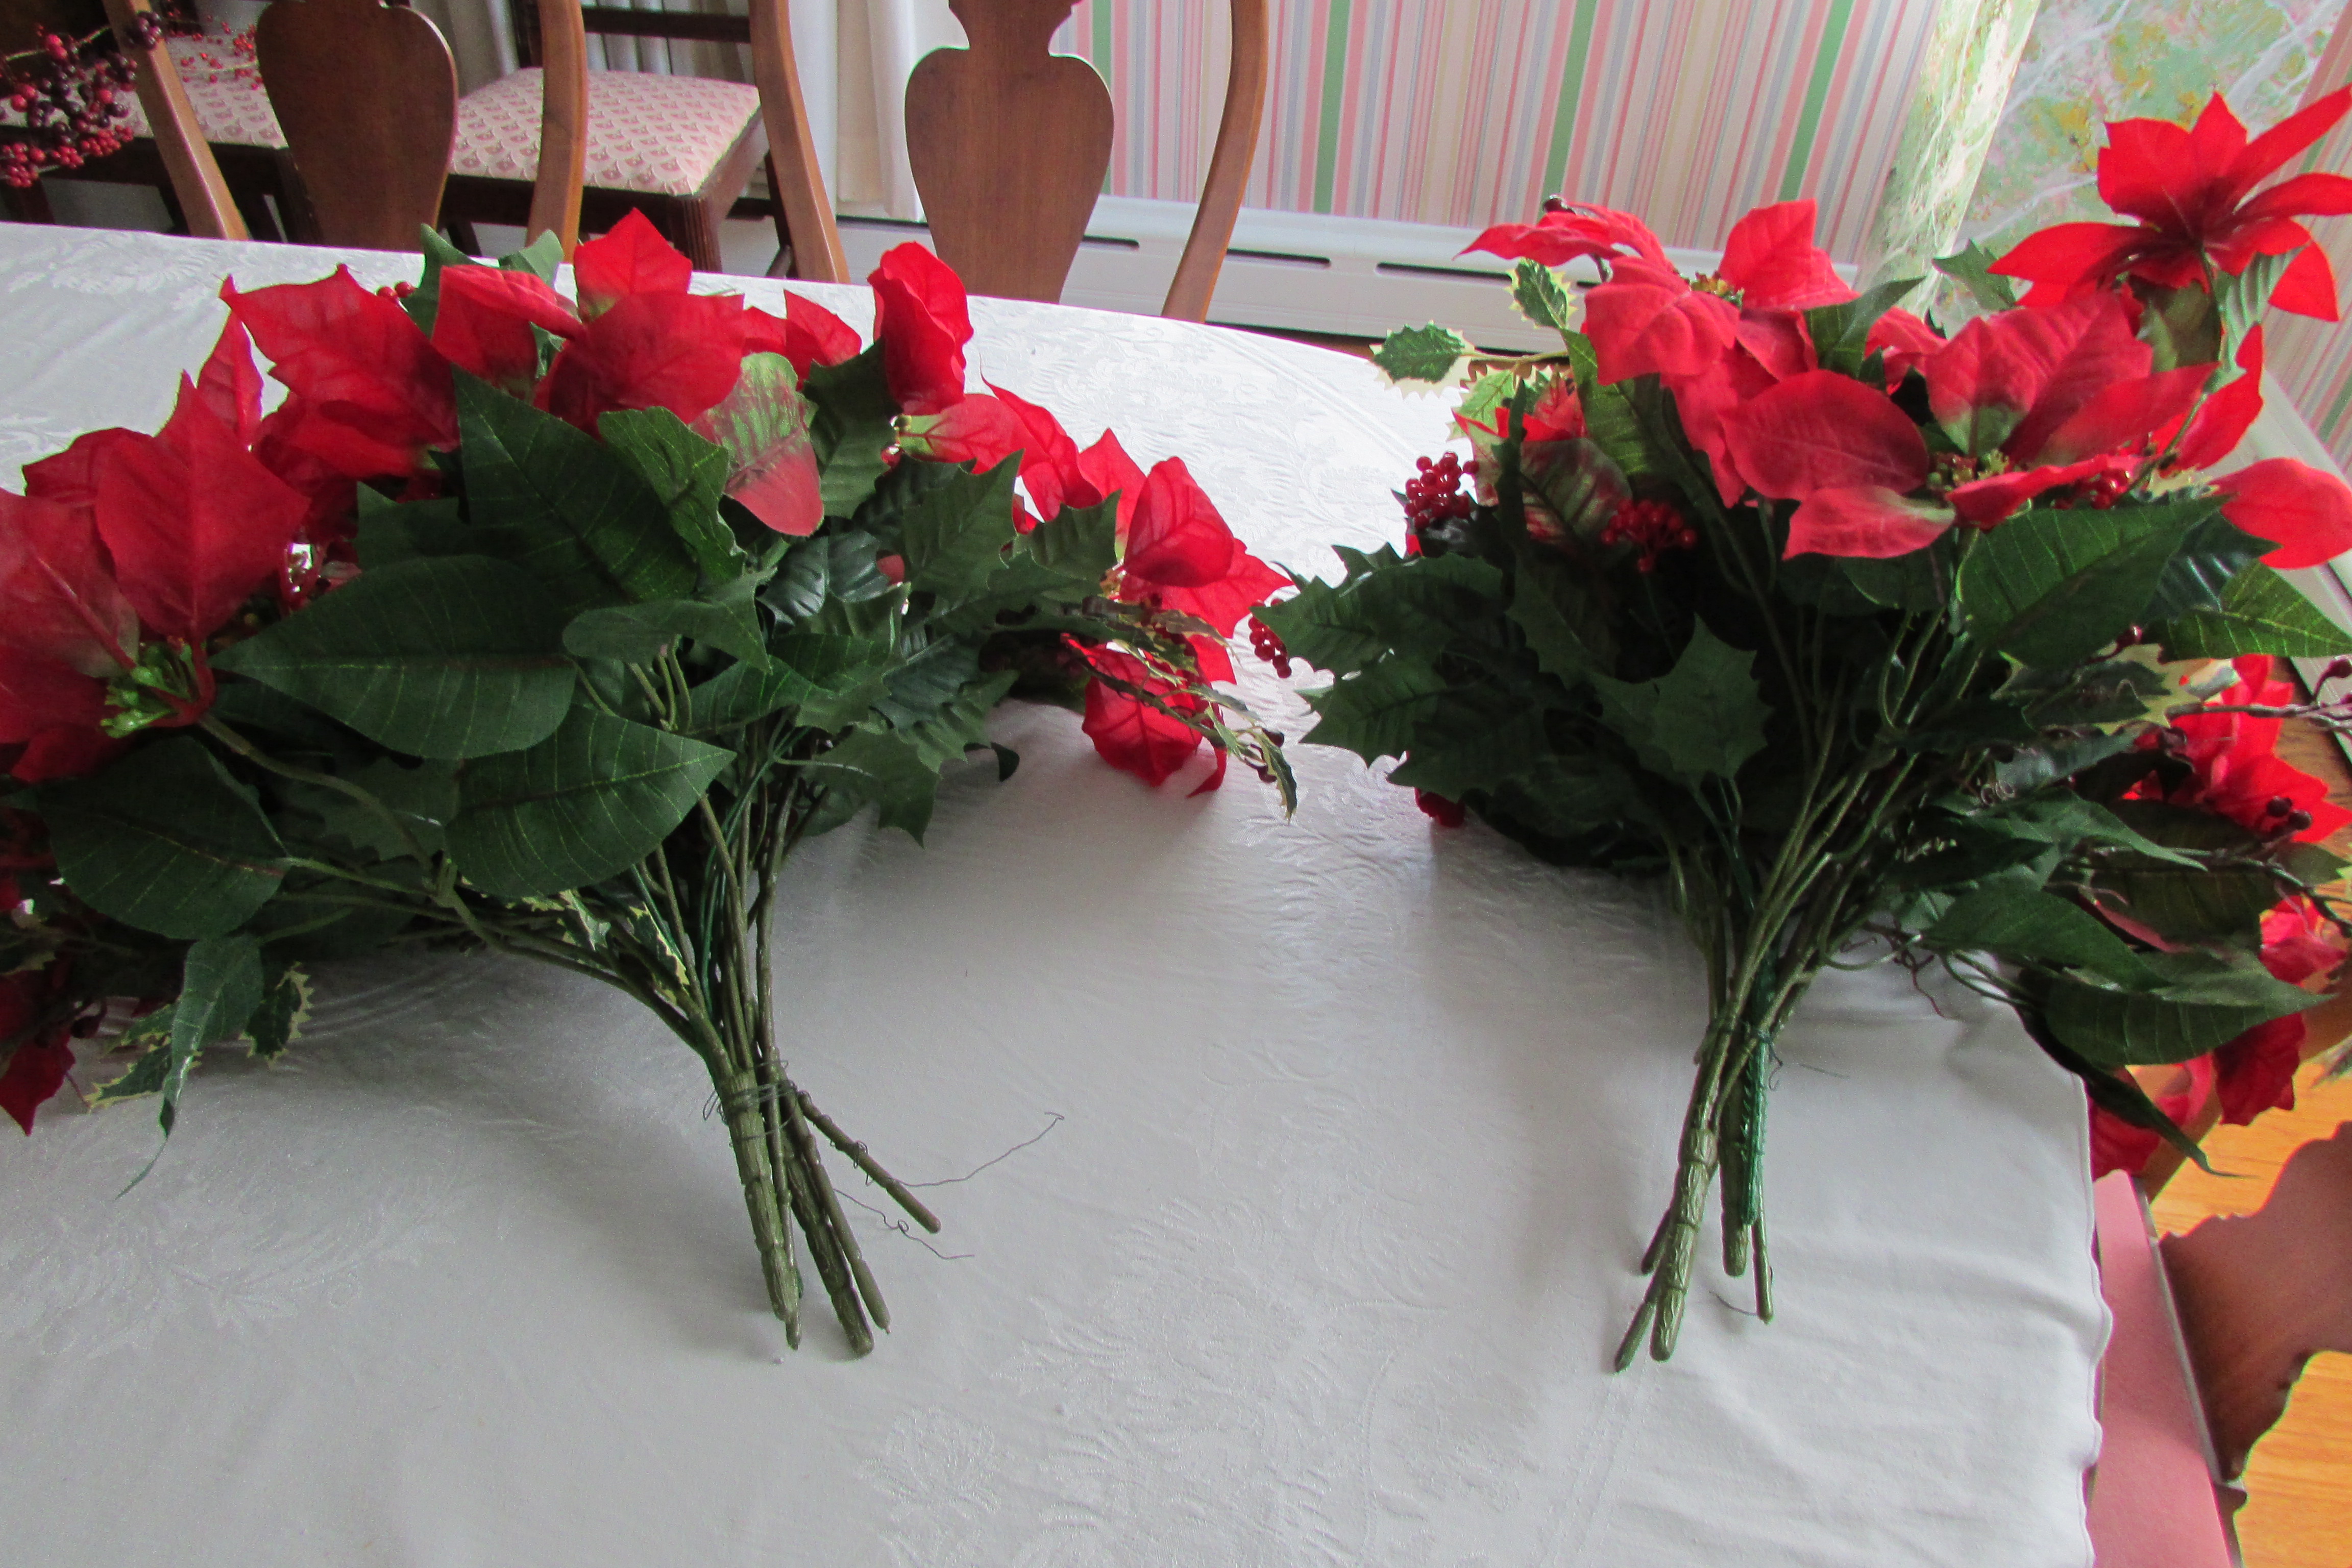 If you’ve made large arrangements of silk flowers, and you like the way they looked and want to have them the same way next year, all you have to do is carefully lift them from their vases (without separating or disturbing the bouquets), take some florist wire and tie it around all the stems, as seen in the above photo and pop it/them into individual kitchen trash bags. I’ve for years had the same flowers lashed together, and they only need a bit of tweaking when first put in their vases when I start my holiday decorating.
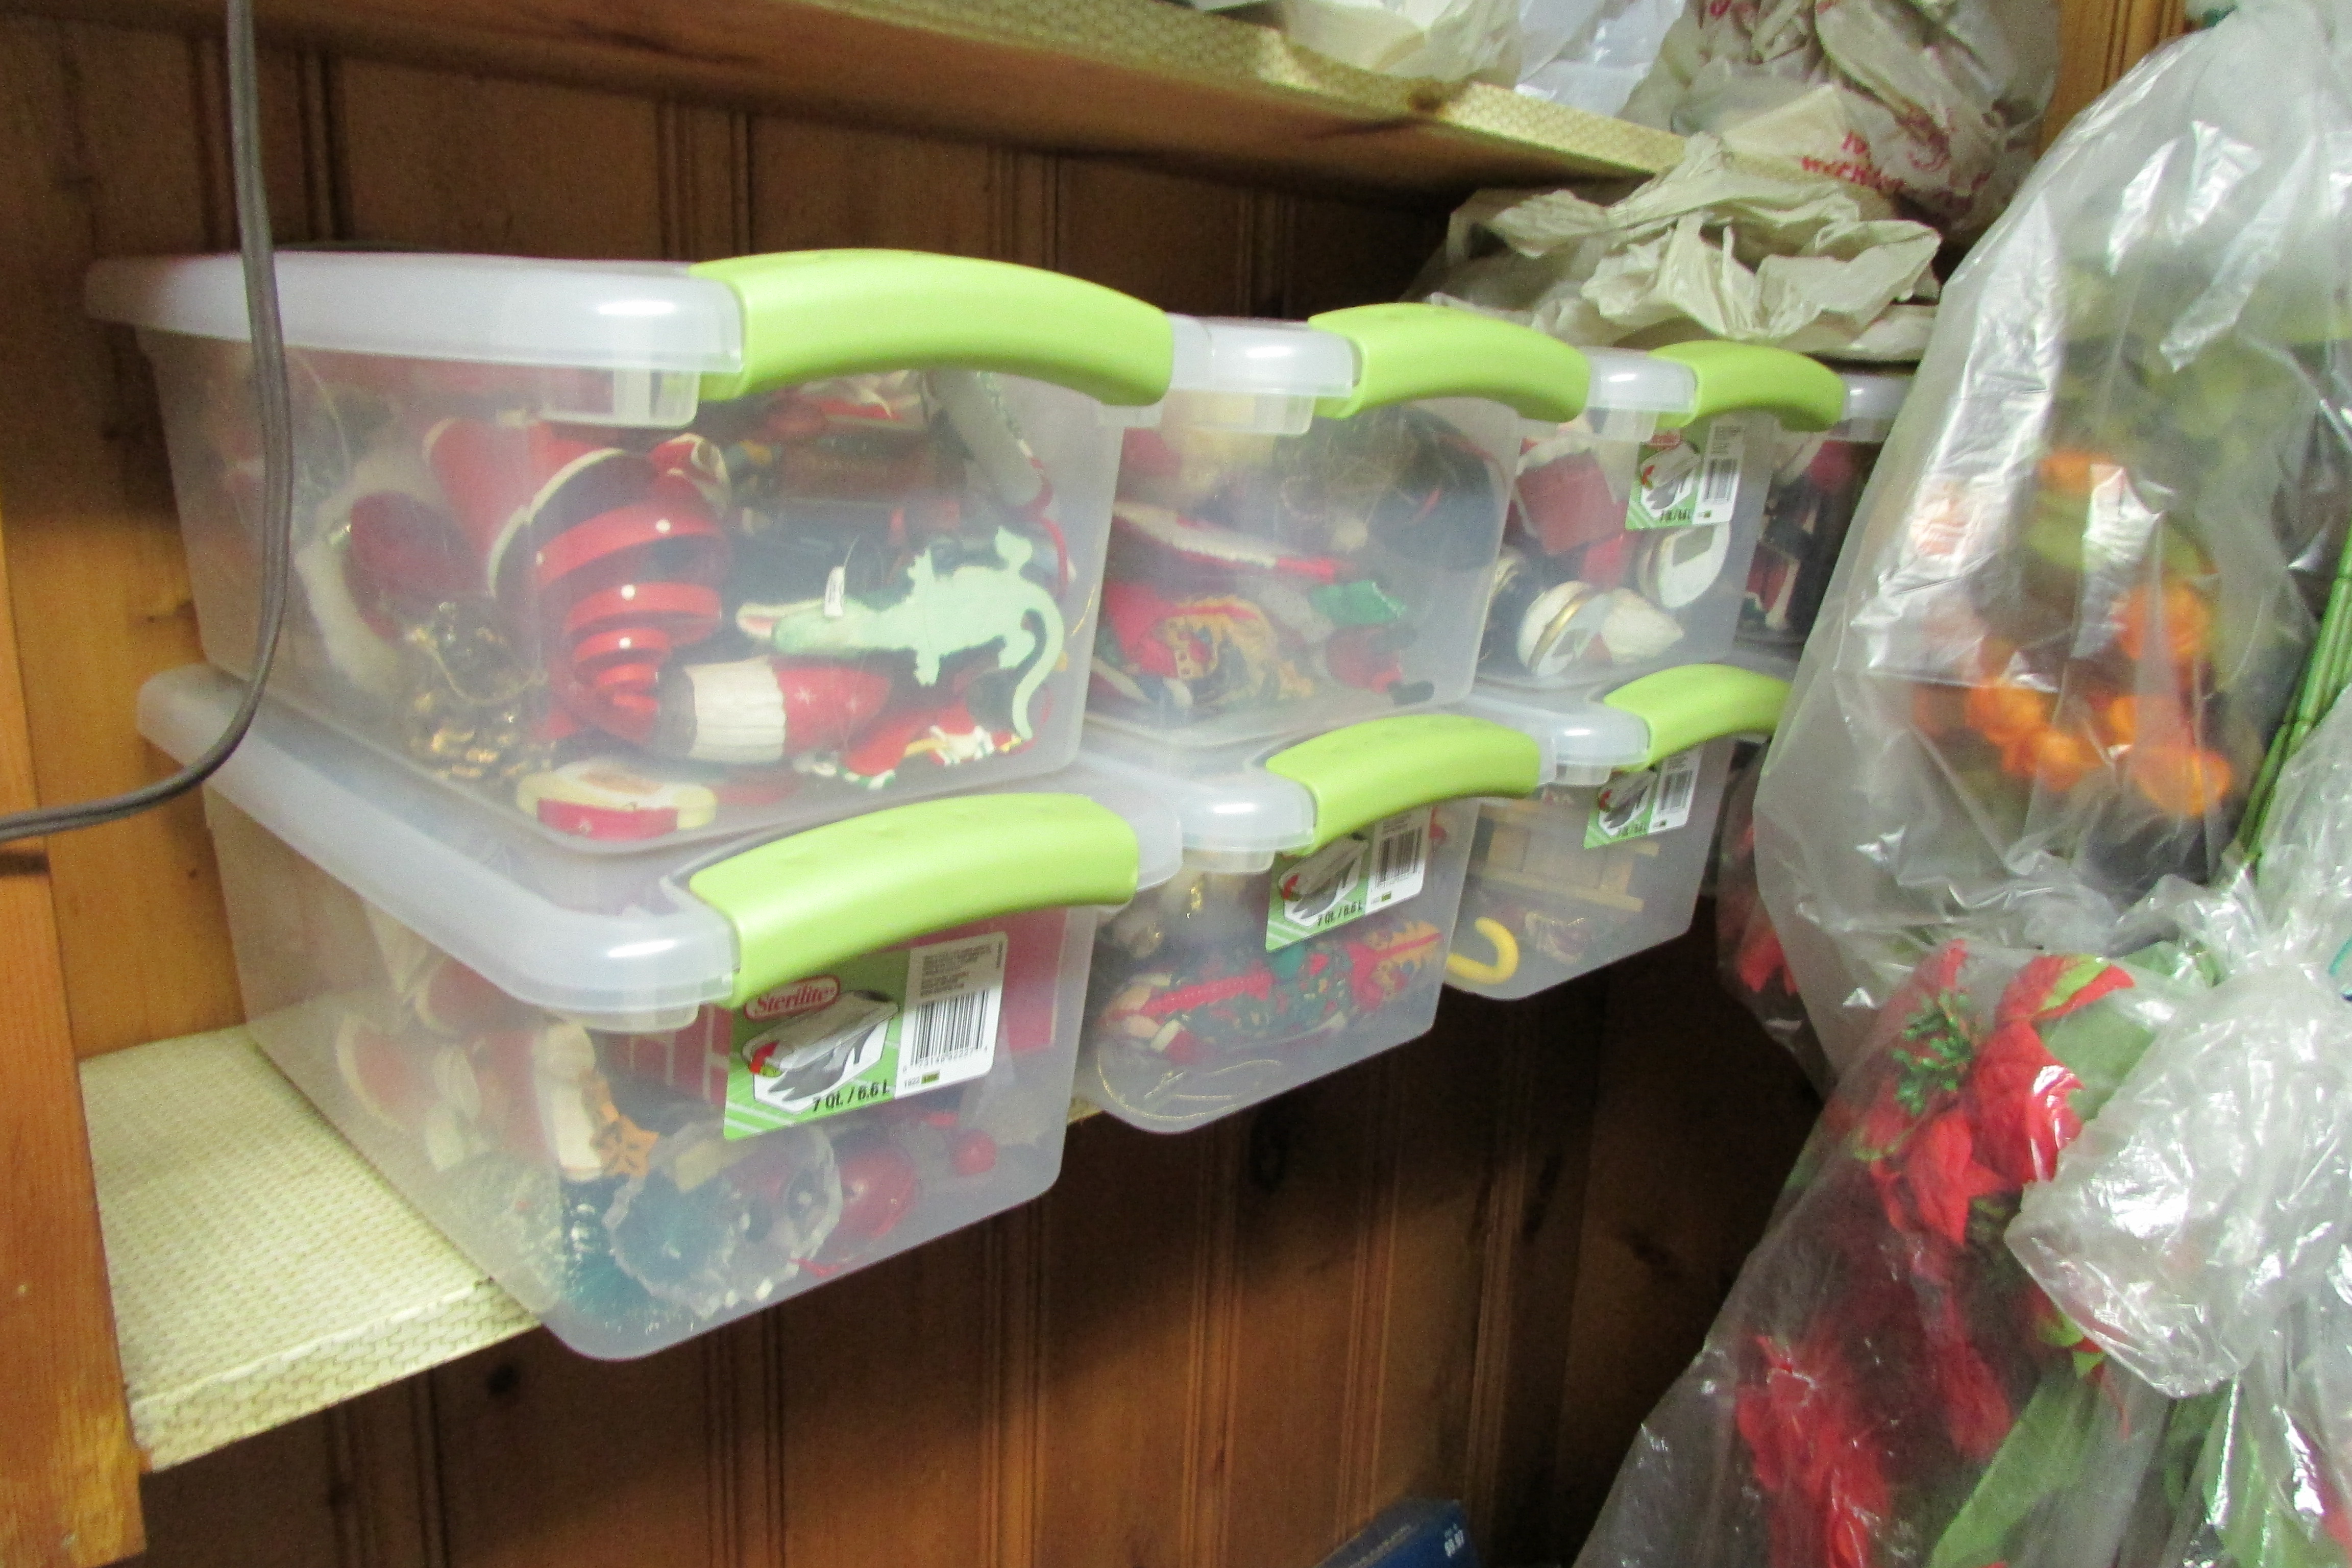 Store metal, wood, plastic, resin or fabric ornaments in Sterilite clear plastic boxes. Place like things together so you can easily get to them when needed. I carefully lay mine one on top of the other in the clear boxes, but if you want to be extra careful, cut and place two sheets of only white tissue paper between the layers of ornaments. The white tissue paper won’t bleed onto your cherished decorations, and will cushion them a bit extra.
If you have fragile metallic or glass ornaments that did not come in boxes, wrap them carefully in many layers of toilet paper then store them in plastic or cardboard boxes. 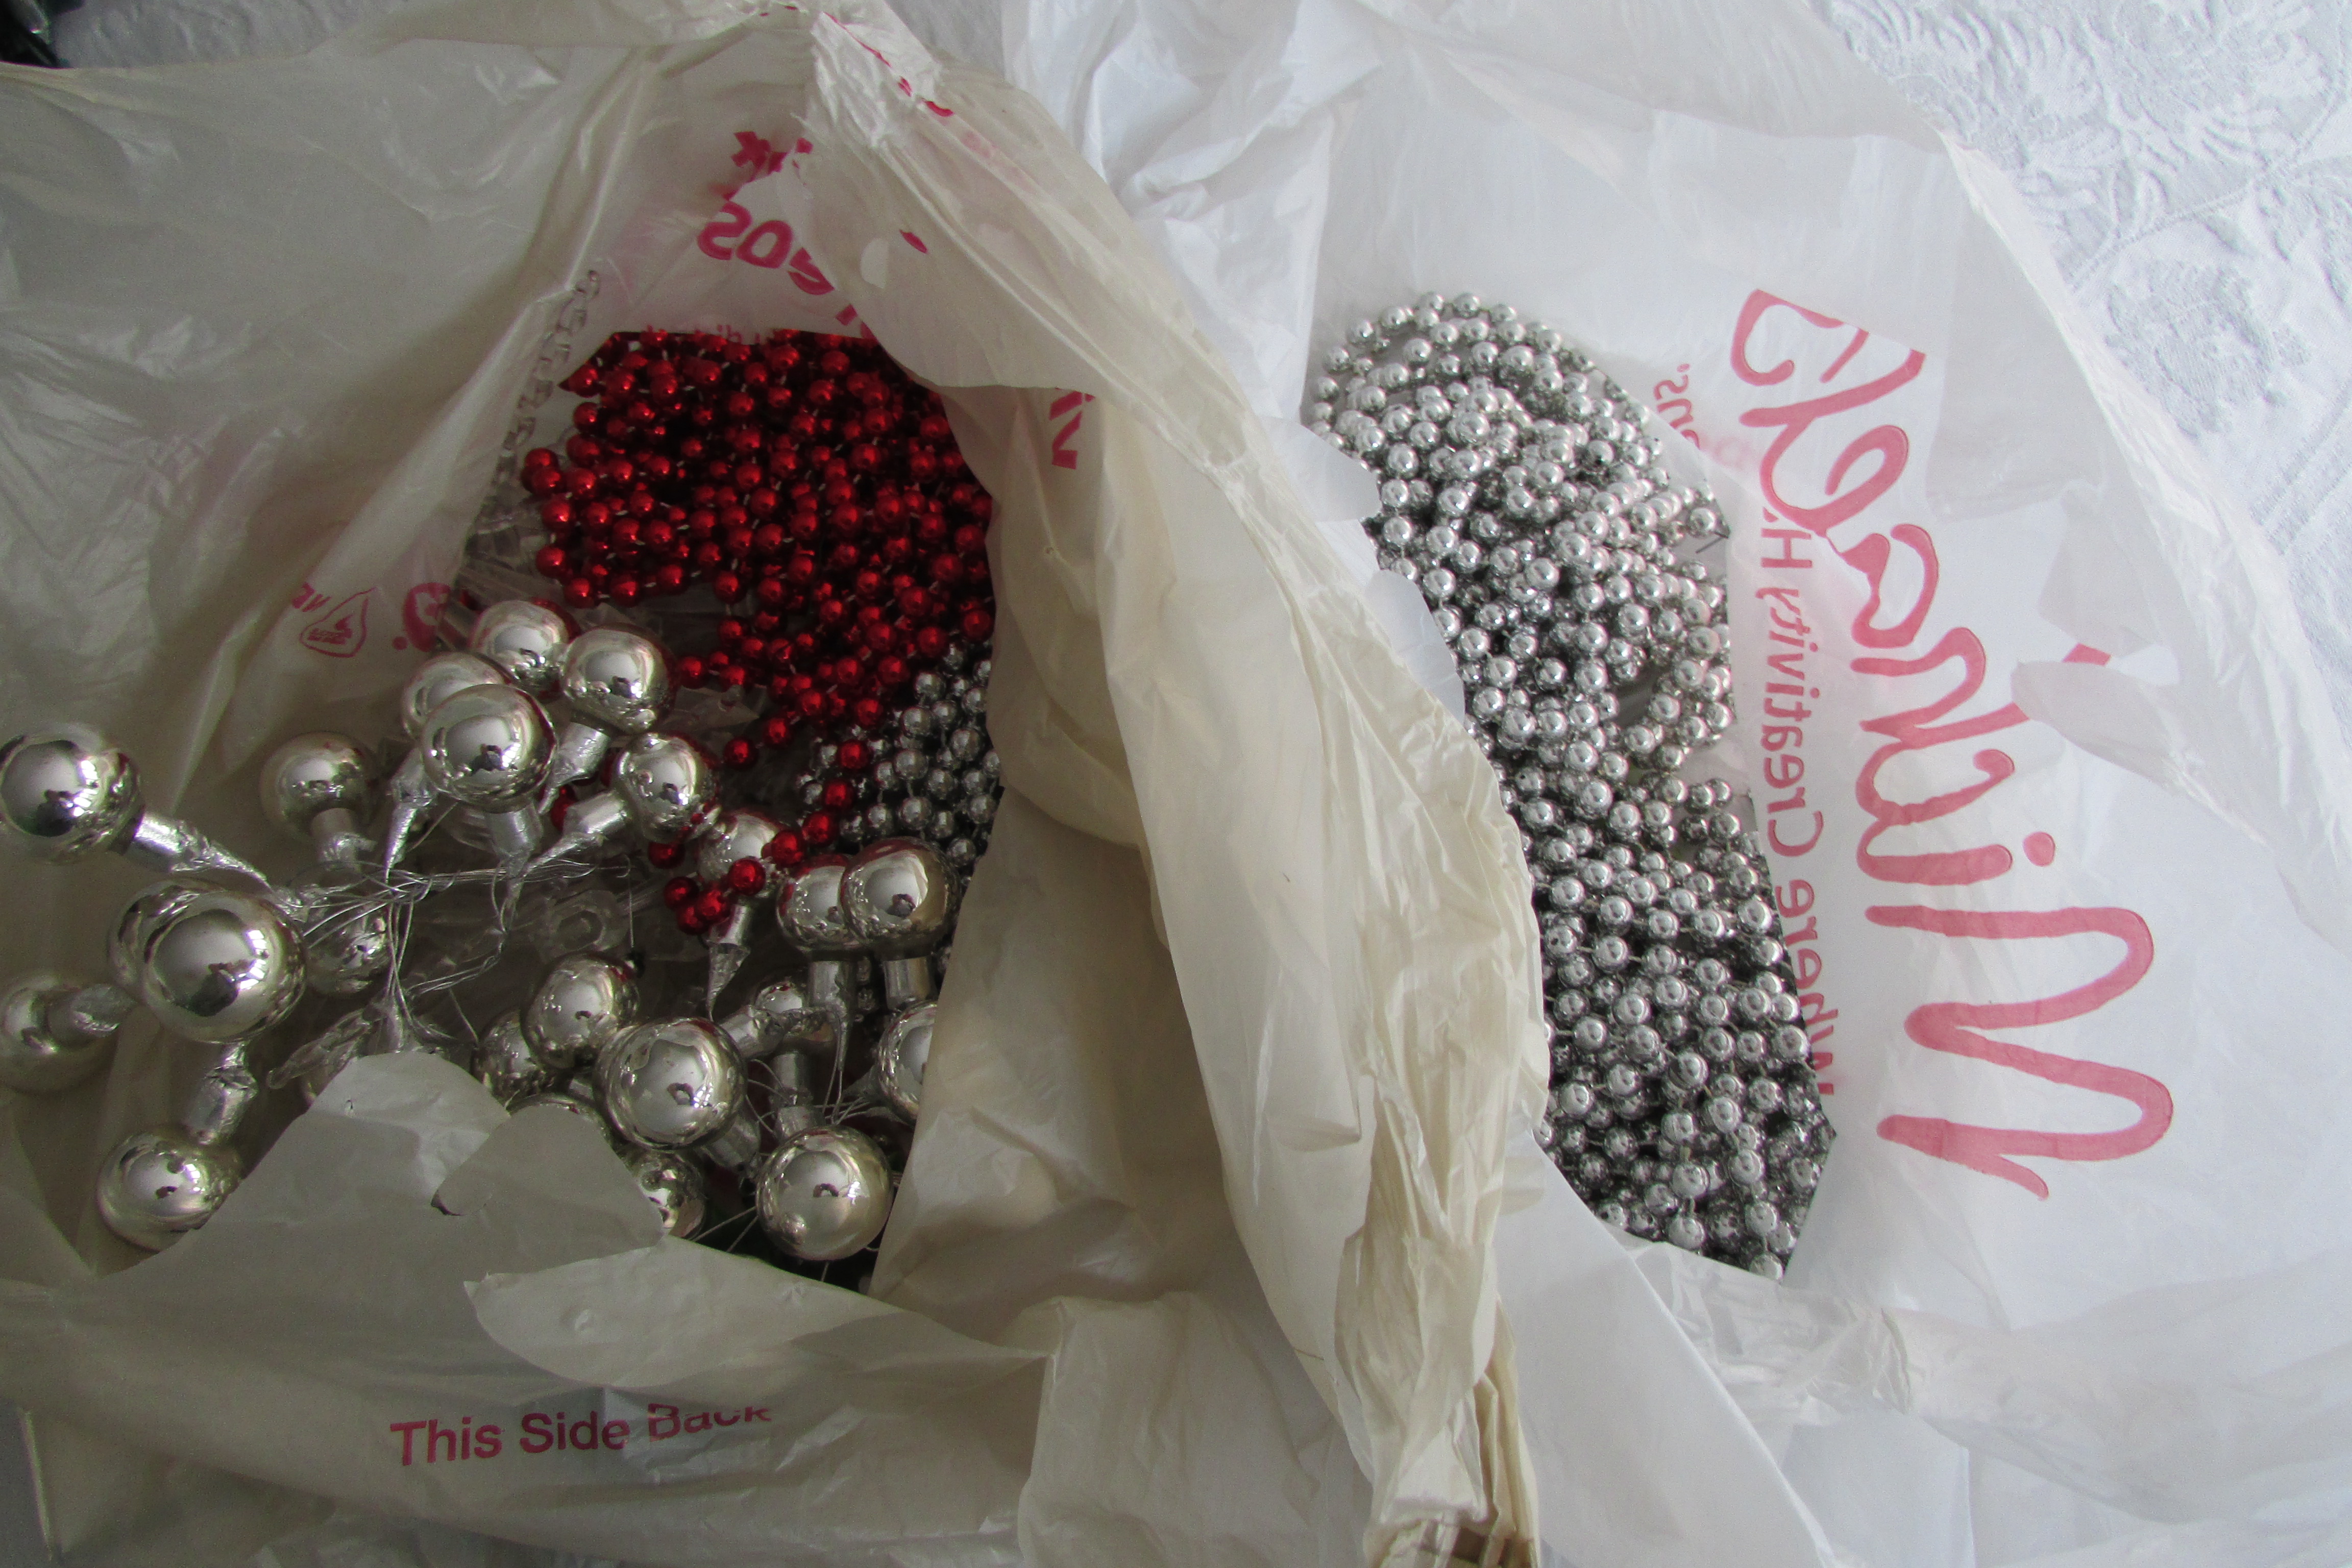 Plastic market bags are great for storing things like bead garland, cloth ornaments, plastic or wood decorations, etc. Partially fill bags with like items so they will be together for next years use. Store your many small bags together in larger containers labeled with what is inside. (Place things together that decorate the tree, the mantel, dining room, or are for outside use, etc).
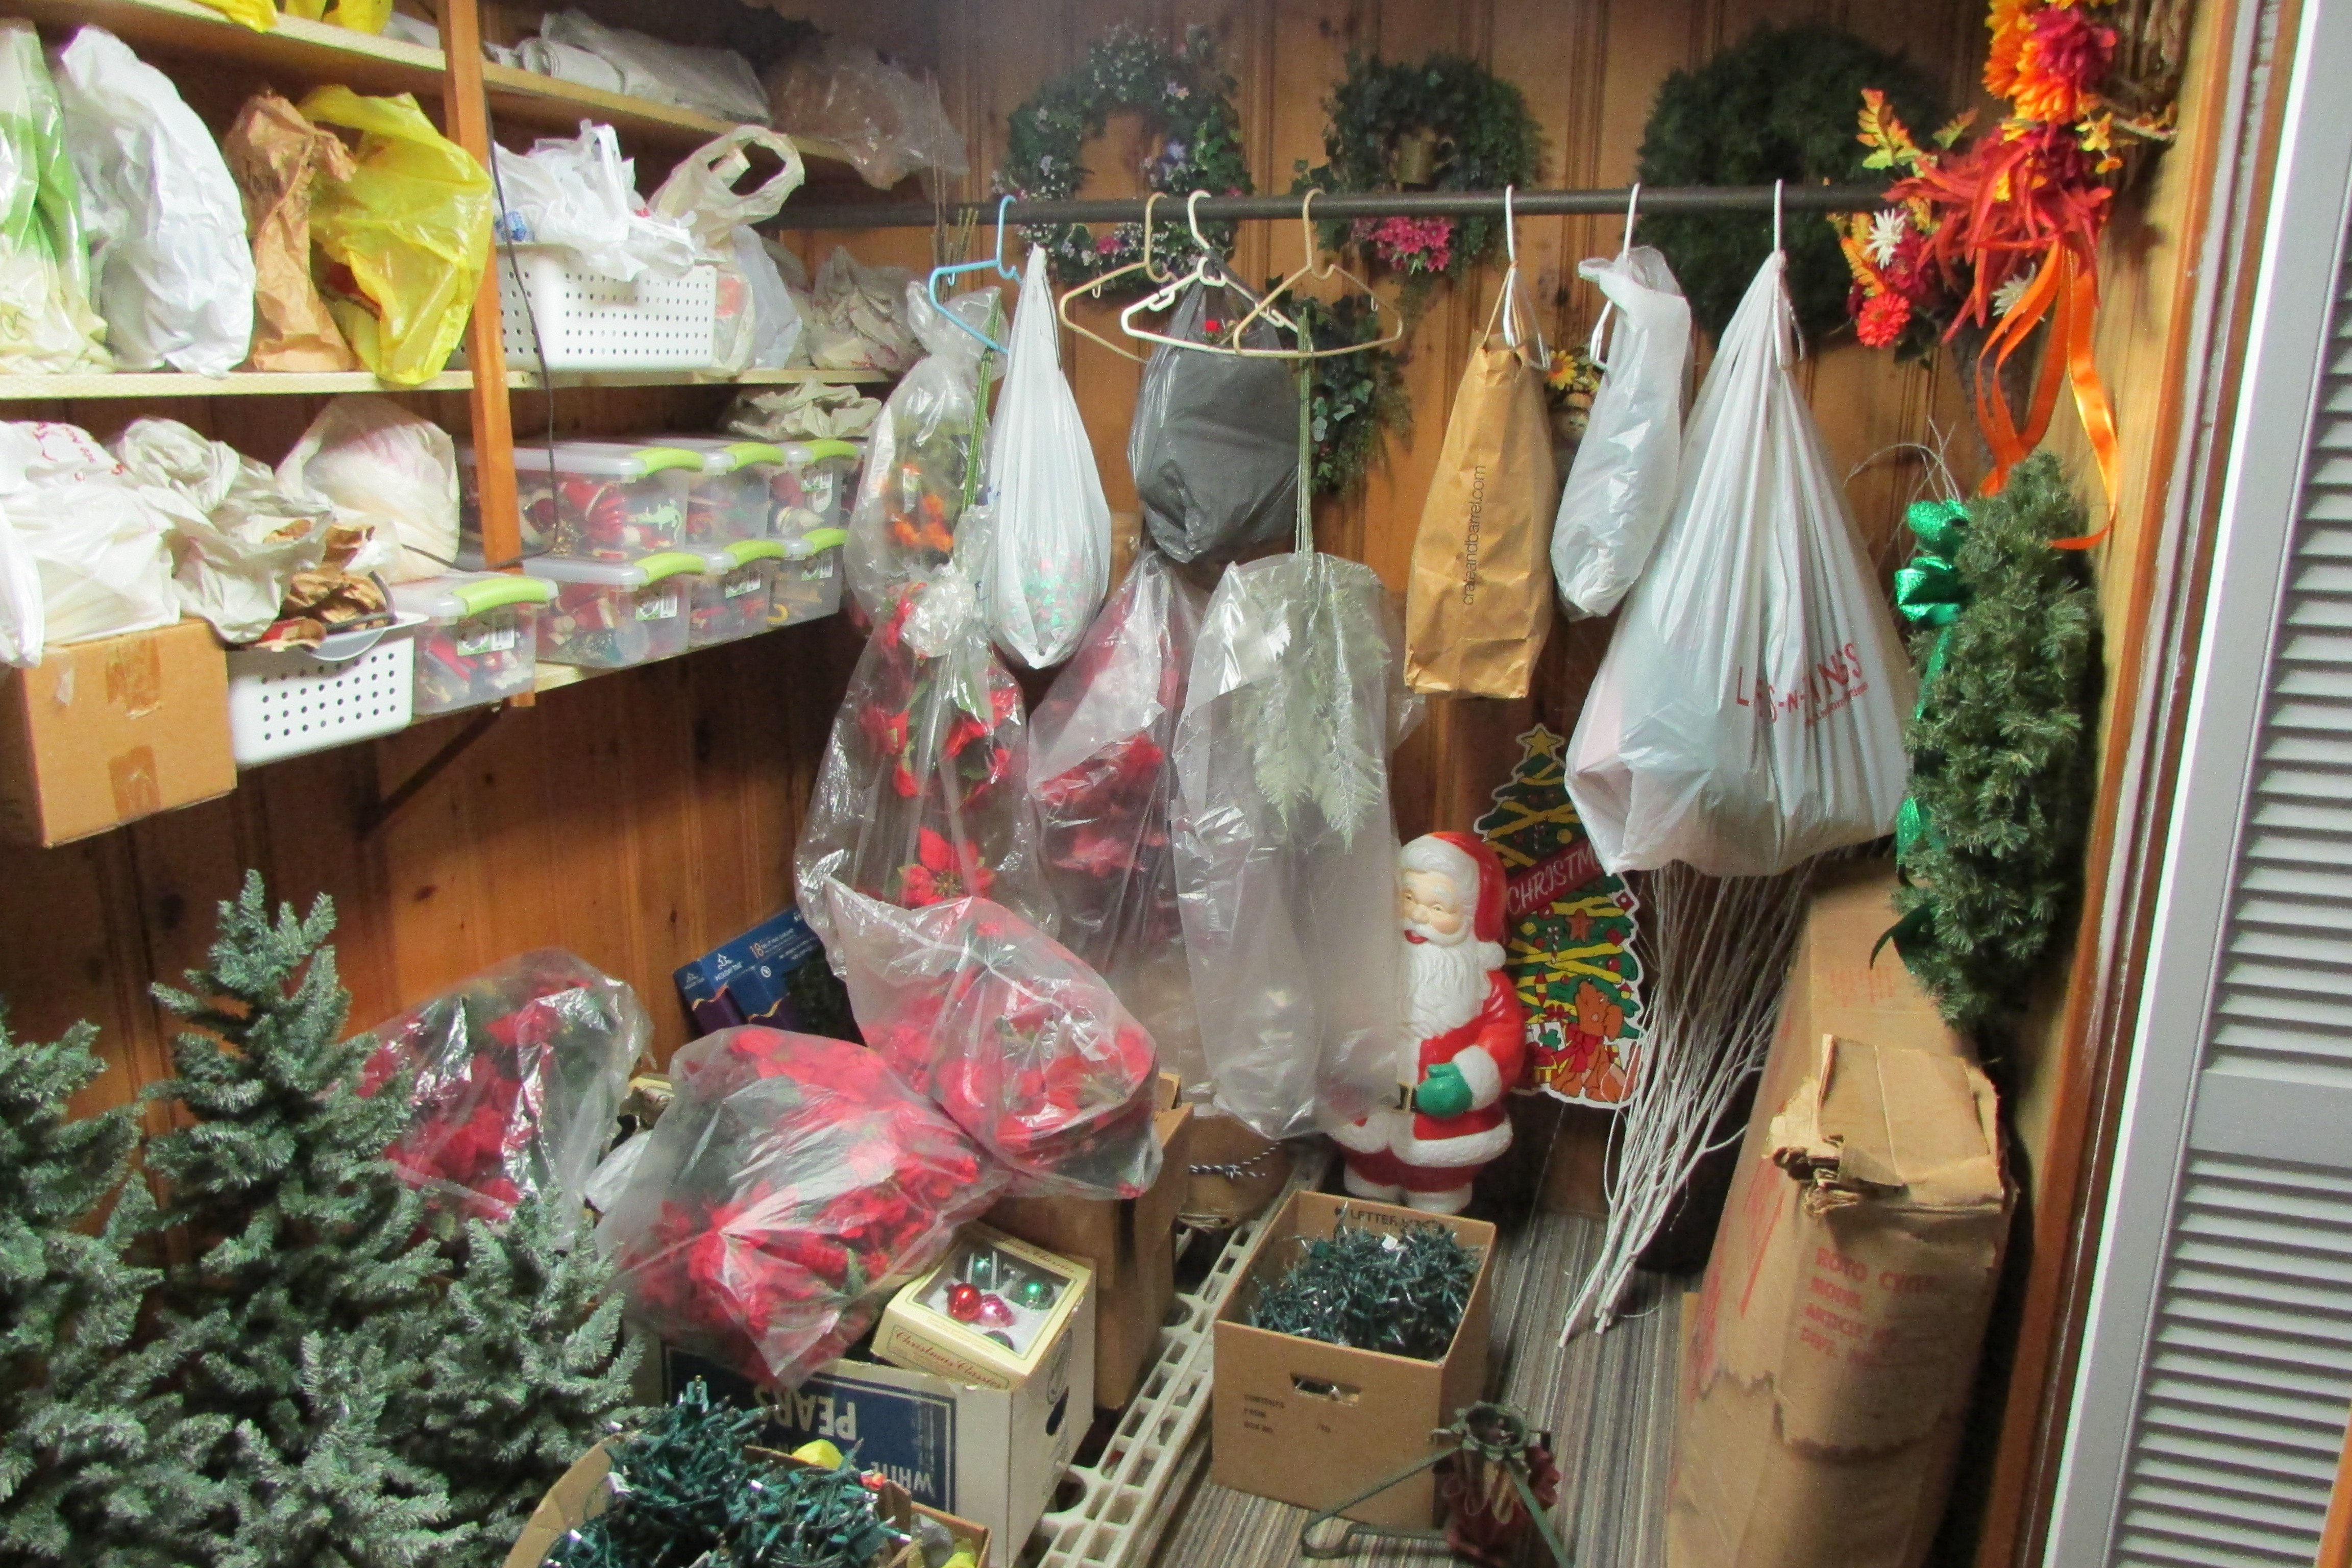 This last photo shows a portion of my Decorations Room, which is a good-sized walk in closet in my basement. First notice all the different seasonal wreaths that are hung up on the walls. All I did was hammer one inch brads (picture frame nails) into the knotty pine paneling, and now the wreaths have a place to hang. Secondly notice the many bags and other things hung upside down from the pole that runs across that side of the room.
I have a lot of decorations, collected over the past 32 years or more, and some are in the clear Sterilite boxes, while others are in plastic and paper bags on the shelves.
Storing my decorations in a cellar space, I have a good amount of the boxed things up on a skid (white plastic thing, on the floor, seen in the photo) so there is air circulation under the decorations, and if any kind of flooding happens, hopefully nothing gets wet and ruined. Finally in the center-bottom foreground of the photo, notice the boxes with some of the balls of electric lights that I’ve so far put away. The outdoor ones will be coming into the “decorations room” soon.
So there you have it, a look at how I put away my Christmas Decoration. I hope that from what I’ve shown you, there might be something that you can do at your own house. Happy New Year to you all, and now that the holidays are over, let’s start looking for Spring (and snow on mountains tops for you skiers) ;-}

