

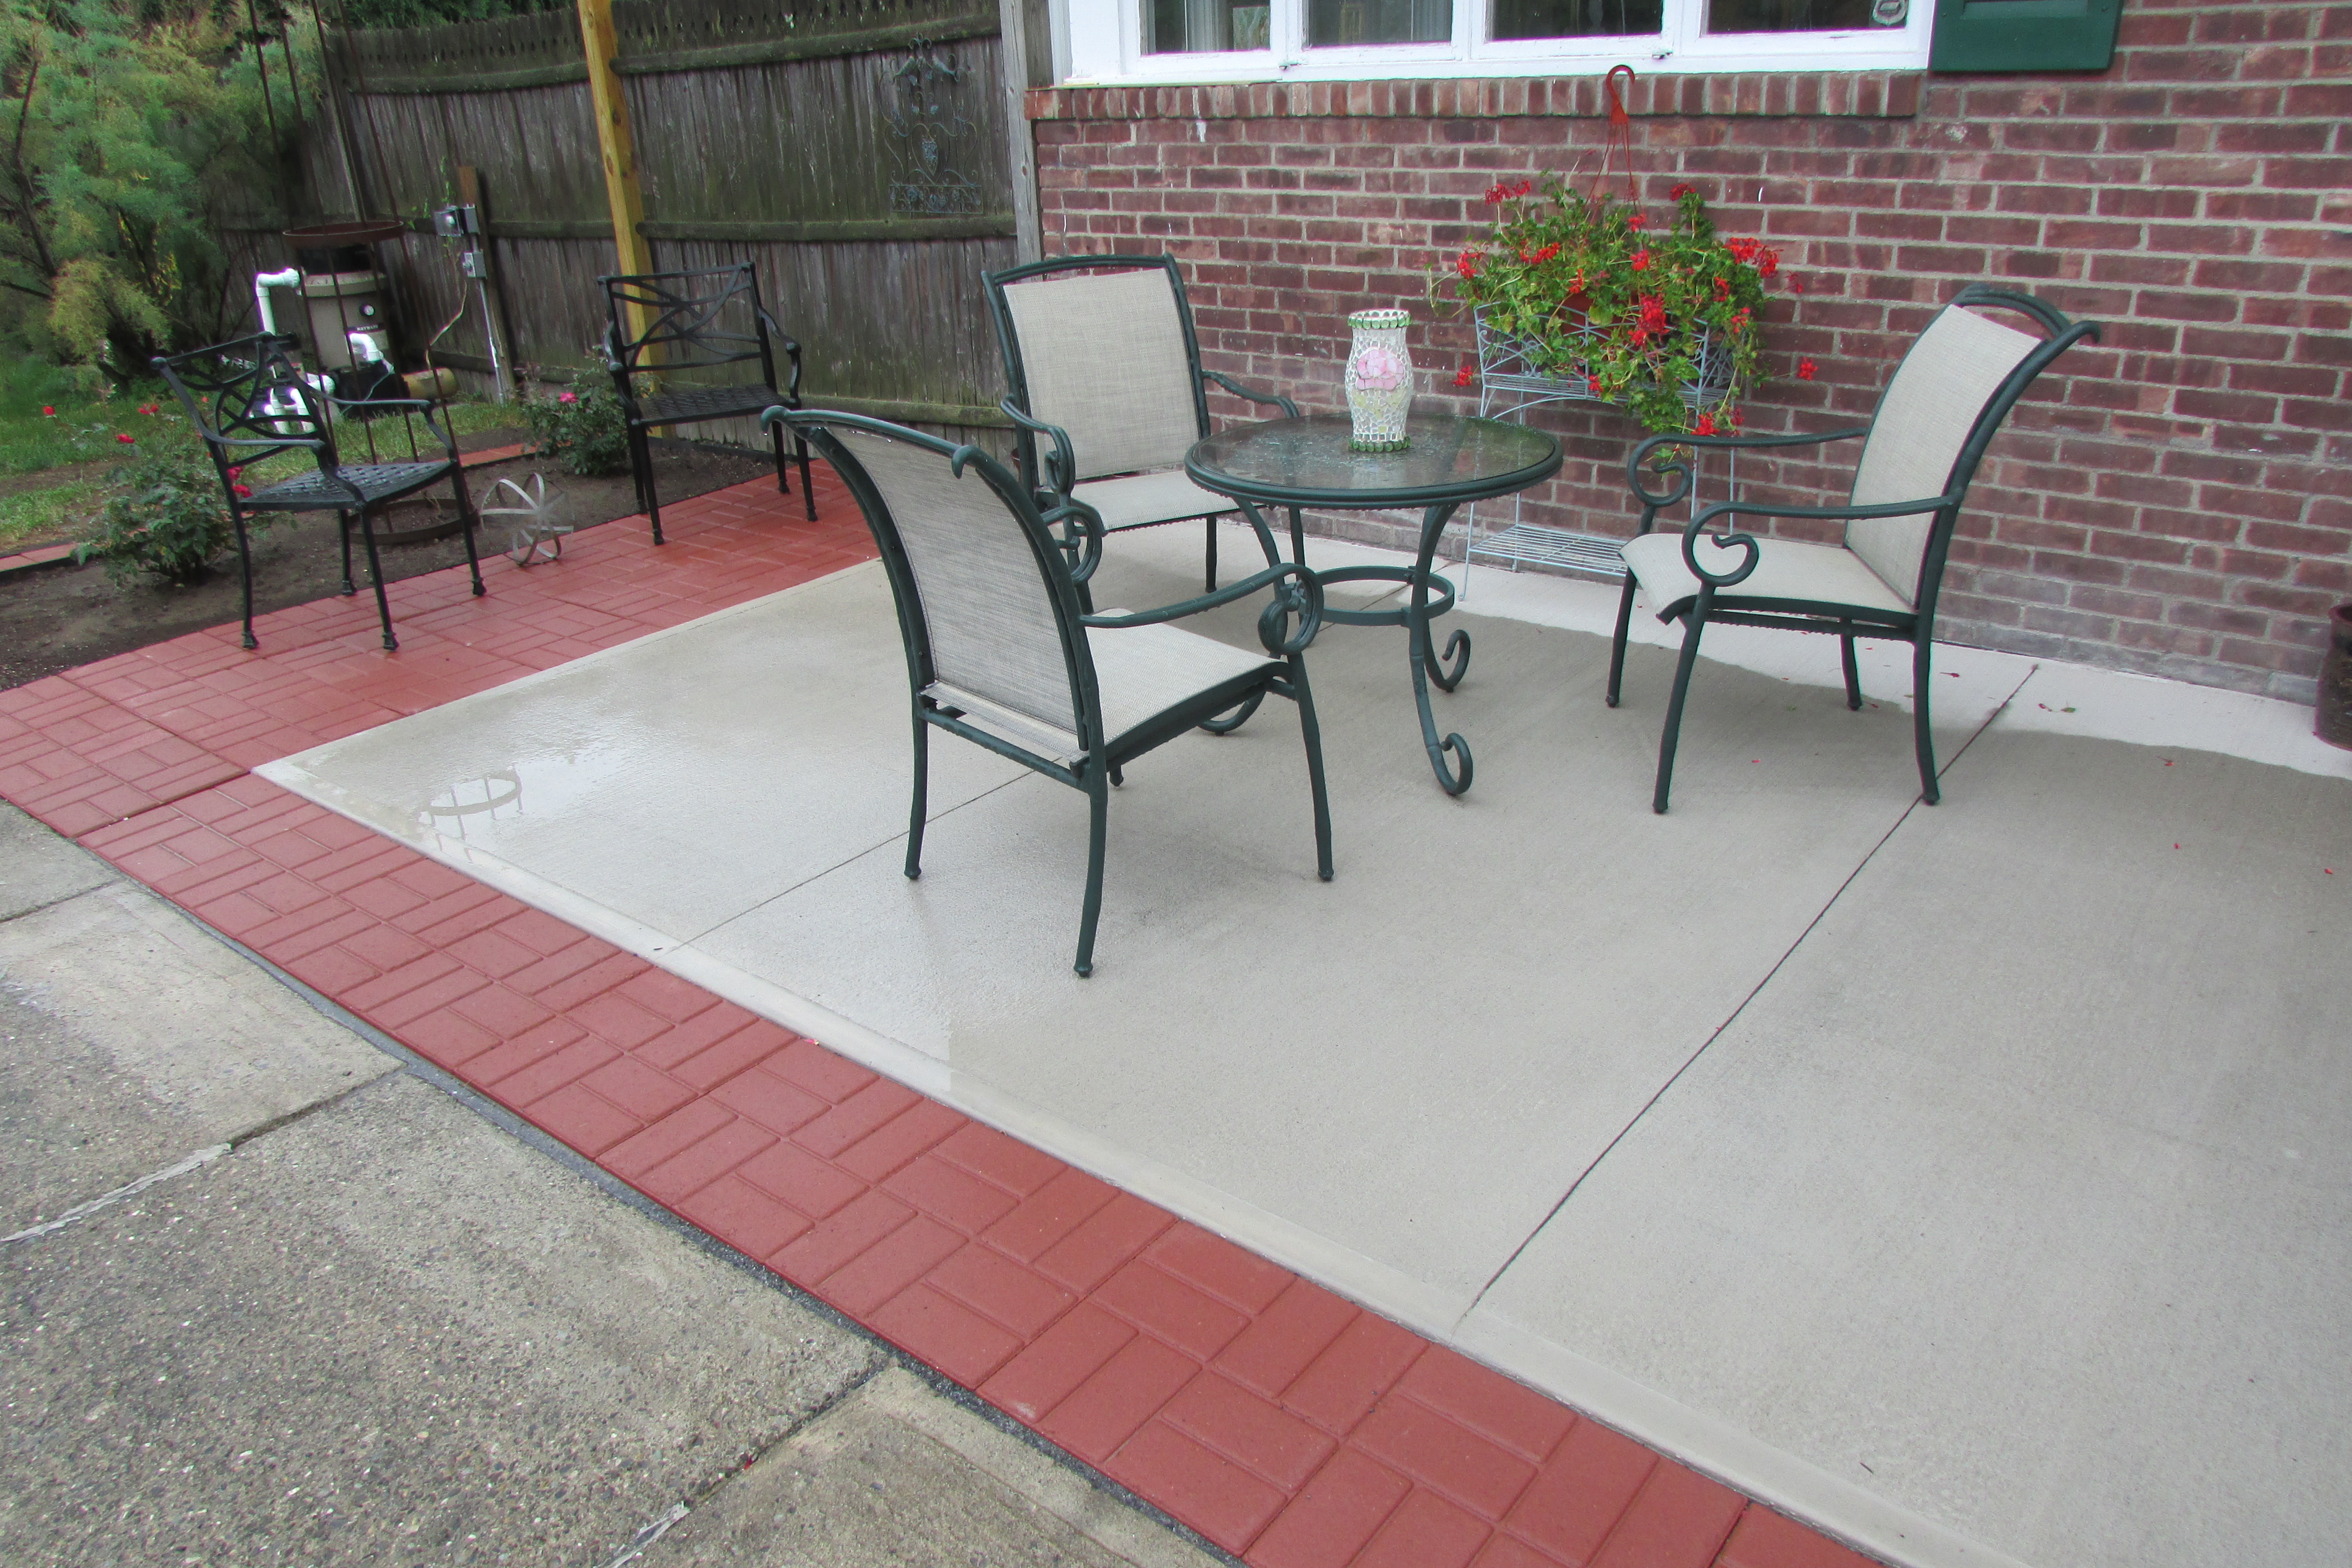
Extending a poured cement patio with sixteen inch square brick-face stepping stone/ patio pavers.
One of my many projects, this past Summer, that I tackled was to extend my poured cement patio with sixteen inch square cement pavers. Before I attempted the project, I looked at a few YouTube videos to see how it was done; but in the end I still had to modify the information that I’d seen and had to figure out how to make it work for me. This post shows the different steps I took to get my patio looking the way I envisioned.
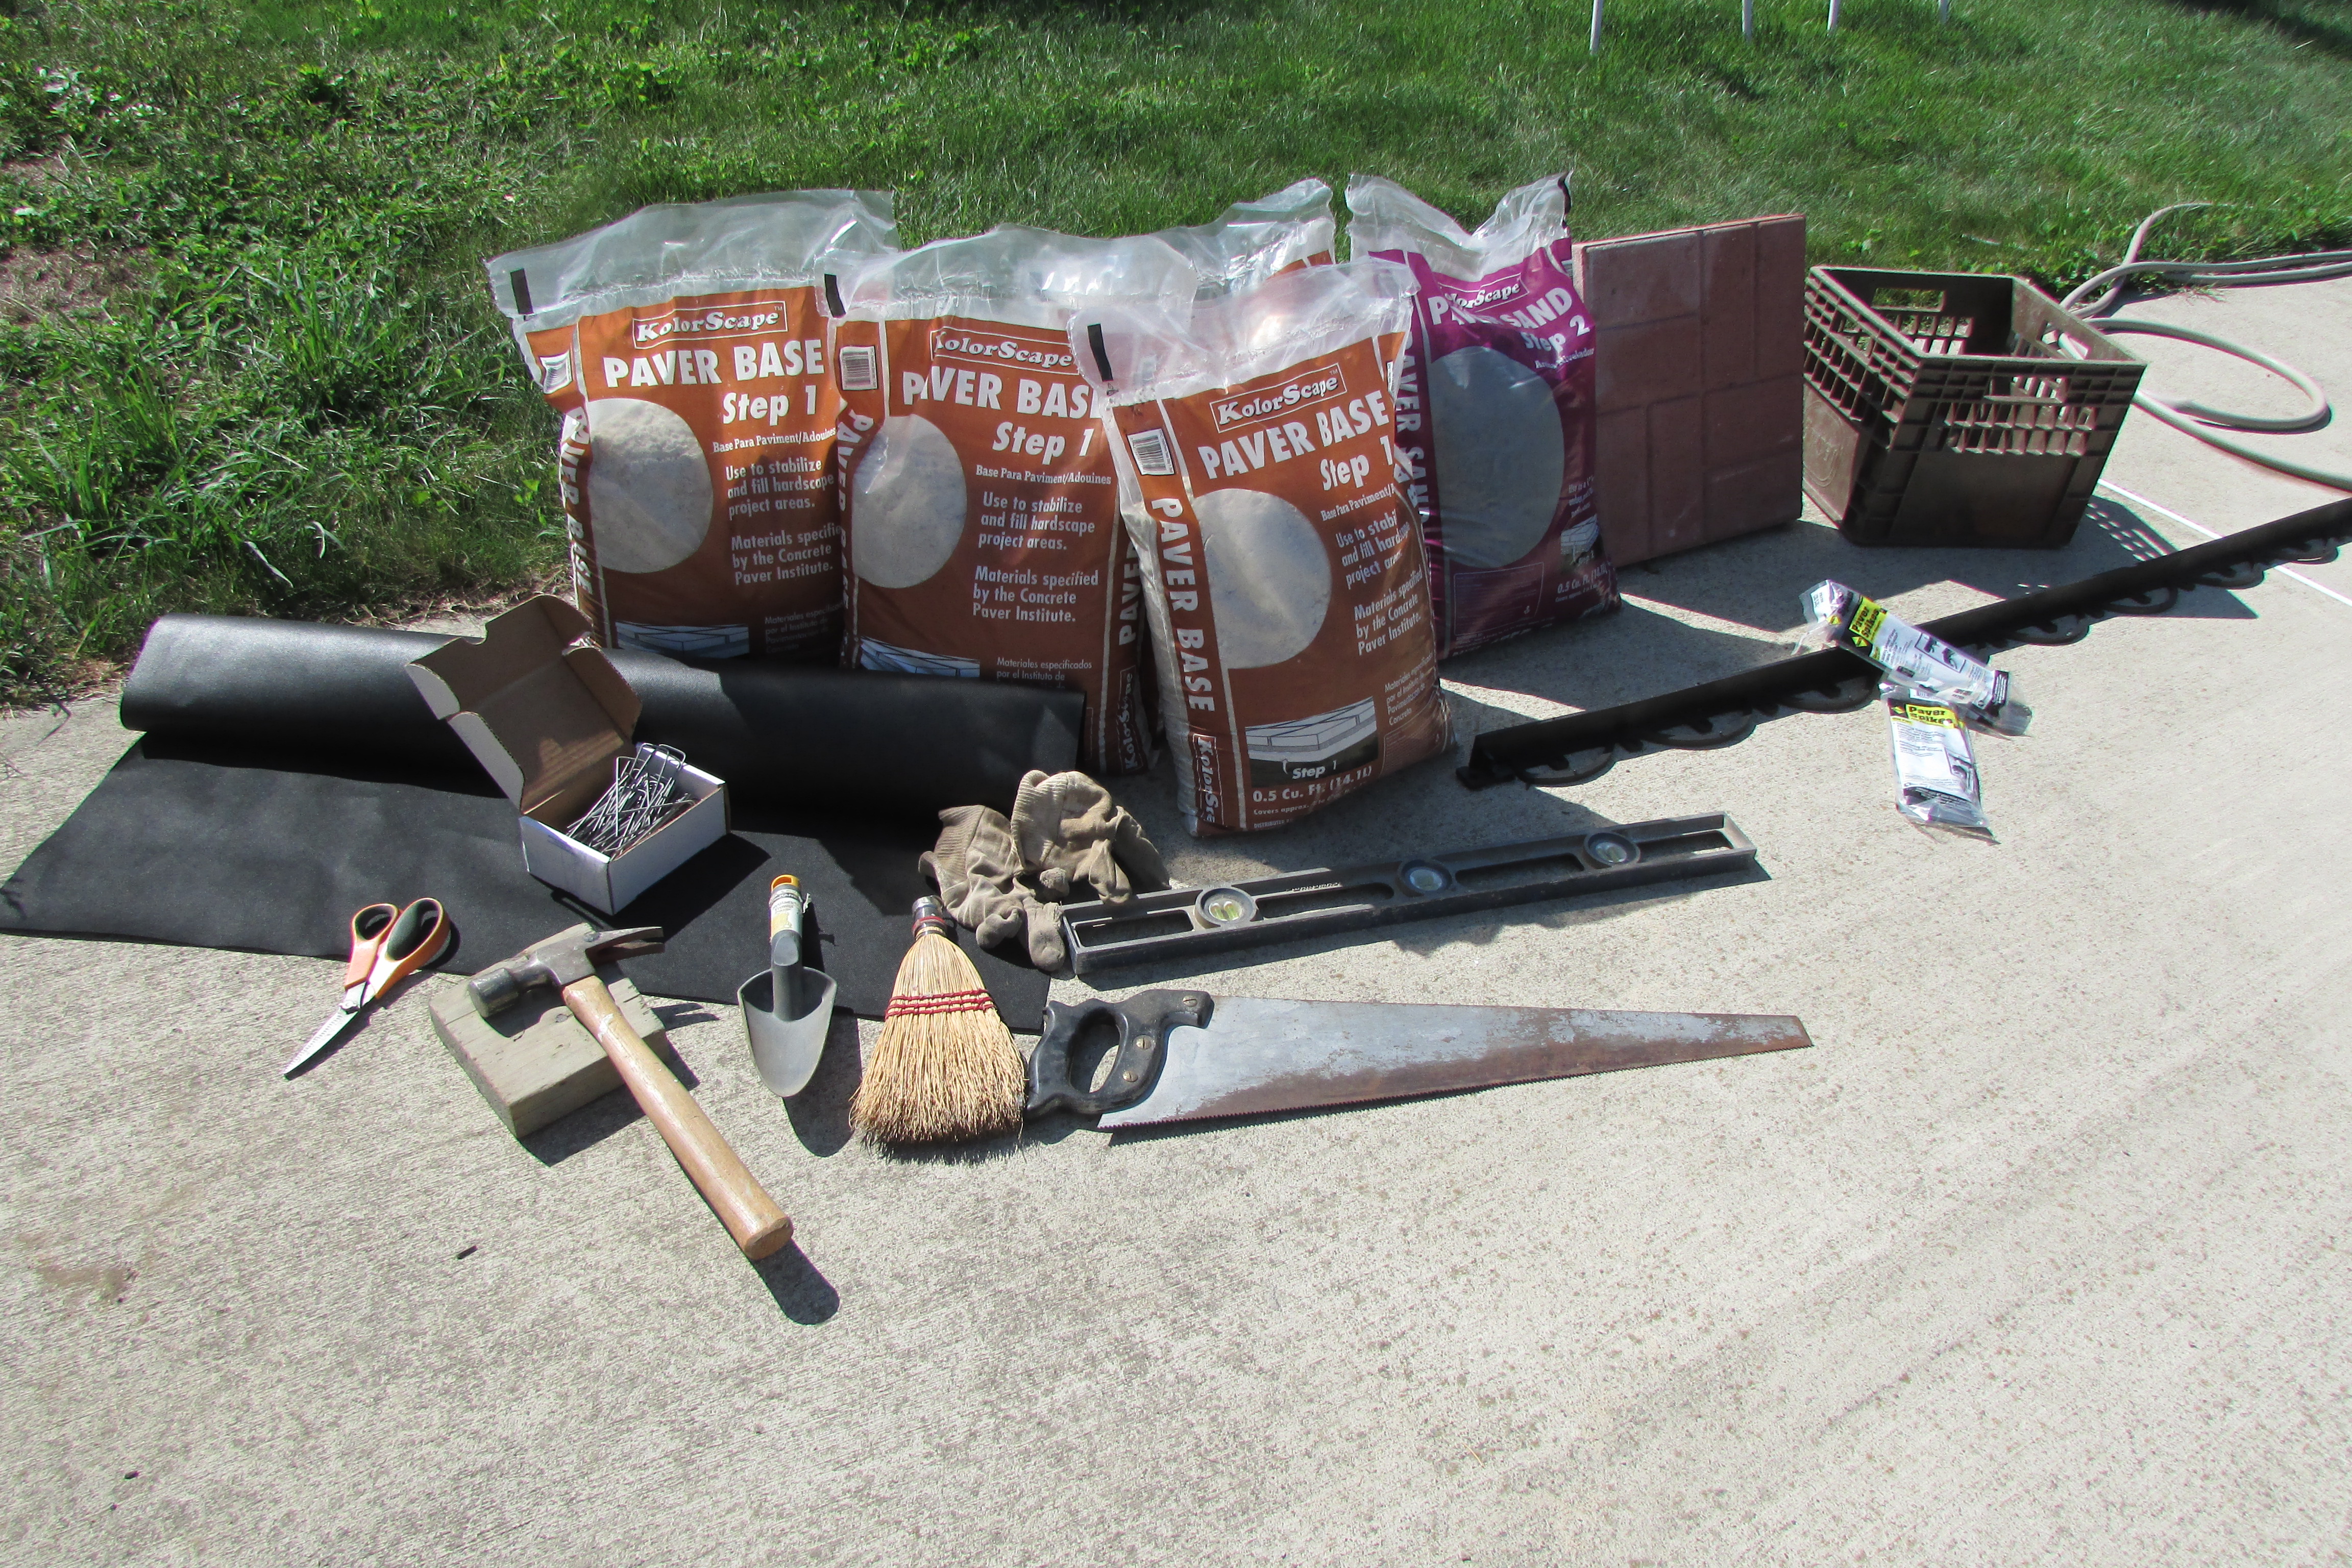
All the supplies I used to lay my cement pavers.
The above photo shows all of the different products that I used to extend the patio, this is the list of supplies needed to do the project…
Hand truck (to move the pavers and paver base from your car or truck),
Wheelbarrow (to move dirt excavated from project site (could also be used to move pavers from car or truck),
Shovel(s) (straight edge and scoop for digging up and moving dirt),
Rake (to help level bottom of work-site, spread out paver base and paver sand),
Work gloves,
Hand broom (for sweeping excess sand from under pavers),
16 inch square by 2 inch thick patio pavers (don’t go larger as they get quite heavy quickly during the project)(got mine from Home Depot),
Landscape fabric (12 year or the heavier weight you can find so it doesn’t break down quickly after you do the project),
Wire clips to hold down the landscape fabric (I got mine at Home Depot),
Scissors (to cut the landscape fabric),
Paver Base Step 1 (I got mine at Lowe’s),
Paver Base Step 2 (also from Lowe’s),
Tamper for big projects (I used the sides and ends of an old brick and block of wood, as my project was small),
Hammer (to be used along with the block of wood for gently pounding pavers into place, for hammering landscape fabric clips and edging spikes),
Garden trough (get one with a good scoop and pointed end)(you will use it for adding extra sand under pavers and cleaning paver sand that goes up the sides of already laid paver stones),
Level (to see if pavers are level and lined up with each other),
Saw (for cutting plastic brick edging),
Plastic edging (goes around the perimeter of laid patio pavers and hold everything in place),
Large plastic edging Spikes (made to hold edging in place),
Plastic milk box, pail or small bench to sit on while doing the project,
and possibly the most important thing of all a place to put all of the dirt excavated from the job site. I gave a lot to my neighbor and have a giant pile left to use for filling dips in the lawn and other holes on my property.
Step 1… Mark off the proposed work site with string, bamboo poles, or whatever you have, making it three inches longer and wider on all sides so you will have enough space for the plastic paver edging, which you will be using to finish the project.
Step 2… Dig down and remove six inches of soil from the site, and transport soil to another location or as I did, give some to a neighbor(s). You want to remove six inches because you will be refilling the hole with three inches of paver base and then one inch or so of paver sand, and then placing the two-inch thick paver itself. (3″paver base + 1″ paver sand + 2″ thick paver stone = 6 inches( depth of hole).
Step 3… With a rake try to level the bottom of your hole, then tamp the bottom of your hole with the tamper, or as I did with the ends, sides and face of an old brick and then a wooden block. You want to level and compact the dirt as much as possible so it does not settle anymore over time.
Step 4… Line the bottom of your hole with the landscape fabric, bringing it up the sides if you can, secure in place with the wire clips (they look like large staples).
The different products that are laid under paver stones.
The above photo shows the different layers that make up the construction of the patio. First you see the hole, which is then lined at the bottom with the landscape fabric (black cloth seen on the right side). The next layer is the light gray paver base which was added and compacted down hard, followed by the darker gray paver sand, which was also tamped down really good, and then topped by the pavers.
Step 5… 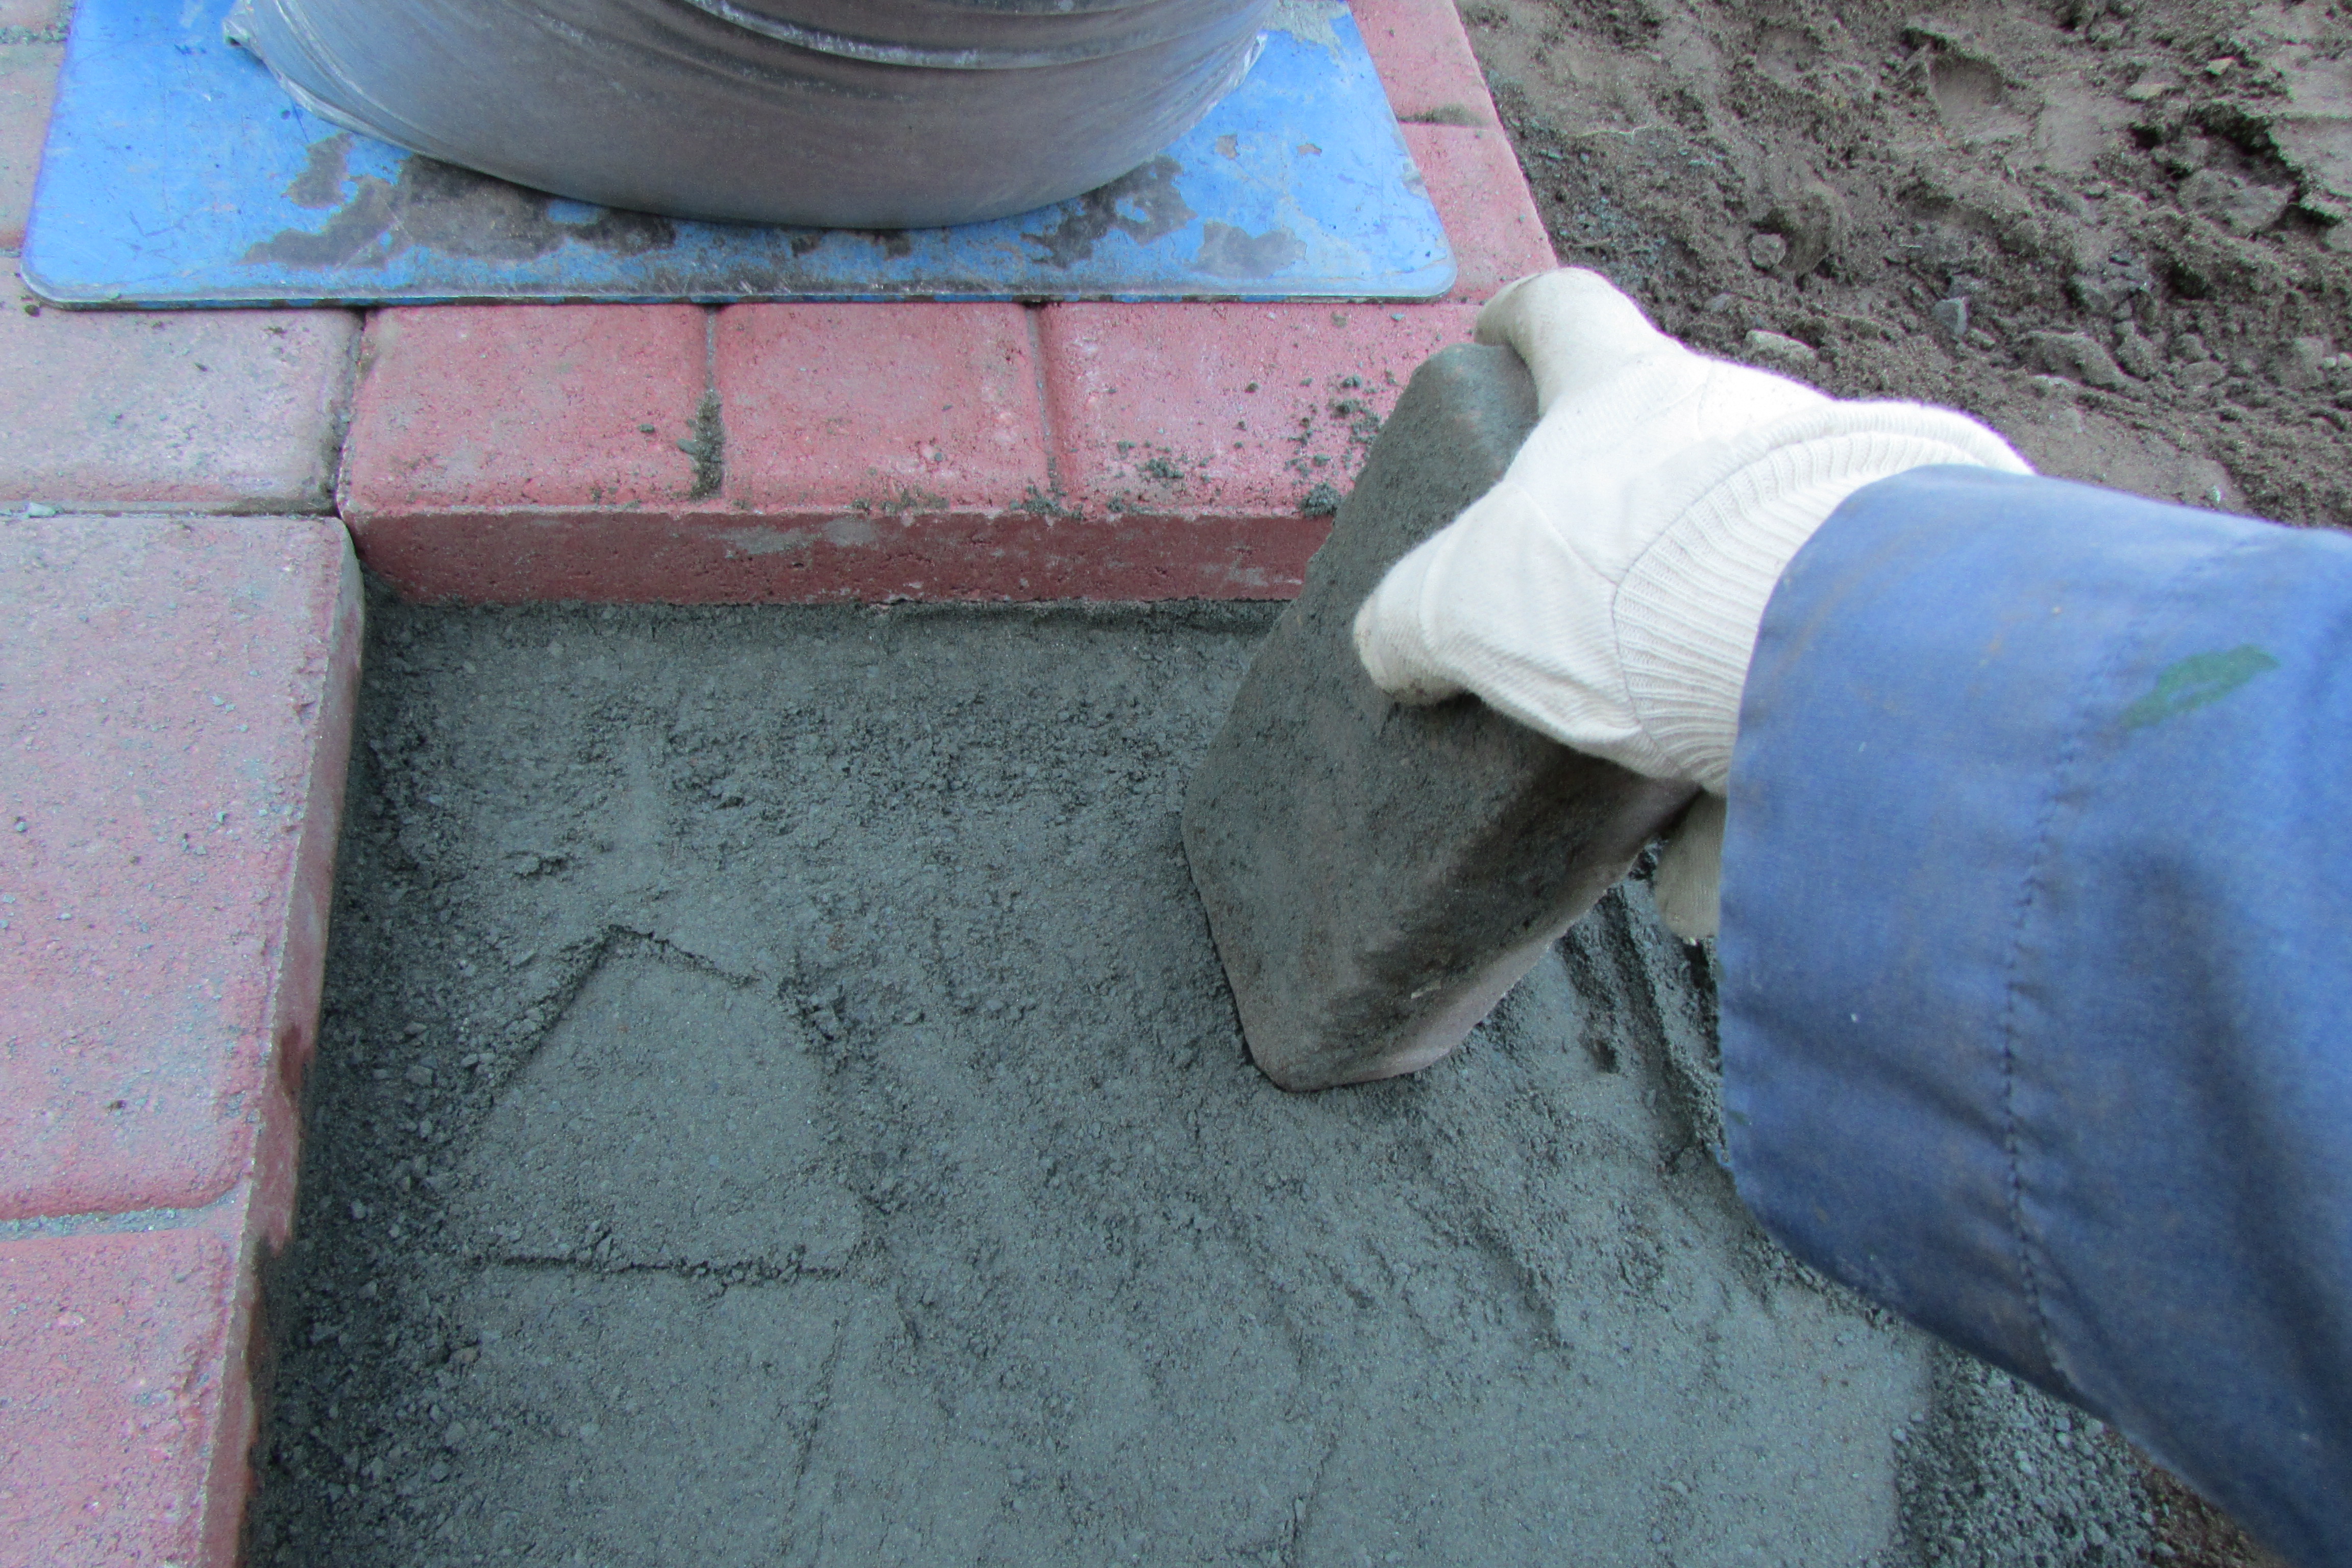
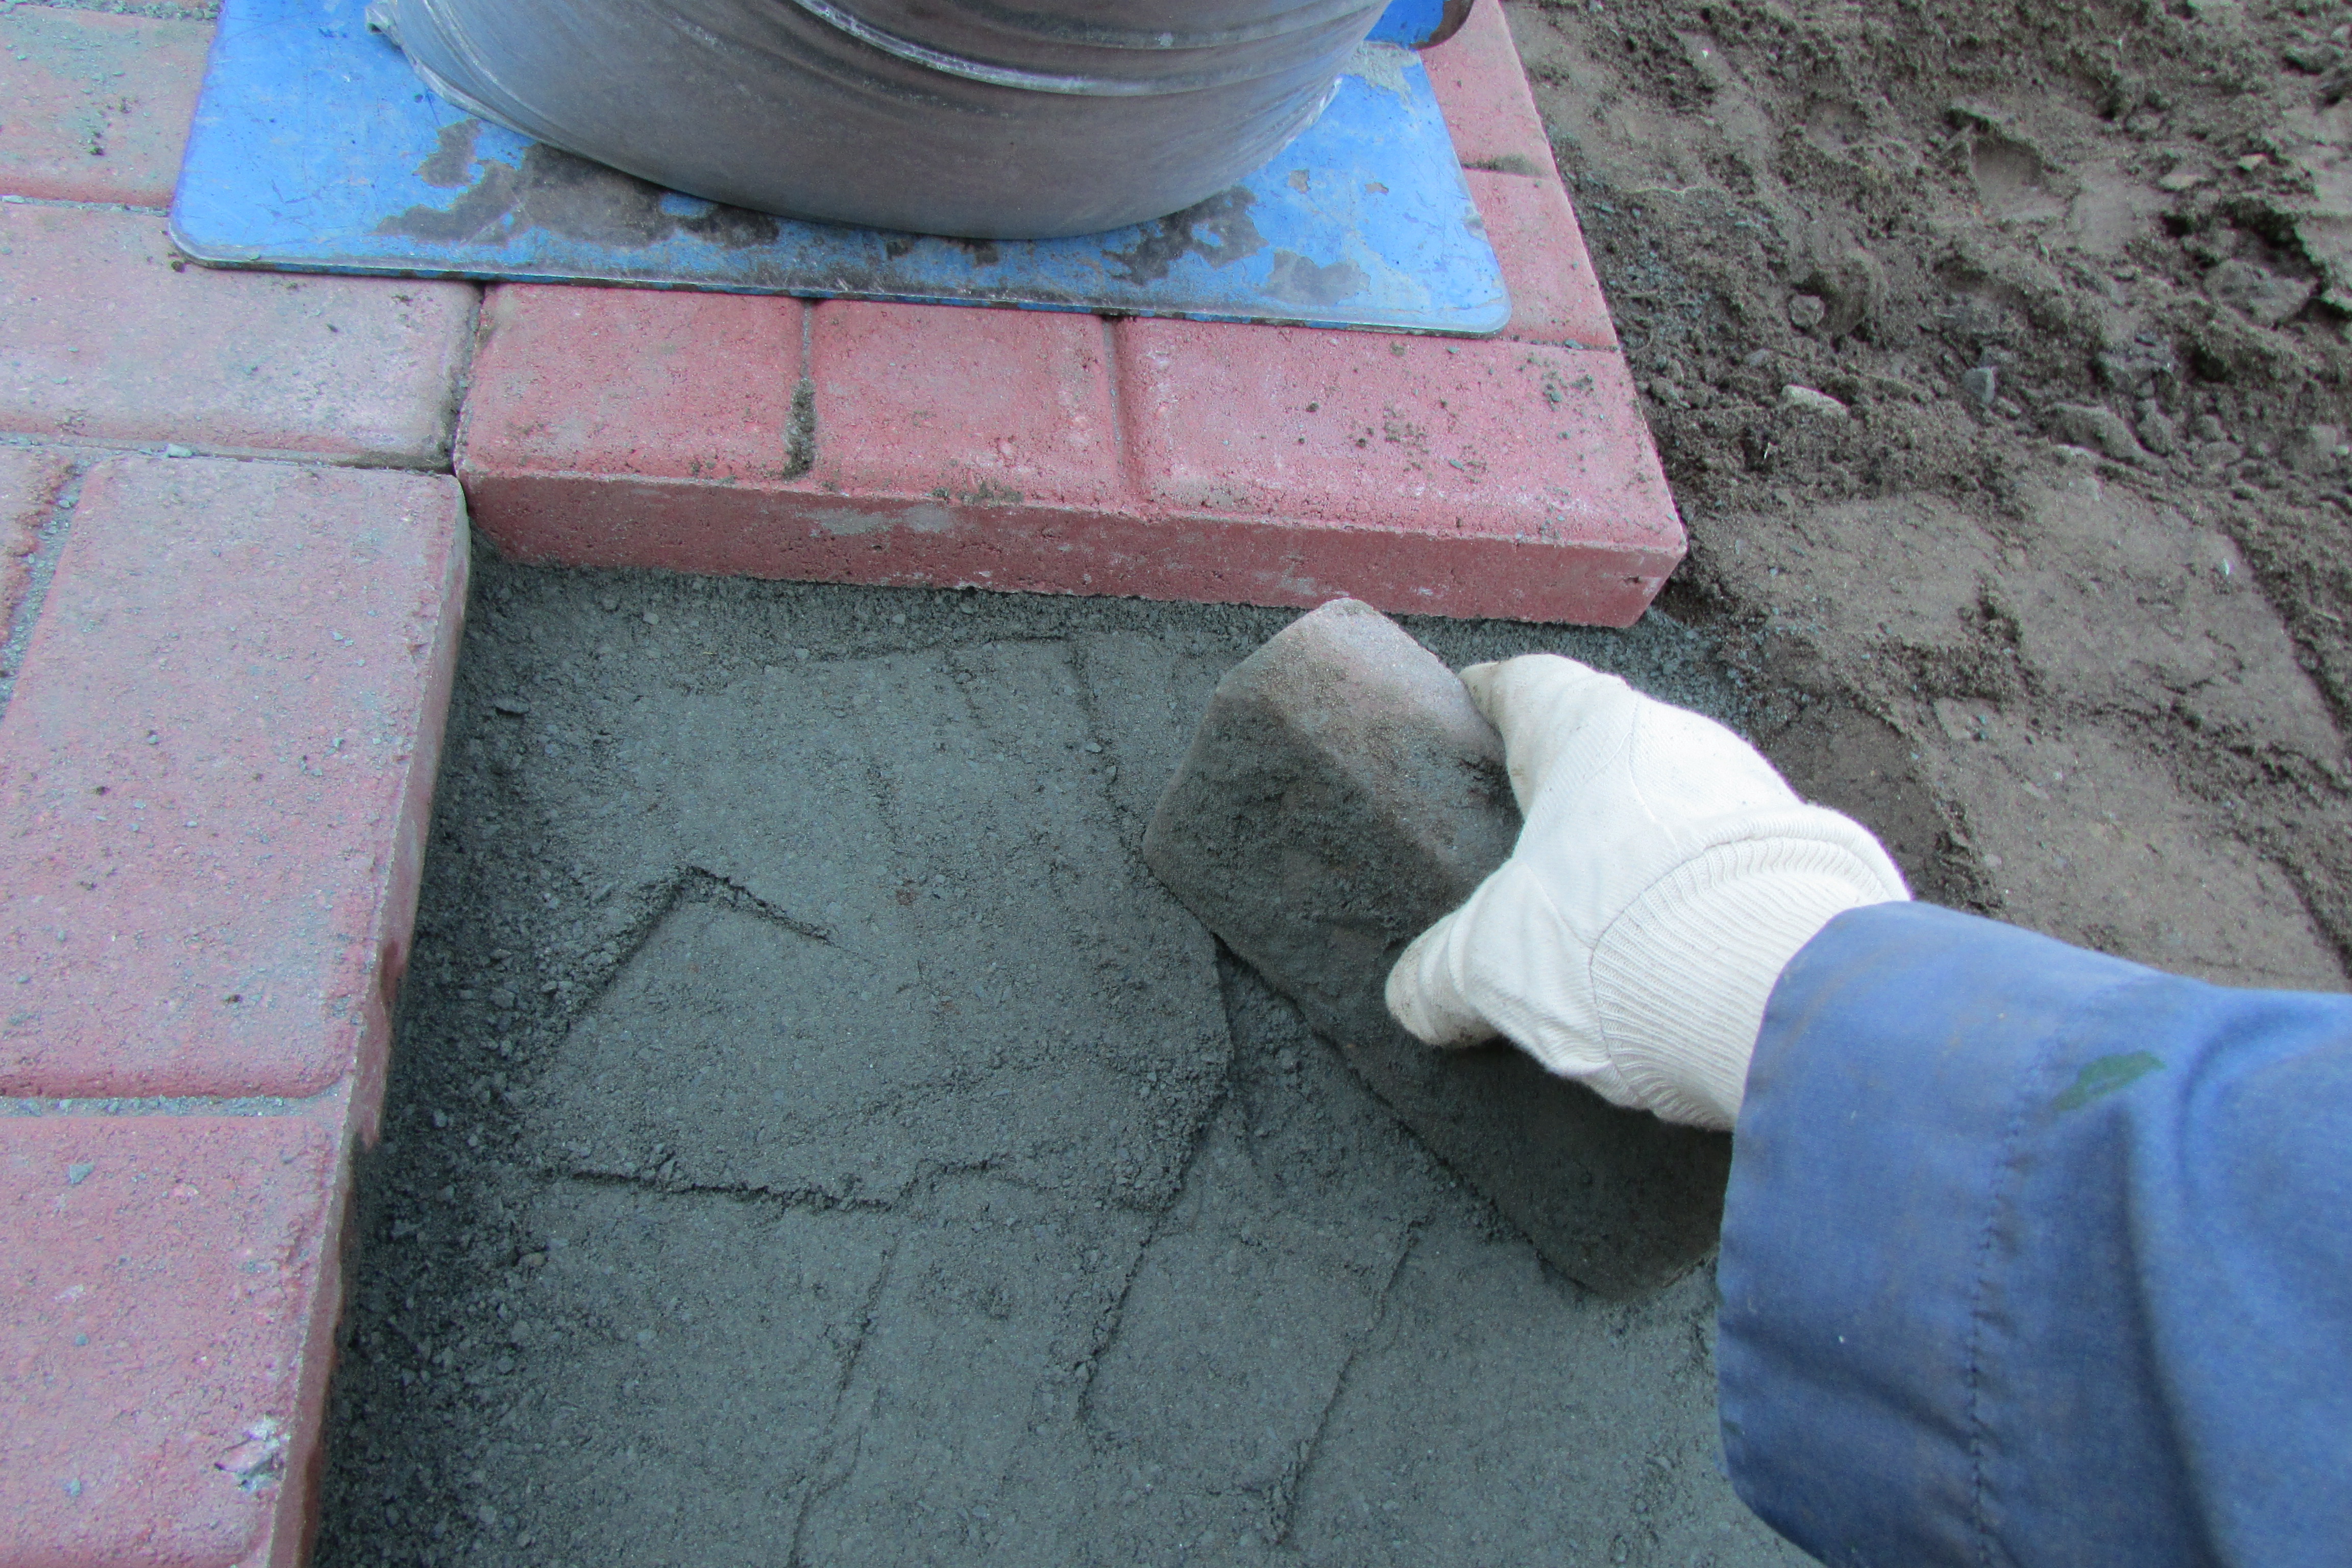
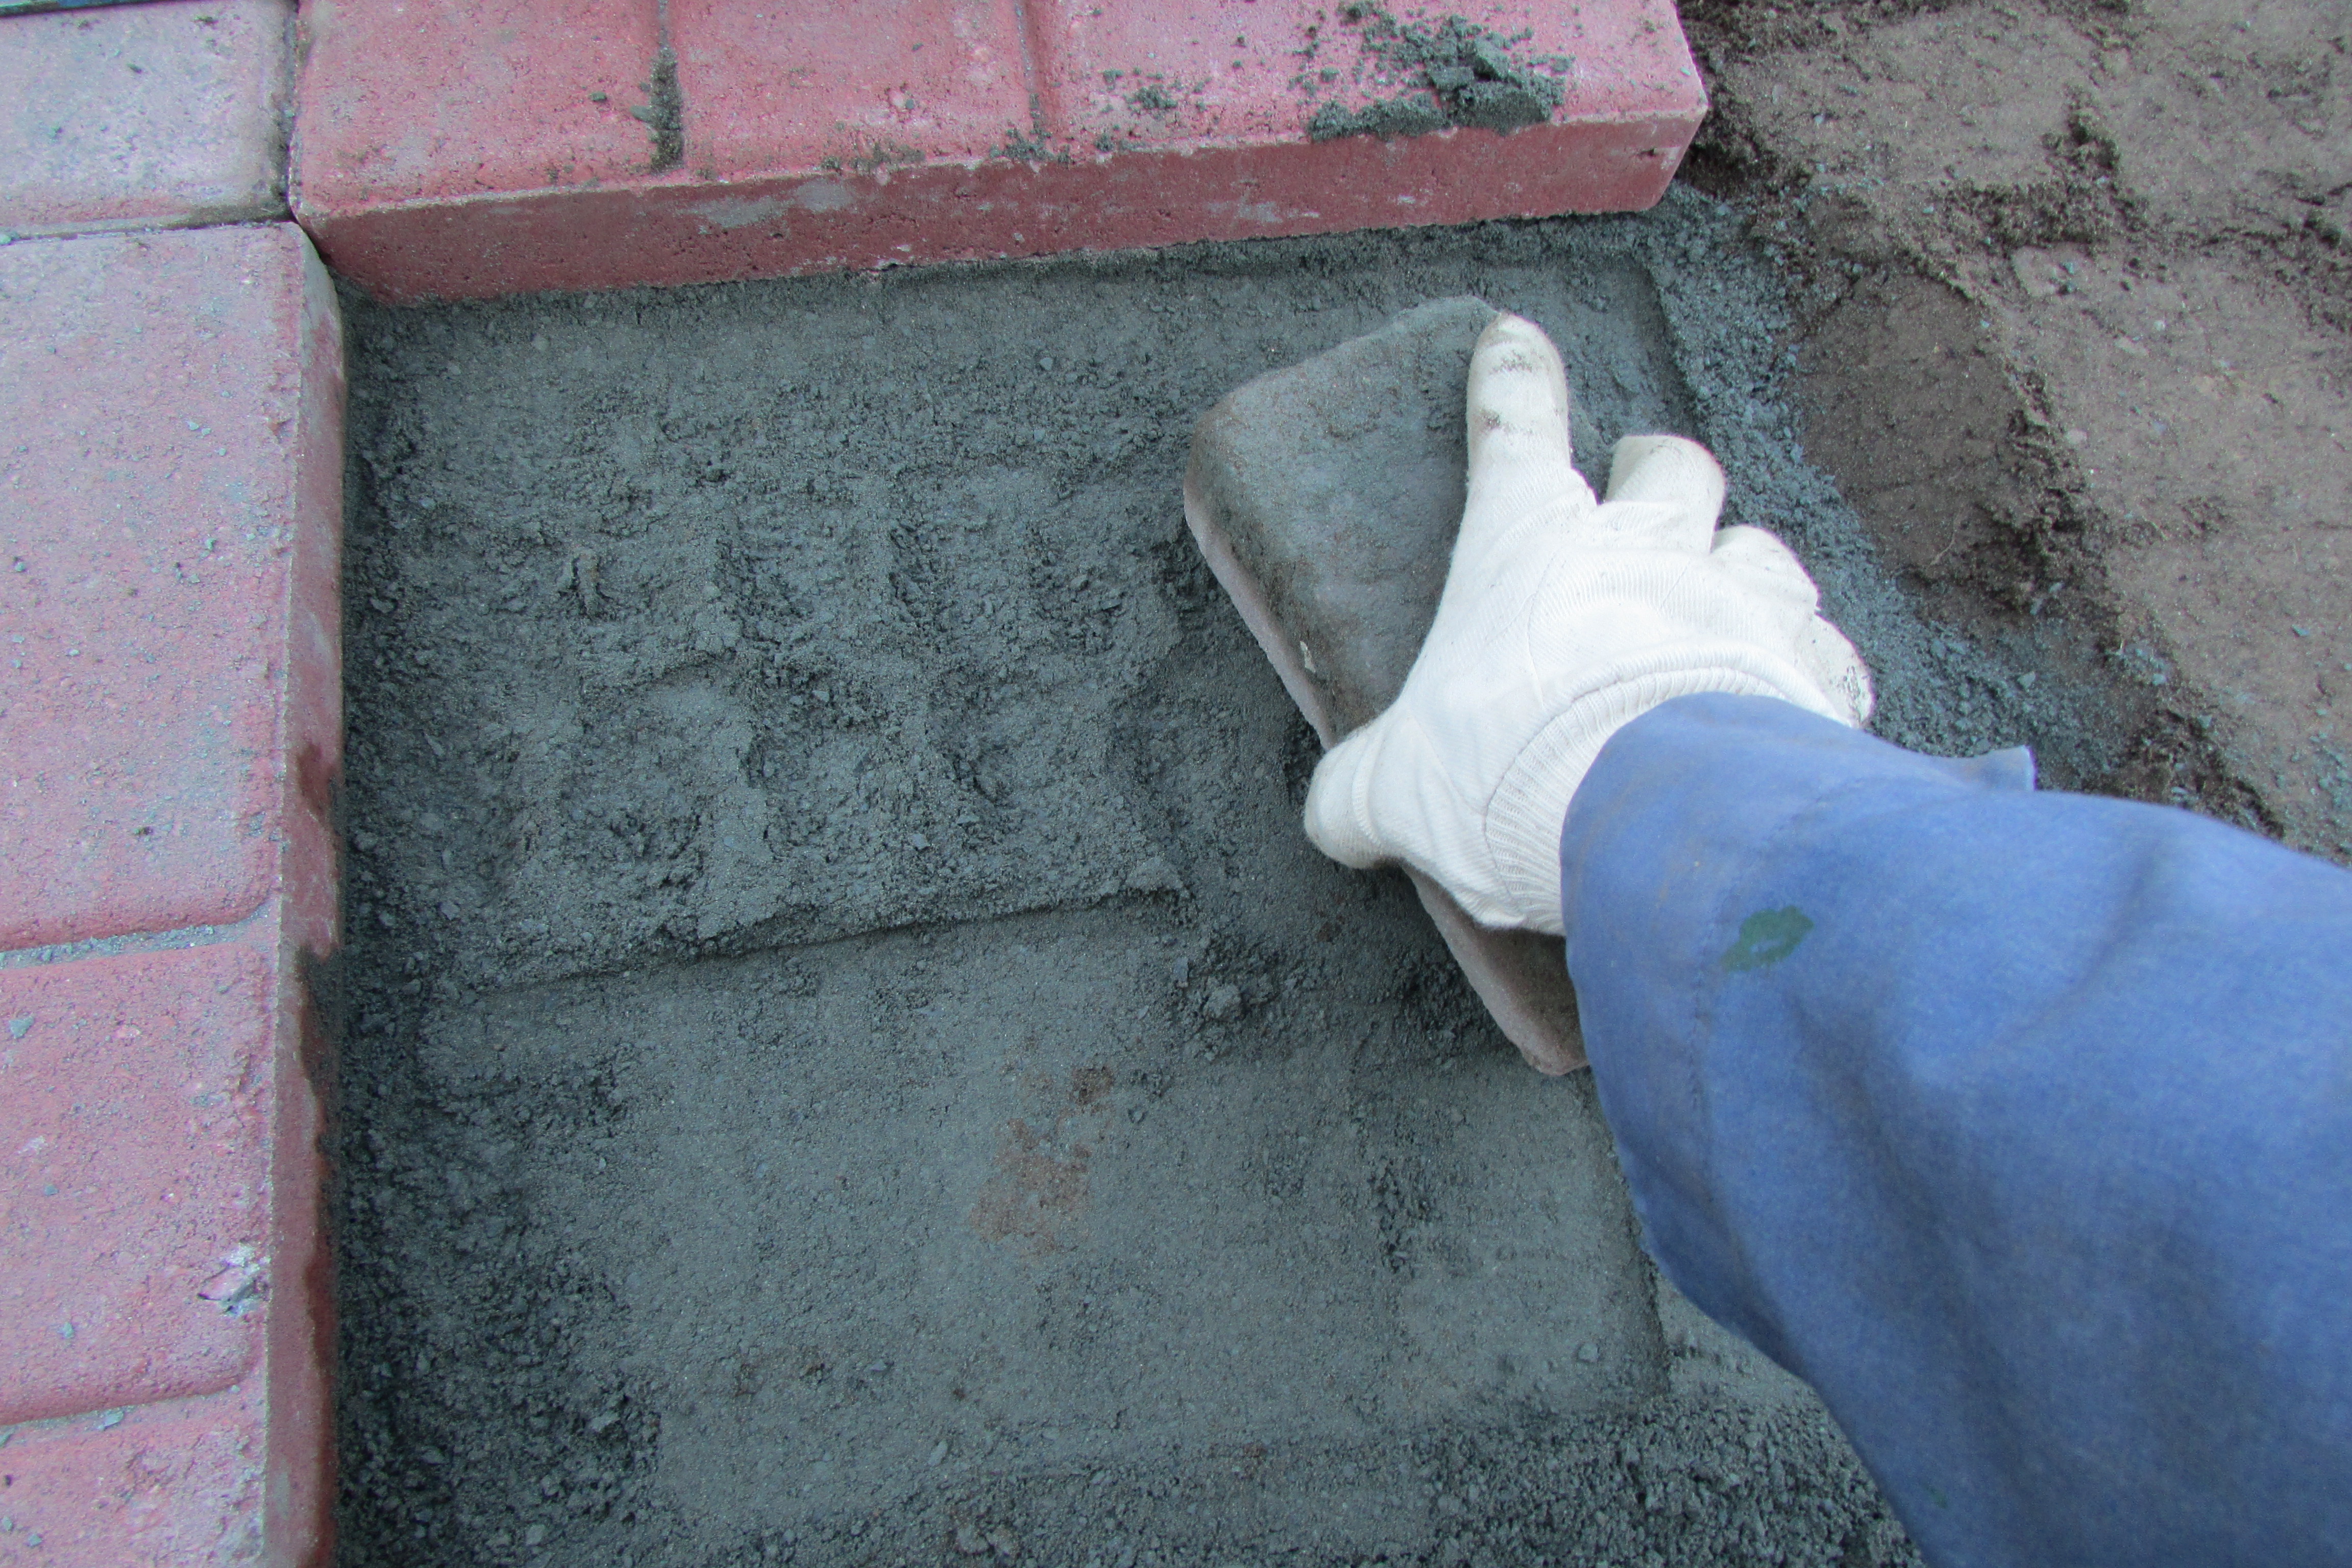 The above three photos show the different ways I used a brick to tamp down the dirt base, paver base and finally paver sand. I started with the brick’s end (first), side, (second), and face (third).
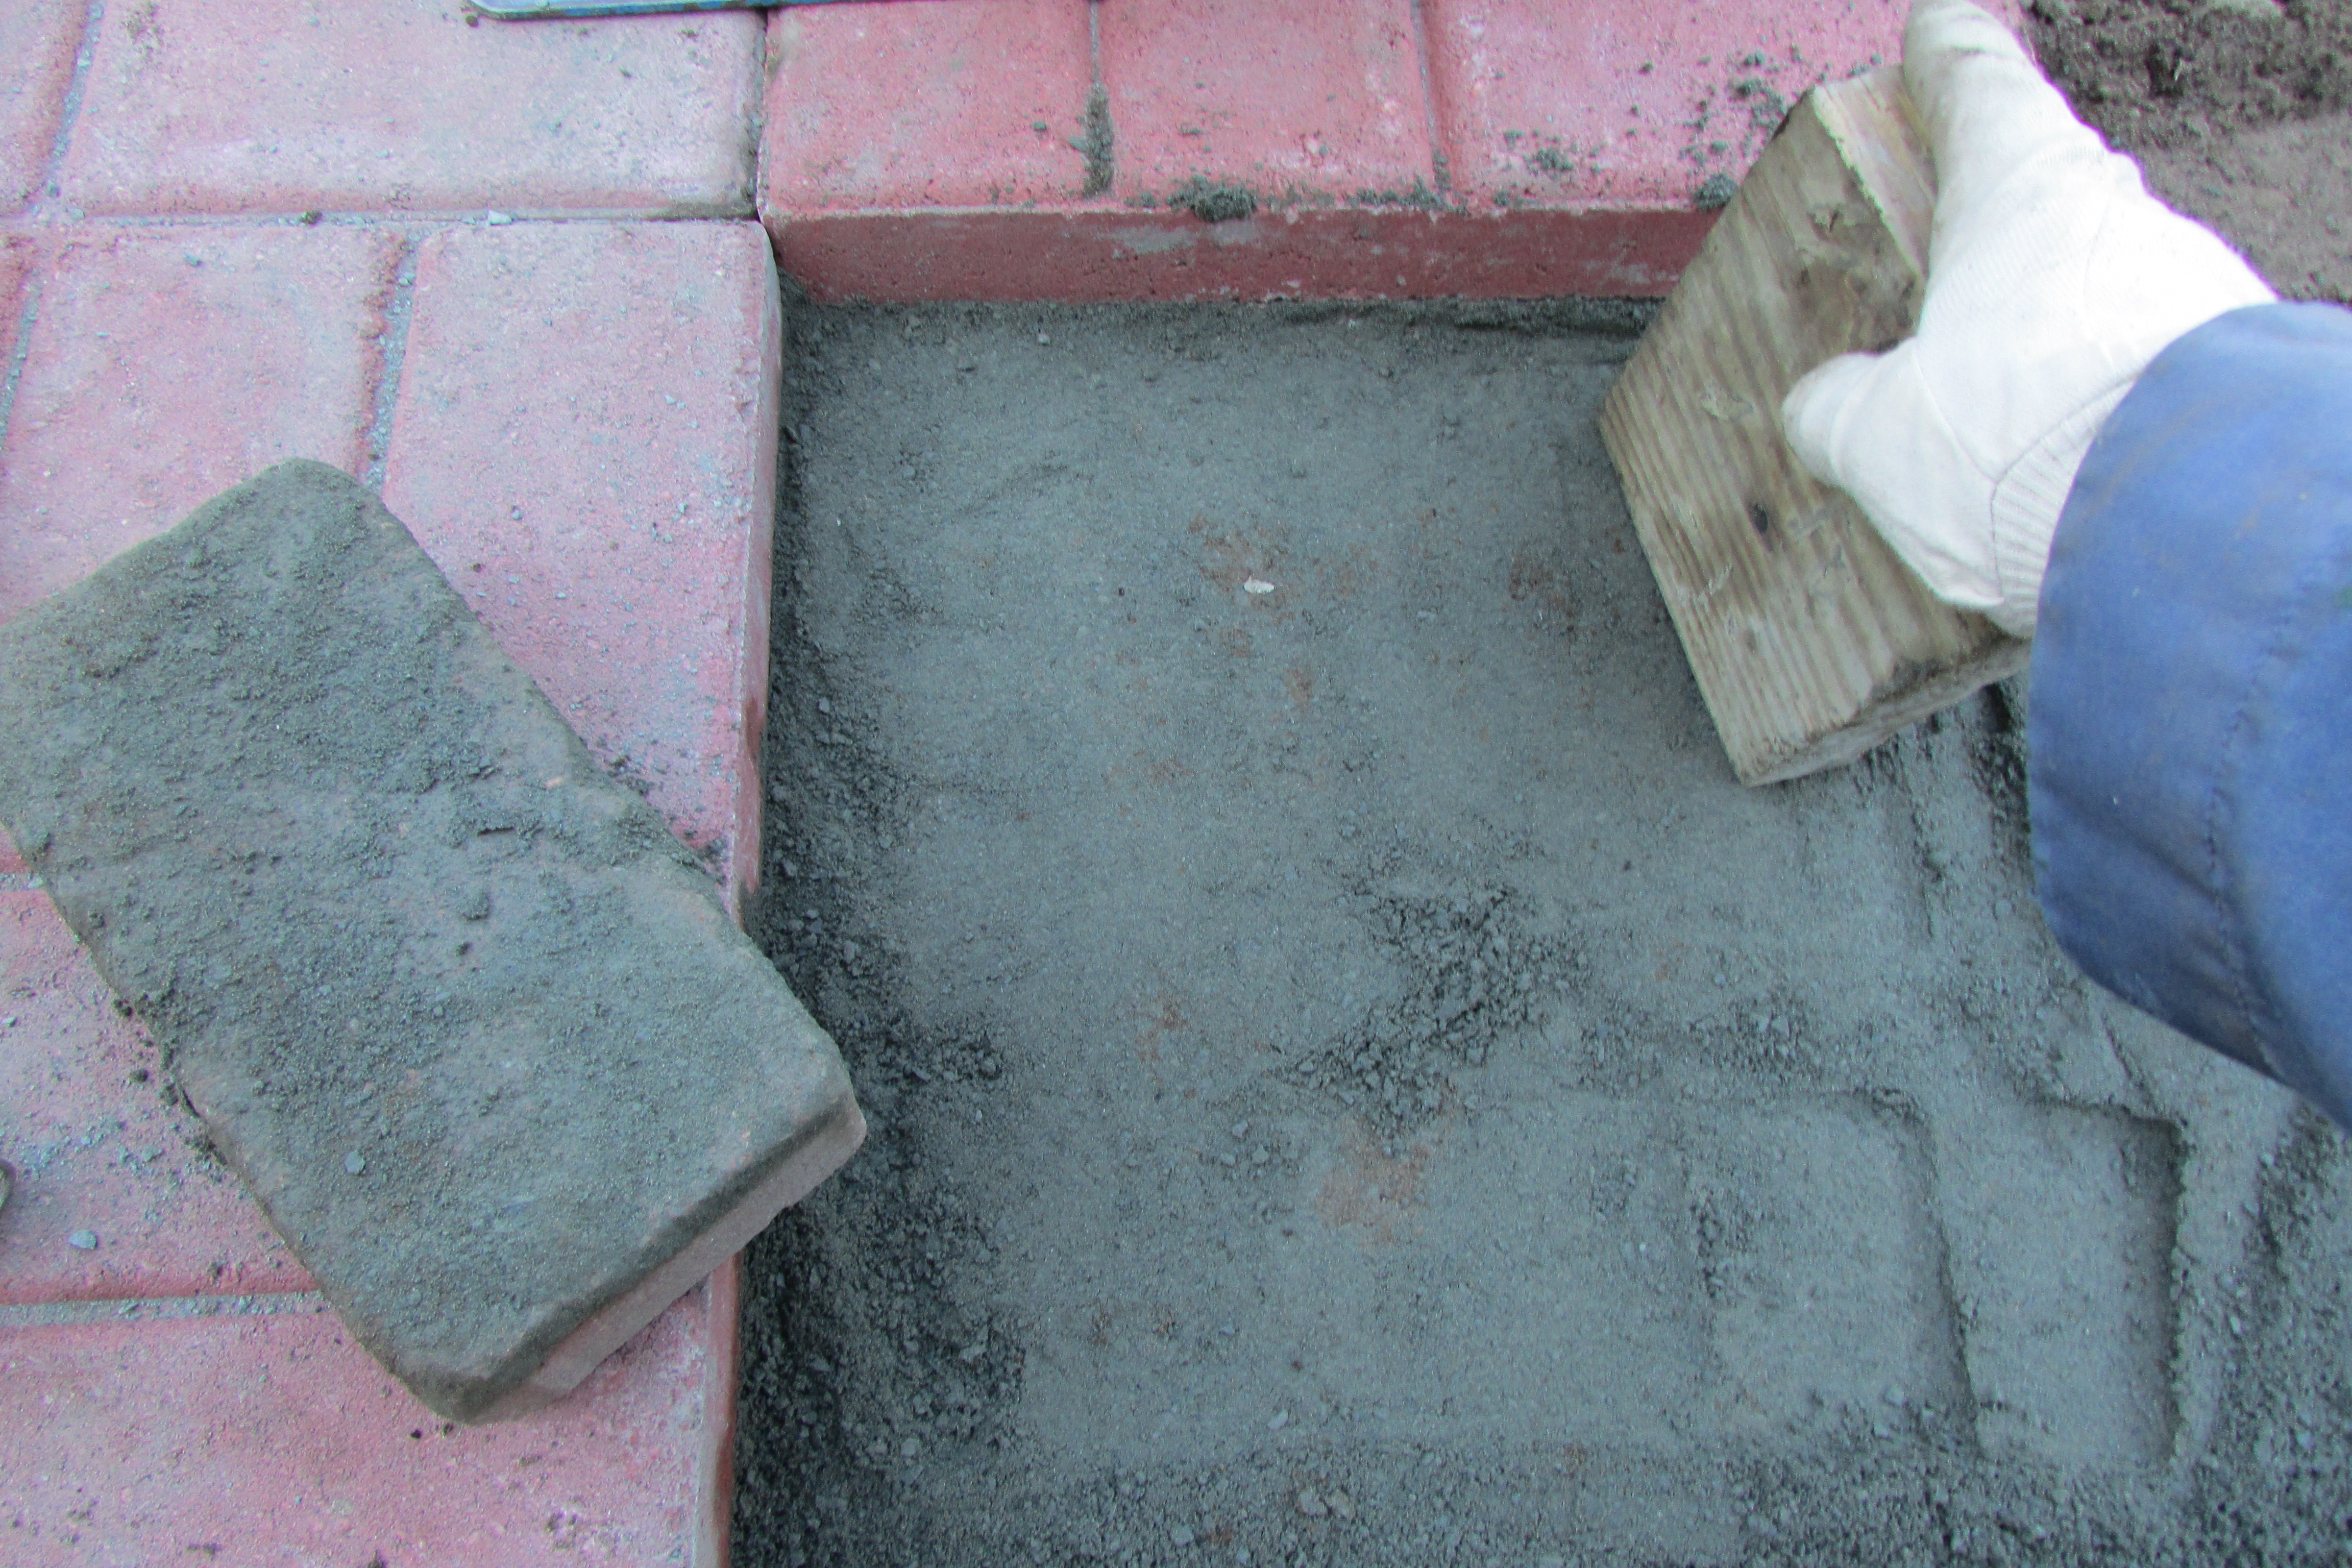
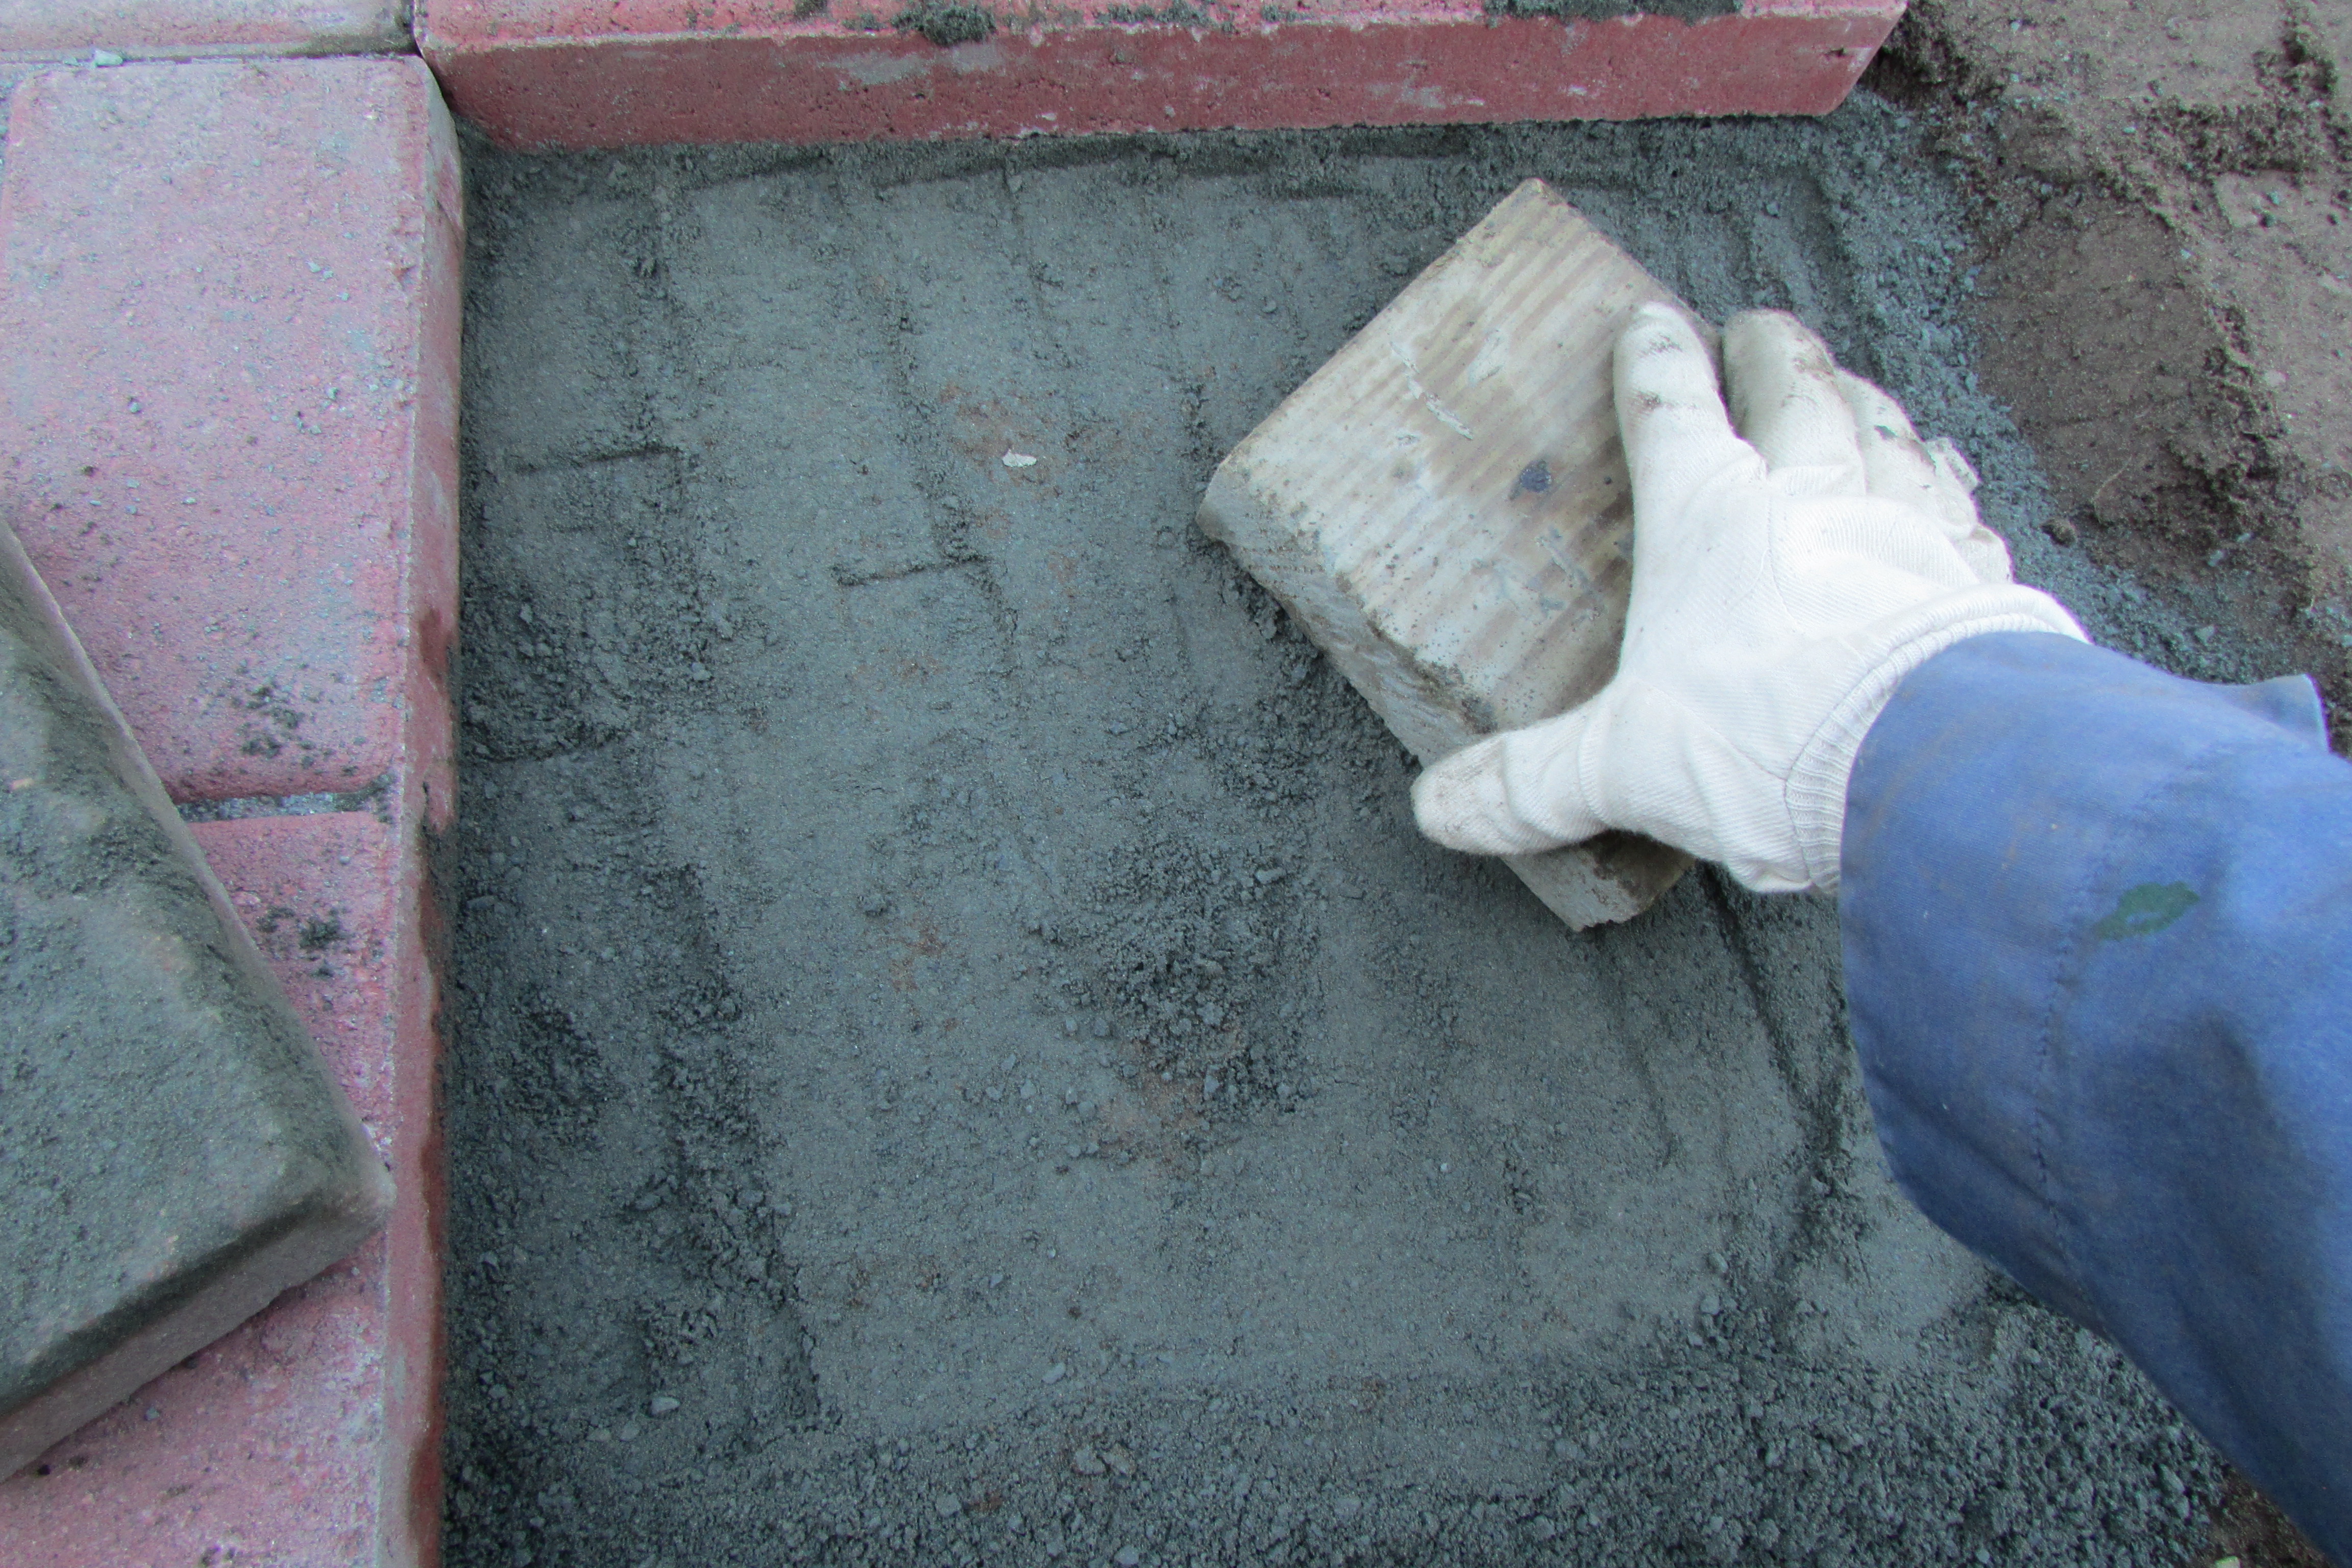 The above two photos show me using, first, the end and then the face of a block of wood to tamp the top layer of paver sand, getting it ready for the paver to be placed on top of it. The block of wood is also perfect for pulling sand across the top surface and leveling it. (I used the wood block also to help compress the dirt base as well as the paver base).
 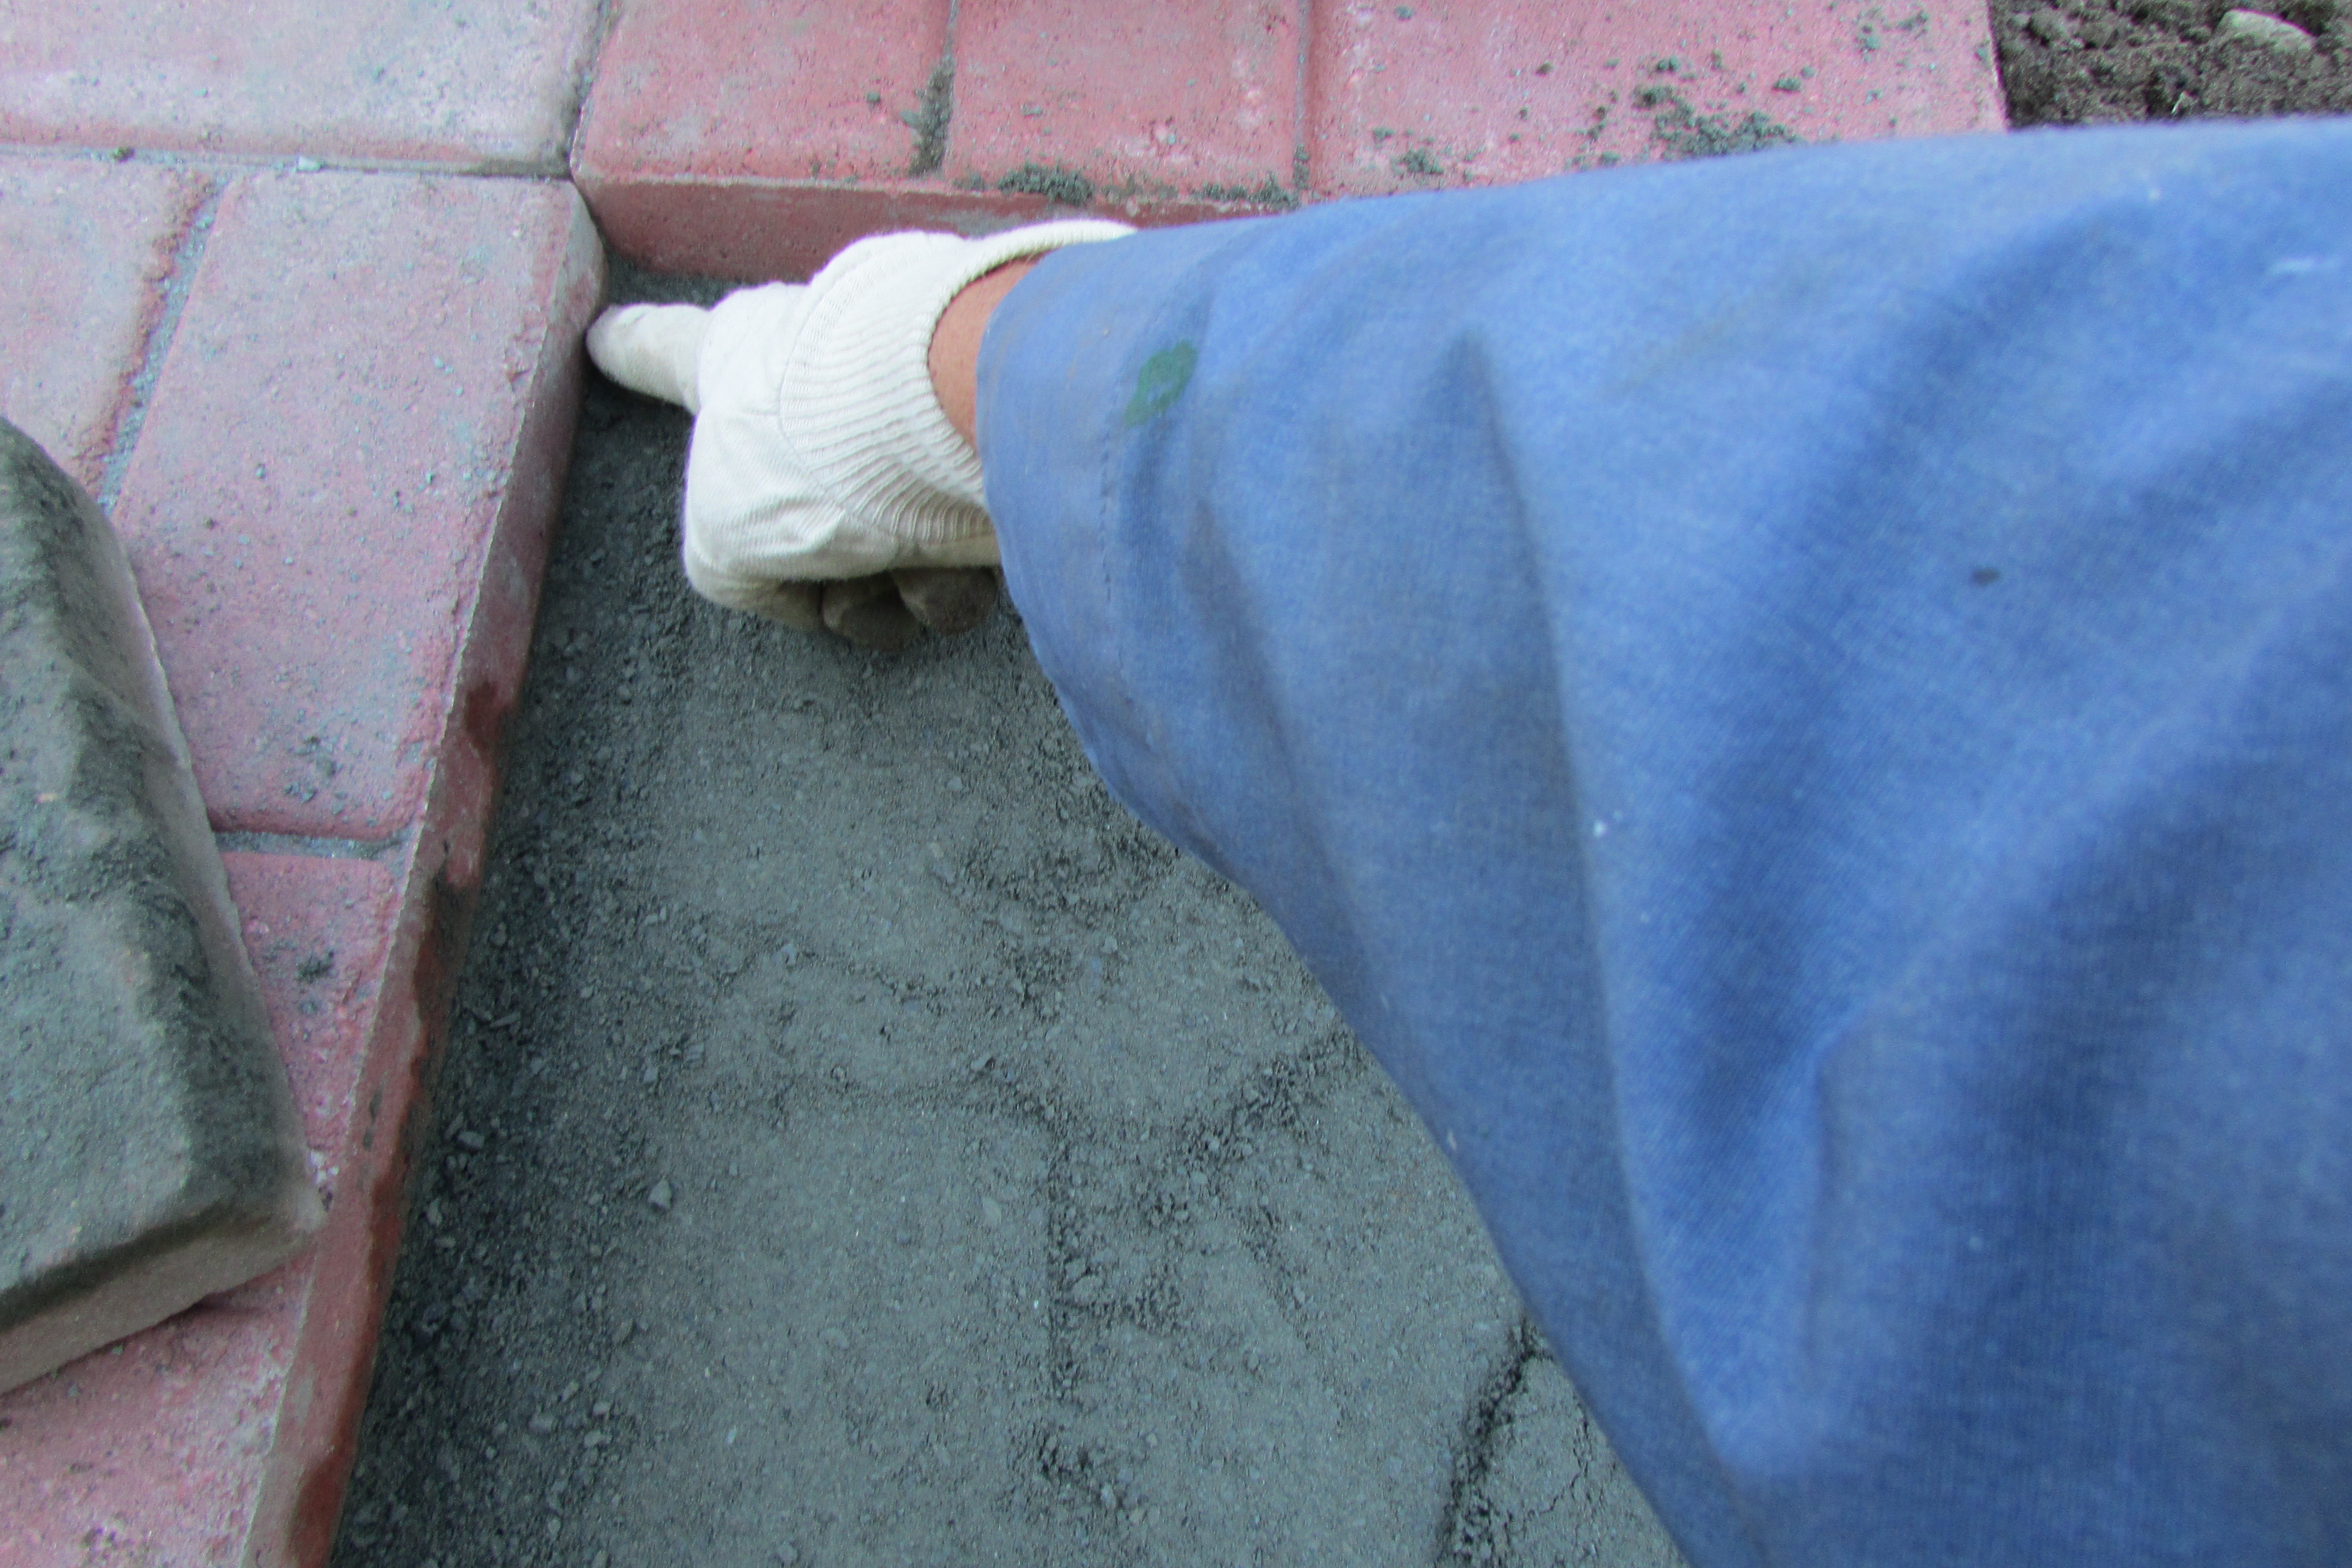 The above photo shows me taking my gloved finger and running it along the sides of the two pavers that have just been laid, so as to remove any paver sand that worked itself up the sides of the pavers. You can also use the pointed end of the garden trowel or the hand broom for removing excess sand. Excess sand on the sides of the pavers makes for a loose fit, which will show gaps.
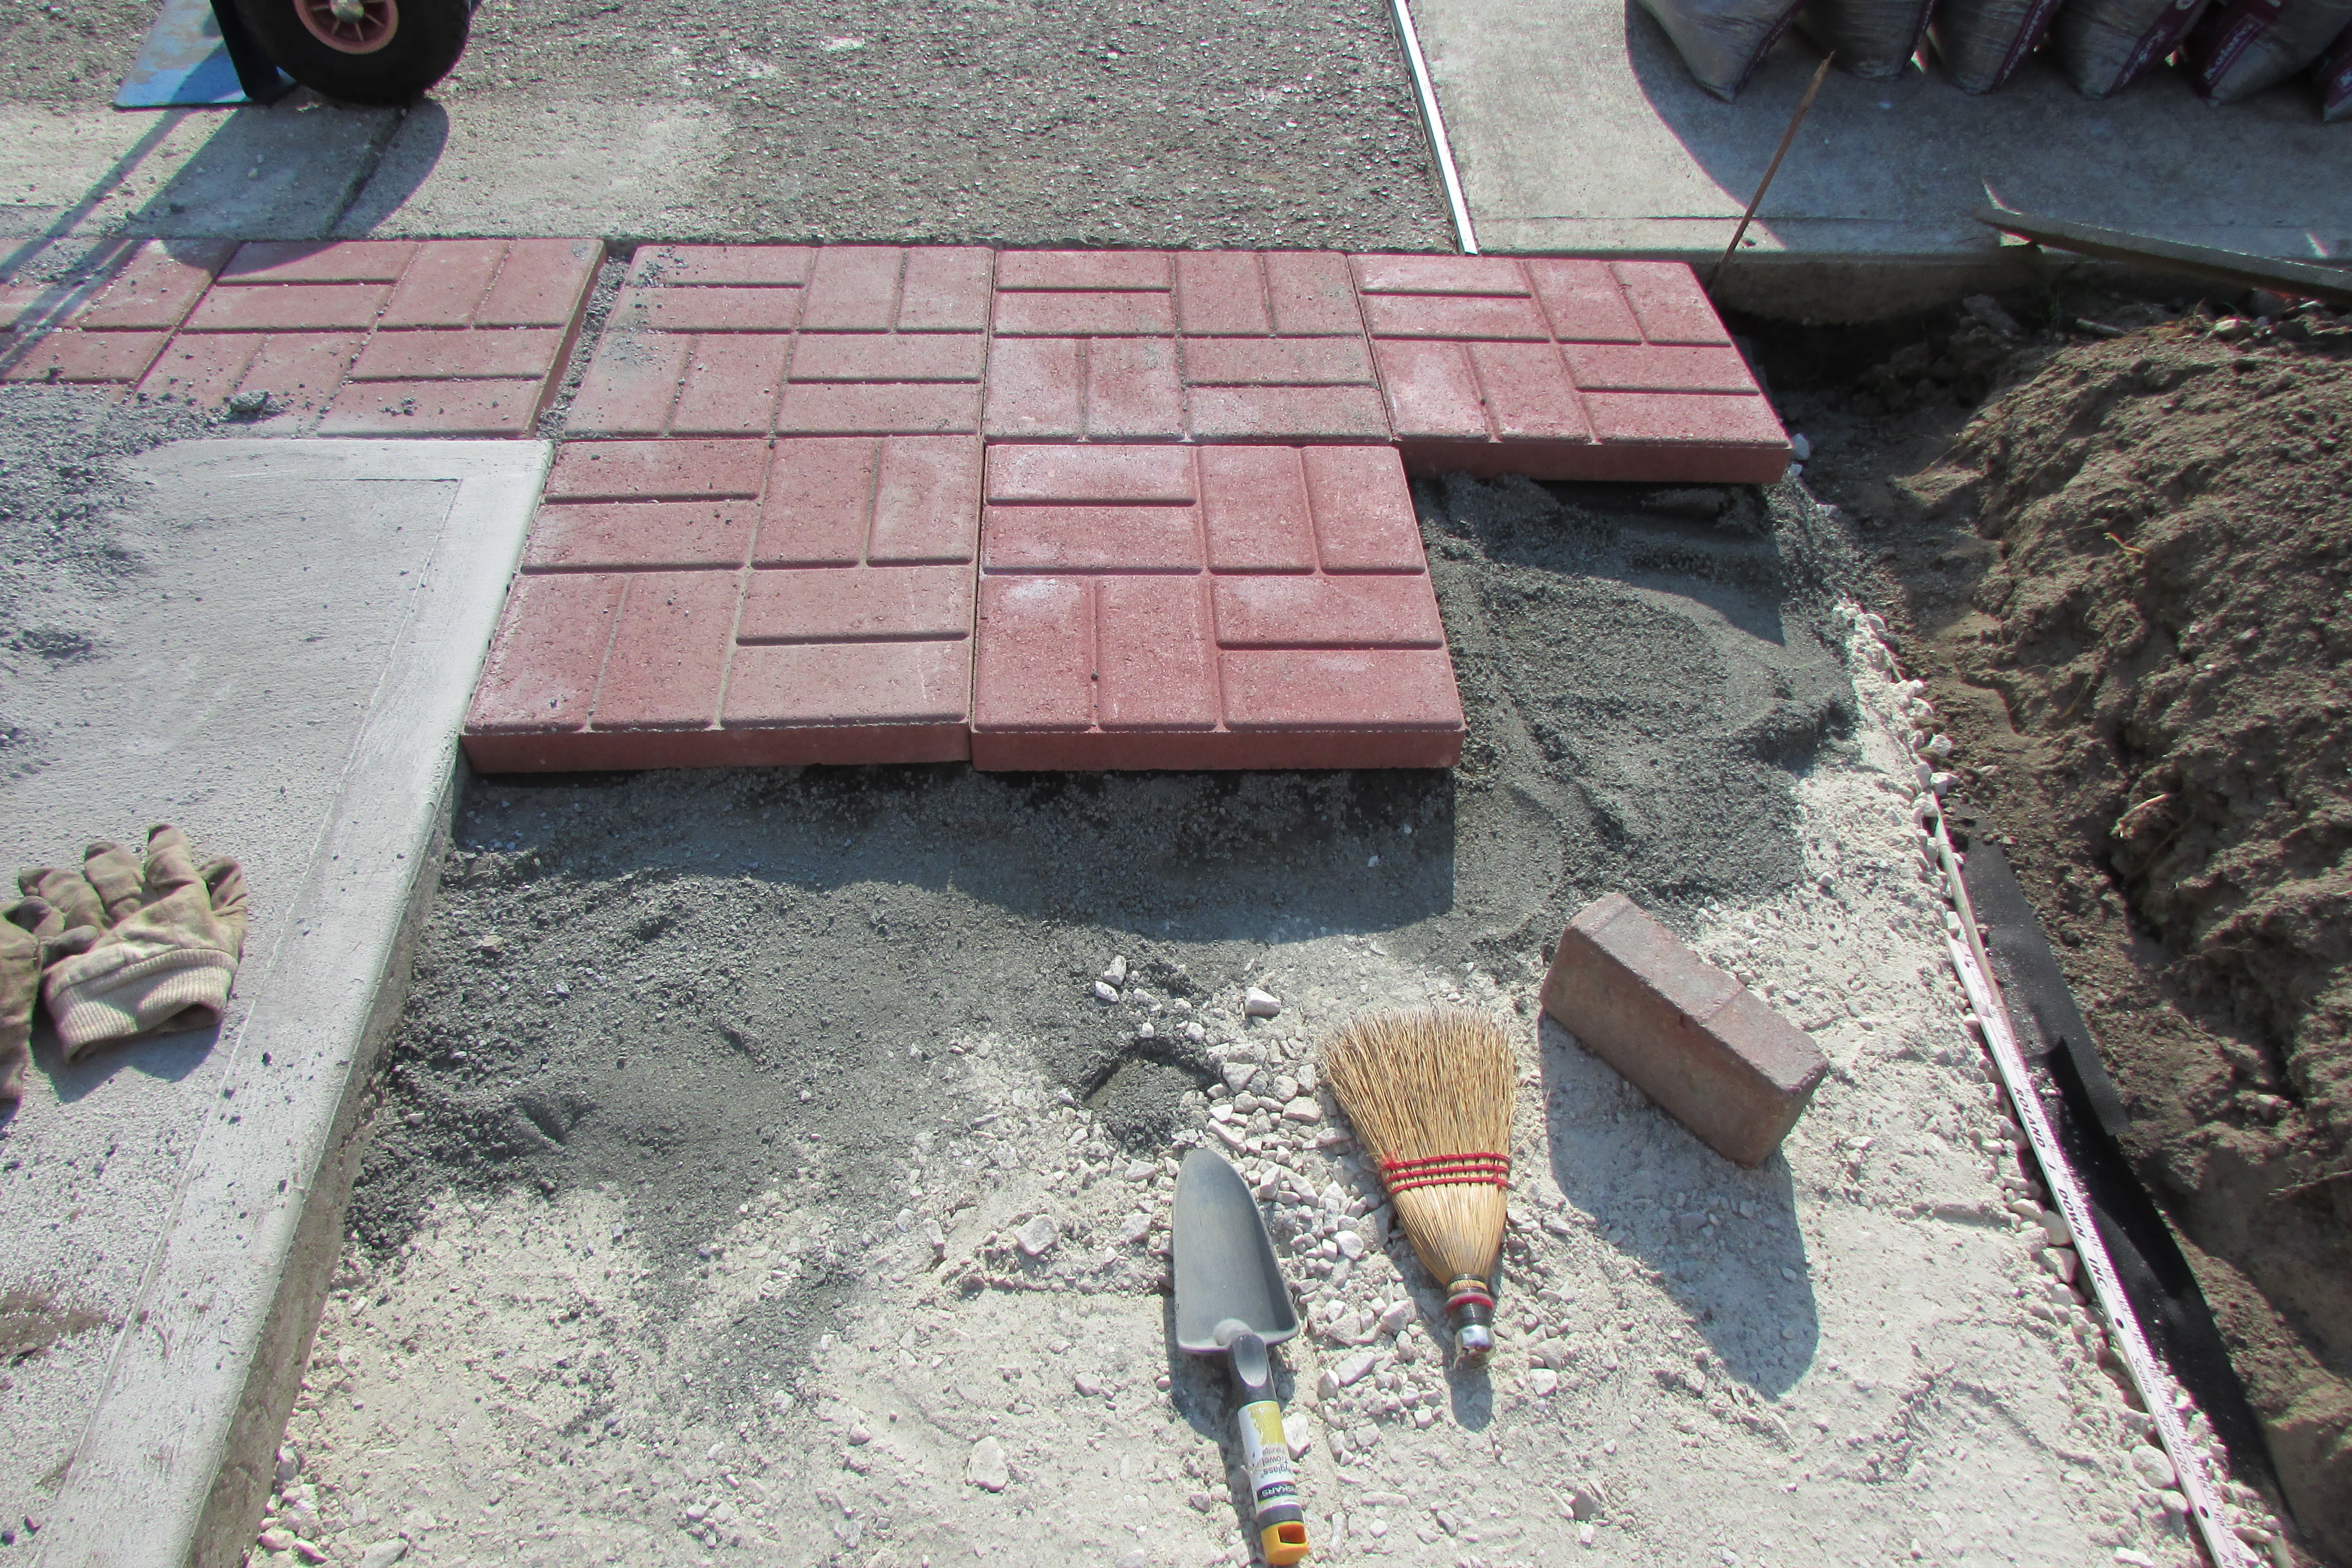
Step 6… Place your first paver and see what happens. 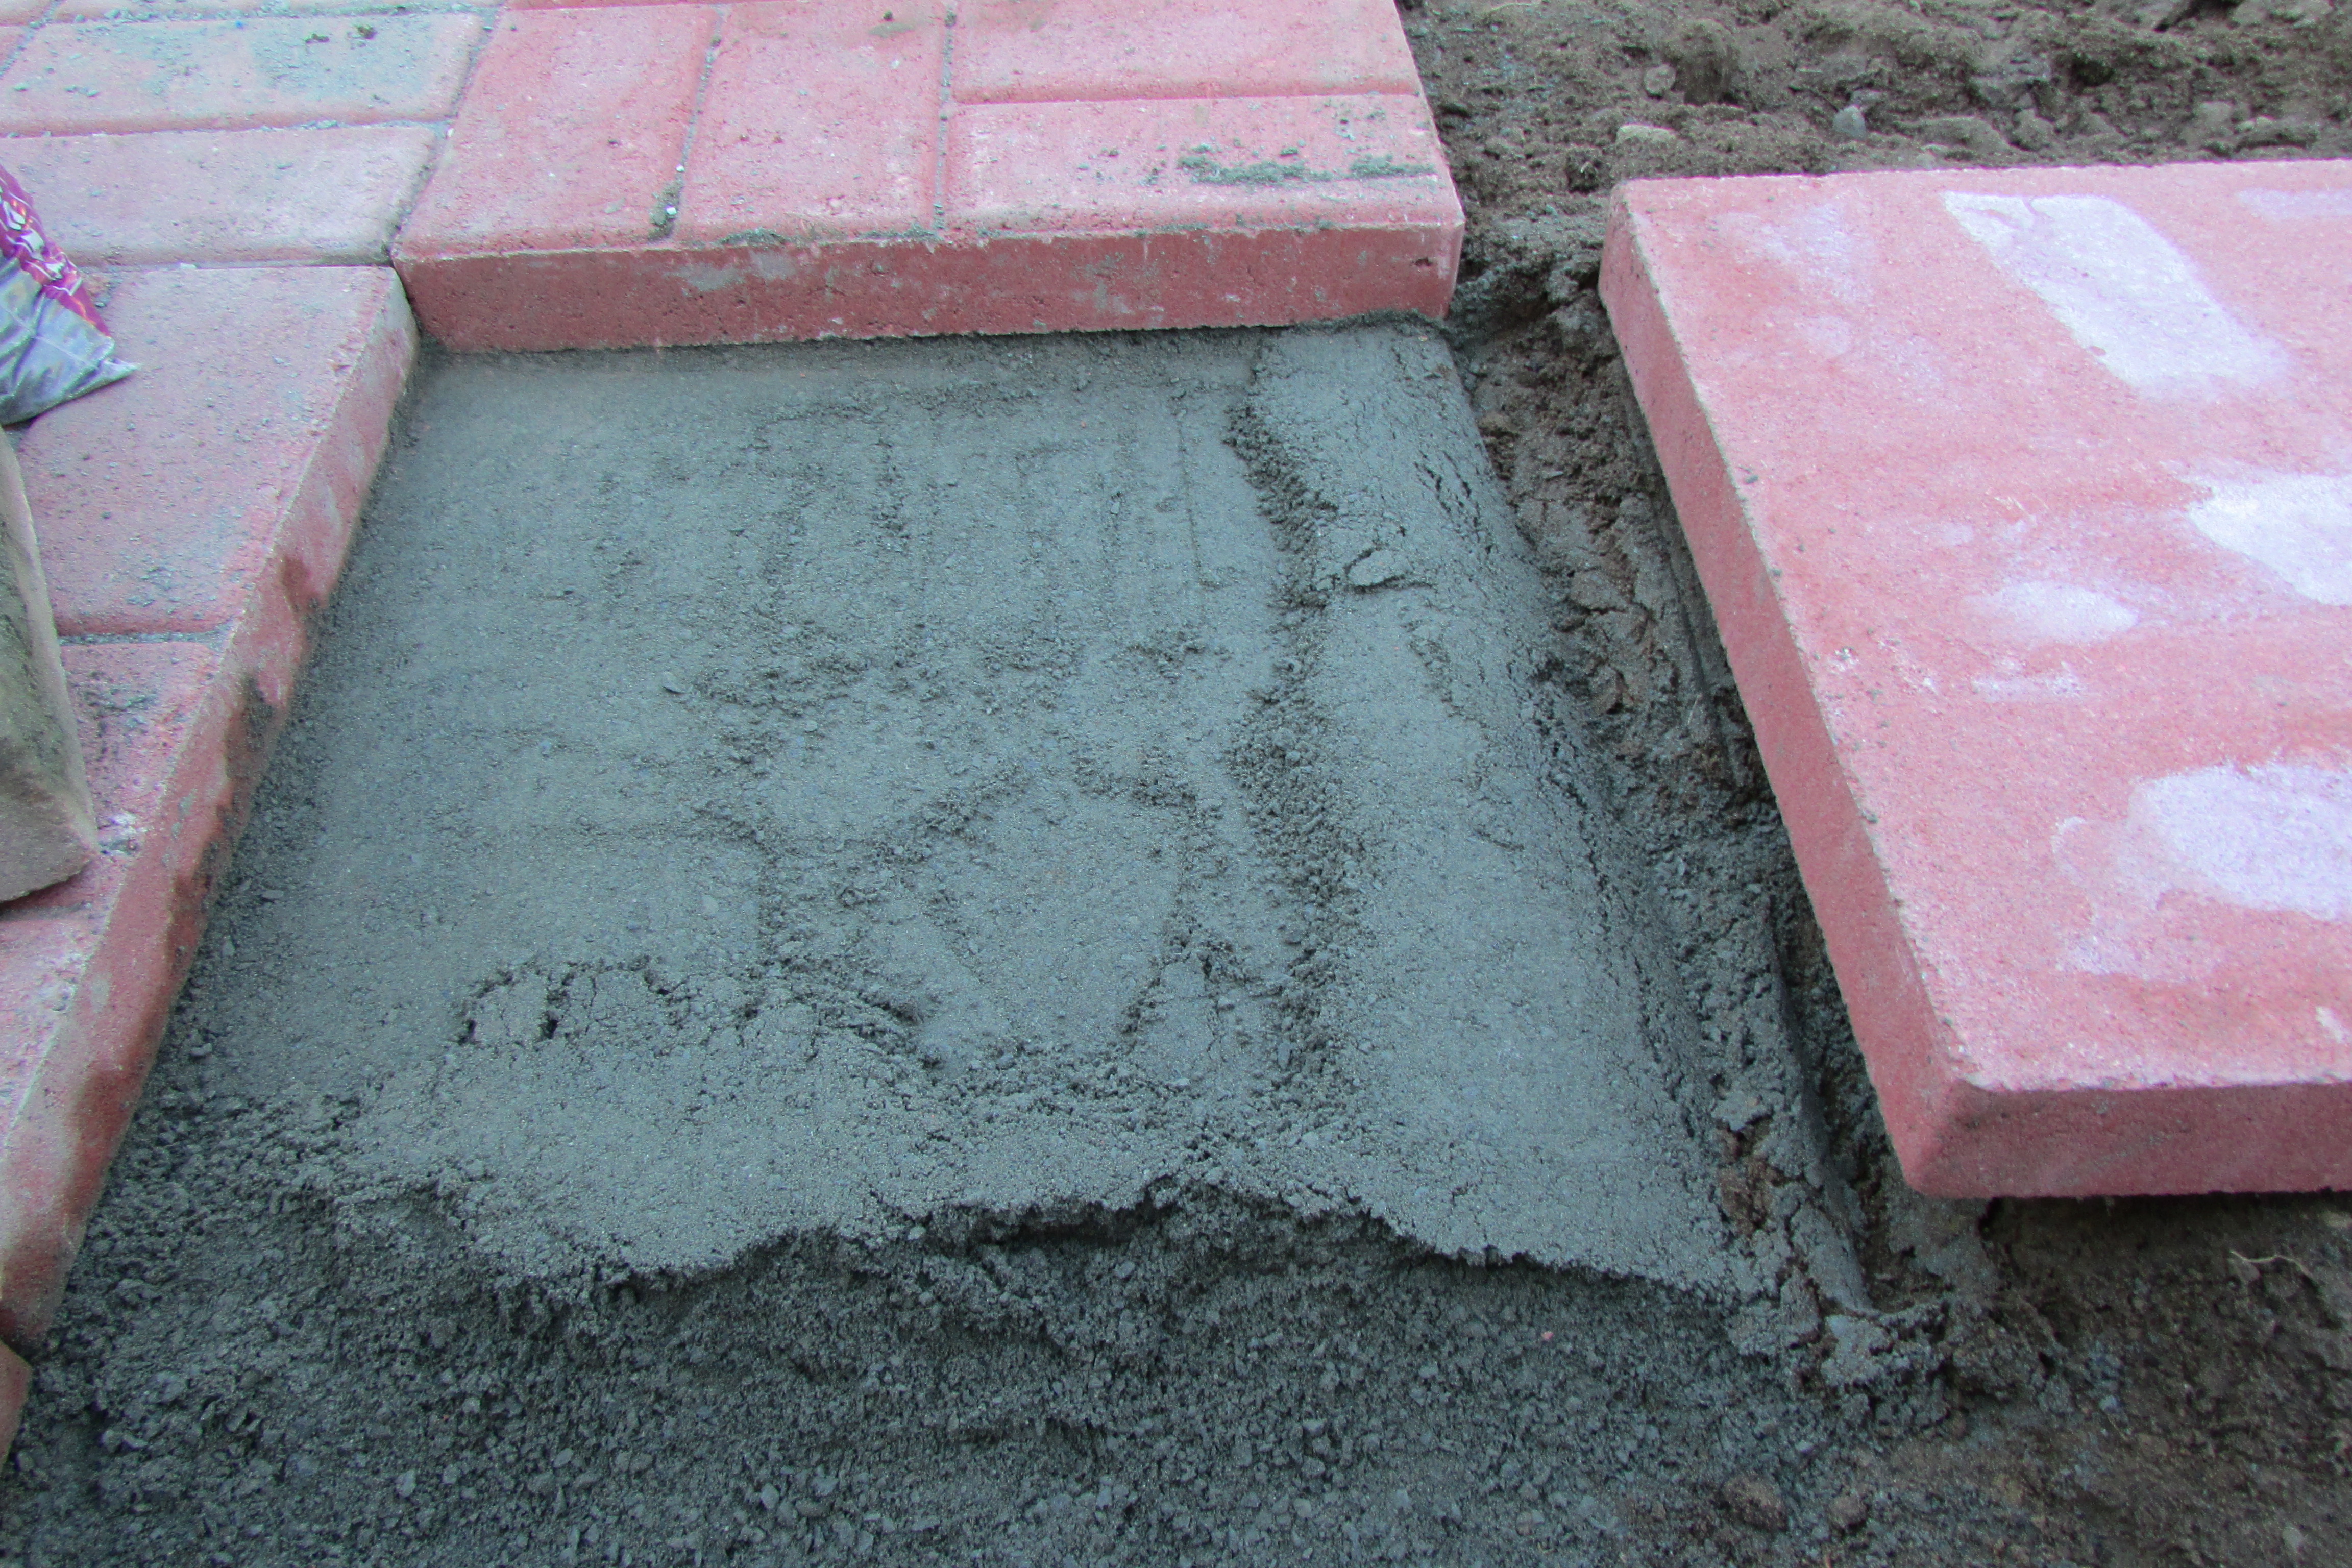 Most likely your paver will not be level, that’s OK. With one hand lift your paver a bit to where you think it should be, and with the other hand use your fingers to push sand under the paver to make it level, then (without moving the sand too much) remove the paver. Looking at the above photo, notice the vertical line on the right, it shows where the sand is higher; that area is where I pushed extra sand under the paver.
Next take your garden trowel and scoop up extra sand and fill in the lower area on the left, so it matches what is on the right. After that tamp down the sand with the face of the wooden block, and remove any sand that worked itself up on the sides of the pavers, and then try laying the paver again; it might lay perfect, or need a bit extra sand and one more adjustment. On average, each paver I laid had to adjust three times.
Next step on you paver and see if it rocks. If a paver rocks push some more sand under the edge where it dips and then step on it to see if you stopped the rocking. If you did, lift the paver again, add a bit more sand to fill in any low spots, tamp the sand and lay the paver once more. Most pavers that rock need adjustment east to west, or north to south.
After you get your paver level take a block of wood, put it next to the edge of the paver and gently tap it tightly up next to the other pavers with the hammer. Never tap the paver directly with the hammer, as you could chip or crack it. If you have access to a rubber mallet that would also work well.
When I was adding pavers next to my poured cement patio I had many irregularities to address. I had different heights of cement, both new and old, to try to line pavers up with, none of the edges of either the old or new cement were exactly straight, and I had different levels of terrain to place pavers on. Nothing is perfect, but what I ended up with looks fine to me.
Step 7… After you have finished laying your pavers, and bricks (as I did) the final step is to install their surround. 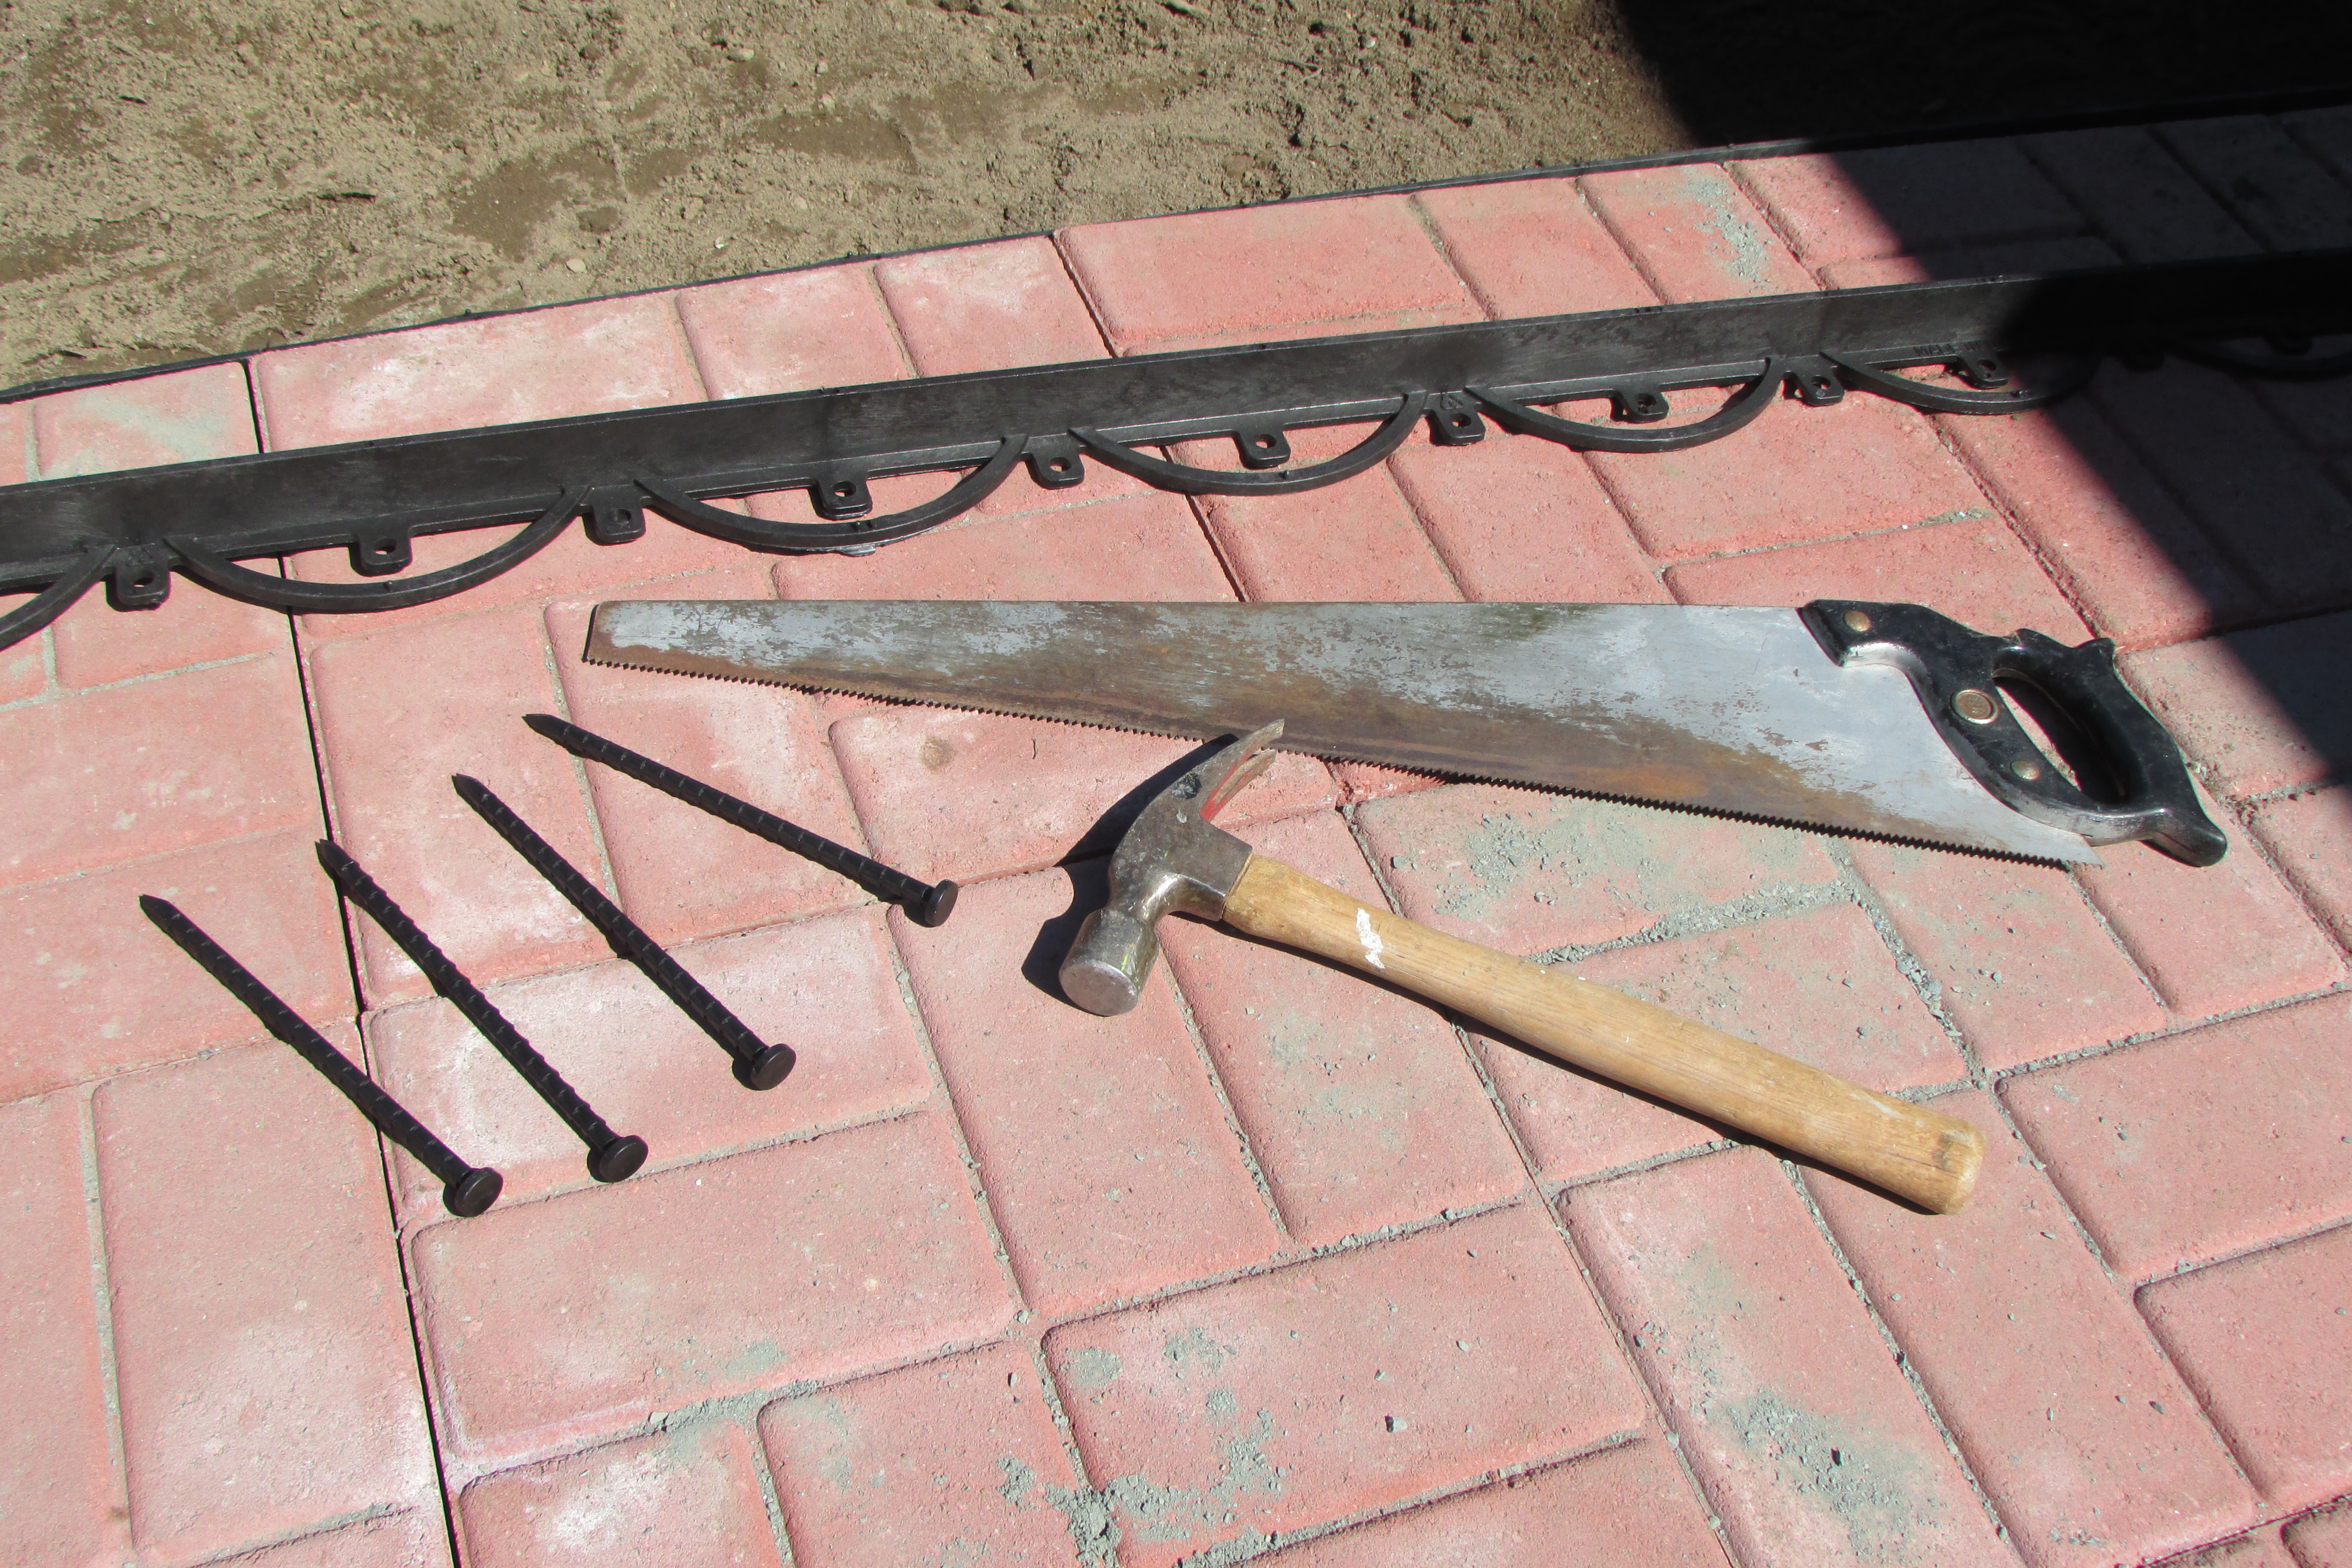 The above photo shows a sample of the plastic edging, the spikes that keep it in place and the saw I easily cut it with.
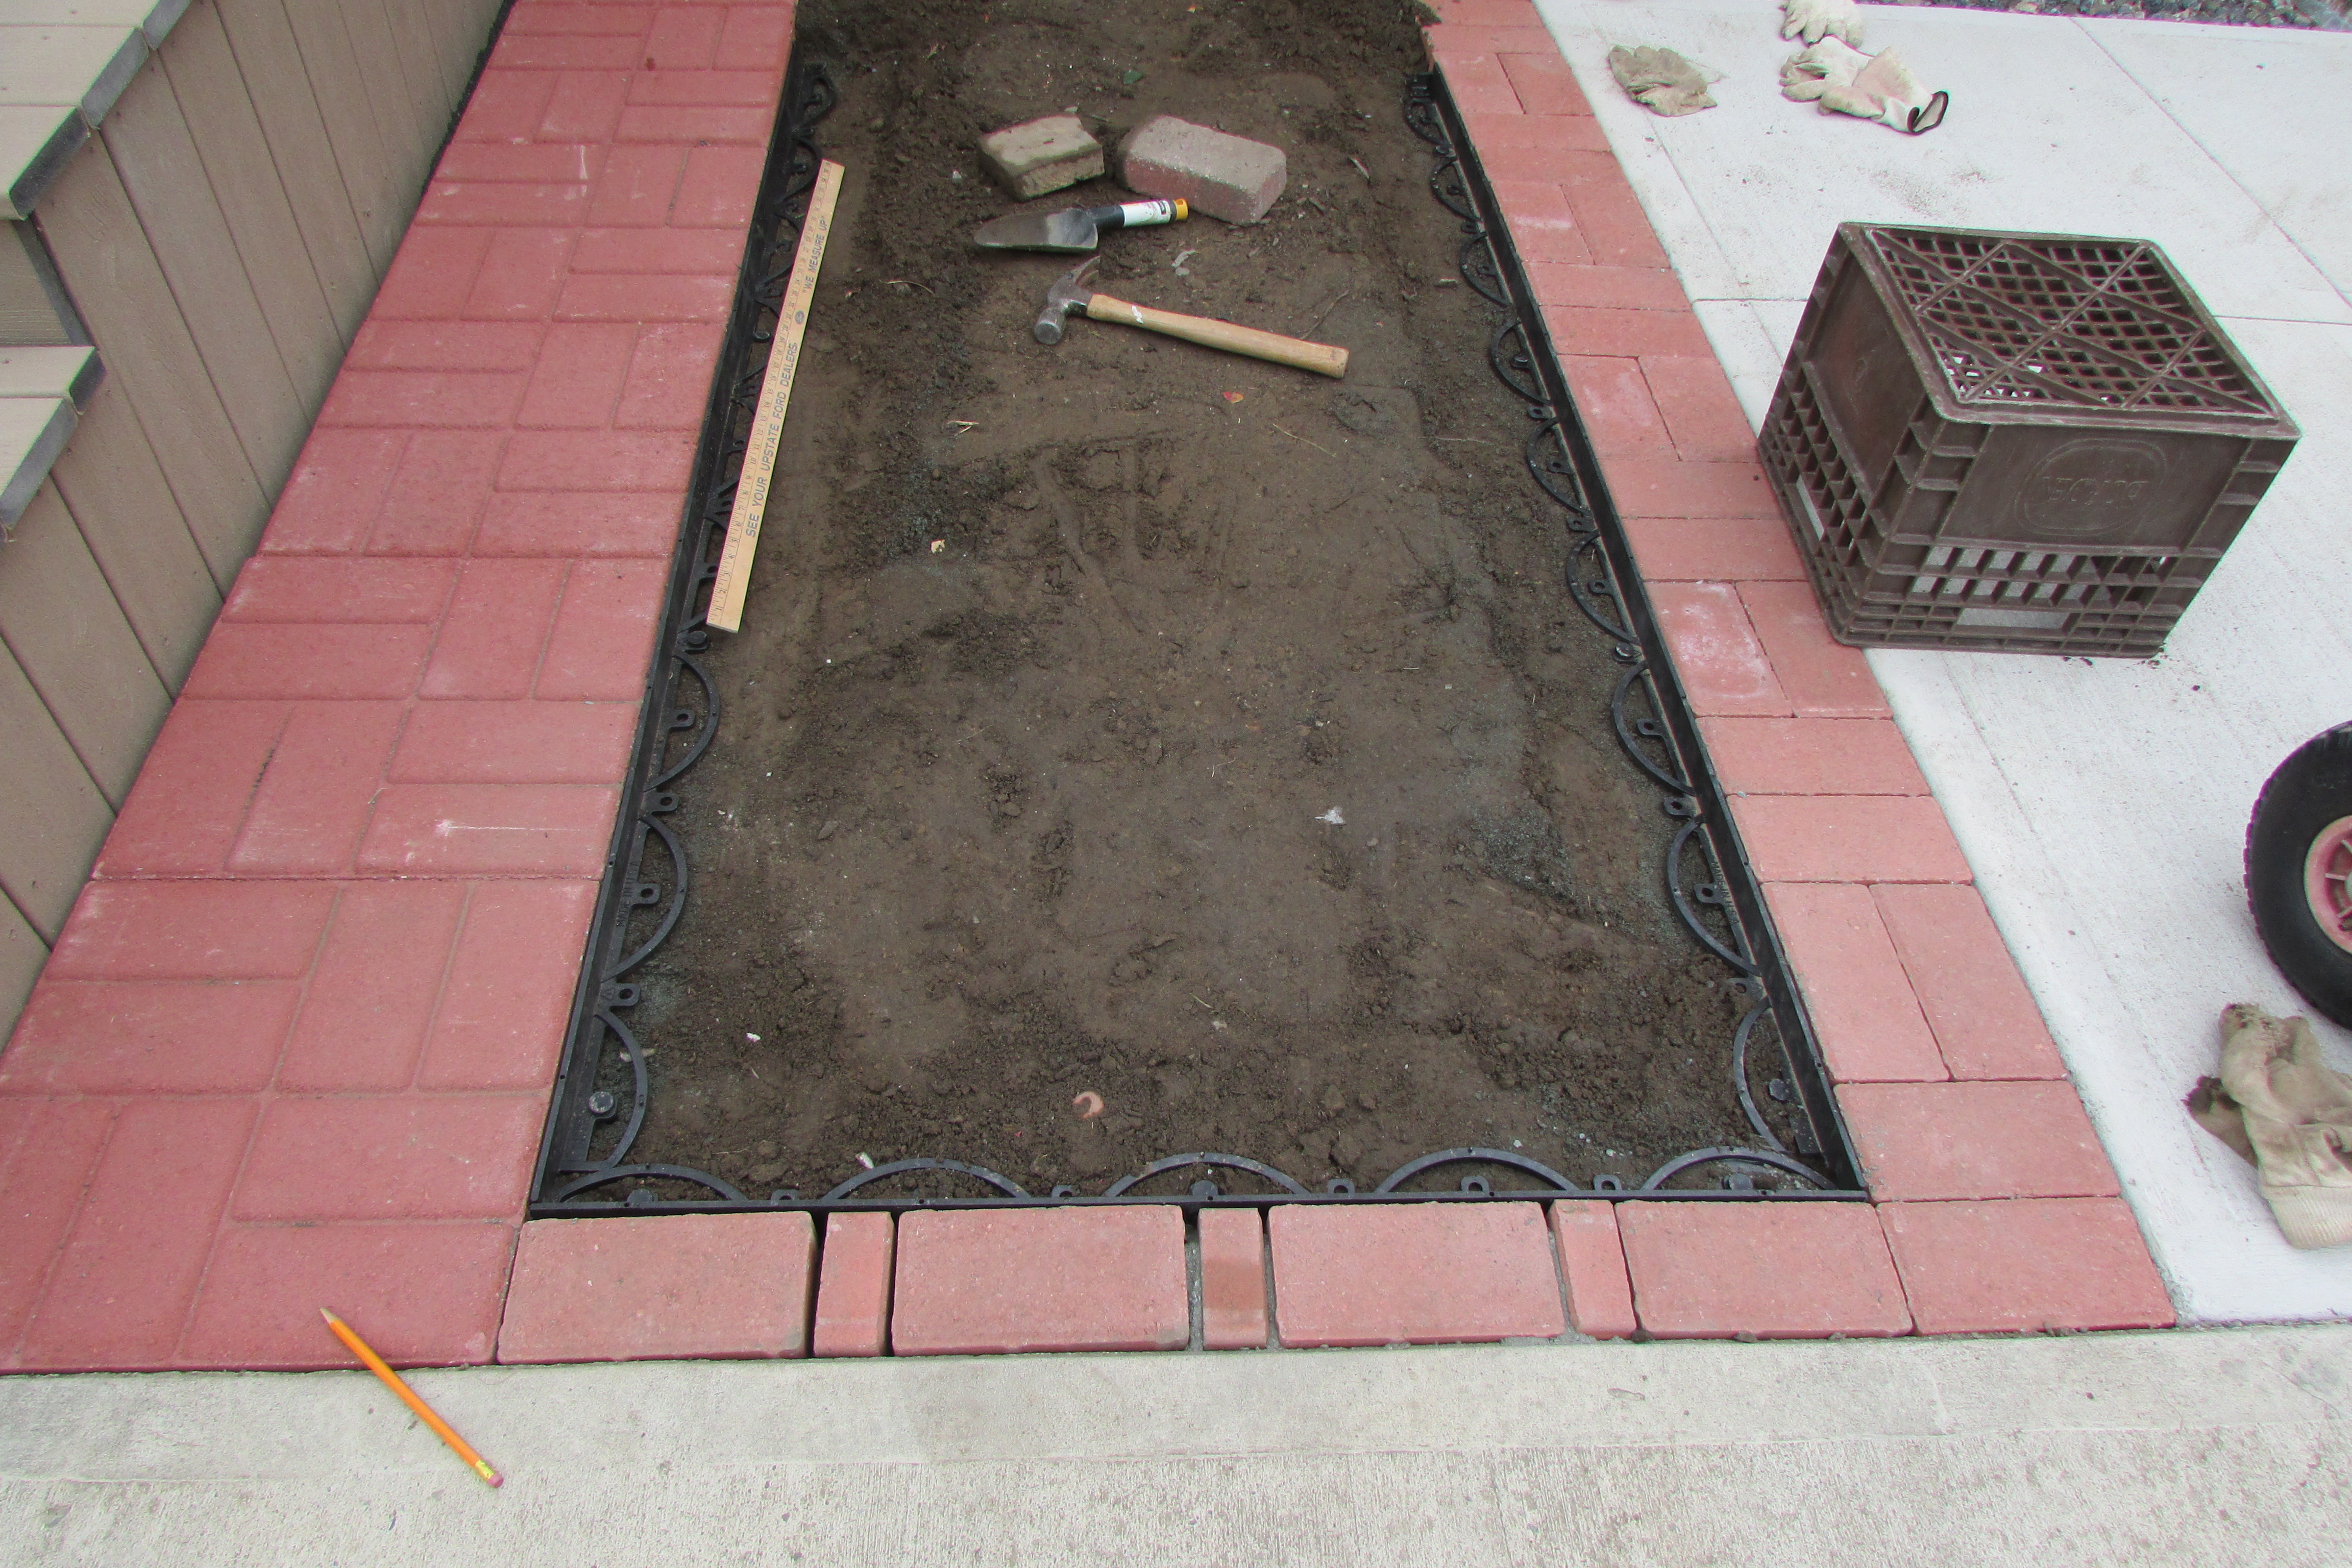
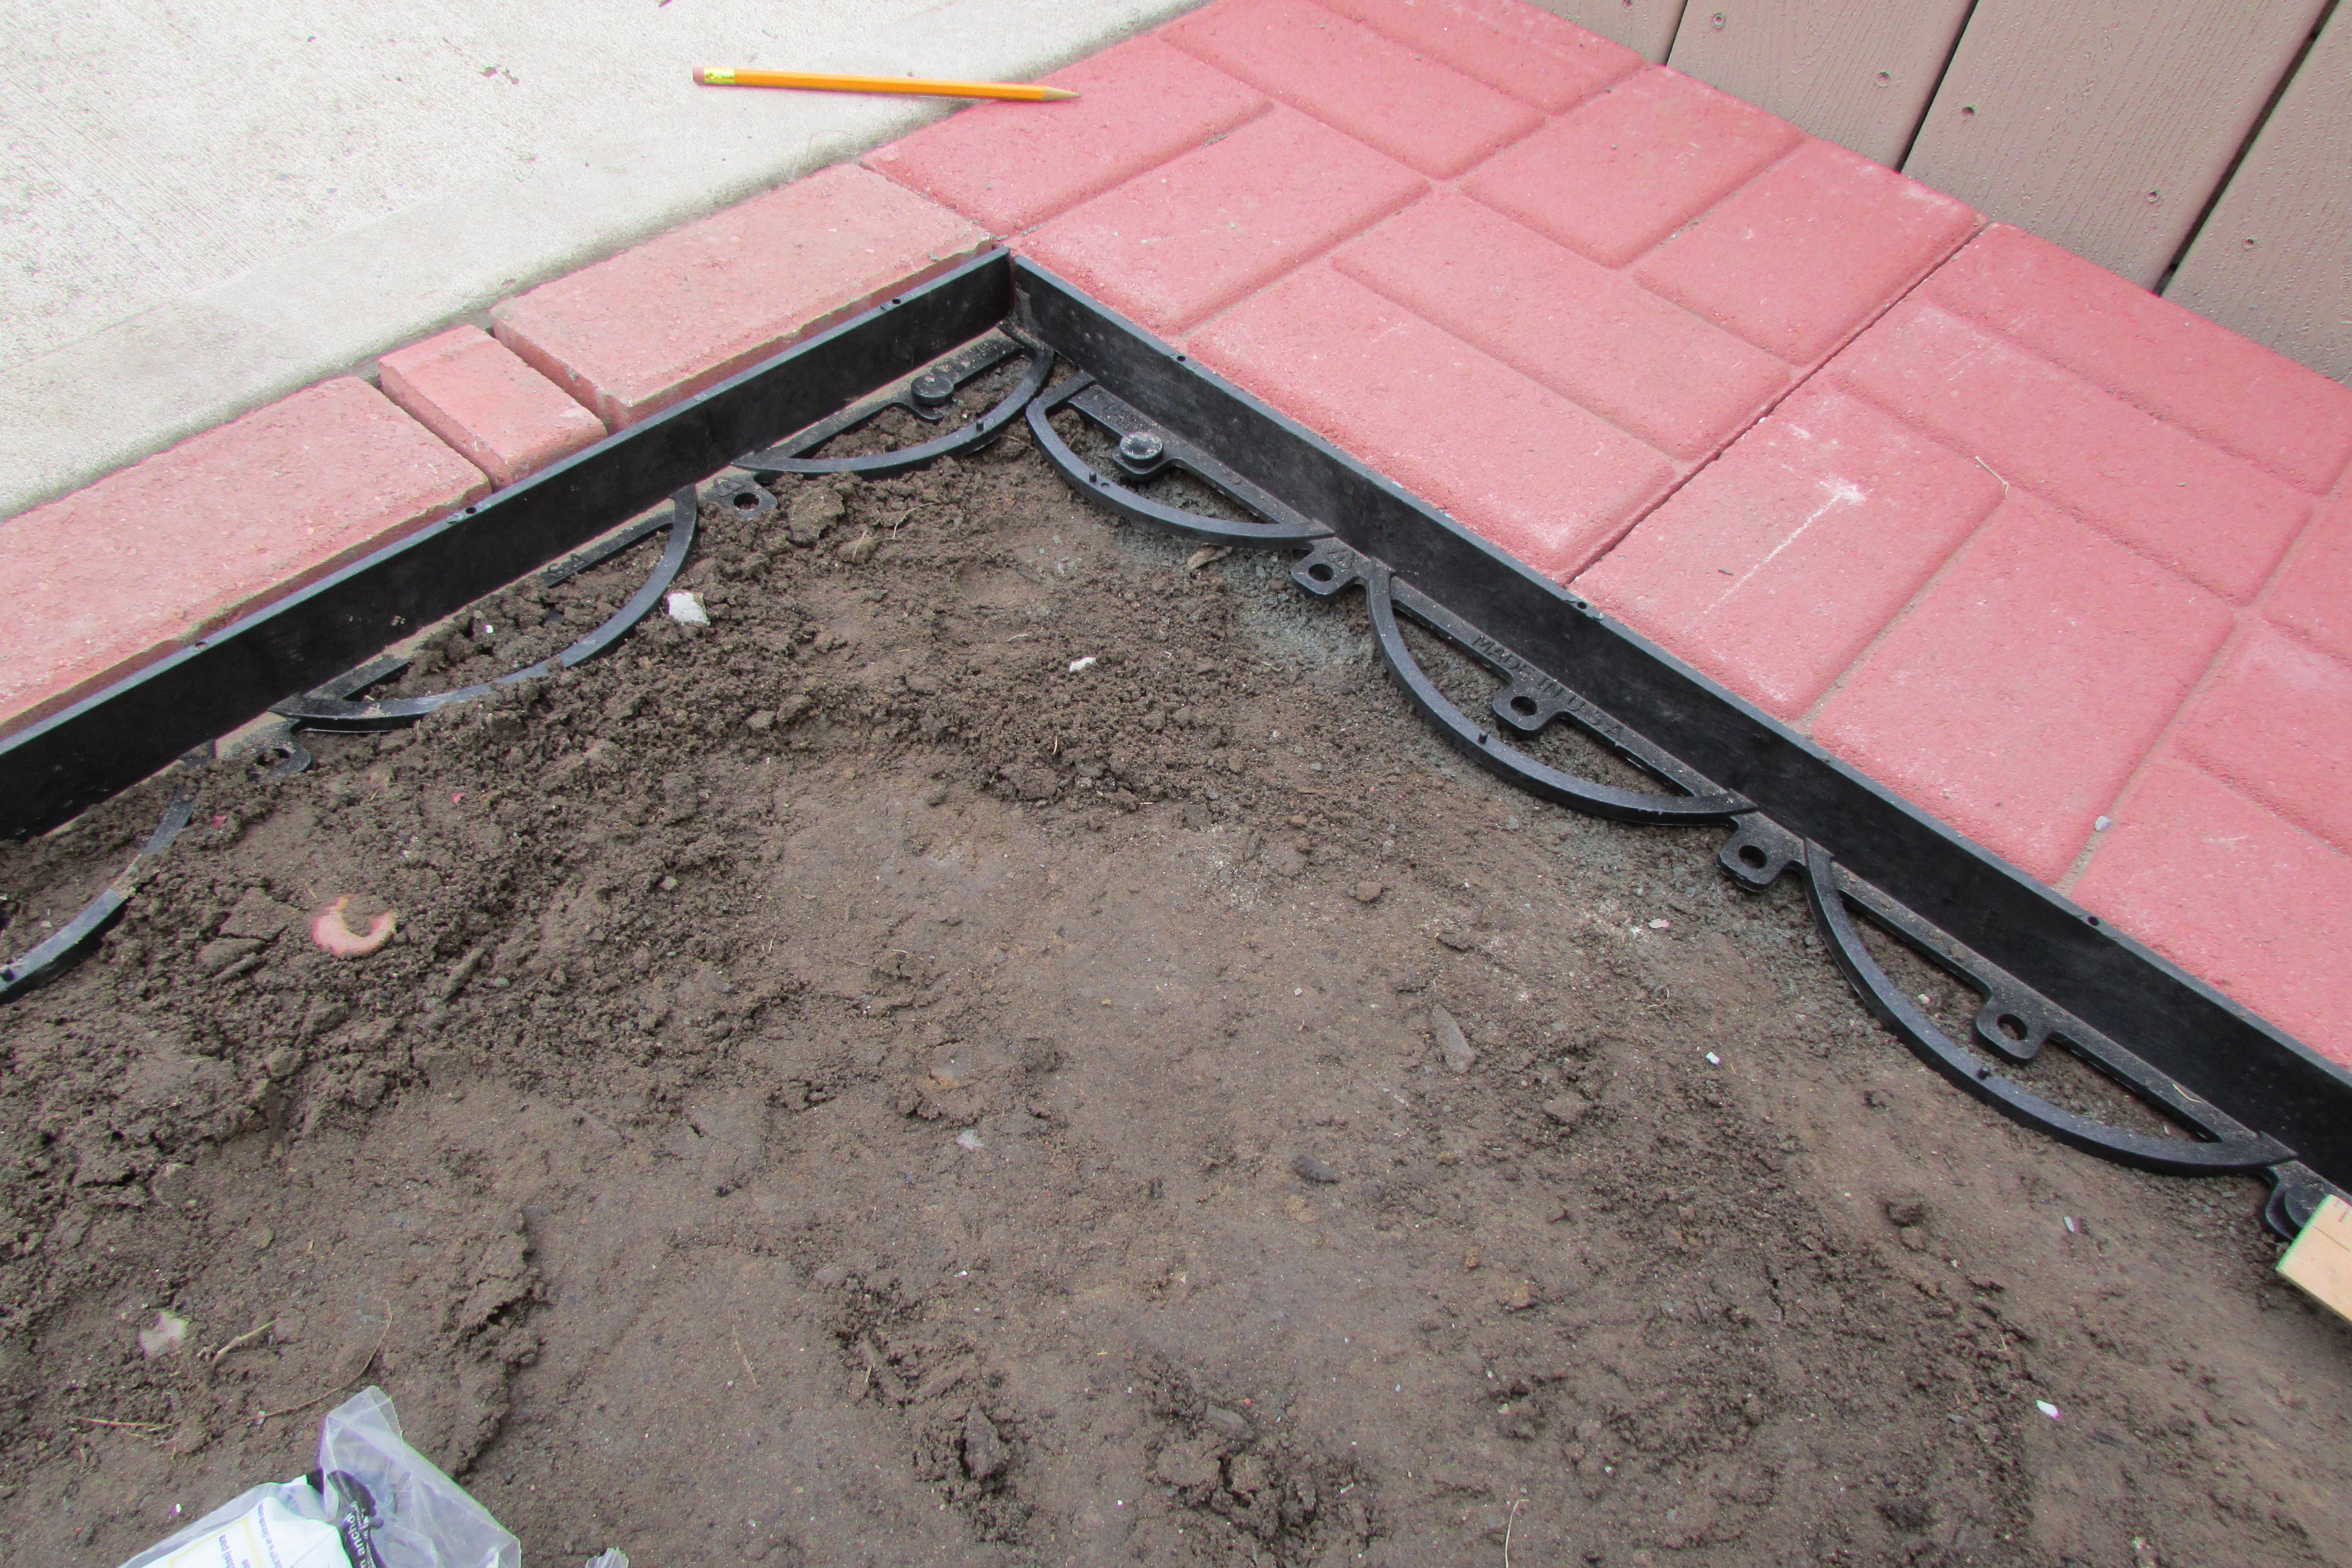 The above two photos show how the edging was cut and placed along the pavers and bricks to keep everything in place.
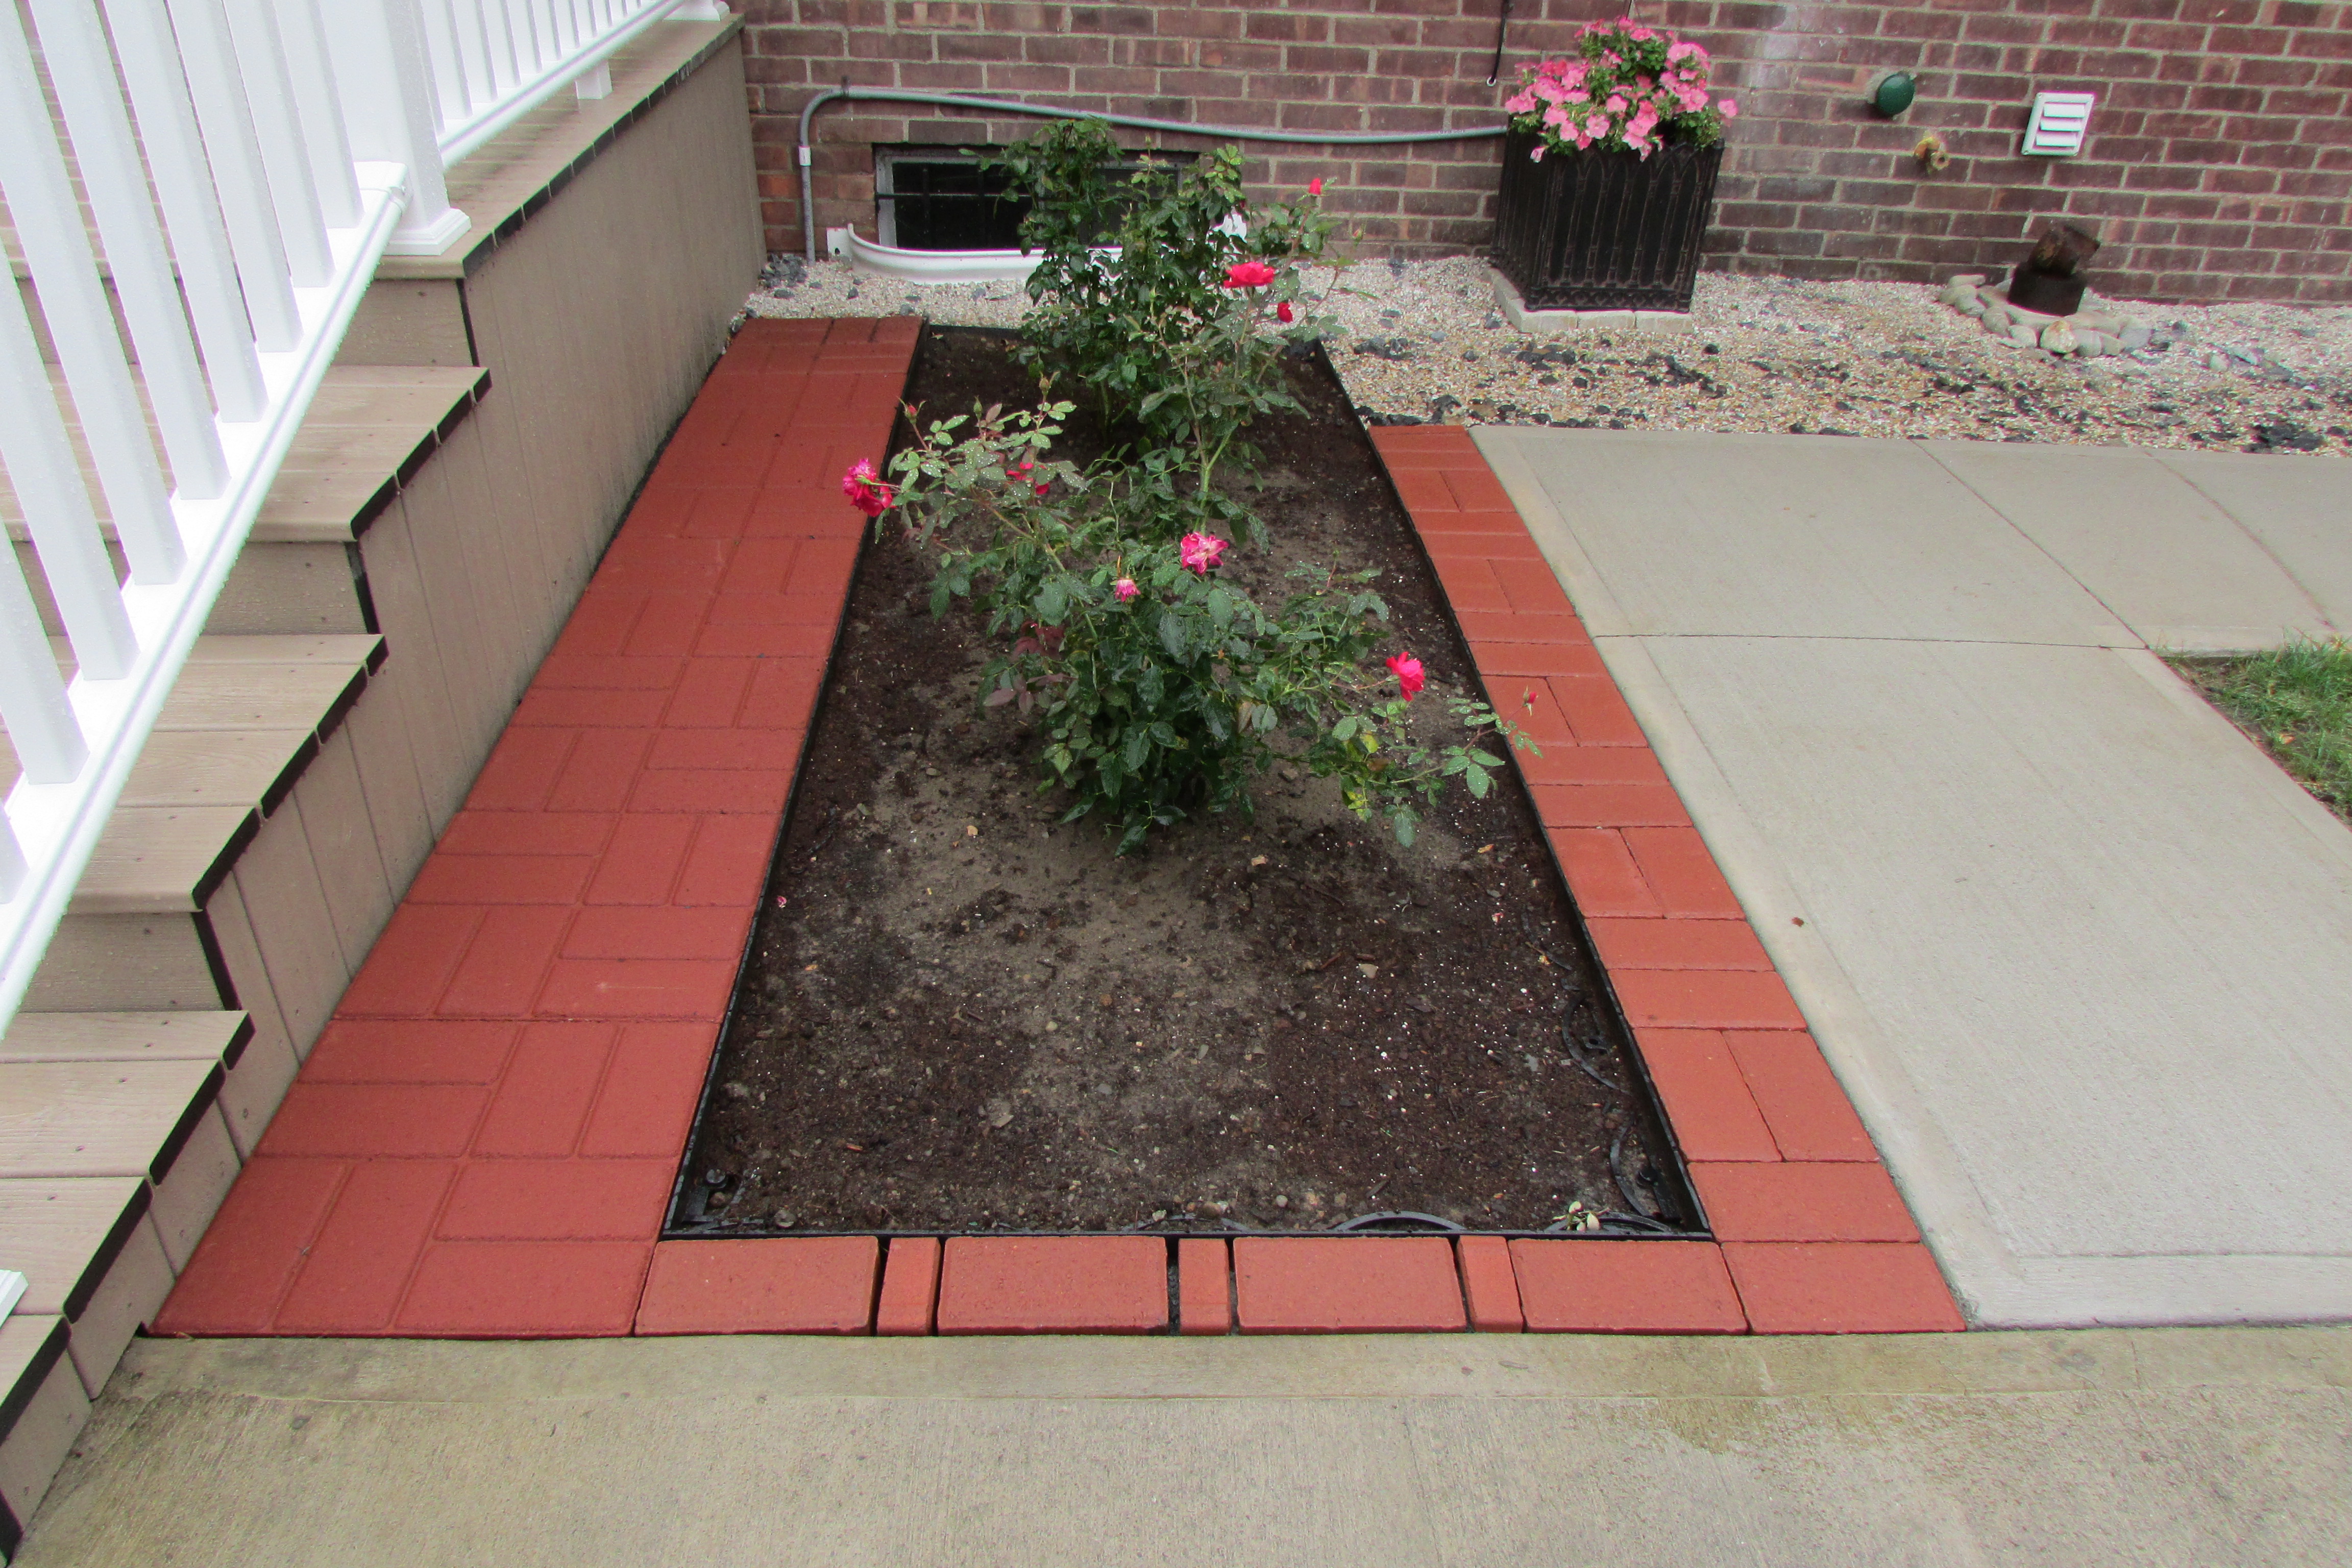
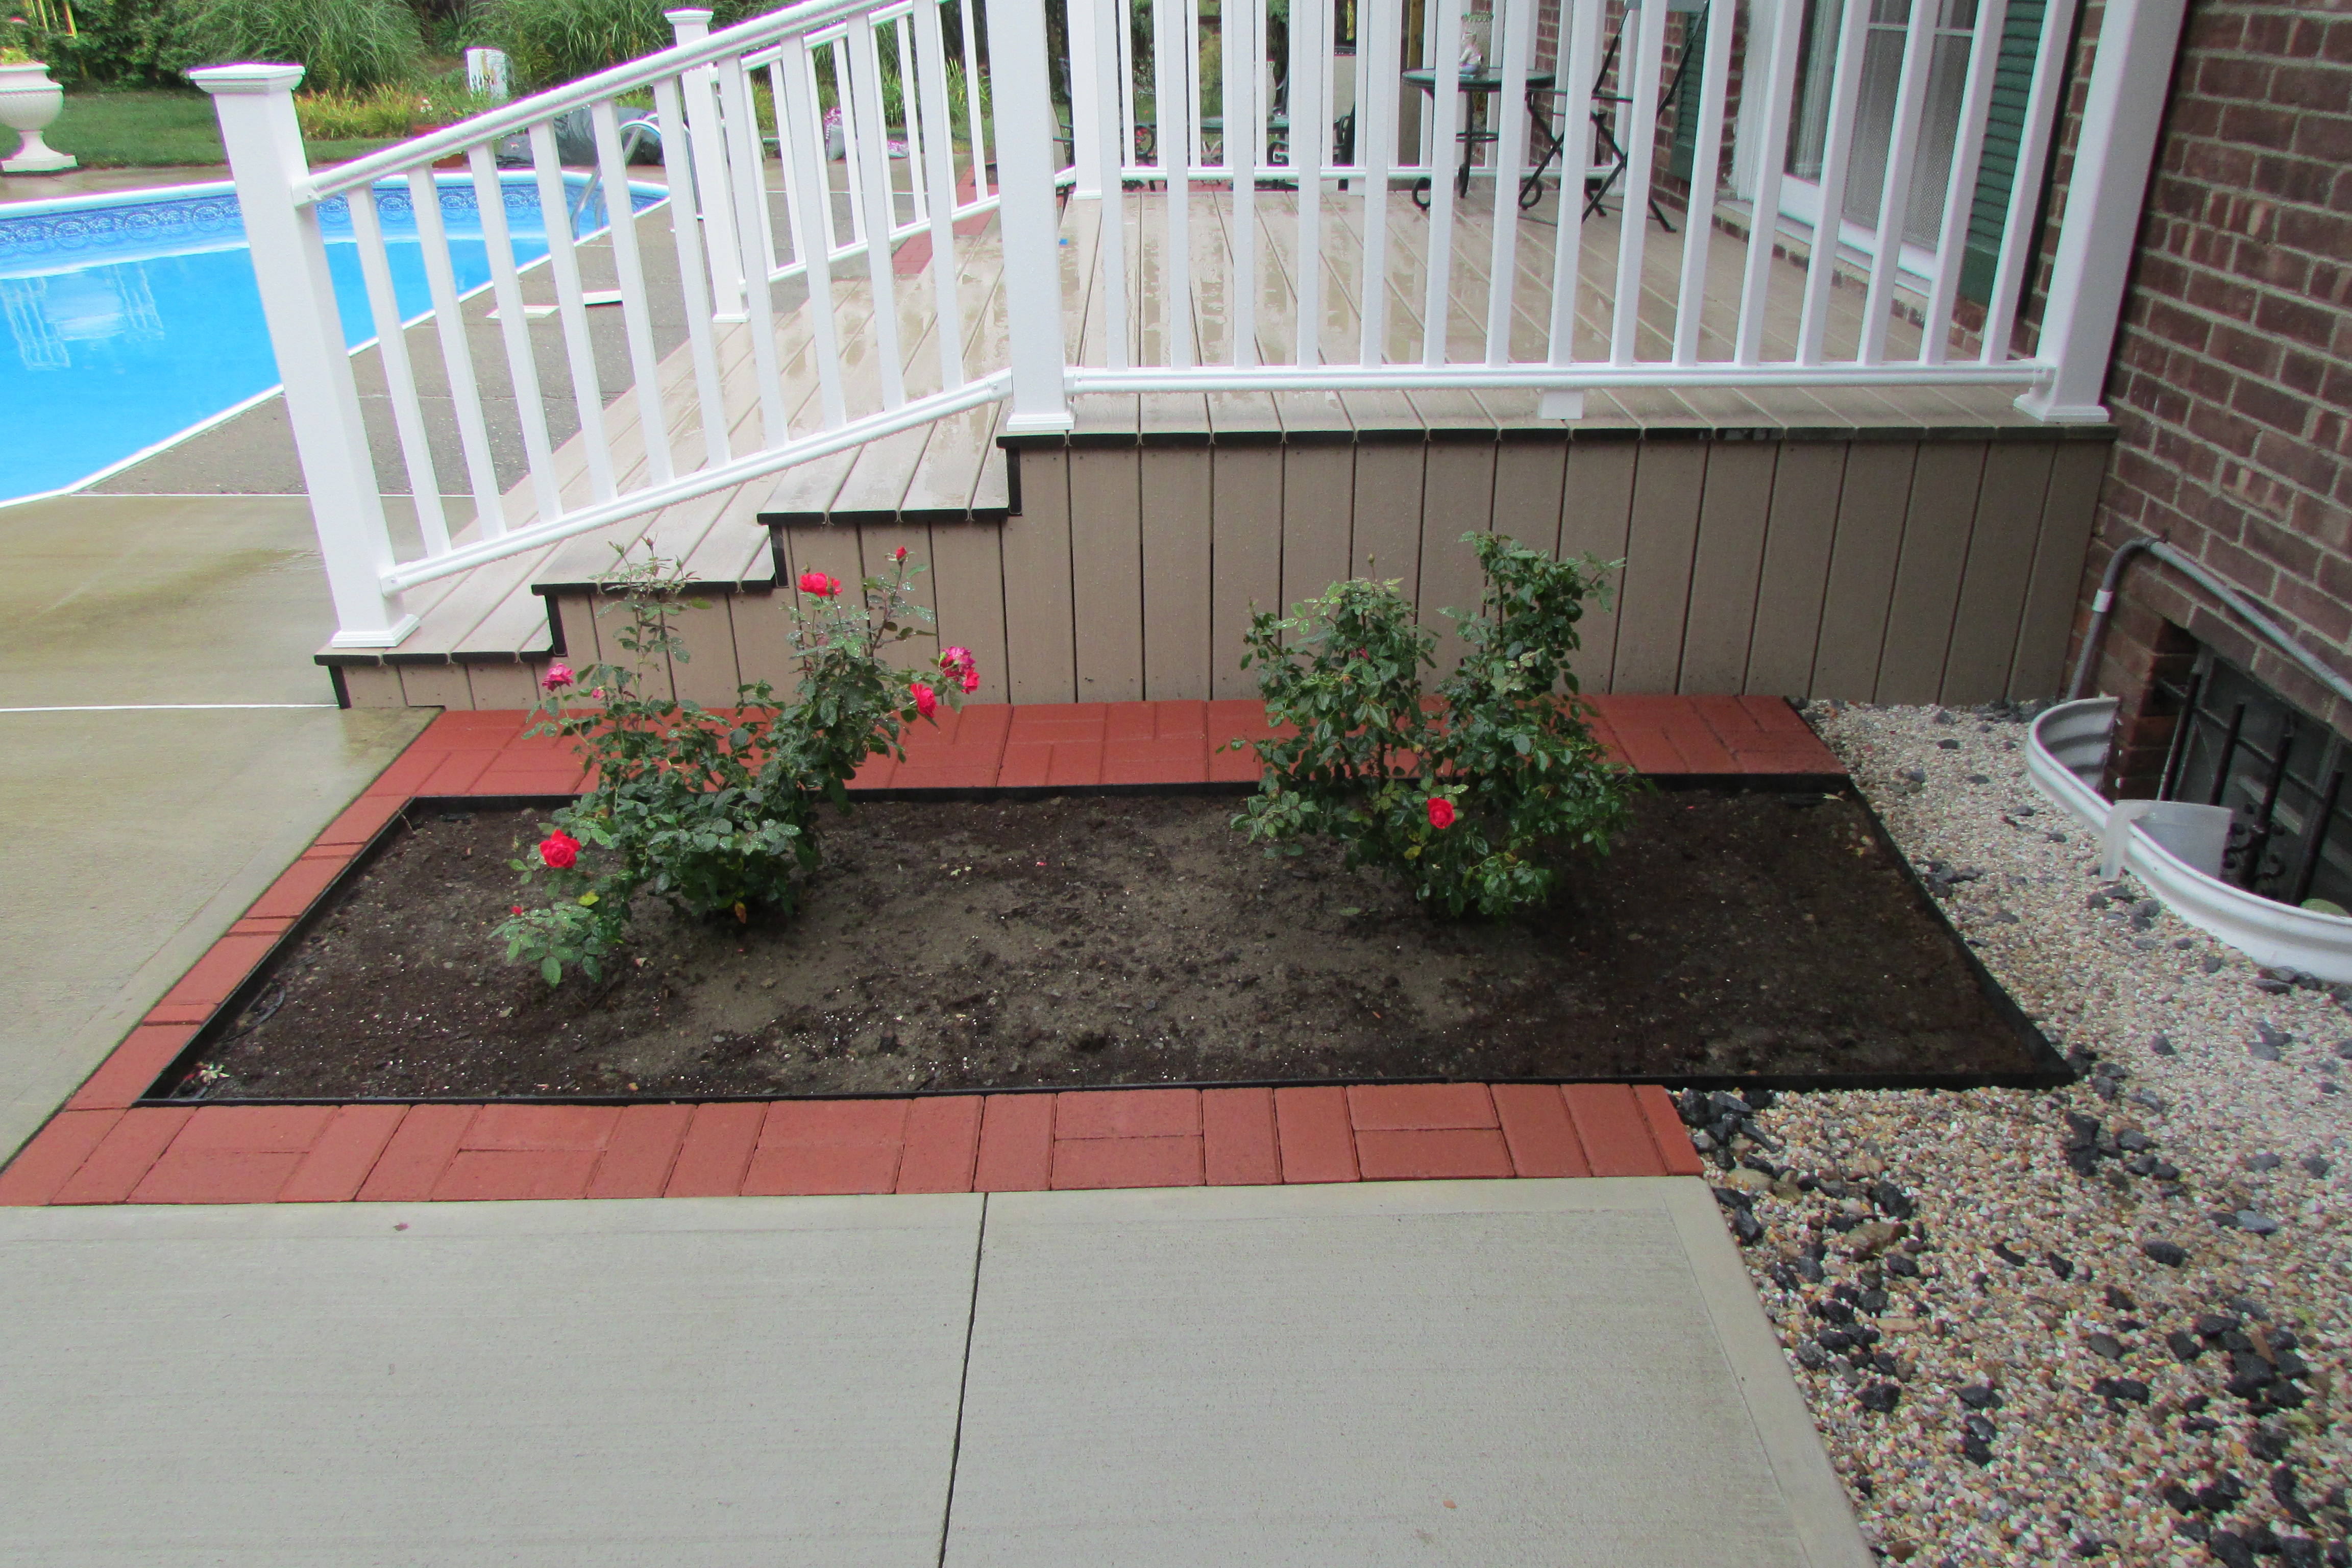 The last two photos show the planting bed completed; it is one of two that flank my patio area.
So there you have it, a look at how I laid patio pavers. I recommend doing the project only if you (1) have a place to unload all the dirt that has to be taken away, and (2) live close to a place where you can buy the pavers and paver base. (I brought home eight pavers at a time in my Subaru Forester, and only six bags of the base or sand at a time). To lay one row of seven pavers alongside my porch it took nine bags of the paver base and seven bags of the paver sand. The project was not inexpensive to do, but less costly than having someone lay them for me, as the price of having pavers professionally laid is twice the amount of having a cement patio poured.
This, my 179th post, marks the 6th anniversary of Fred Gonsowski Garden Home.com
Companion Posts on Fred Gonsowski Garden Home.com
Why Rake Leaves? Grind them with a Mower 11-20-2010,
Choosing the Right color Roof for your Home 10-7-2011,
Picking the Right Paint or Siding Color(s) for your Home 10-19-2011,
Cleaning your Tile and Grout with Oxi Clean..Calking the Tub like a Pro 2-25-2012,
Got Grass growing out on your Sidewalk or Driveway..Edge it! 8-26-2012,
Siting a Garden Shed on Your Property 6-9-2012.


Love it Fred! Great job. Is there anything you can’t do?
A fan… Robin
Hi there Robin, there are many things that I can’t do, or have the time to try. Having gone to too many estates with Garden Conservancy Open Day Tours (looking at what people with a lot of money have, and what really talented designers have helped place on those properties) my mind is always thinking about possibilities that could be done here. I’ve also looked at too many decorating magazines and books that have also inspired be. My problem is that all of the places that I’ve gone to, and all the things that I’ve seen in magazines, are places where staffs of people are on hand to do the projects and maintain the places; alas I only have a staff of three (me, myself and I). Thanks for your comment ;-}
Great job, Fred! I like how the pavers draw the color of your brick home out into the patio and tie them together.
And congratulations on 6 years of excellent, helpful posting!
Hi there P.W., In a way the brick surround of the poured cement patio makes me think of the border on an oriental rug. The cement patio and even the sidewalks makes the brick house and patio trim work together, because there are the large neutral spots of the cement patio and sidewalk for the eye to rest on. If the patio were completely pavers, the bricks would be too much visually for color and pattern; it would probably fight the back facade of the house. Also when looking at my patio, the color of the deck/porch is a really a good match to the color of the mortar between the bricks and is a tone just a bit darker than the cement. Pertaining to decorating or either inside, it is really all about working colors, pattern and textures around a space. P.W. it is always nice when you comment, Happy Thanksgiving to you!
Hello Fred! You are either busy decorating, or you are already finished–I can’t figure out which! I don’t know if you will post before Christmas, so I thought I would say now that I hope you have a wonderful Christmas and that the new year will bring you only the best!
Hi there P.W, I’m not finished with the blog. I’ve taken photos of my Christmas decorations which I will post soon, and I’m working on a piece that I will put up right after Christmas, or in the beginning of January. Merry Christmas to you and Happy New Year, thanks for your concern ;-}
Hi, Fred! Just wanted to let you know how much I love your blog! I’ve been dreaming of adding on to the cement slab patio of my lovely small home, and ran across your tutorial. Your directions are always so clear and concise! I’ll be doing this in the fall (2017). Thank you for sharing your projects and ideas!
Hi there Cindy, the project was not that hard, but it did take a bit of time. I live in an area that gets a cold frosty Winter, and a few of my bricks have to be reset, with a little extra sand under them because they shifted or pushed up during the cold period, but on the over all, 99% of my pavers and bricks stood in place. Have fun with your project, and thanks for your comment.