
It’s EASY to make a Leaf Wreath of Fallen Leaves.
Autumn is here and the leaves are starting to fall. Other than raking the leaves or mulching them with your lawn mower, how about turning some of them into an attractive wreath. This blog post shows how easy it is (with step-by-step instructions) to make something that comes from your own front or back yard.
Supply List…
(1)Leaves (maple, oak, ginkgo, etc) any kind of leaf that is attractive to you and has a pliable, kind of long stem. My wreath was made entirely of maple leaves.
(2) An old wire hanger
(3) Green Florist Wire ( I used #24 GA)
(4) Wire Cutters
(5) Wired ribbon from a craft store to make a no tie bow.
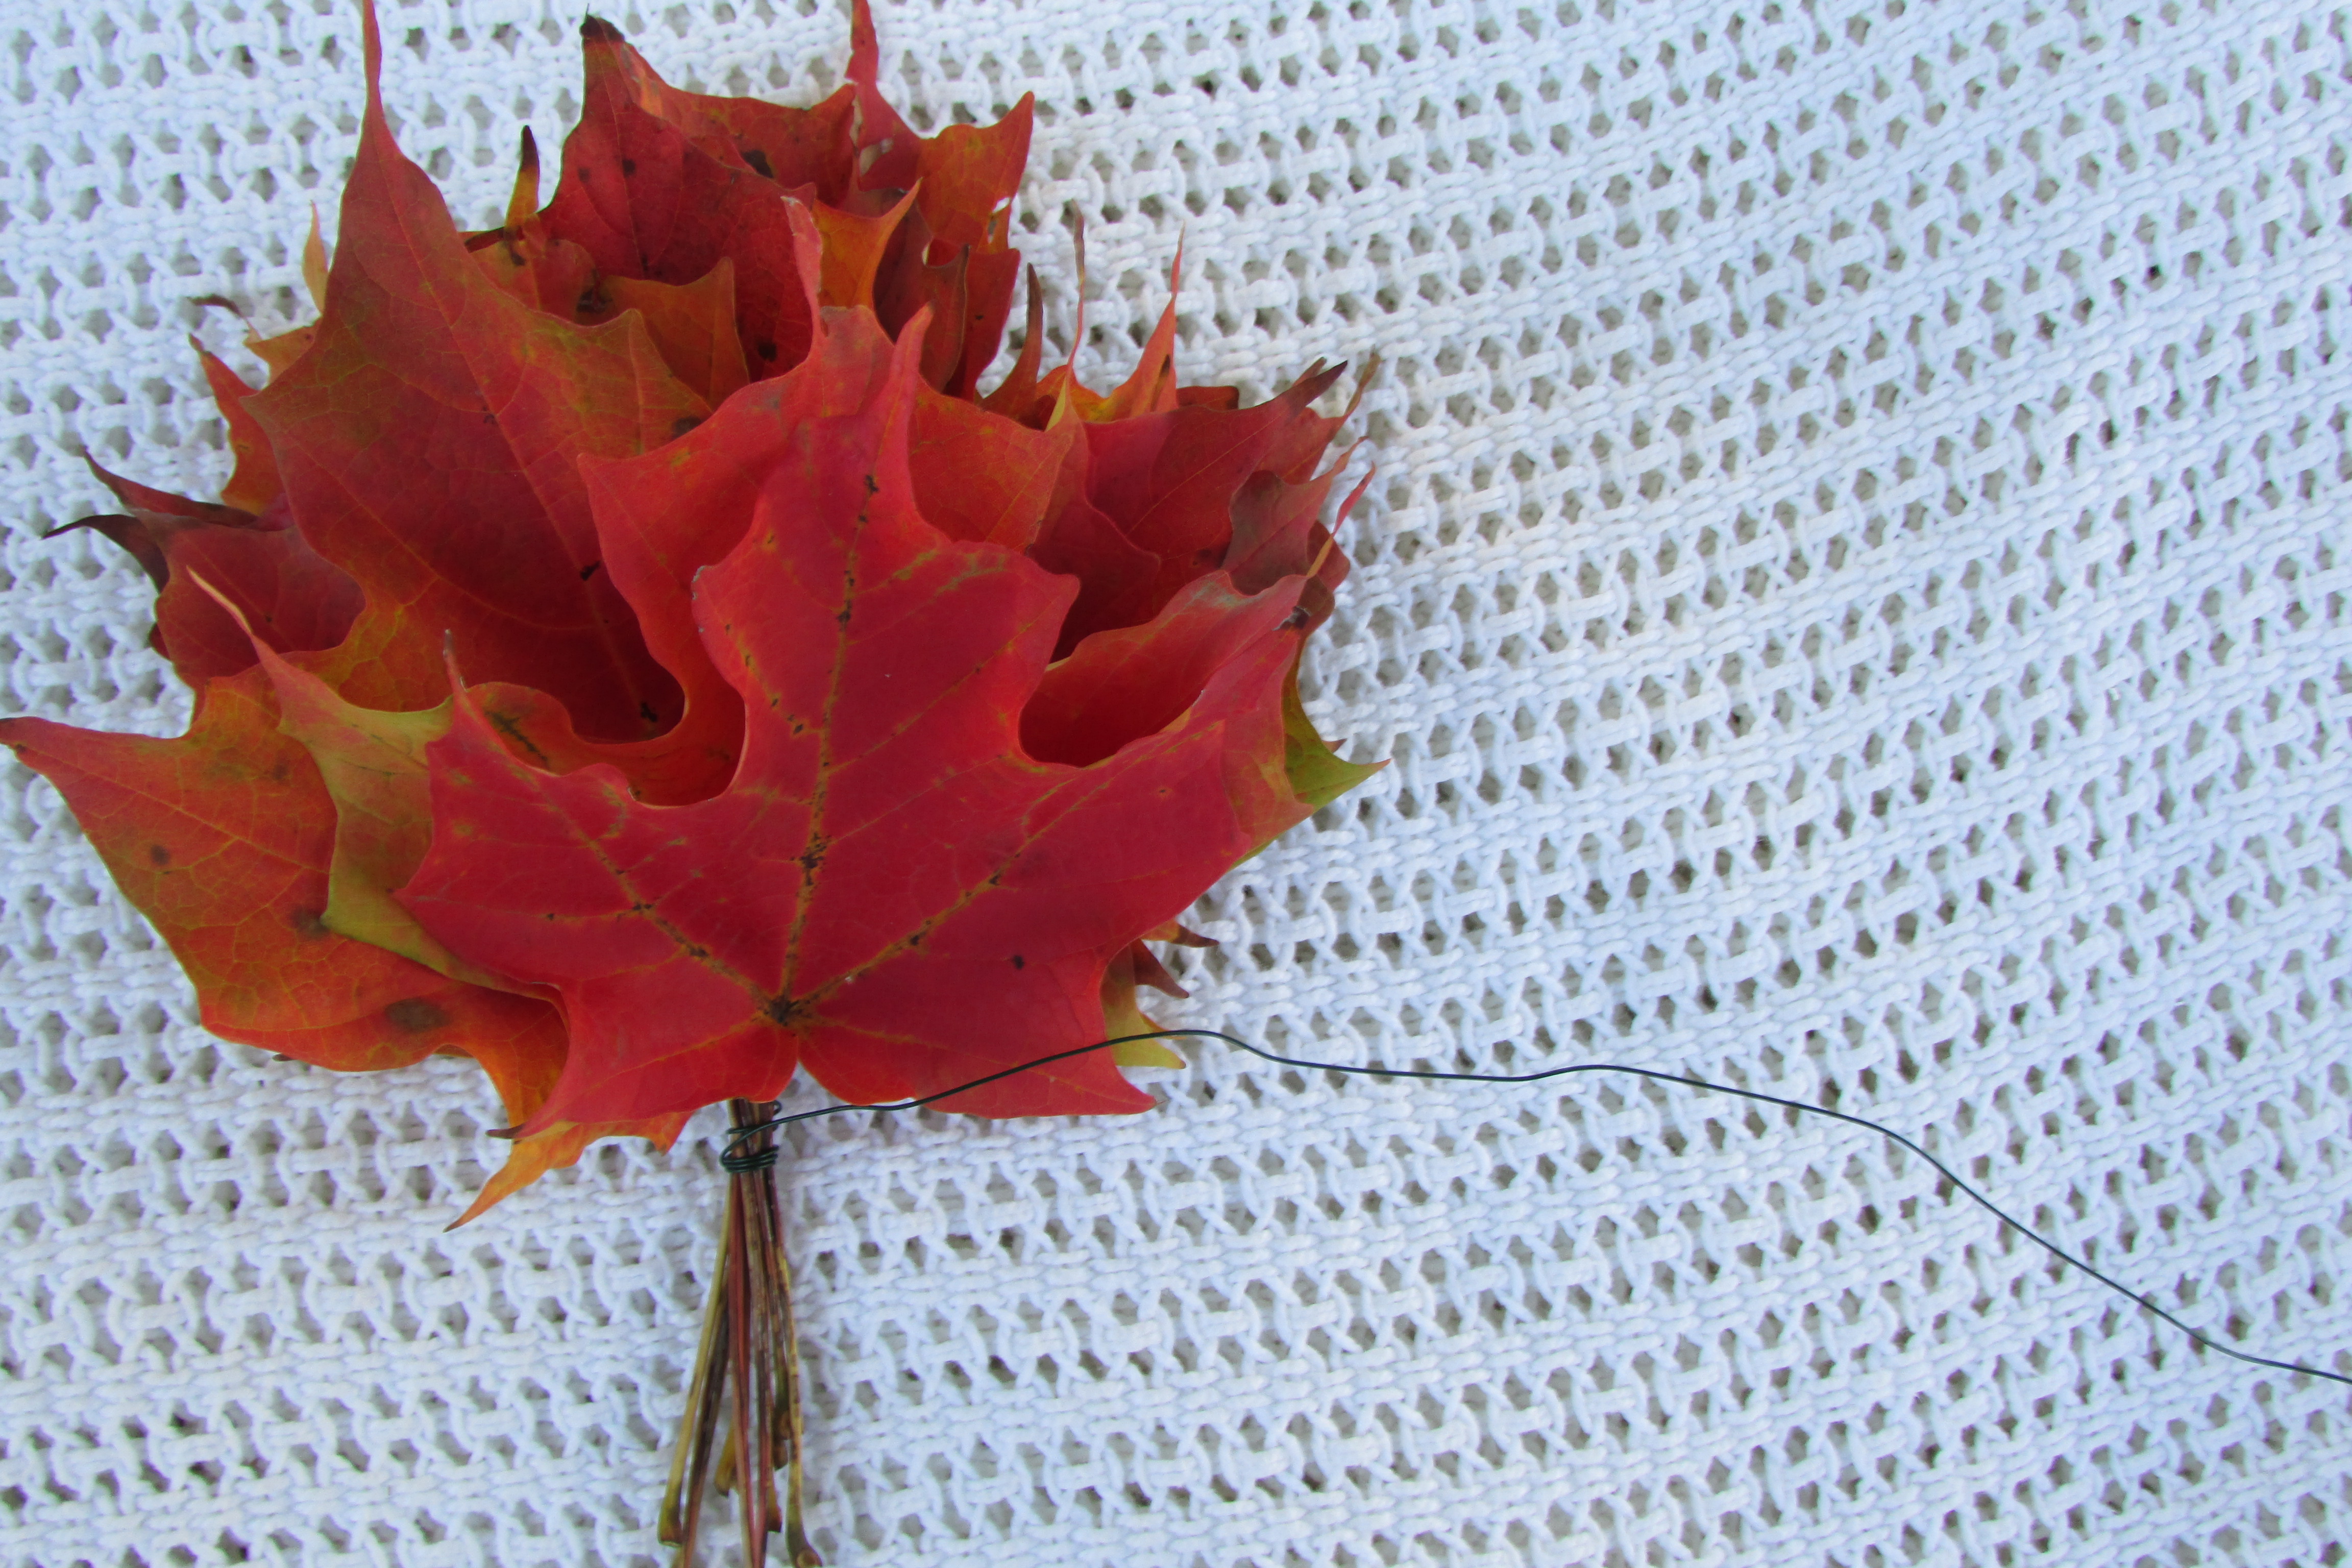
Step 1 …Start by placing 10 same sized leaves (mine were all maple) face up one on top of the other, as shown in the photo to form a bunch. Take your florist wire and tie it around the base of the leaves five times. Look at the photo to see where I did that. After tying the wire five times around the base of the leaves, leave 8 to 9 extra inches of florist wire as the tail; you will be lashing the bunch of leaves to the coat hanger with it. You have just seen how the first of many bunches of leaves were assembled that formed the wreath.
 Step 2 …Take your wire hanger and form it into a circle. Bend back the top hanging part so it is now horizontal, and close up the hanging part to form a small circle; you will be hanging your wreath from that loop.
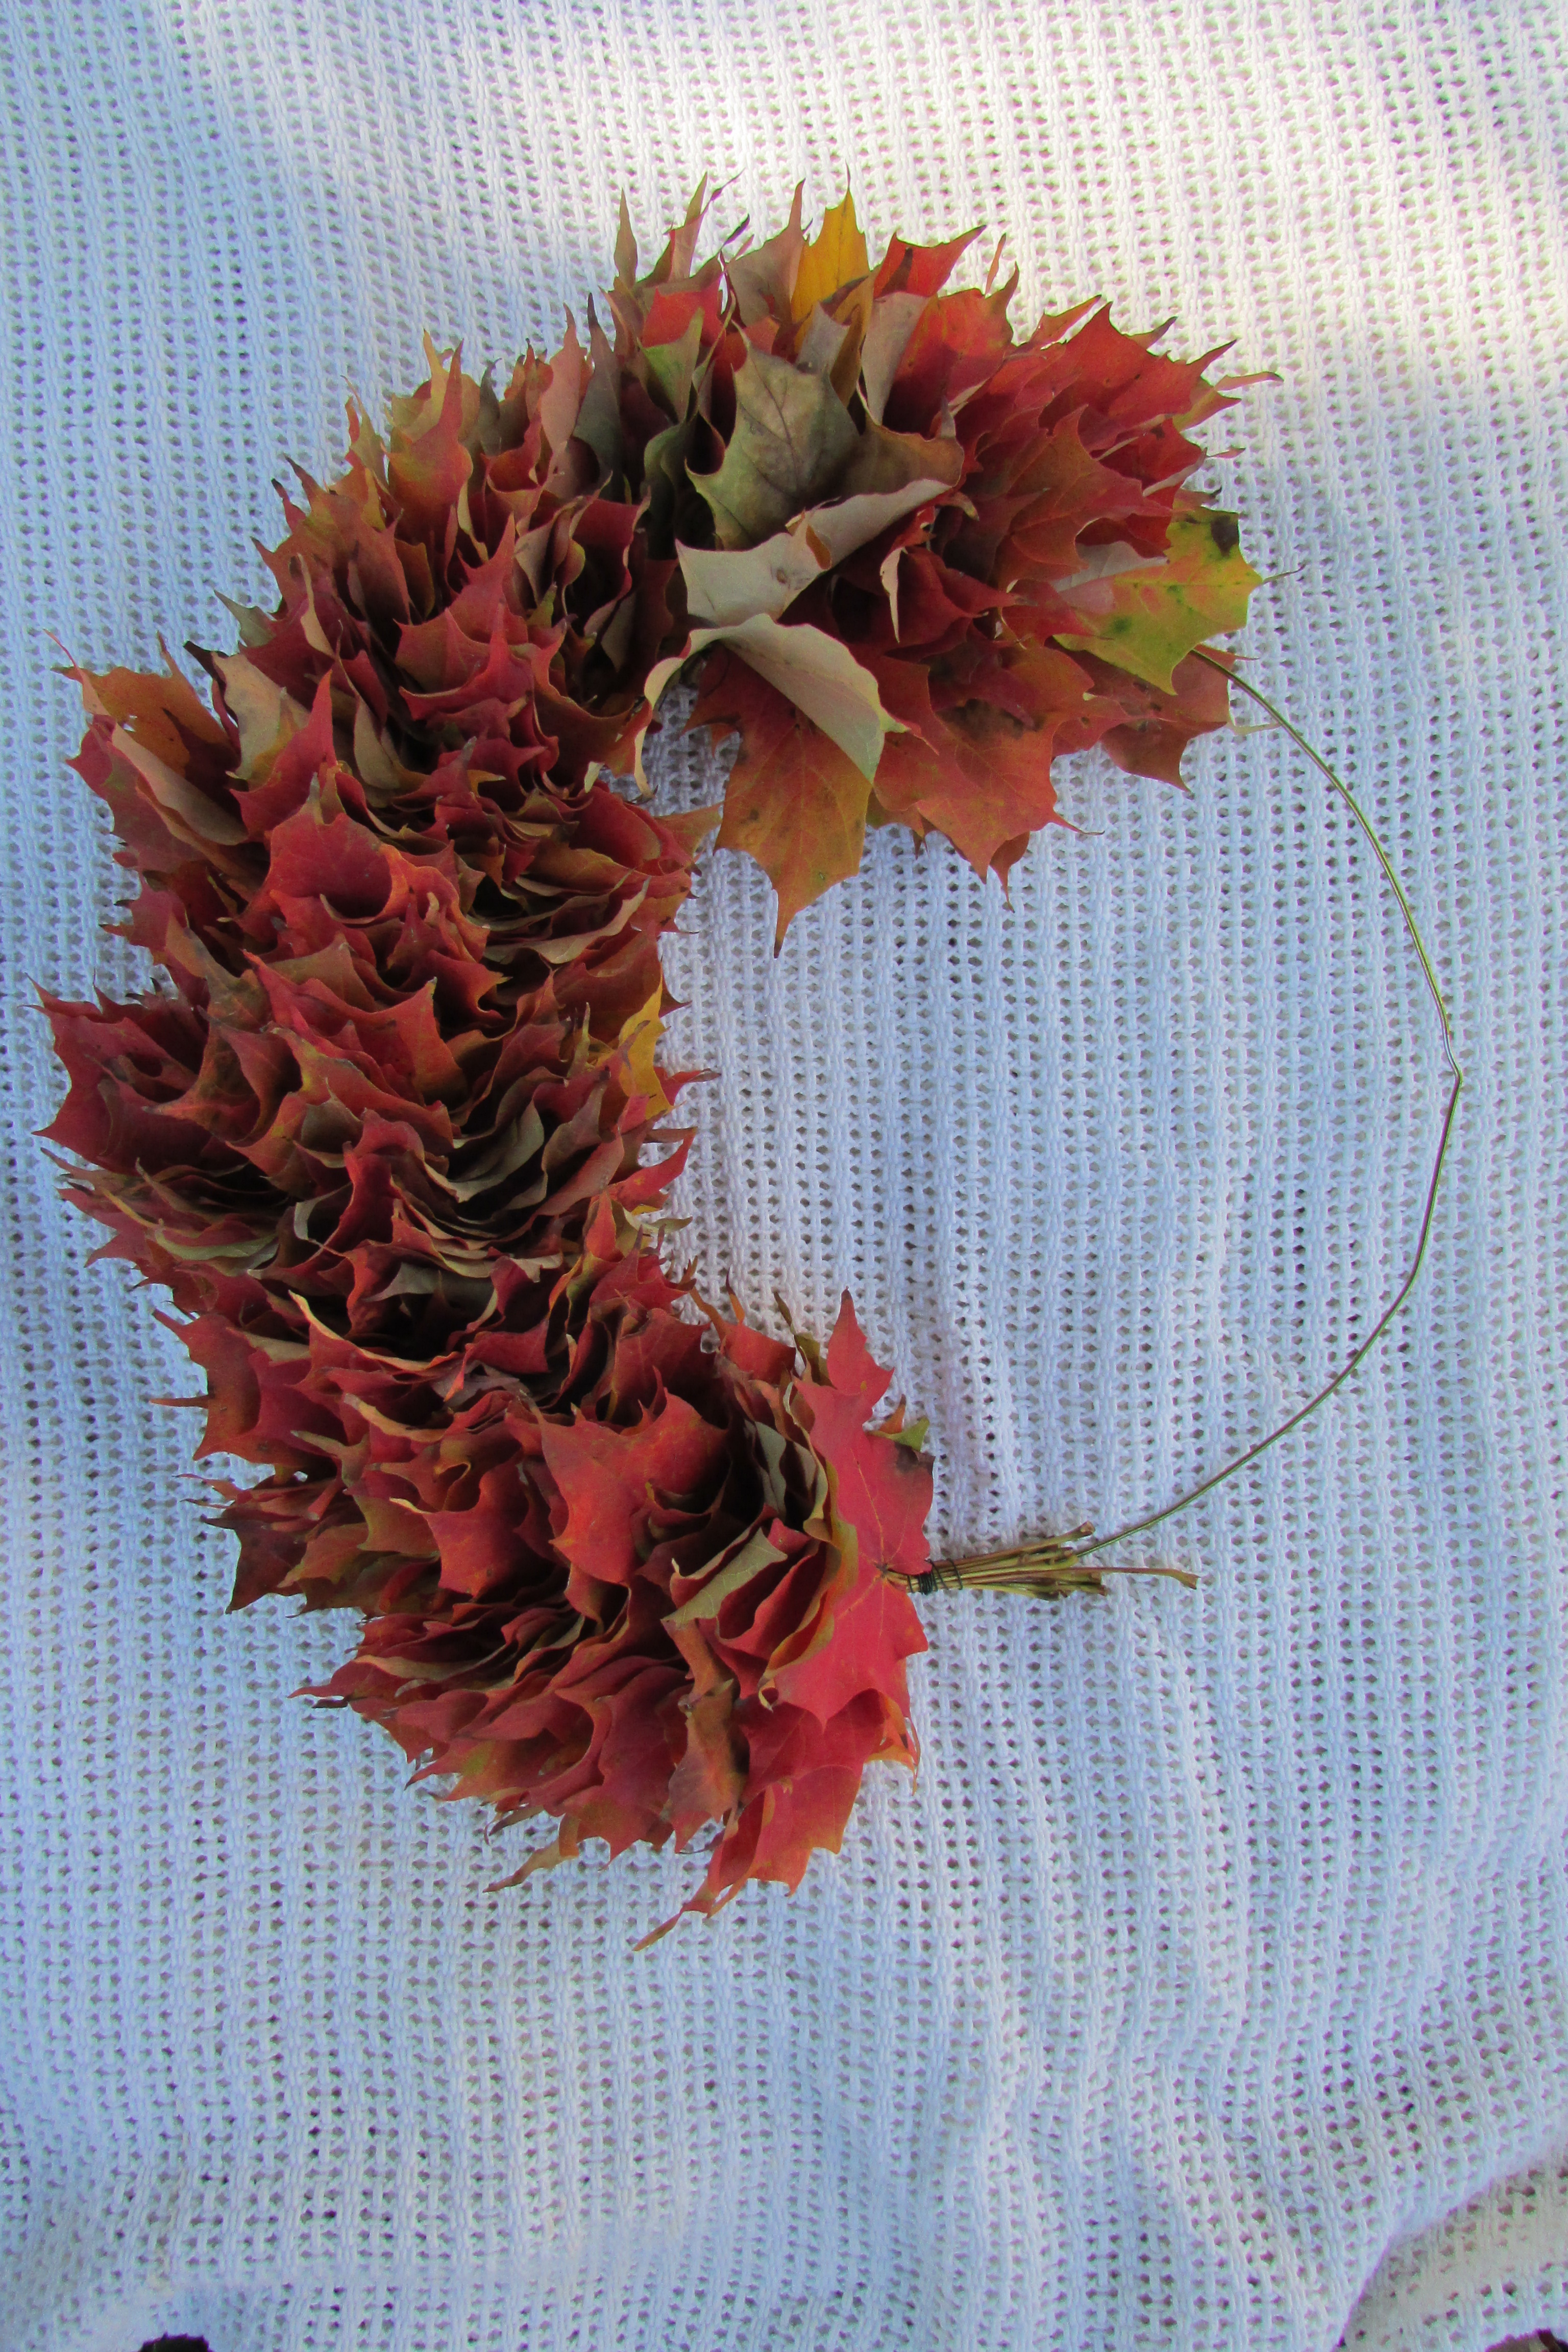
Step 3 …Take your first bundle of 10 leaves face up that you made and lash it to the top of your wire hanger. Try to secure it tightly close to the loop you made, then use your 8 to 9 inches of extra florist wire and wind it around the stems of the leaves, so they are all tied to the wire hanger. You are making a base, of wired stems, that you will be wiring the next bunch of leaves to and on top of.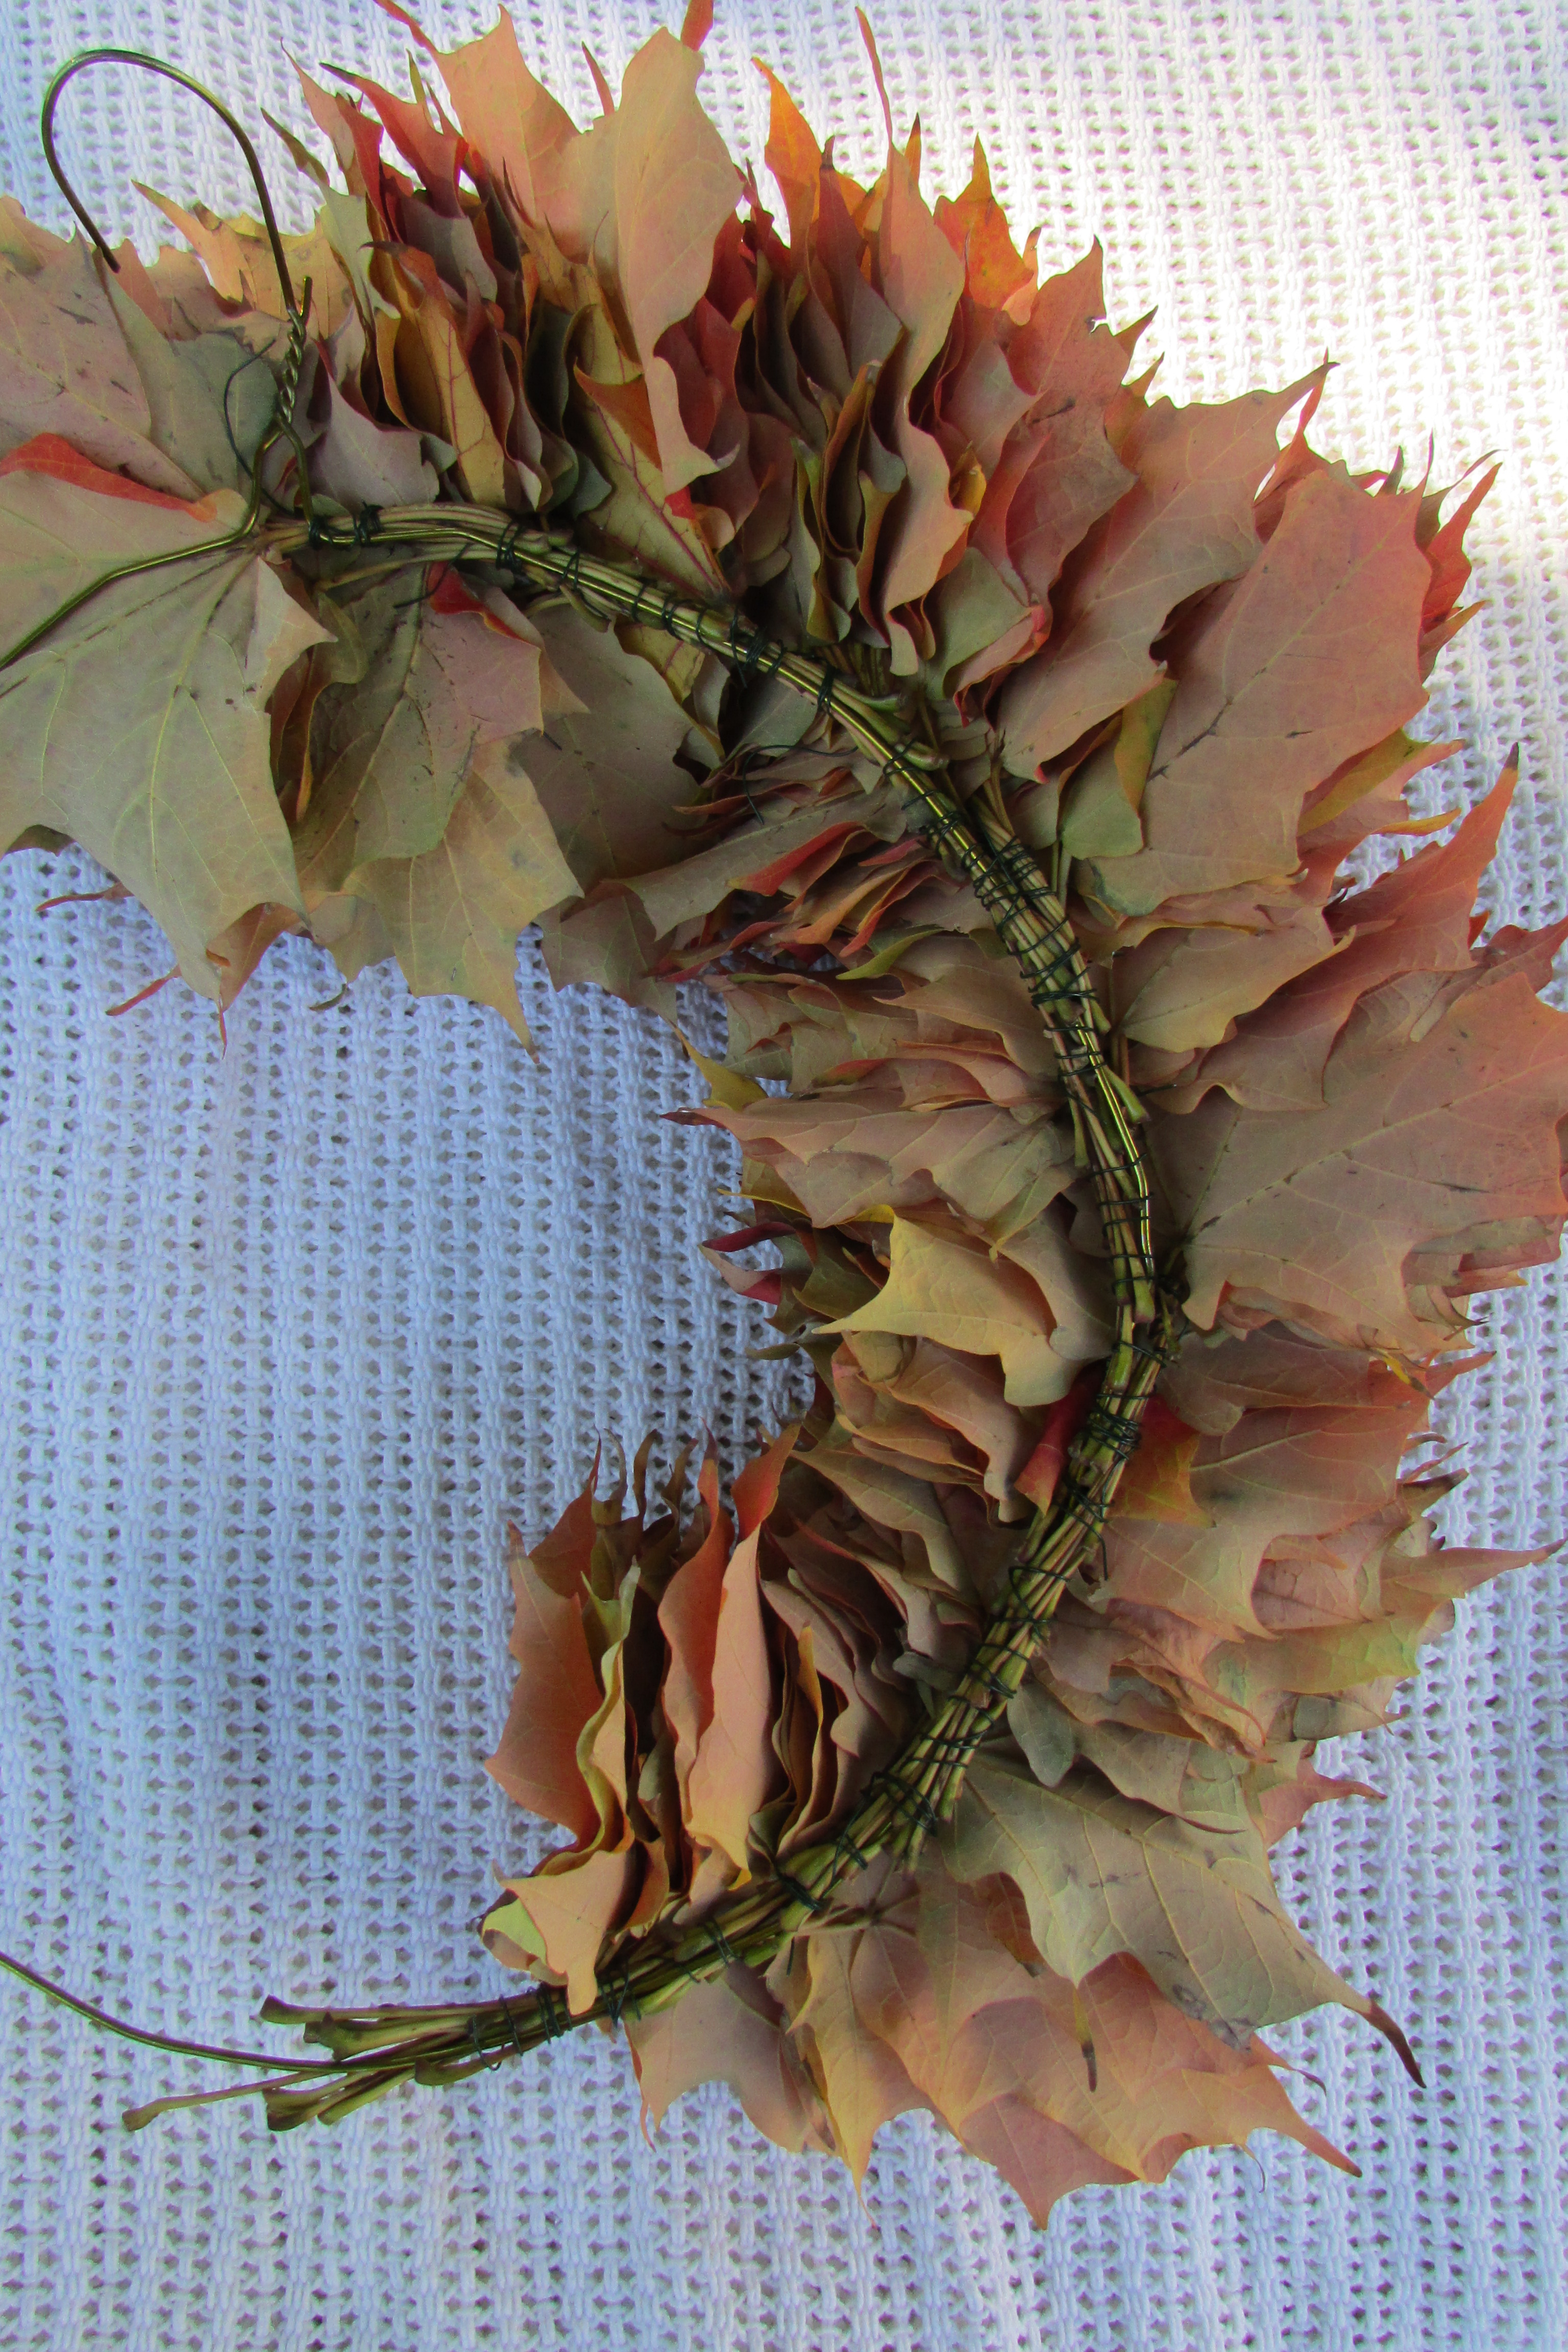 This photo shows the back of the wreath and how I started lashing the bunches of leaves to the top of the coat hanger (click on photo to enlarge if needed). Notice how I kept tying the 8 to 9 inches of wire around the stems of the leaves and the coat hanger to form the base of the wreath. The last bunch attached, shown at the bottom, is now ready to have the next bunch placed next to it and wired down.
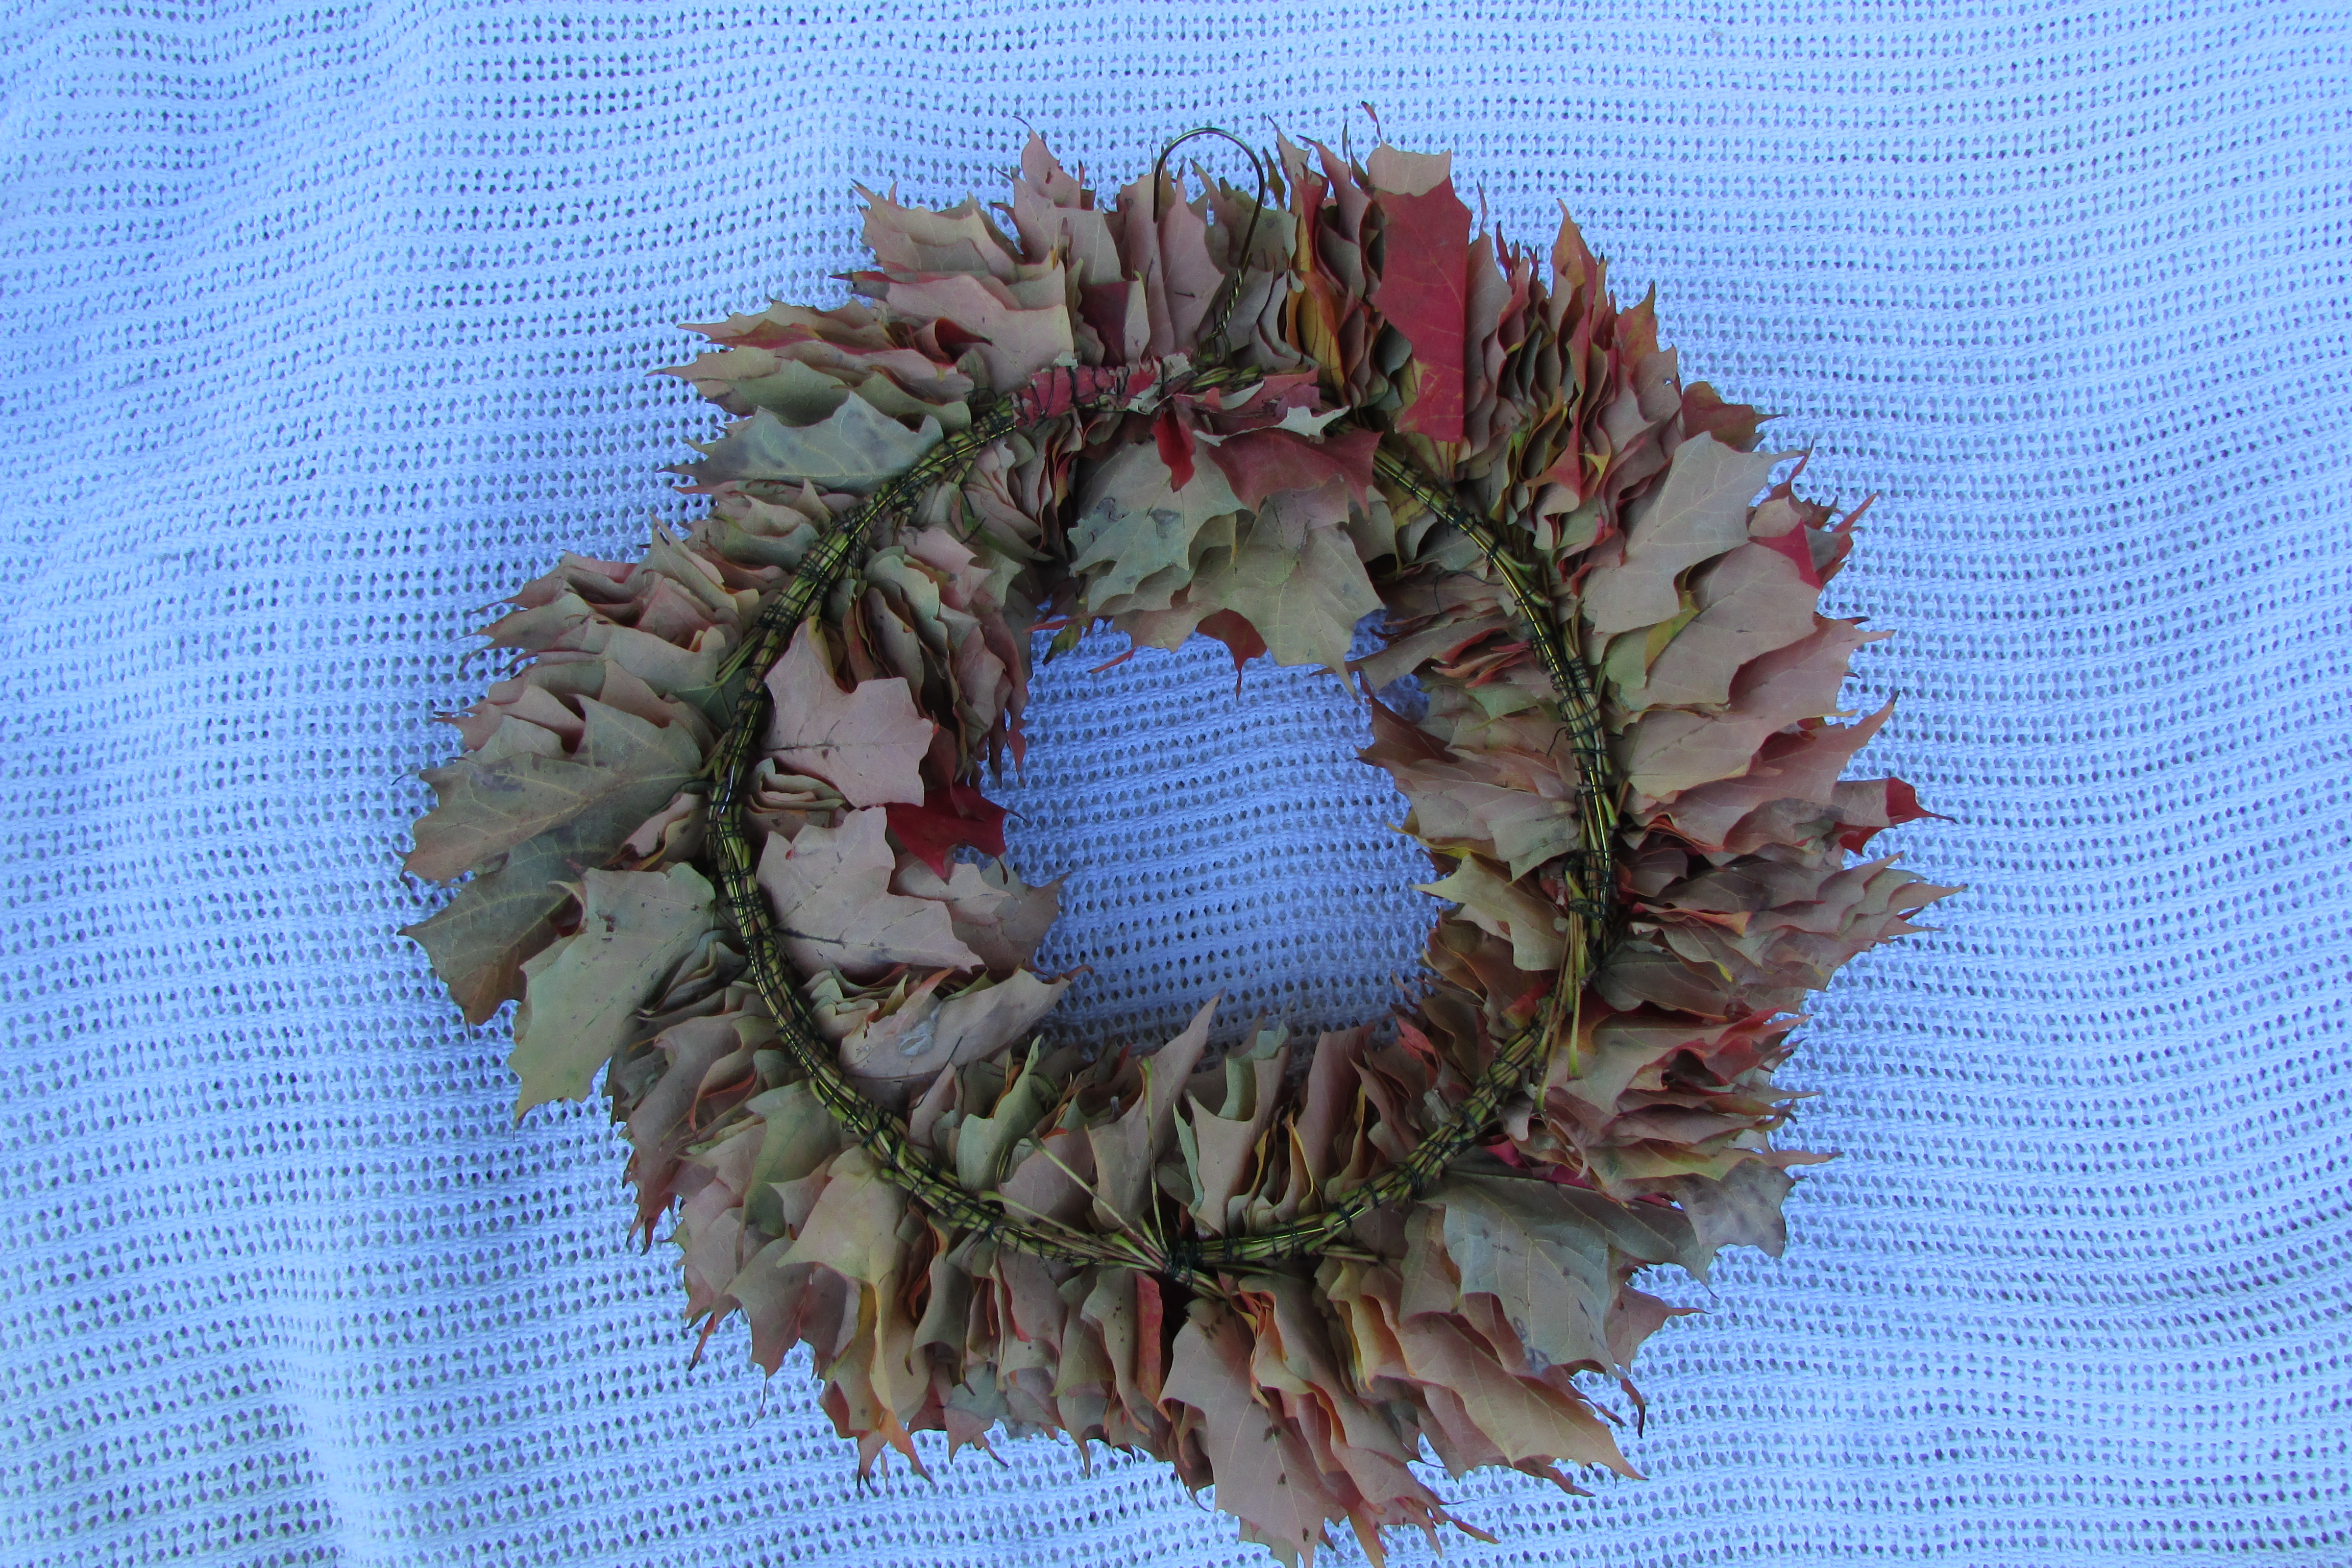 The above photo shows the back of the wreath completely finished. Notice how all the wired leaf stems form the base and completely cover the wire hanger.
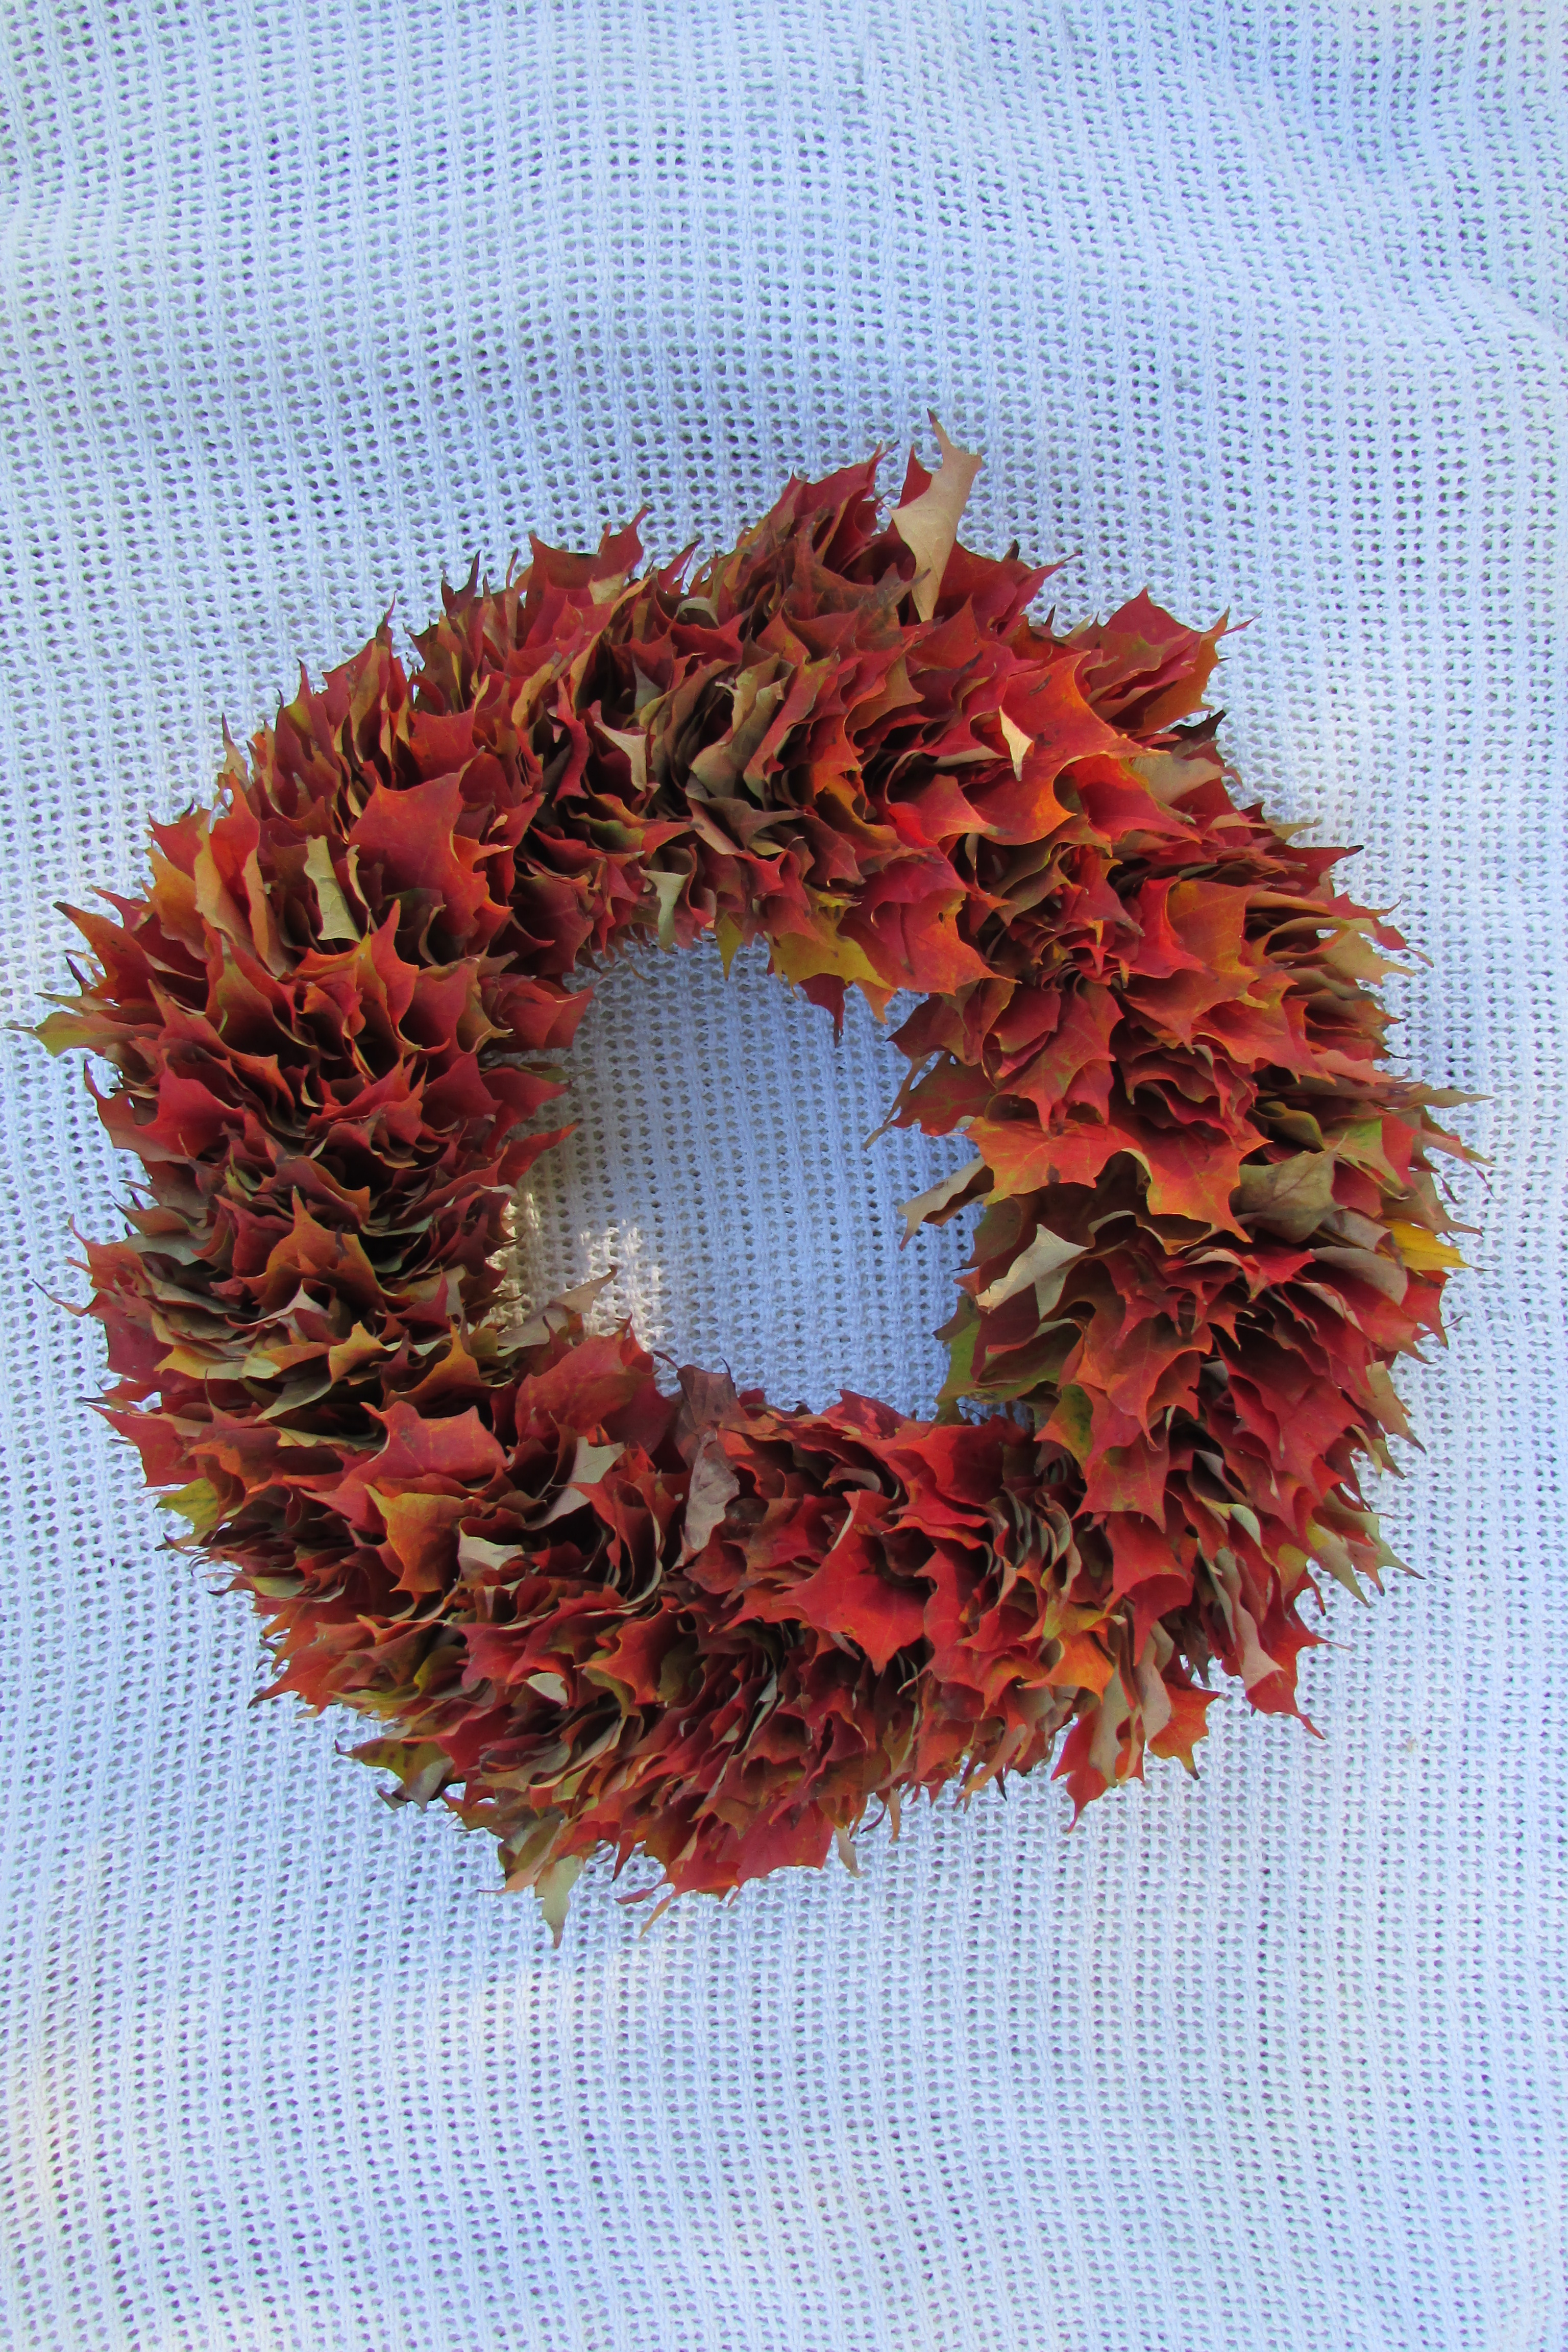 This is how the front of the completed wreath looked before the no tie bow was made and added. If at this point the wreath looked a bit fuller on one side and skimpier on the other, extra bunches of 10 leaves could be made and added to the wreath; just feel down through the wreath for where one bunch ended and the other began, and wire your extra bunch in between them. Make sure your added bunch is face up, going in the same direction as the other bunches. To my wreath I added three extra bunches for fullness.
Step 4 …To make a No Tie bow, read my post Making an easy NO TIE Bow for your Christmas Wreath.
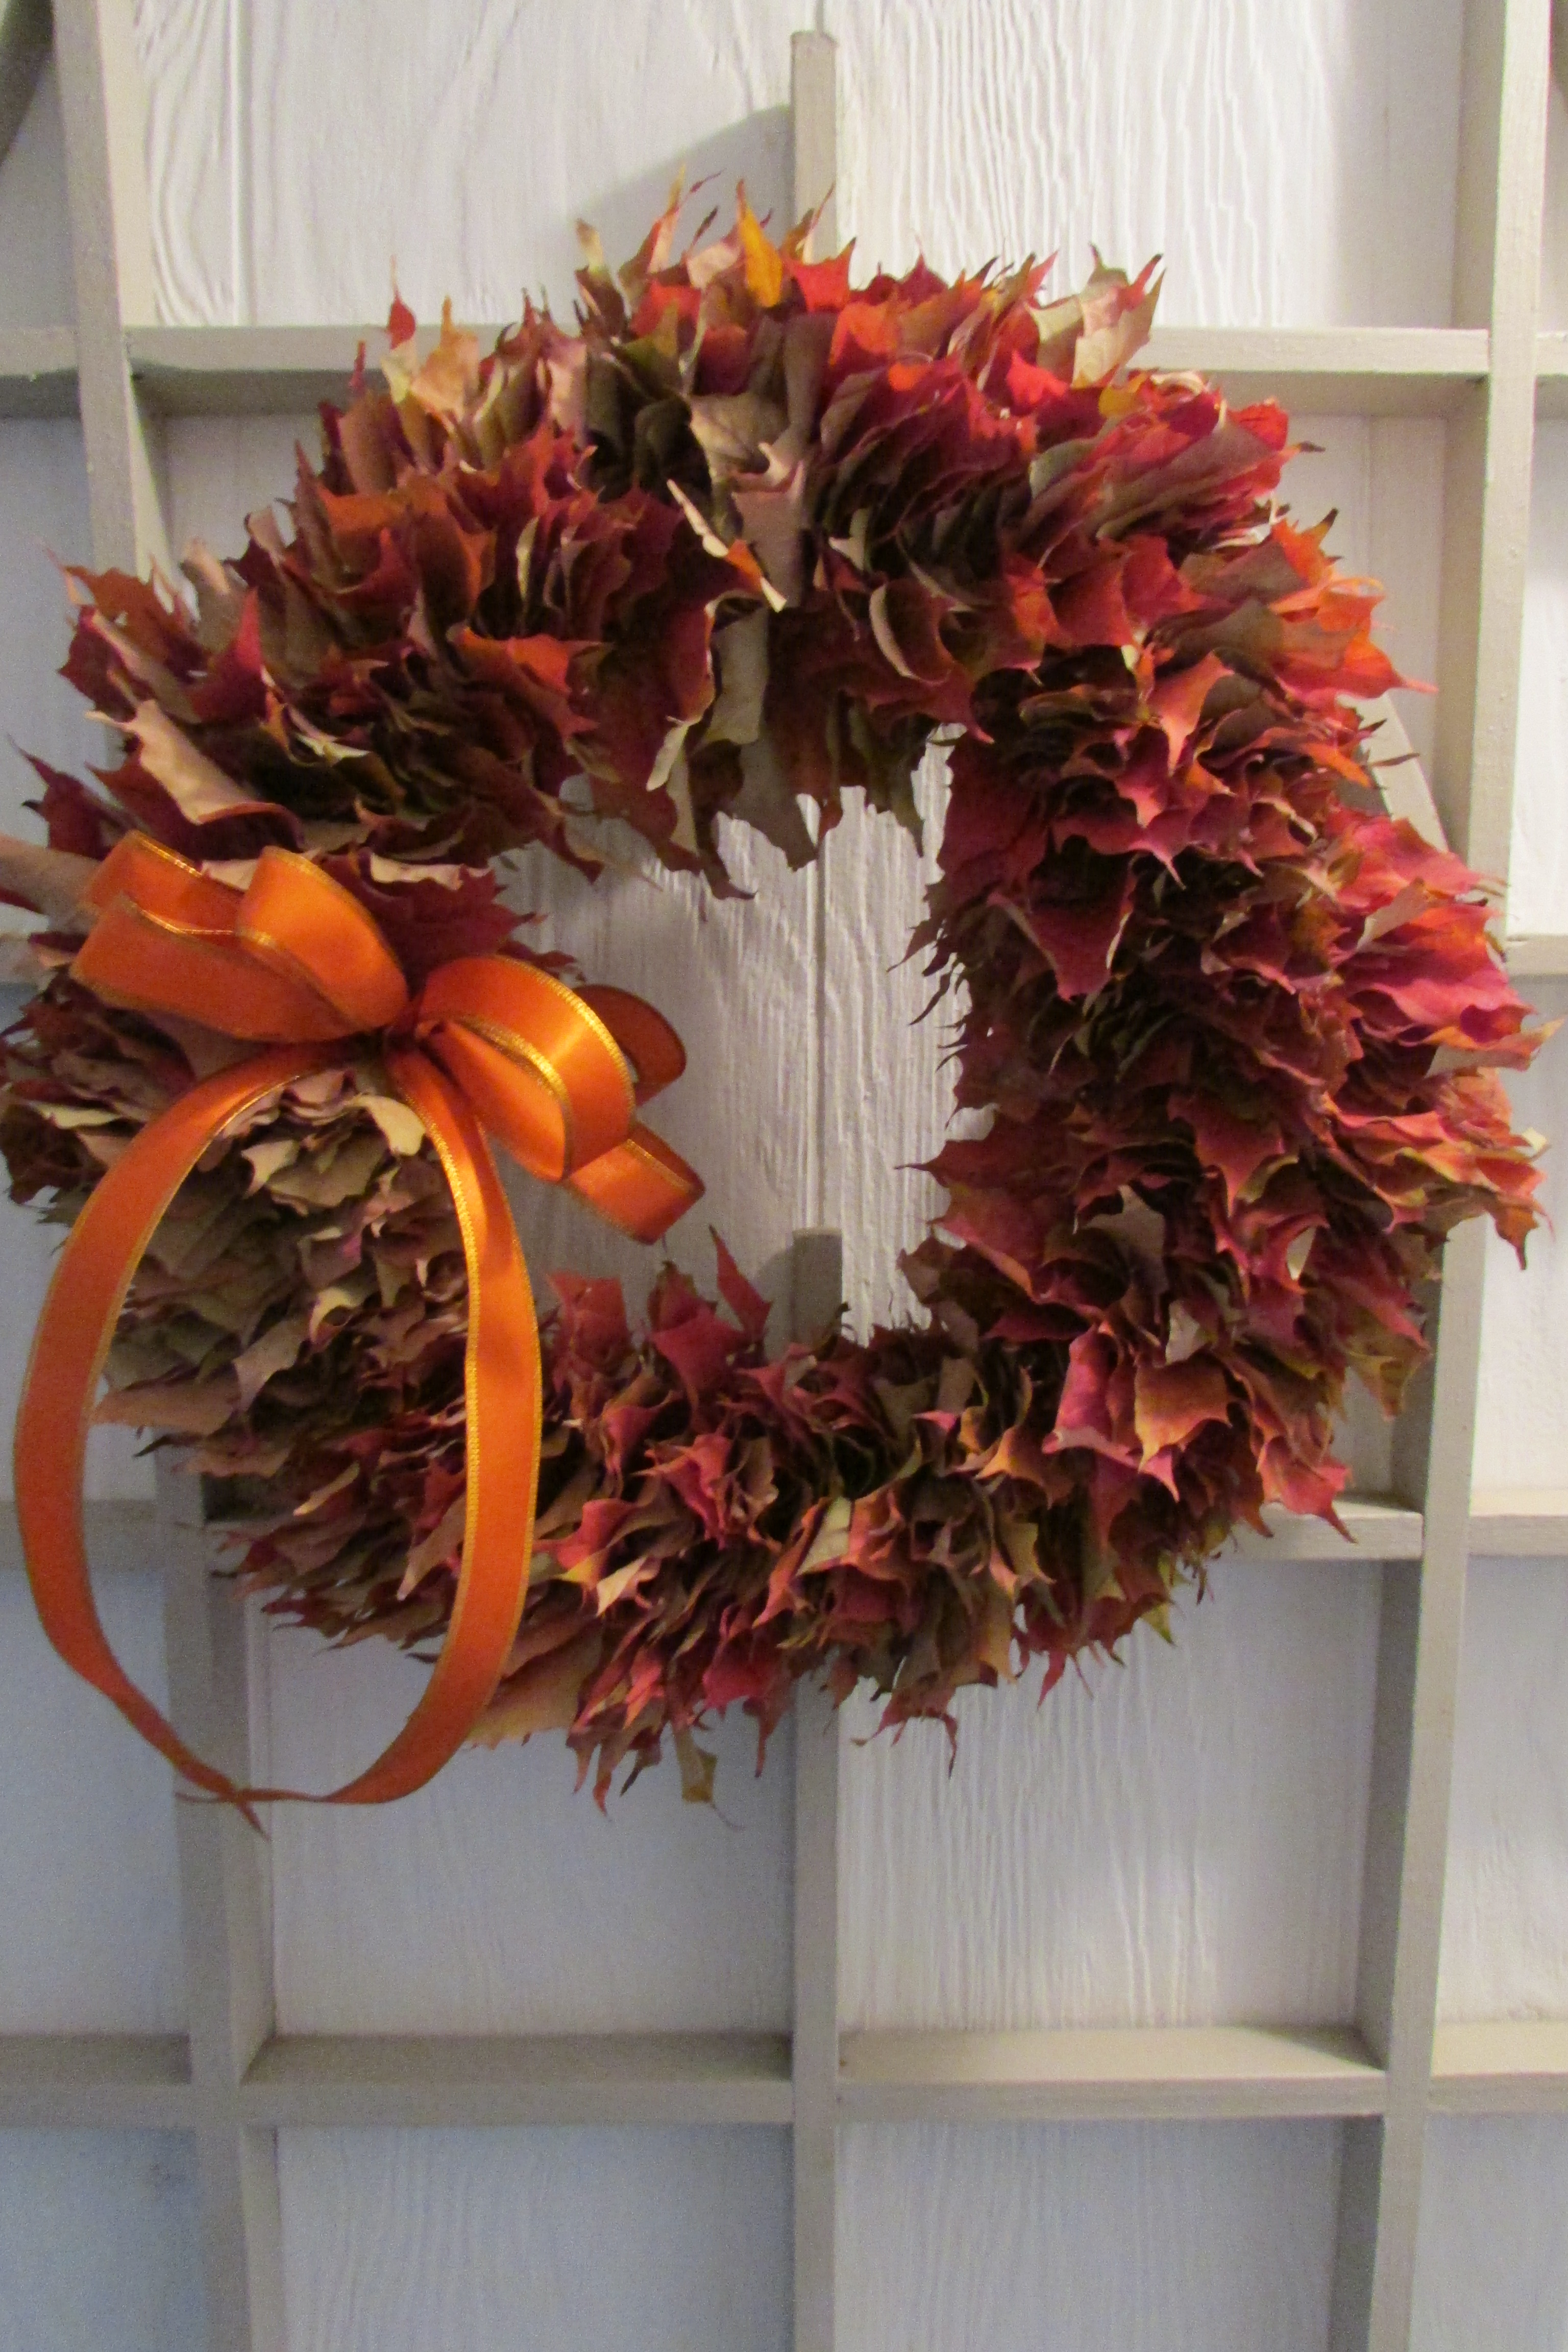
Finally, the leaf wreath over time will start to beige up a bit and the tips of the leaves will start to curl some. If you hang it indoors, warmer conditions will accelerate the drying process. If hung outdoors, place it on a door that does not have a storm door, or hang it on a fence or the wall of a porch. Being that is made of natural materials it looks pretty when fresh and as it is turning, that is part of nature.
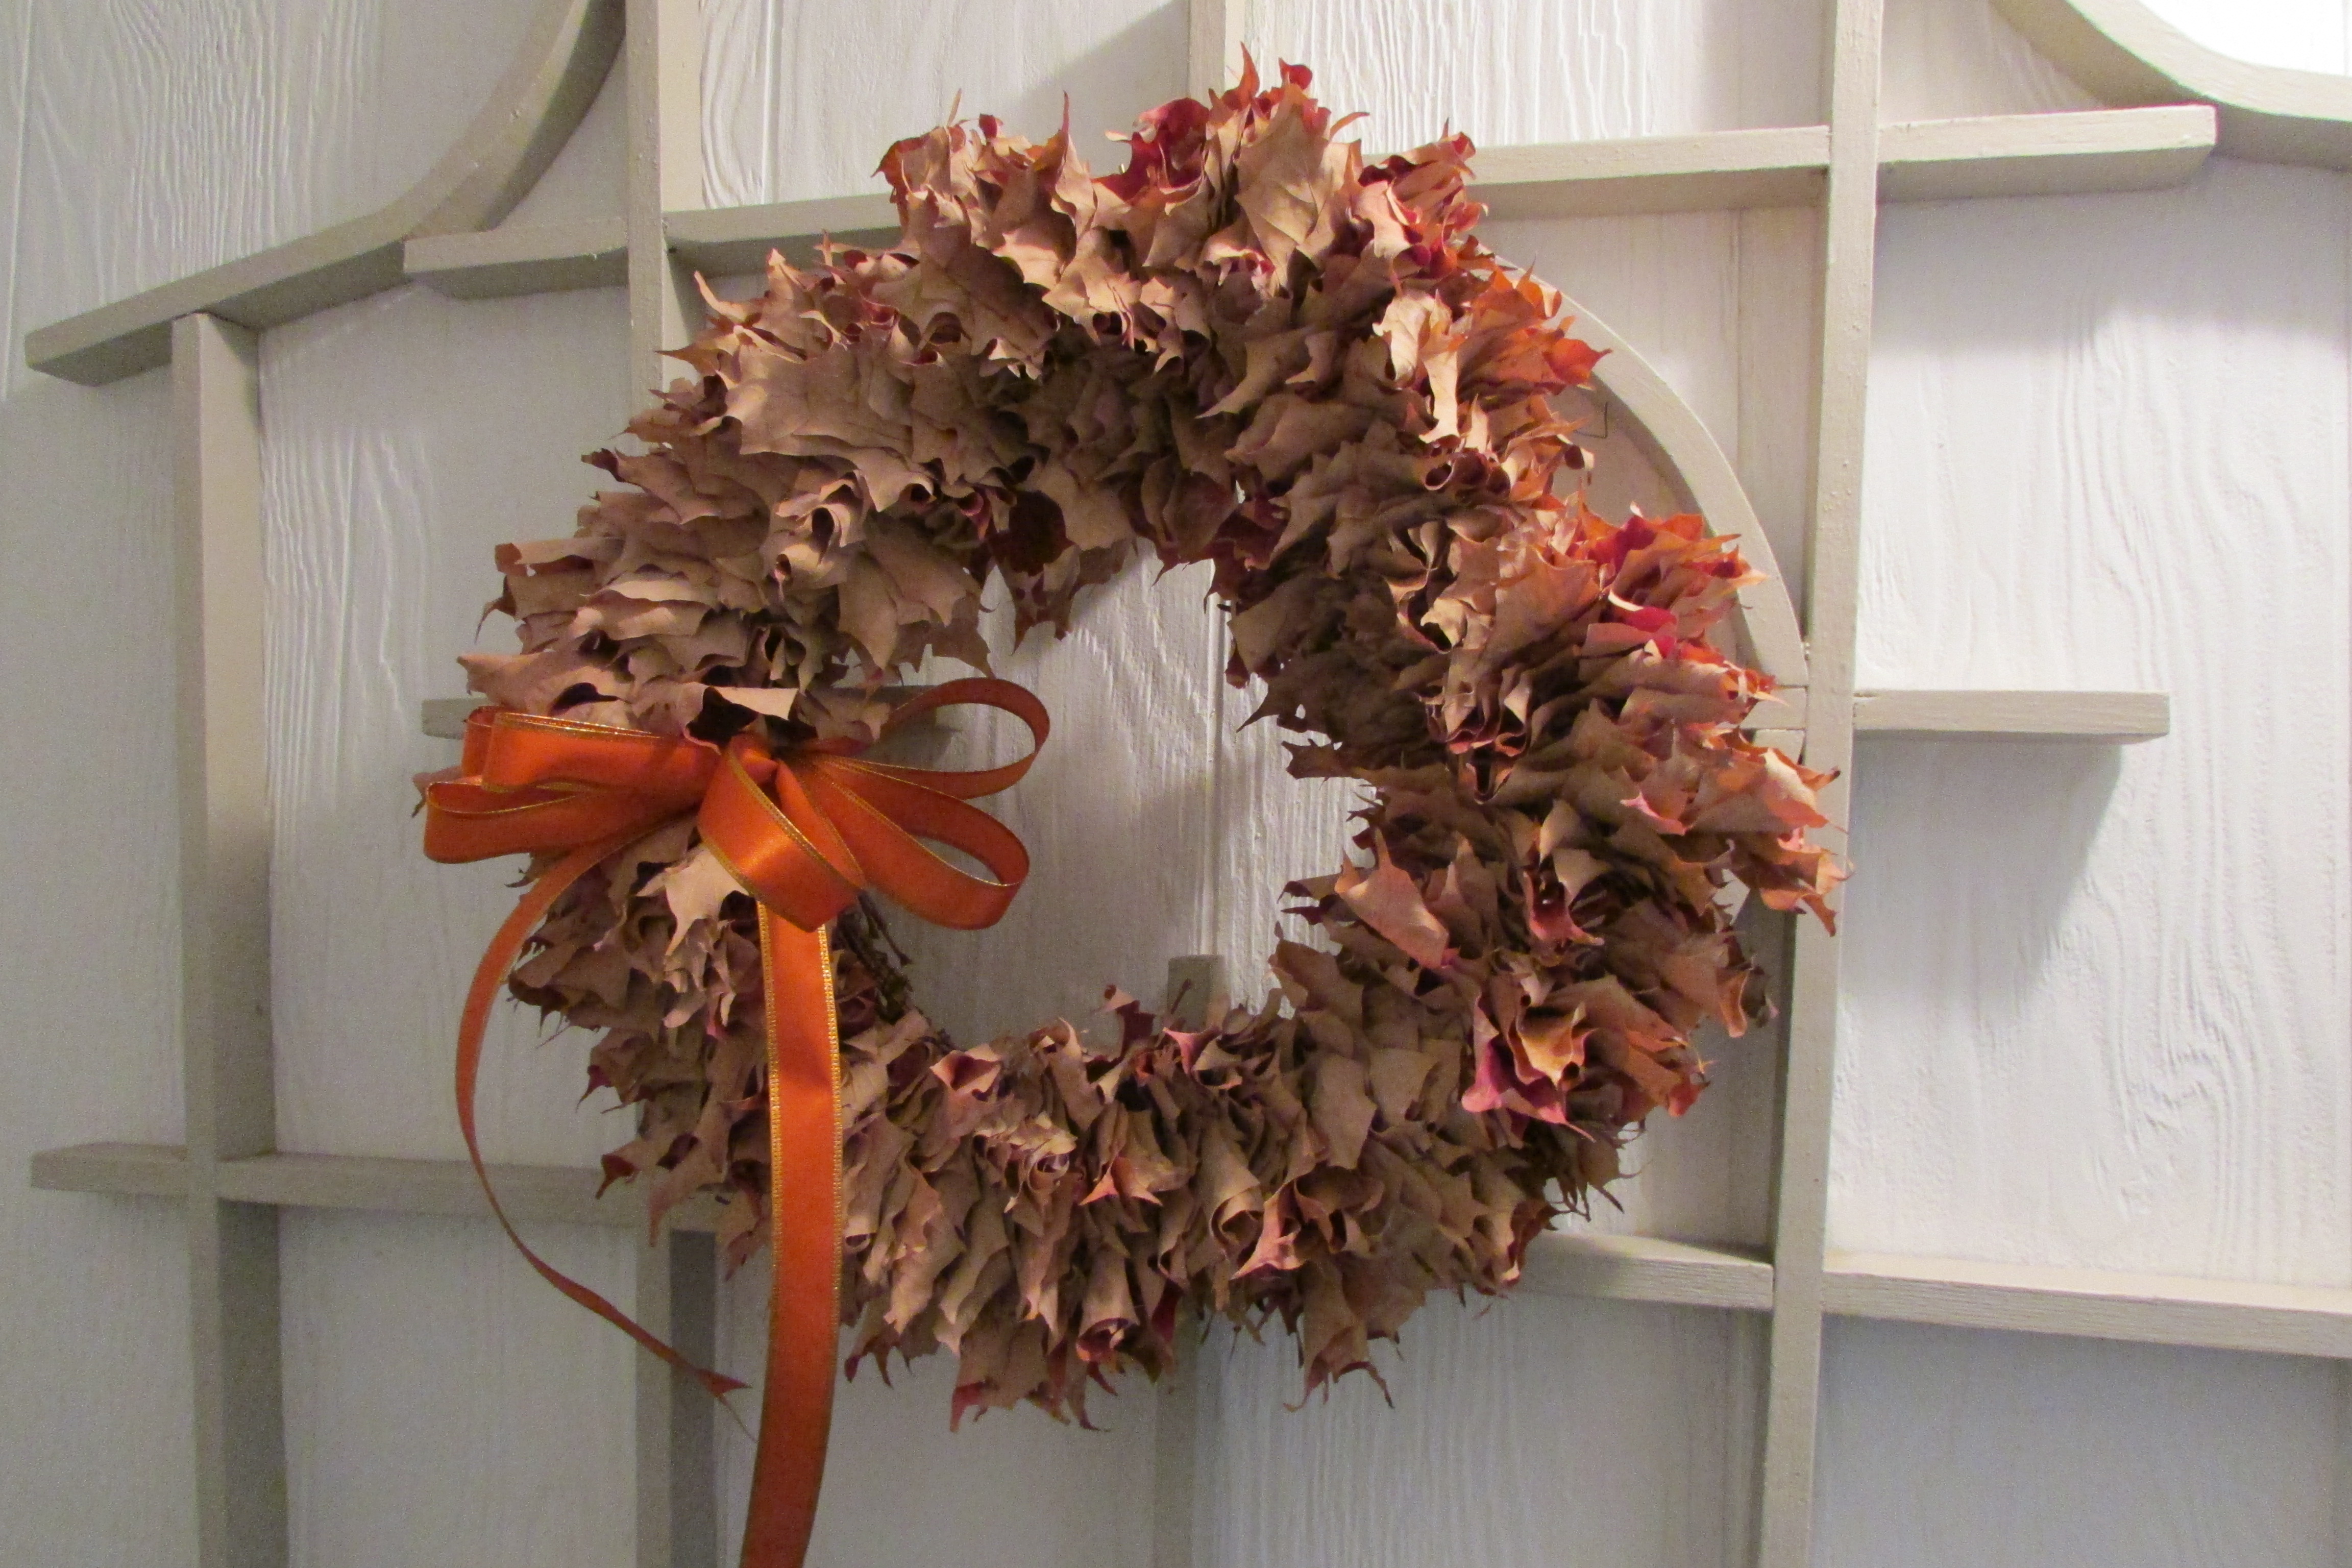
I put an orange bow on my wreath and it is hung on a vintage trellis, that is in a cool indoor back hall that goes to my garage; it is shown as the cover shot for this post. The trellis is 50 plus years old and I bought it about 25 years ago at an antiques store. Even thought my wreath is not in a really warm place it has already started to turn, but that is how nature is.
If you make the wreath and want to keep it hung past Thanksgiving, think about putting a bow on it that is in a color that is not evocative of any one holiday period. Pick something that is possibly a chocolate-brown, a lime green or even an eggplant color (whatever goes with your choice of leaves and house), and it will look good way into Winter. If you bring a leaf or two with you to a craft store, you can pass it/them by all the ribbons they have and one of the ribbons will smile at you, and that will be the one for your wreath.
 The above photo shows the leaf wreath one year after being made. The wreath was hung, uncovered, in a cellar storage room, after being used as an Autumn decoration where it completely dried out.
I hope this post gave you some insight into making something different from all the lovely, but everyone has one, silk wreaths that adorn many doors at this time of year. Enjoy the colors of Autumn, as they quickly go by as the leaves fall from the trees.
Companion Posts on Fred Gonsowski Garden Home.com …
How to make a Pine Cone Christmas Wreath 10-29-2015,
It’s Easy to Fluff a Fake/Artificial Wreath 11-30-2011,
It’s Easy to Make a Tulle Christmas Wreath 10-20-2012,
Putting Lights on a Christmas Tree..the Easy Way 11-3-2011,
Christmas Tree Decorating..Step-by-Step, Like a Pro 11-13-2011,
Why Rake Leaves? Grind them with a mower 11-15-2010,
When designing a perennial garden it’s all about the Shapes of Leaves 1-15-2011,
Daffodils..Planting, Fertilizing and Maintenance 4-8-2011,
Tulips..Planting, Fertilizing and Maintenance 4-19-2011.


I am a ‘mature’ woman and new to your blob. I love it, and have made use of so many of your ideas and ‘how to’s’ in such a short time. You are my new ‘go to’ for everything! Thank you.
Thanks for your comment J, it is appreciated ;-]
love it!
Thank you Jodi ;-}
Do you think this wreath can be used for more than one season due to the leaves drying up? Great blog and article! Thanks
Hi there Nancy, I would say one season, Fall through a Winter, then pitch it at the time of Spring cleanup or along with the pumpkins and other things put out now for Autumn decorating. Years ago I did a flower tree for a local museum, and sprayed the flowers with AQUA NET which almost varnished the hydrangea that I used. The flower heads turned out really firm and hard with that product, twice, sprayed on them. You could try spraying it with something like that. Today I was at Target and saw a leaf wreath there produced by Smith and Hawkins. It was a mix or real maple and oak leaves, but they were treated with something which made them a bit firmer and gave then a fall color story. The wreath was nice, but not as full as mine, and mine I made for free, where as theirs was now twenty something dollars, I think on clearance.