

Step-by-Step instructions for decorating an Artificial Christmas Wreath
Have you ever gone into one of those craft/hobby stores, the gift shop in your local garden center, or the holiday decorating department at an upscale store and saw the most beautiful Christmas wreaths, and wanted one, but the pricing was just too high? This post will teach you the fundamentals of layering and composing a Christmas wreath so you can make one that completely compliments your holiday decorating and won’t break the bank. 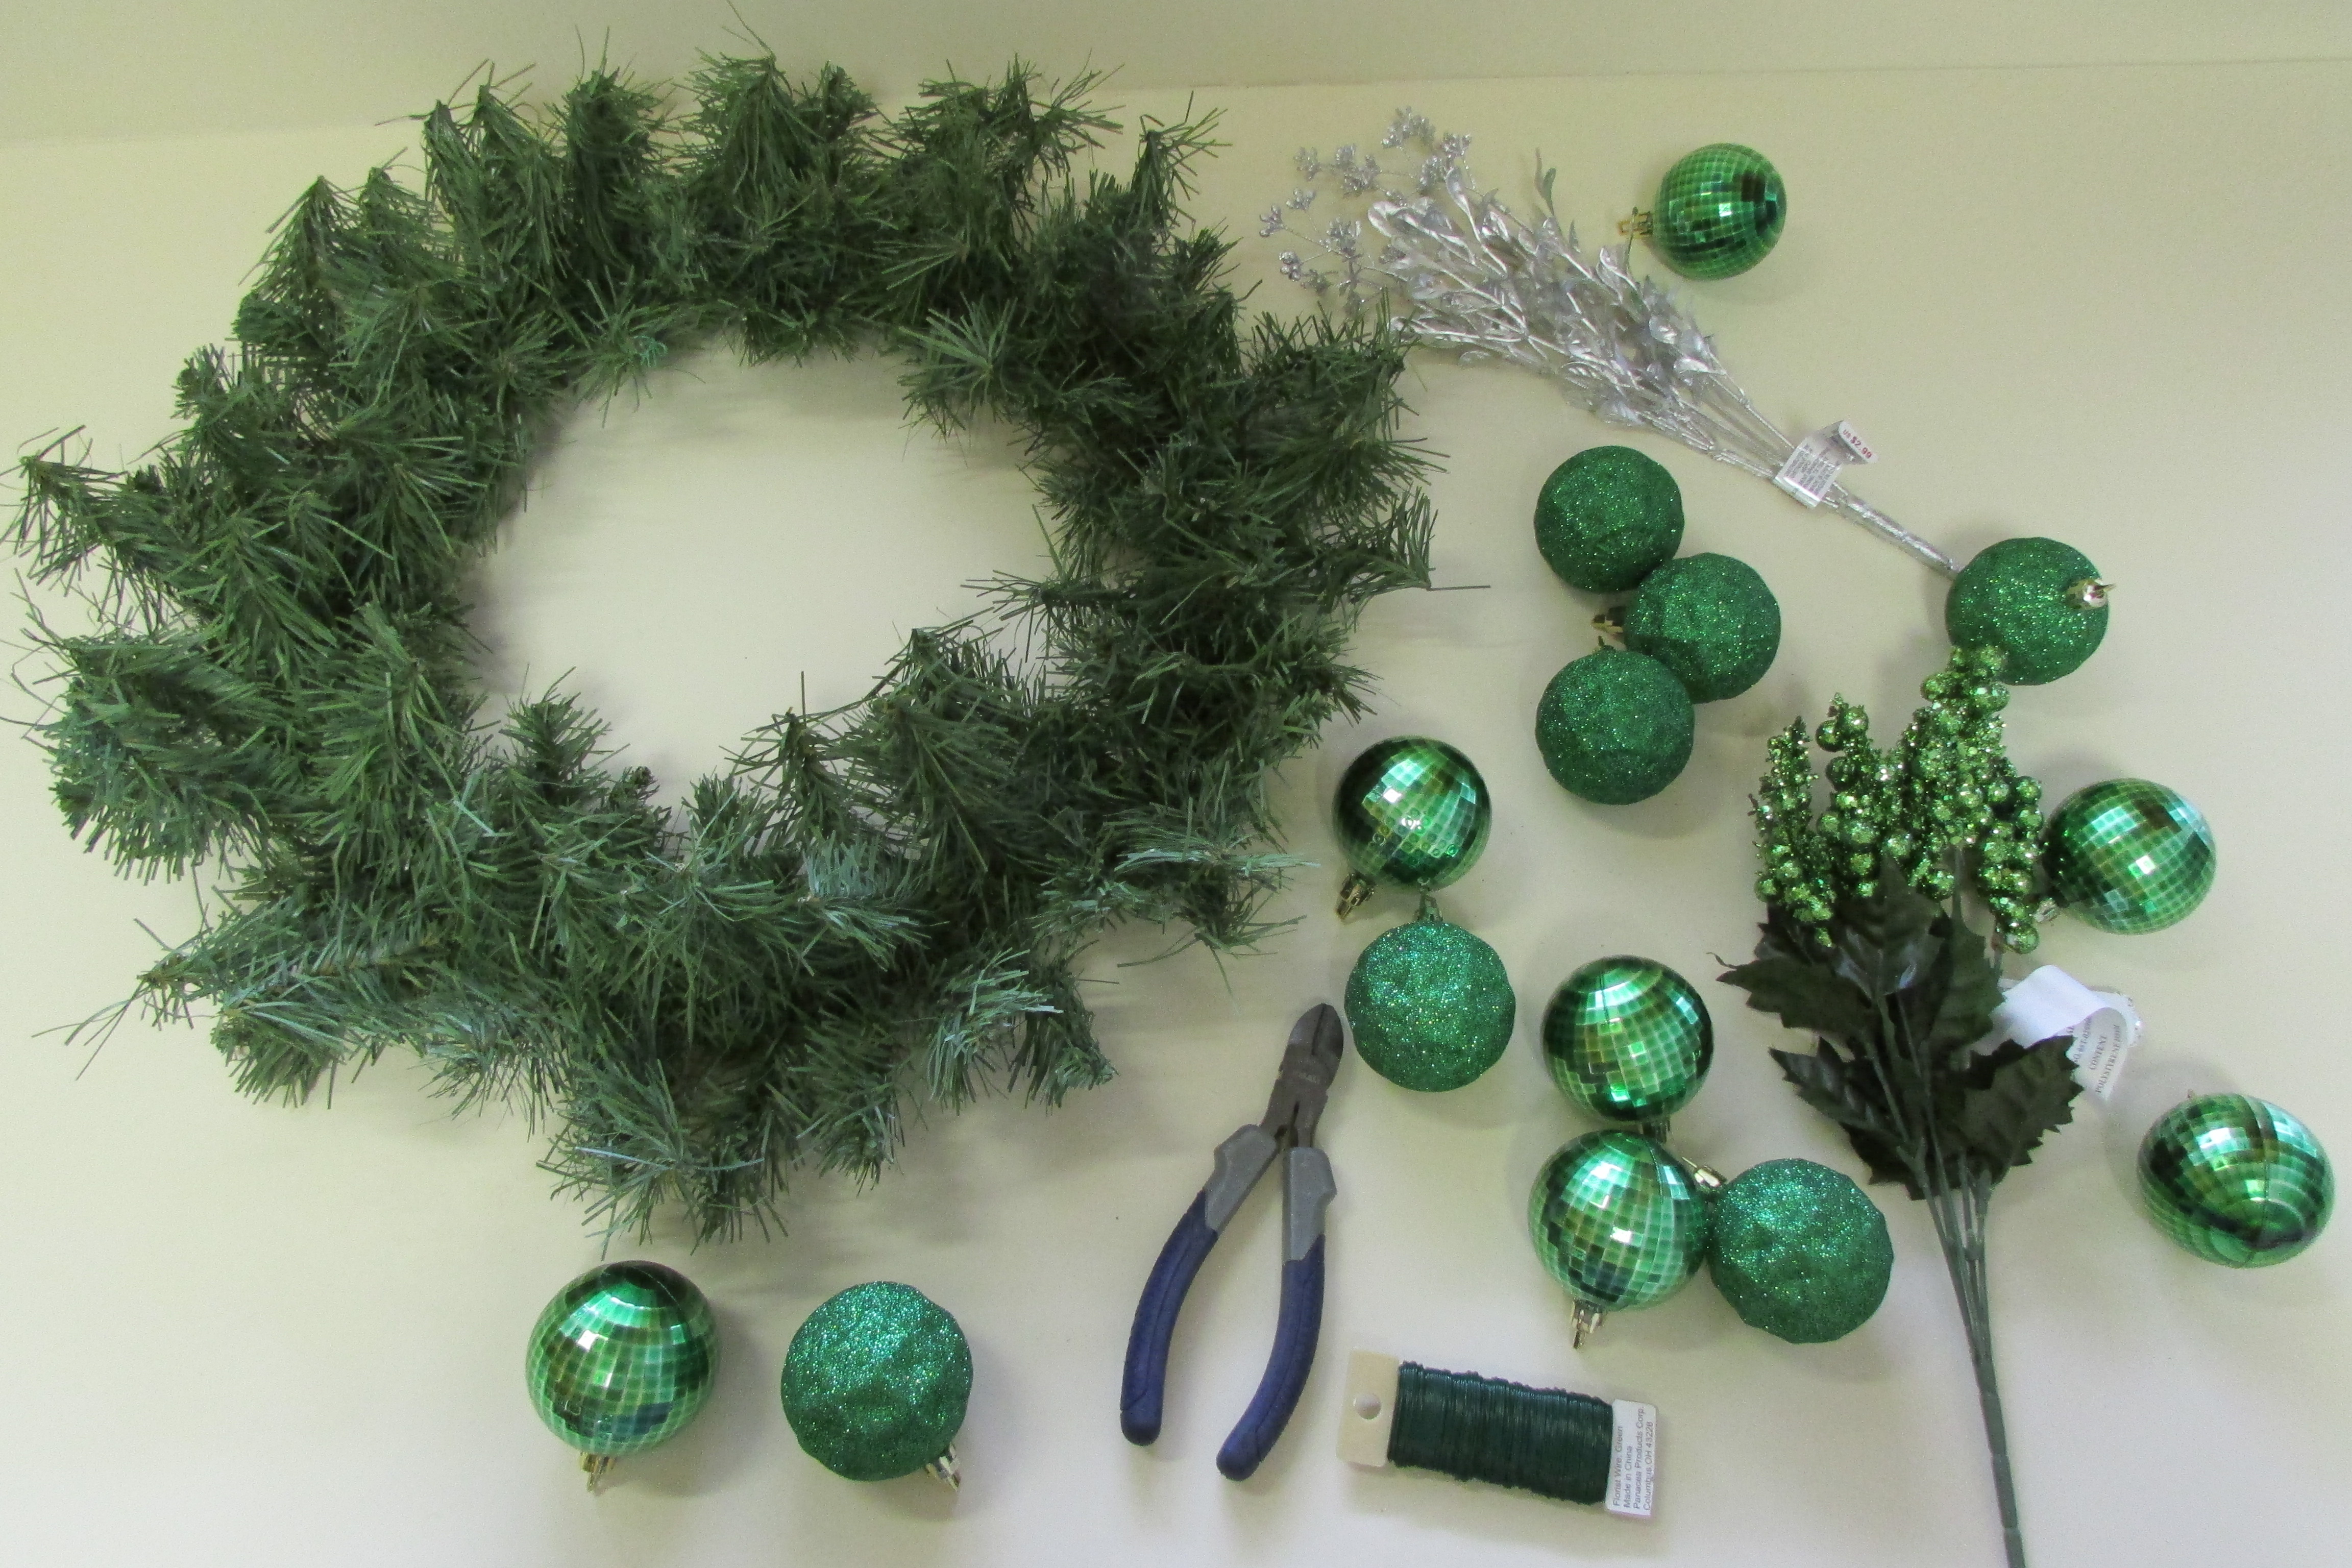 Supplies needed to make a Christmas Wreath
(1) An artificial Christmas Wreath ( I used a 20-inch non-lit basic wreath from Walmart). If you are hanging your wreath on a door that is protected by a storm door, pick a wreath that is not too thick so it will not be crushed by the storm door.
(2) Florist wire (I used 24GA).
(3) Wire cutters
(4) Artificial foliage ( For my wreath I chose a mini bush of silver toned leaves (seen top center) and a mini bush of glittered berries (seen right middle of above photo).
(5) Plastic indoor/outdoor tree ornaments in assorted textures (and sizes if desired).
Pick an odd number of base foliage pieces and ornaments for your wreath (think 3,5,7,9, etc depending on the size of your wreath). I have 5 silvered sprigs of leaves, 5 clumps of glittered berries, and 5 shiny and 5 glittered balls on my wreath.
(6) A good quality craft glue.
(7) Q-tips or any other brand of Cotton Swabs.
(8) Wired ribbon to make a No Tie bow
Step One, Fluff up your wreath. To see how simple it is, read my post titled It’s EASY to Fluff a Fake / Artificial Christmas Wreath. 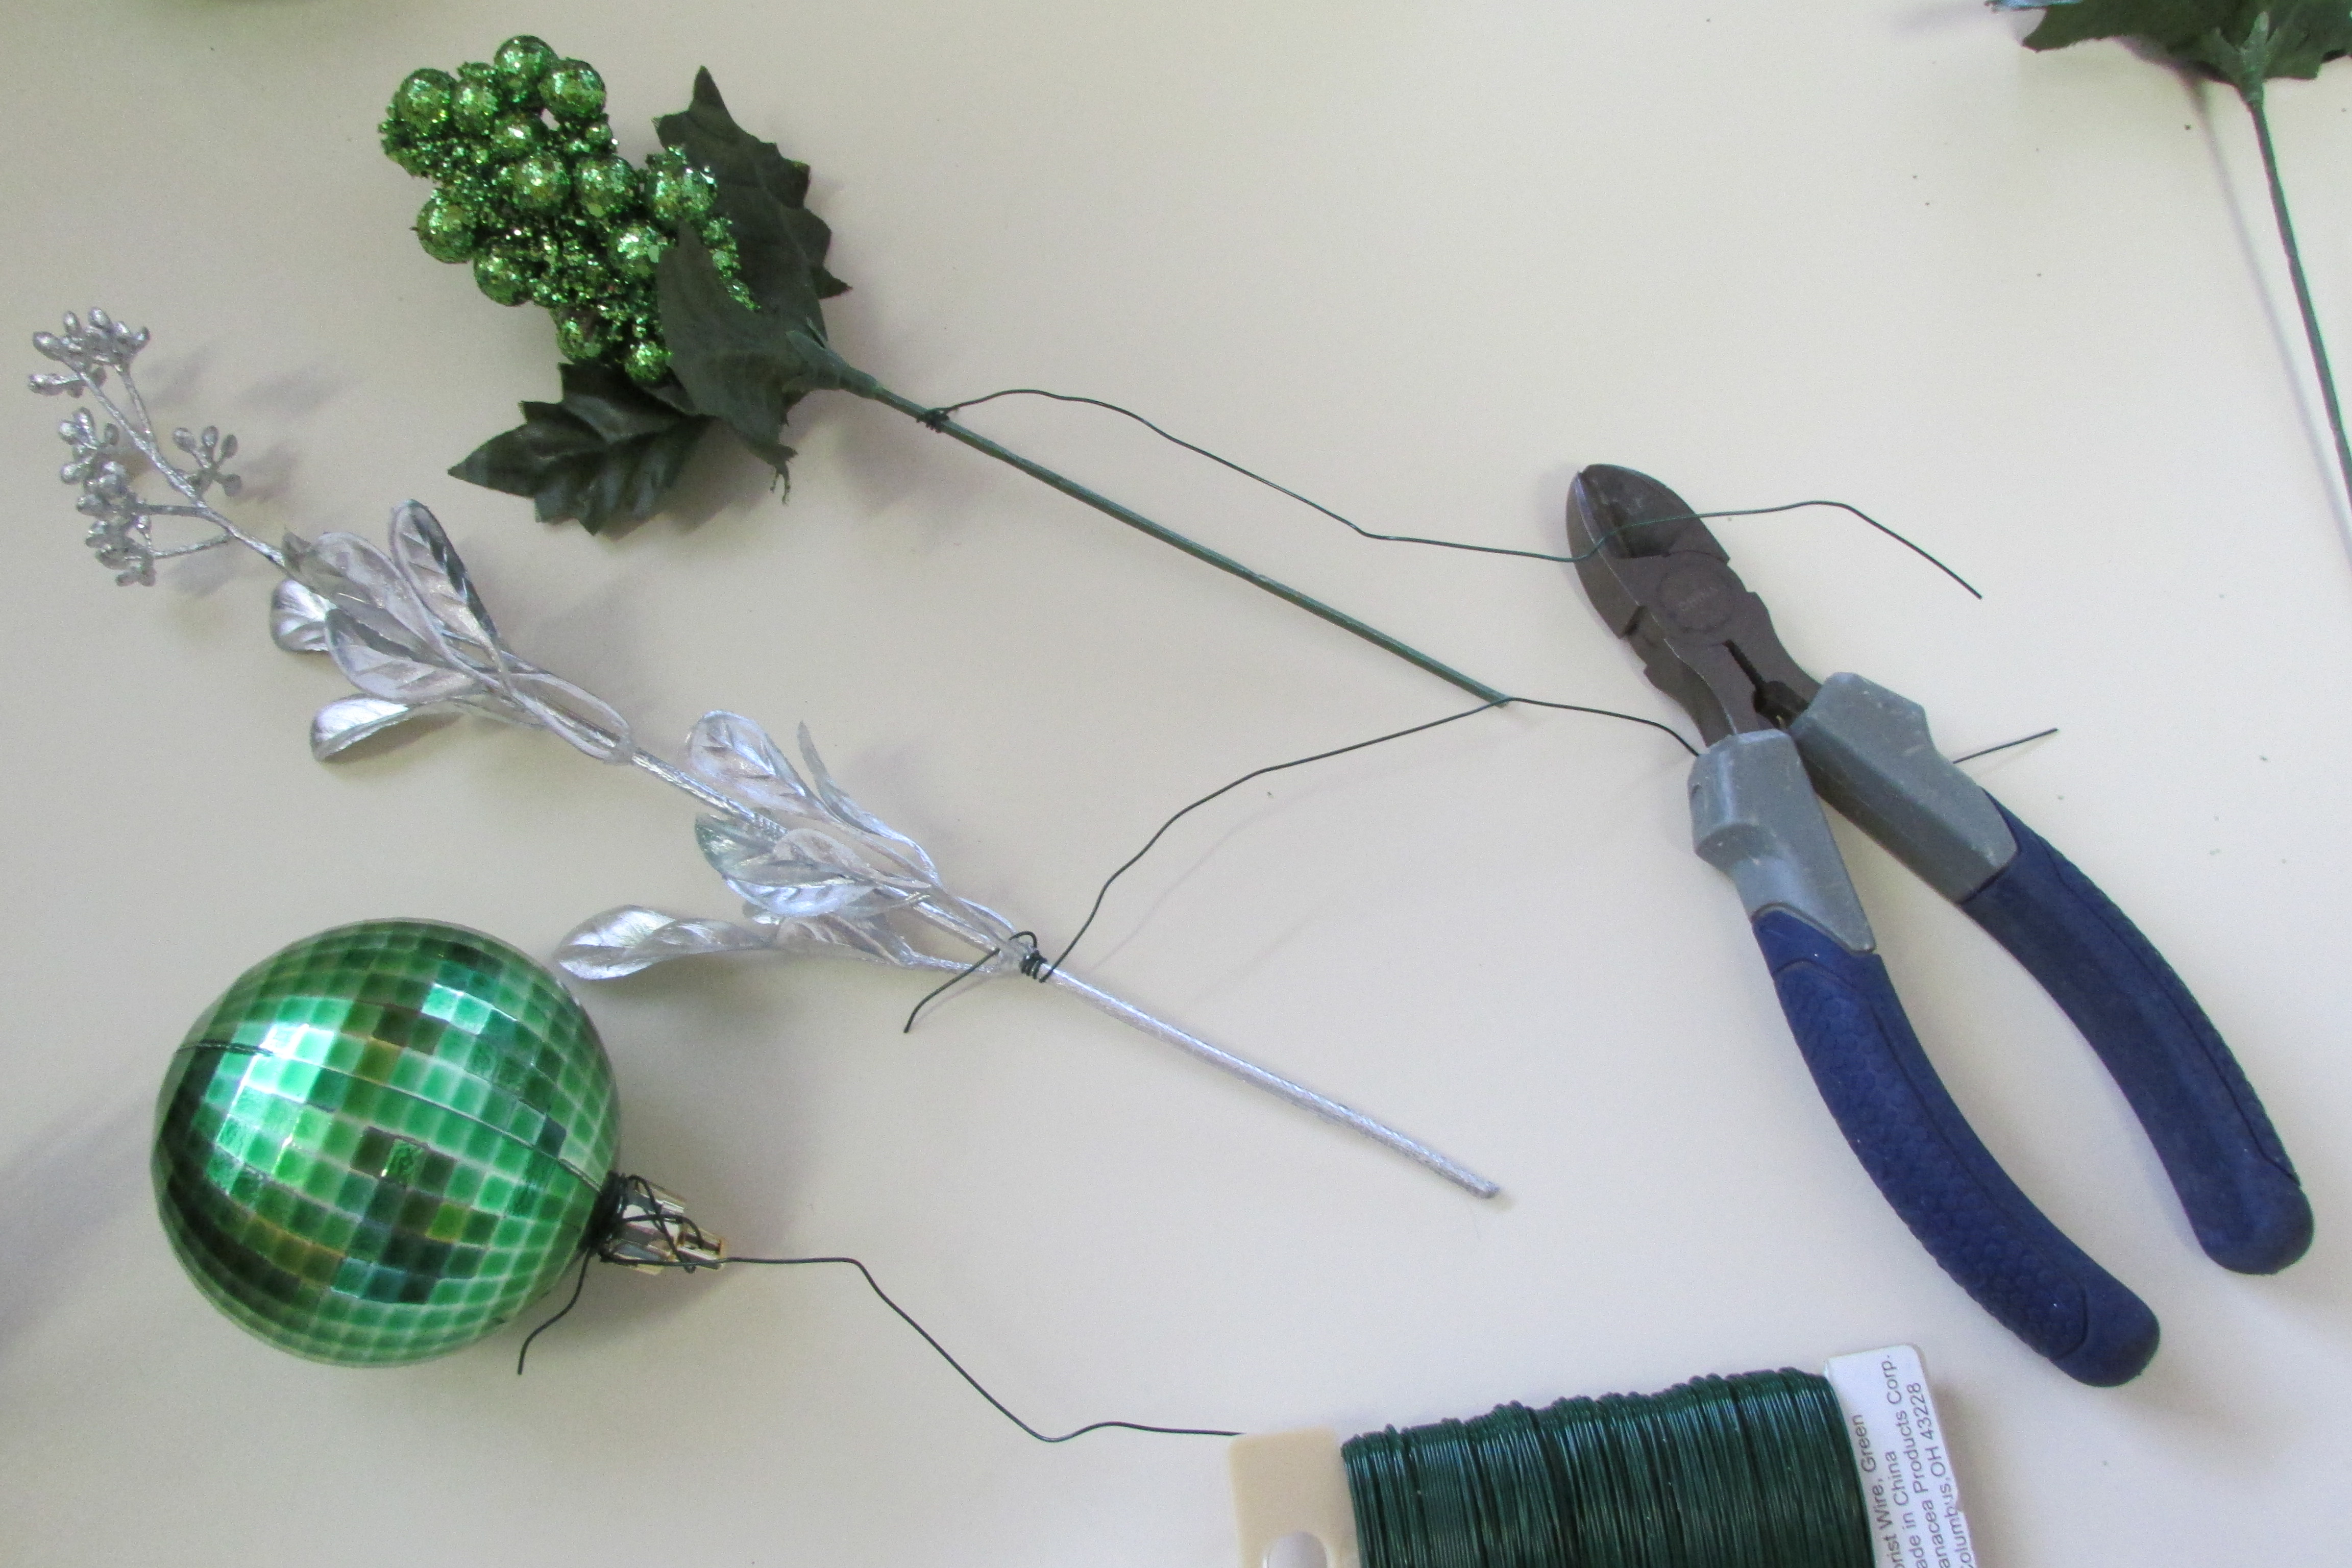 Step Two If you can, pop off the plastic hanging top parts of your plastic tree ornaments. Using a cotton swab paint craft glue around the top of the bulb and snap the plastic hanging part back on to your bulb. (Let dry for many hours or over night). By gluing the hanging part to the top of your plastic bulb it will not pop off during wiring or when creating your wreath.
To wire your bulb(s) pass the florist wire through the top hanging part of your bulb(s) and extend it down your bulb(s) about an inch, as seen in the above photo. Twist florist wire tightly 3 times around the top of the bulb, then cut it from your wire paddle/spool leaving 8 or 9 inches of wire as a tail for attaching it to your wreath. Take the one inch of wire, by your bulb, and fold it back in the direction of the tail of florist wire attached to your bulb.
Wire your base foliage and any other kind of flowers (if you are using them) the same as the bulbs, twisting the florist wire 3 times around your product and leaving 8 or 9 inches of wire to attach it to your wreath.
Step Three Do a dry run. Lay out all of your elements on your wreath before wiring anything permanently down. Start with your base foliage and continue adding elements, layer by layer, until you have completed your wreath and have come up with an arrangement of product that you find attractive. The next photos show how I added the different element, one-by-one, to my wreath.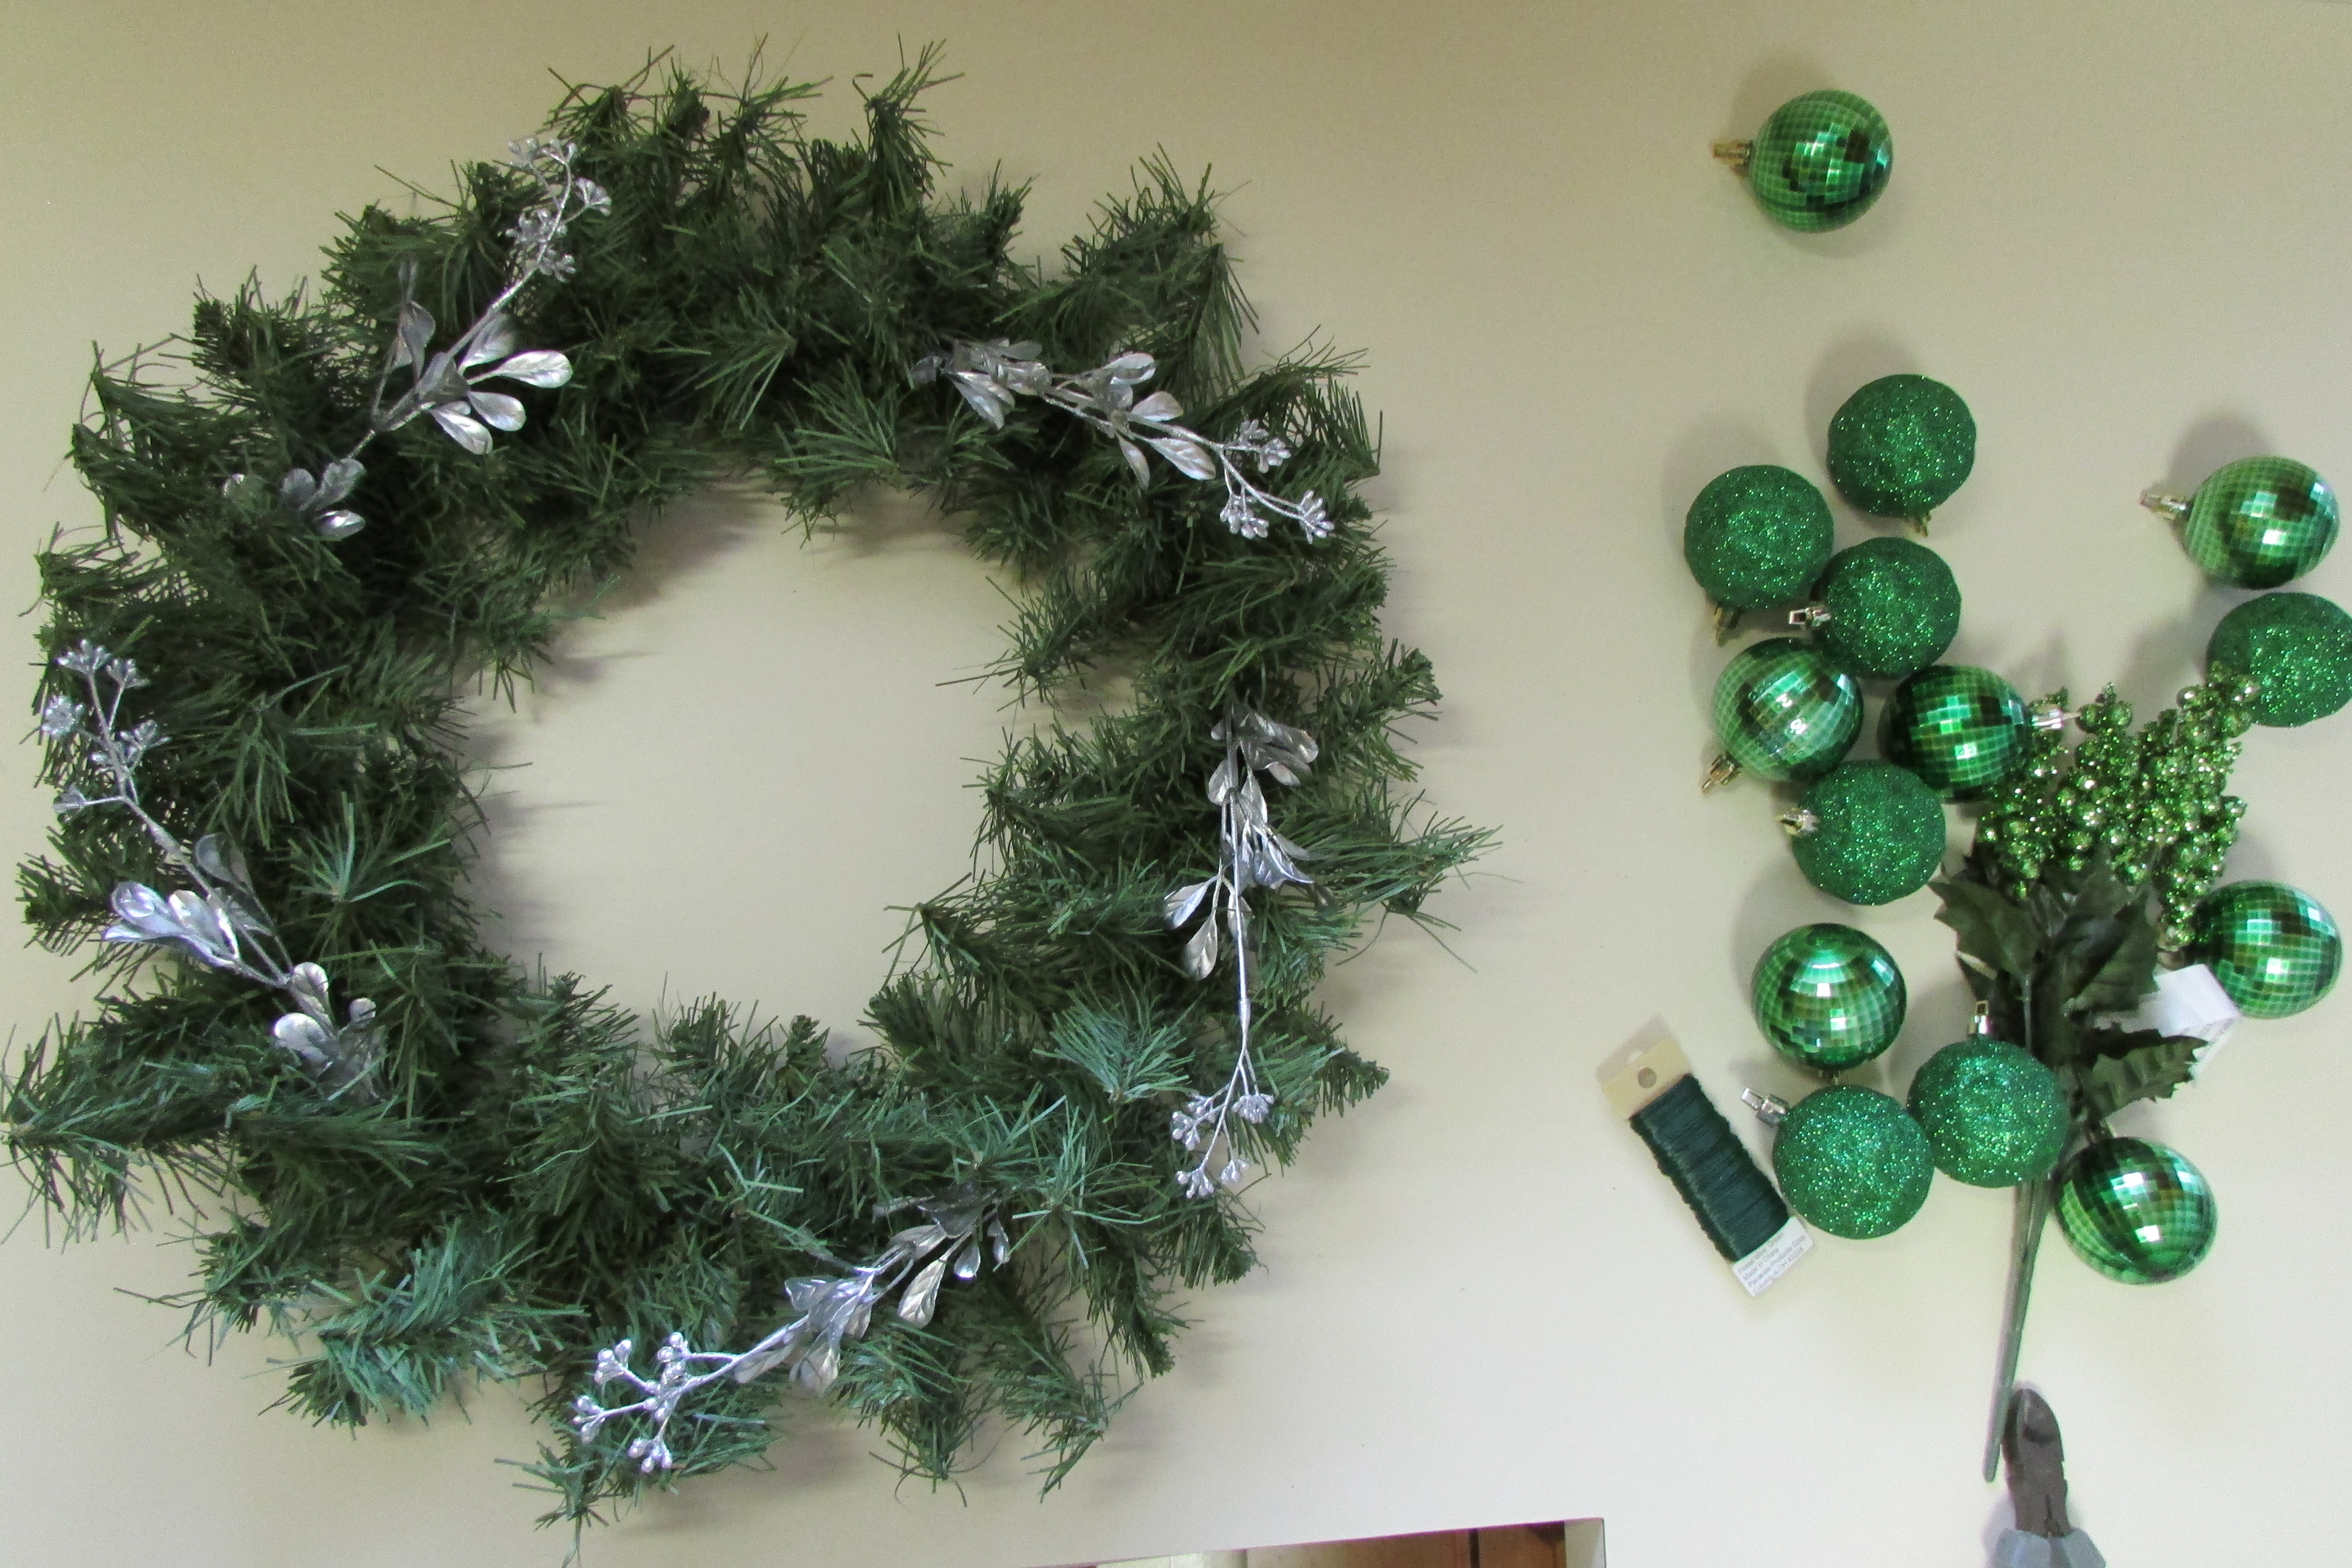 This photo shows how the 5 silver sprigs were first spread (evenly spaced) around the wreath; all going in the same direction.
 Next 5 glittered clumps of berries were placed between the 5 silver sprigs; again all pointing in the same direction.
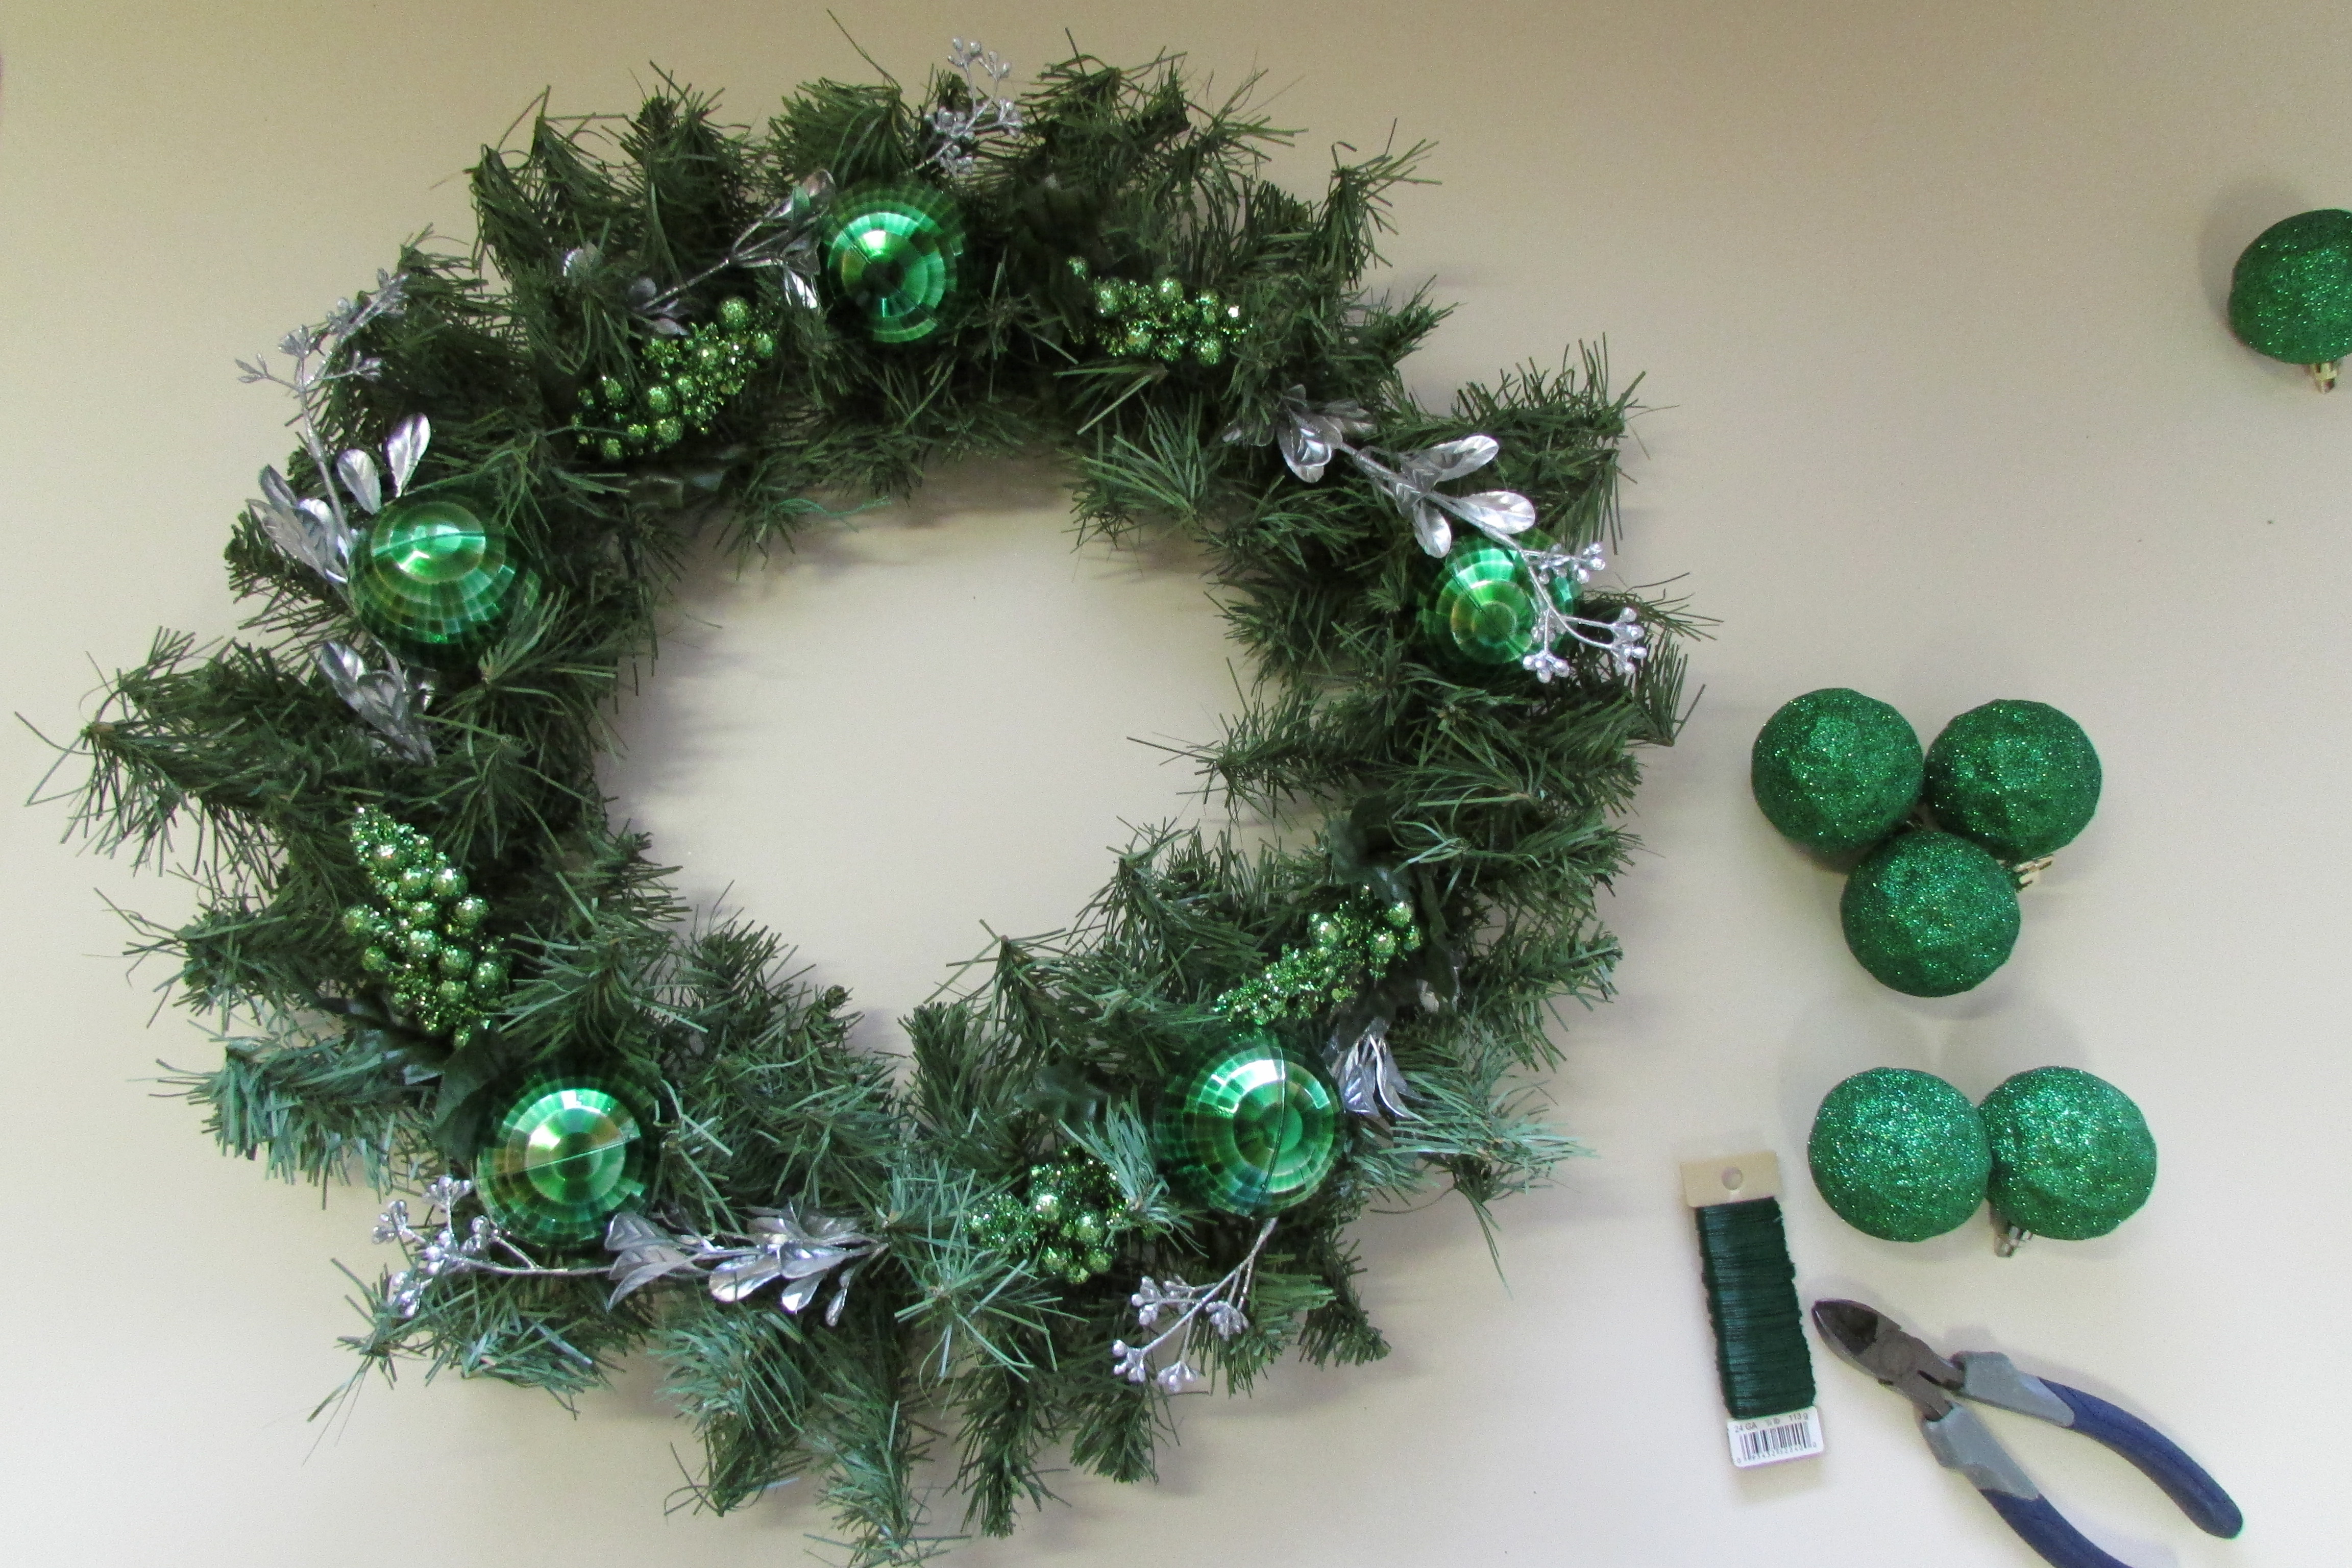 5 shiny green mirror balls were evenly placed around the wreath, and then followed by..
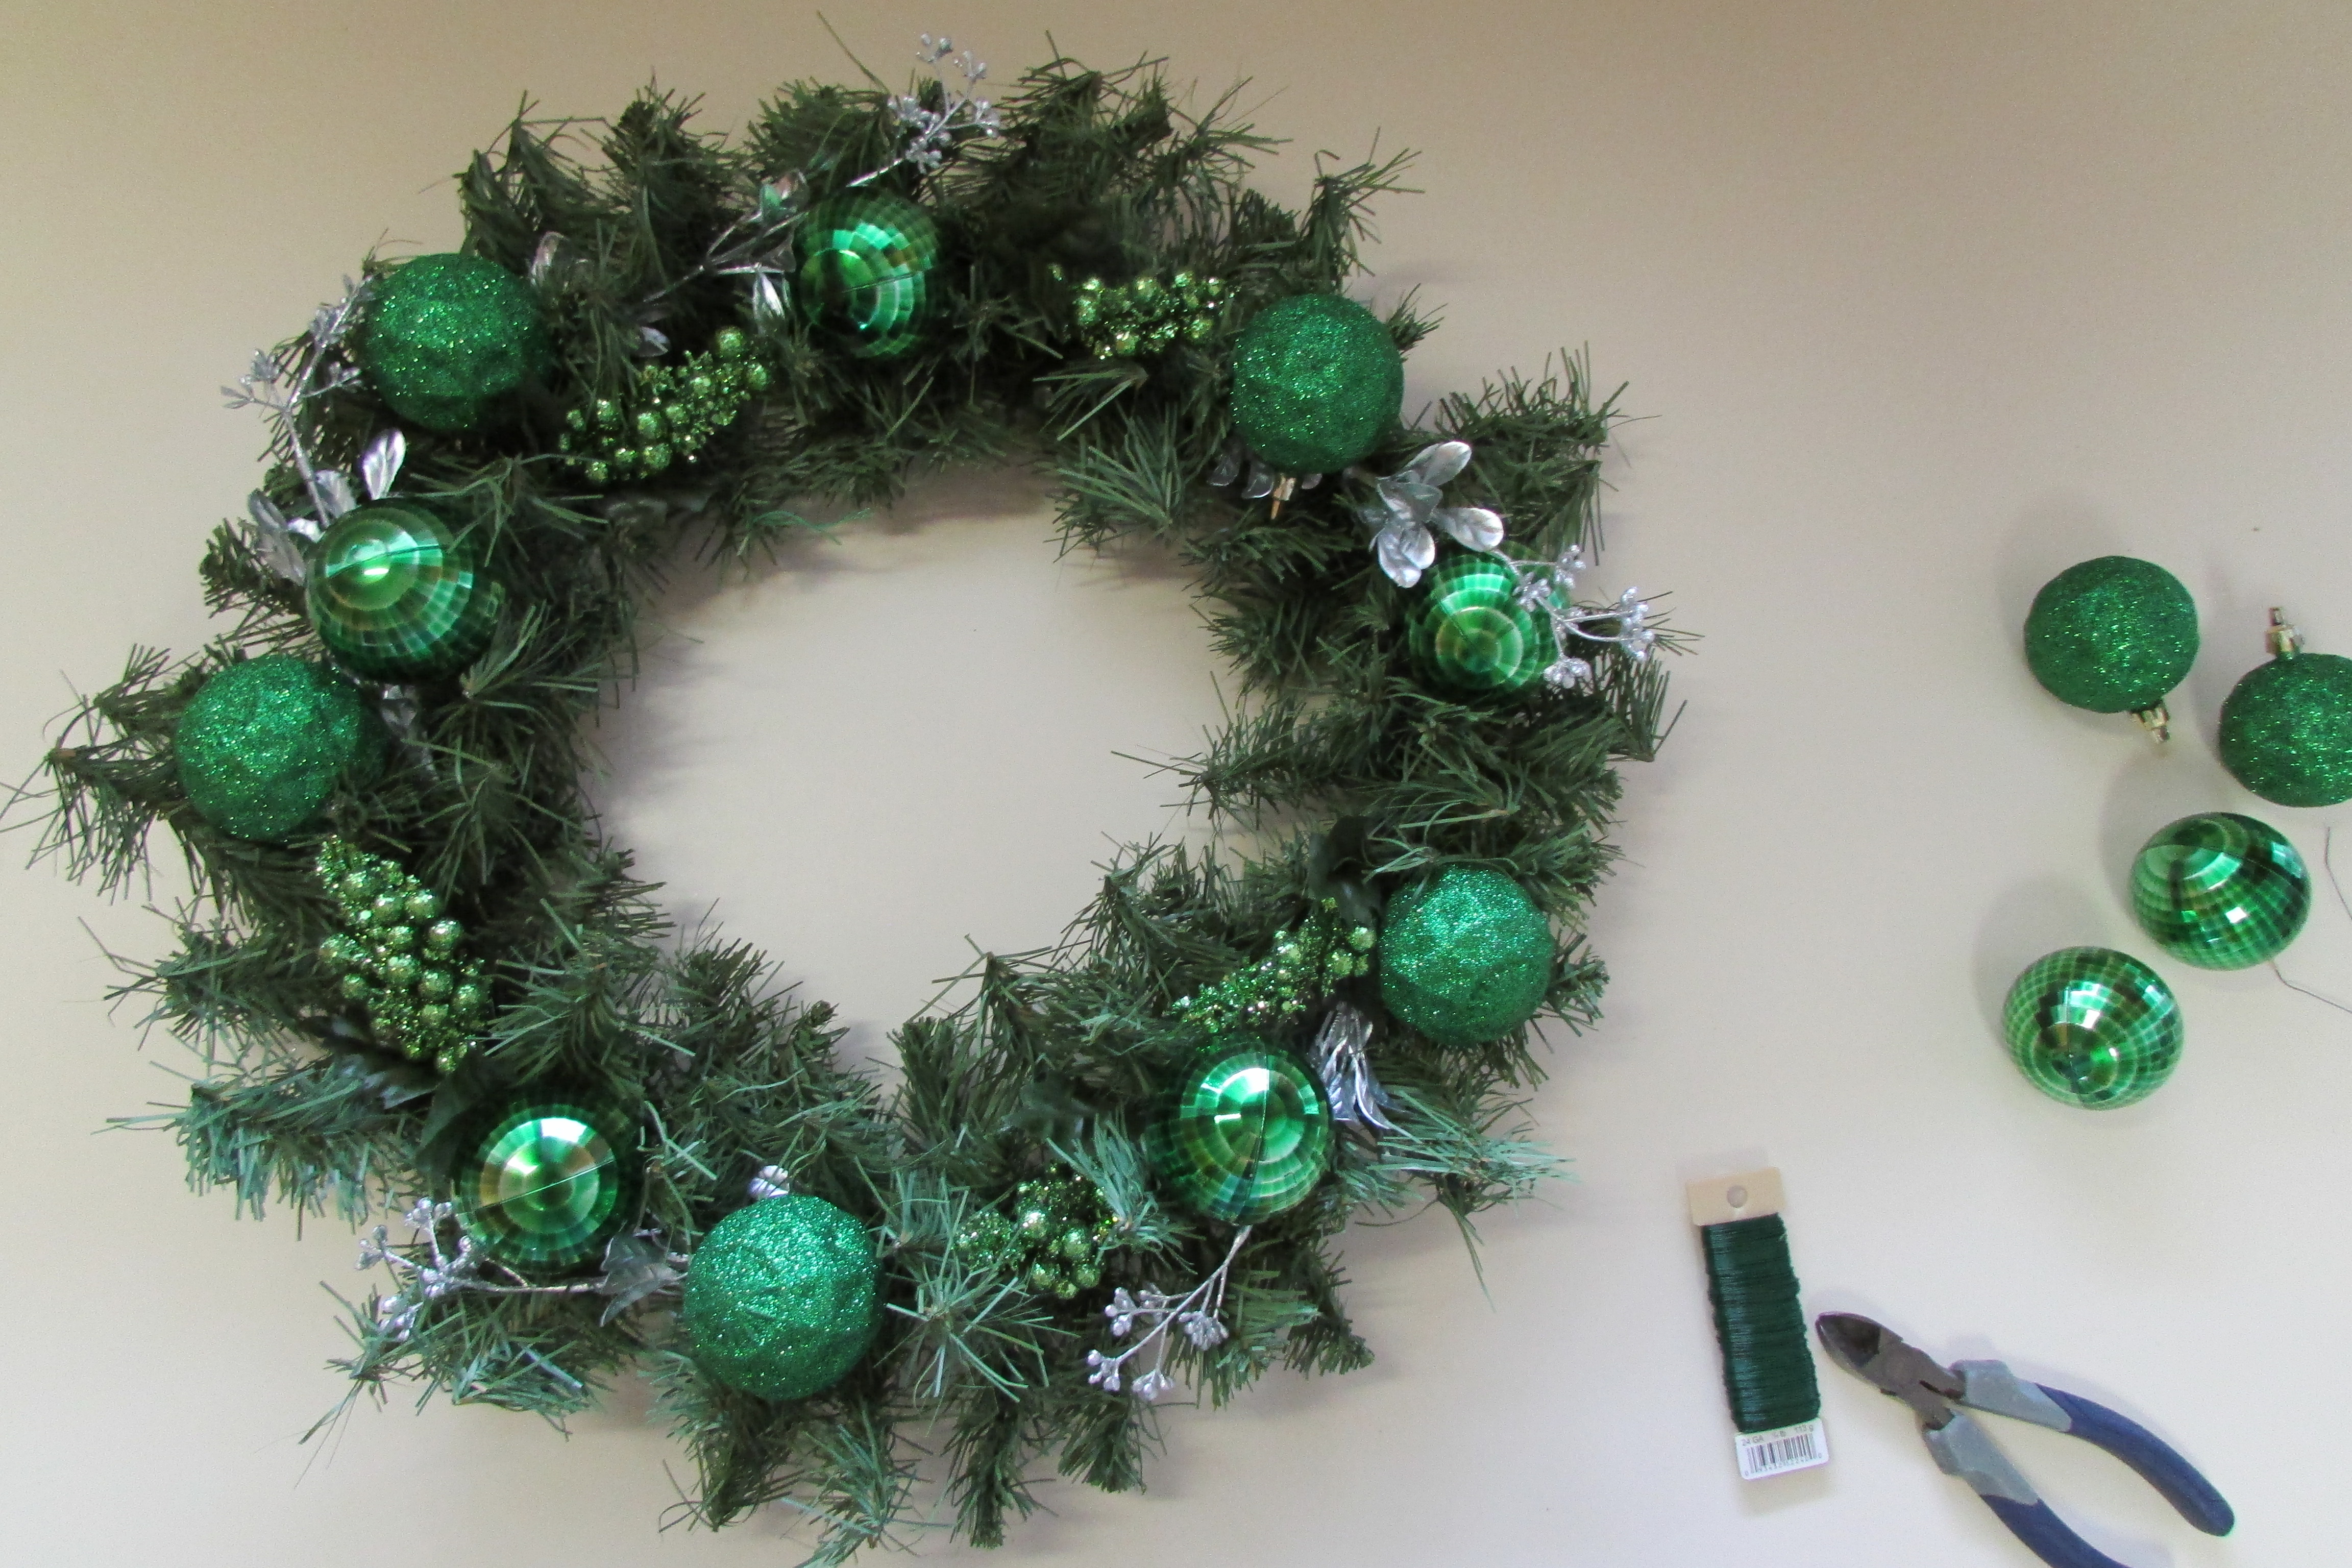 five glittered balls.
At that point I liked the composition that I came up with; and knew how I laid out the decorations. I took everything off of the wreath and wired them, layer by layer, just as I’ve showed you, as I composed the wreath.
When wiring each element to the front of your wreath, take your florist wire tail and push it through the wreath to the backside, and twist the wire twice around the wreath’s frame to secure your piece. After that twist the remaining bit of wire around any of the tips of your wreath, and finally bend the end tip, of your florist wire, back into the wreath.
If I were going to add a bow to the wreath, I would Making a No Tie Bow, but I did not want one on my wreath. I have hung five un-decorated wreaths with big bows on all of the windows on the front of my house and wanted something, that went with, but was a bit different for the front door. The next photo shows me out front, and you can see one of the other wreaths.  If you find the snowflakes attractive, that also grace my windows during the Winter months, learn how to make them by reading my post Cutting /Making Paper Snowflakes.
So there you have it, the basics for assembling a wreath. You can make yours simple, as mine is, or keep adding elements to take it over the top; it all depends on what you are going for and how much you want to invest in the project. My Walmart wreath cost just $2.48, the three bunches of shiny and glittered plastic bulbs, also from Walmart totaled $2.97 and the two mini bushes of foliage/glittered berries, from Michael’s were two for $2.99. If a bow was added to the wreath, the ribbon would be a few dollars extra.
Now I want you to go back to the stores that sell the expensive and fancy wreaths. I want you to look at how they were composed. Look to see what was the first layer, and then what was added after that, until the wreath was completed. By knowing what you are looking at, you can figure out how to construct it and what elements you will need to make a wreath that is perfect for your home.
Merry Christmas to you and the Happiest of New Year.
Companion Posts on Fred Gonsowski Garden Home.com….
Putting Lights on a Christmas Tree 11-3-2011,
Christmas Tree Decorating..Step-by-step…Like a Pro 11-13-2011,
How to Decorate a Christmas tree with Tulle 10-20-2012.


Thanks for the tips Fred! i wish you a Merry Christmas and a new year that is healthy and bright!
Patricia..A Happy Christmas and 2016 to you also *************A string of holiday stars***************************
Thank you for these instructions. I appreciate your process-oriented approach which gives me the freedom to make something beautiful with what I have access to (and can afford). I saw some wreaths at a “big box” craft store, but the prices practically scared me out of the store! They were ok, but sooo not worth the prices. I wonder, could I apply these principles to a garland as well?
Wishing you all the best this holiday season!
Hi there Heather, all of design is knowing what your are looking at, and figuring out how to do it yourself. Oh too often people like the way something looks, but can’t tell you why. The premise of this blog is to get people thinking, and I think you will now start analyzing things and figuring out just how to make them work for your purpose. Happy Christmas to you and have a wonderful 2016!