
Christmas Time is here at Whimsey Hill House
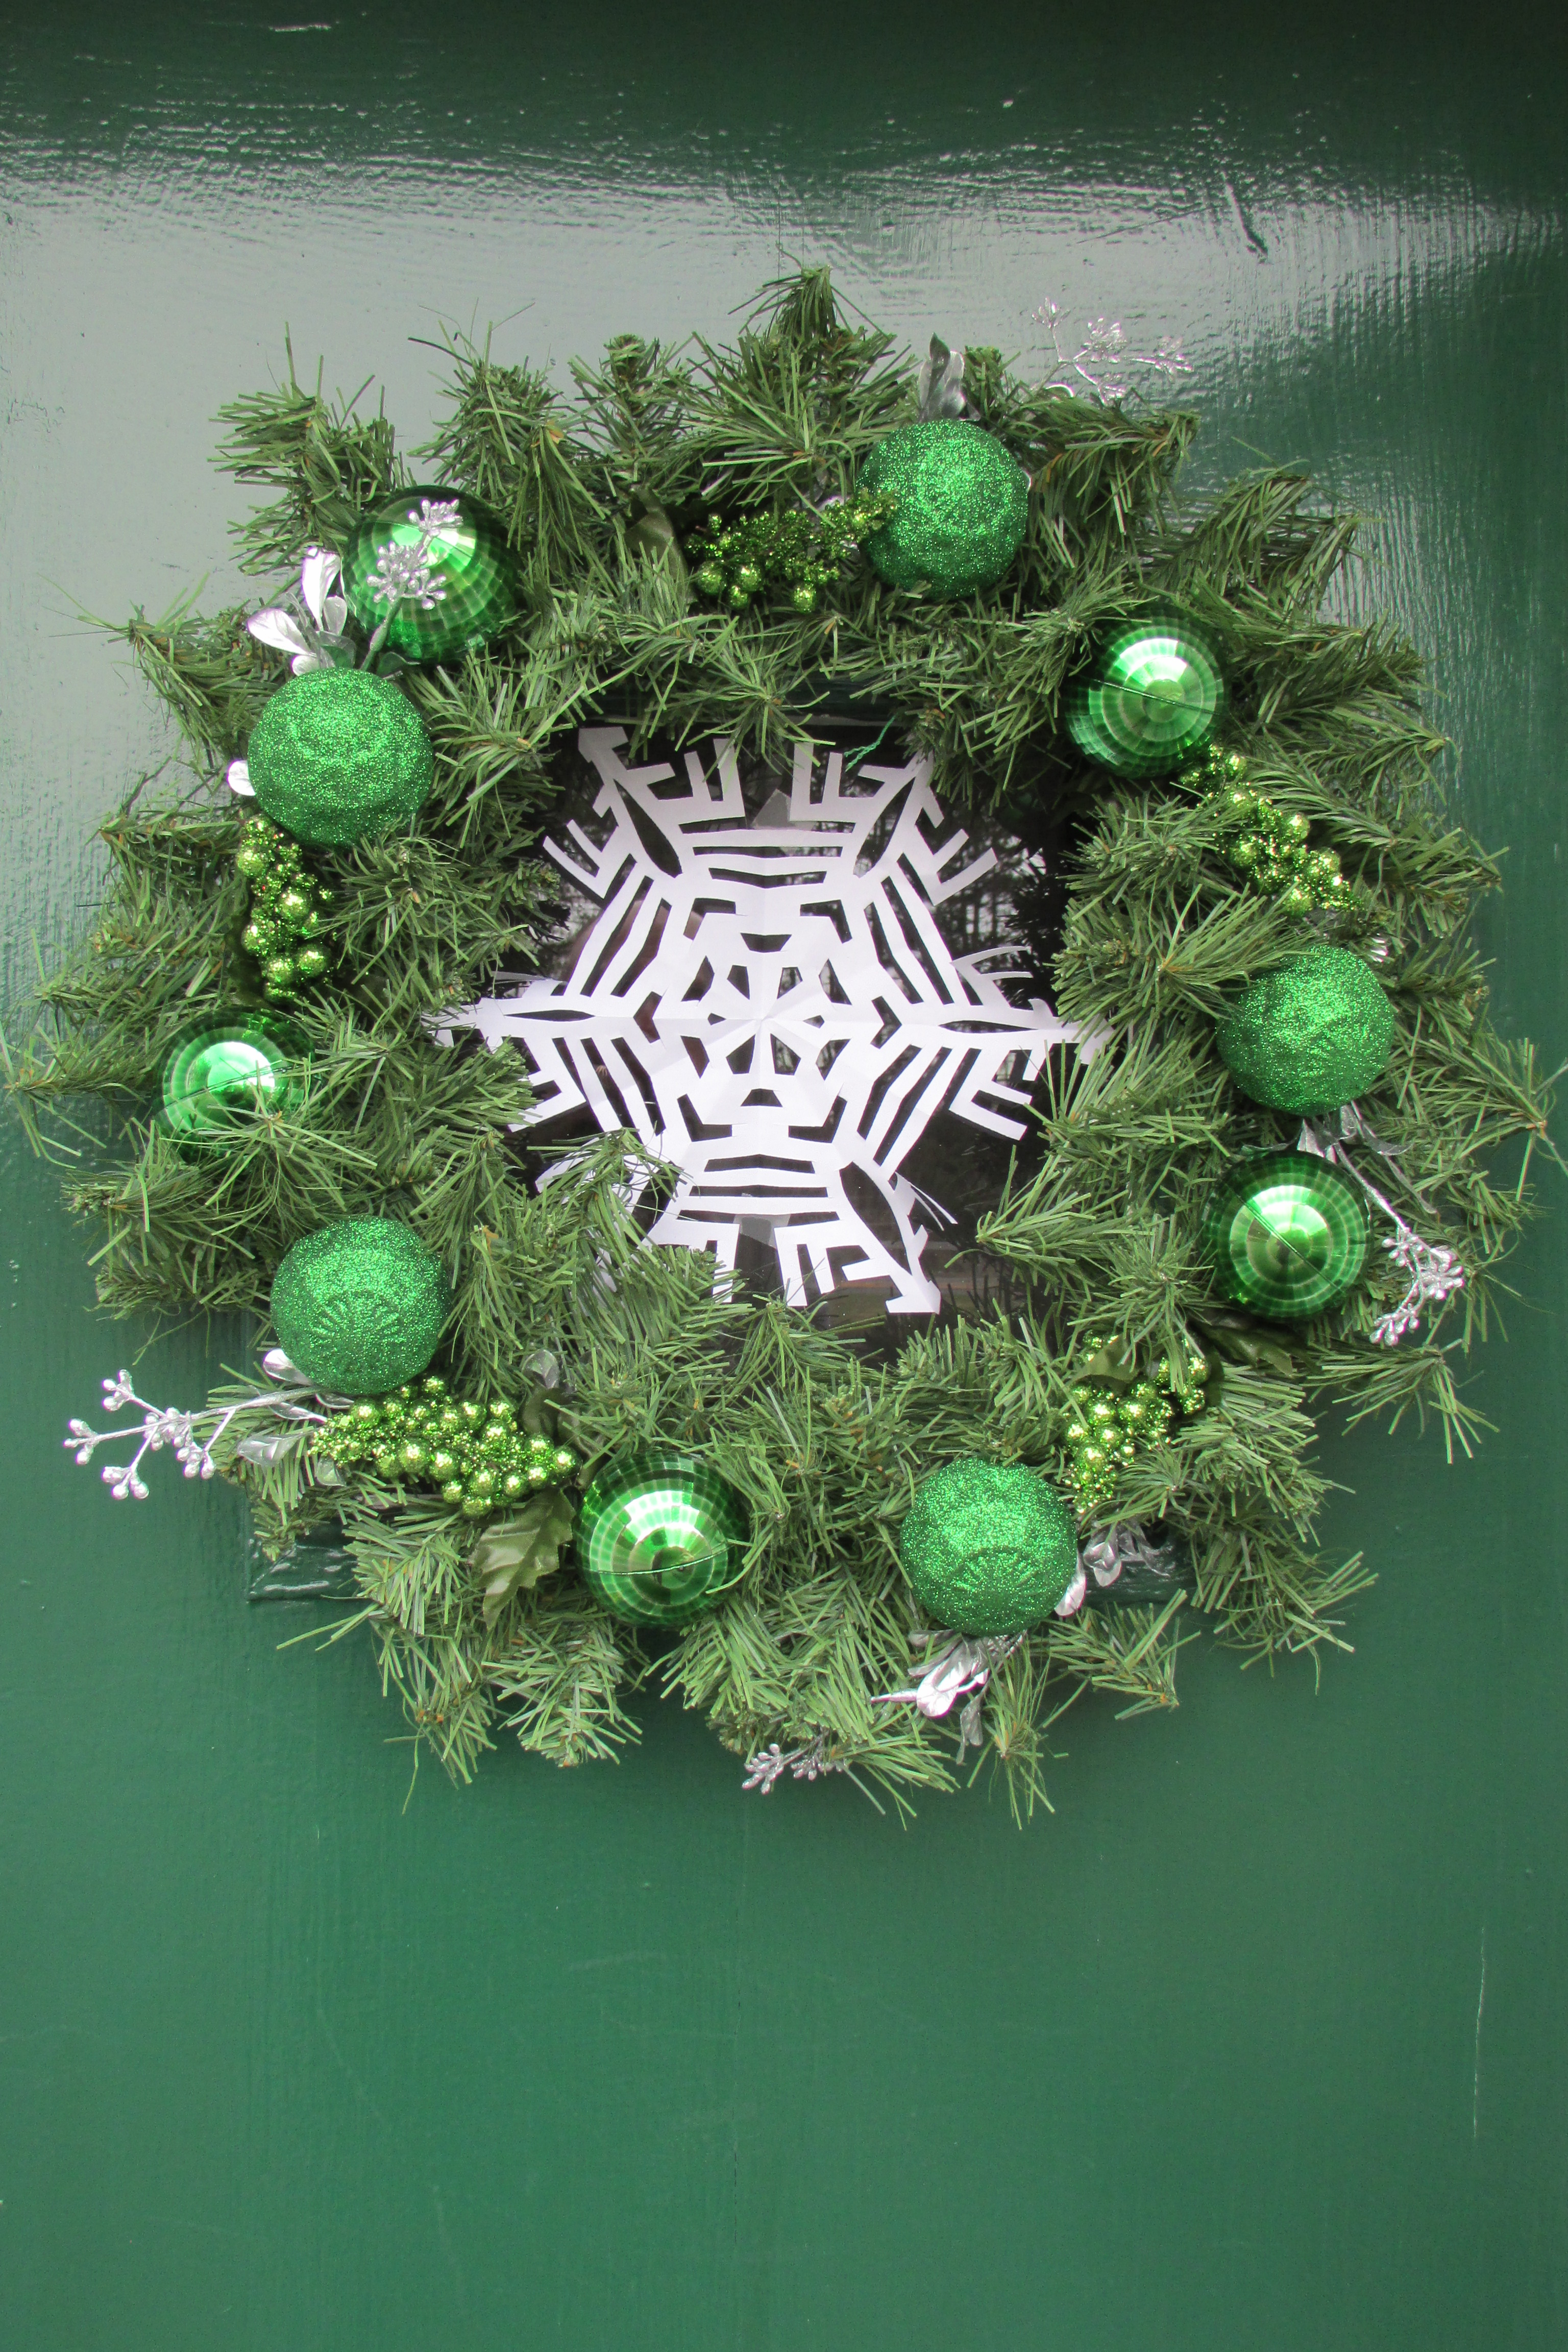
Christmas wreaths, that I’ve decorated, are hung on all the doors and windows.
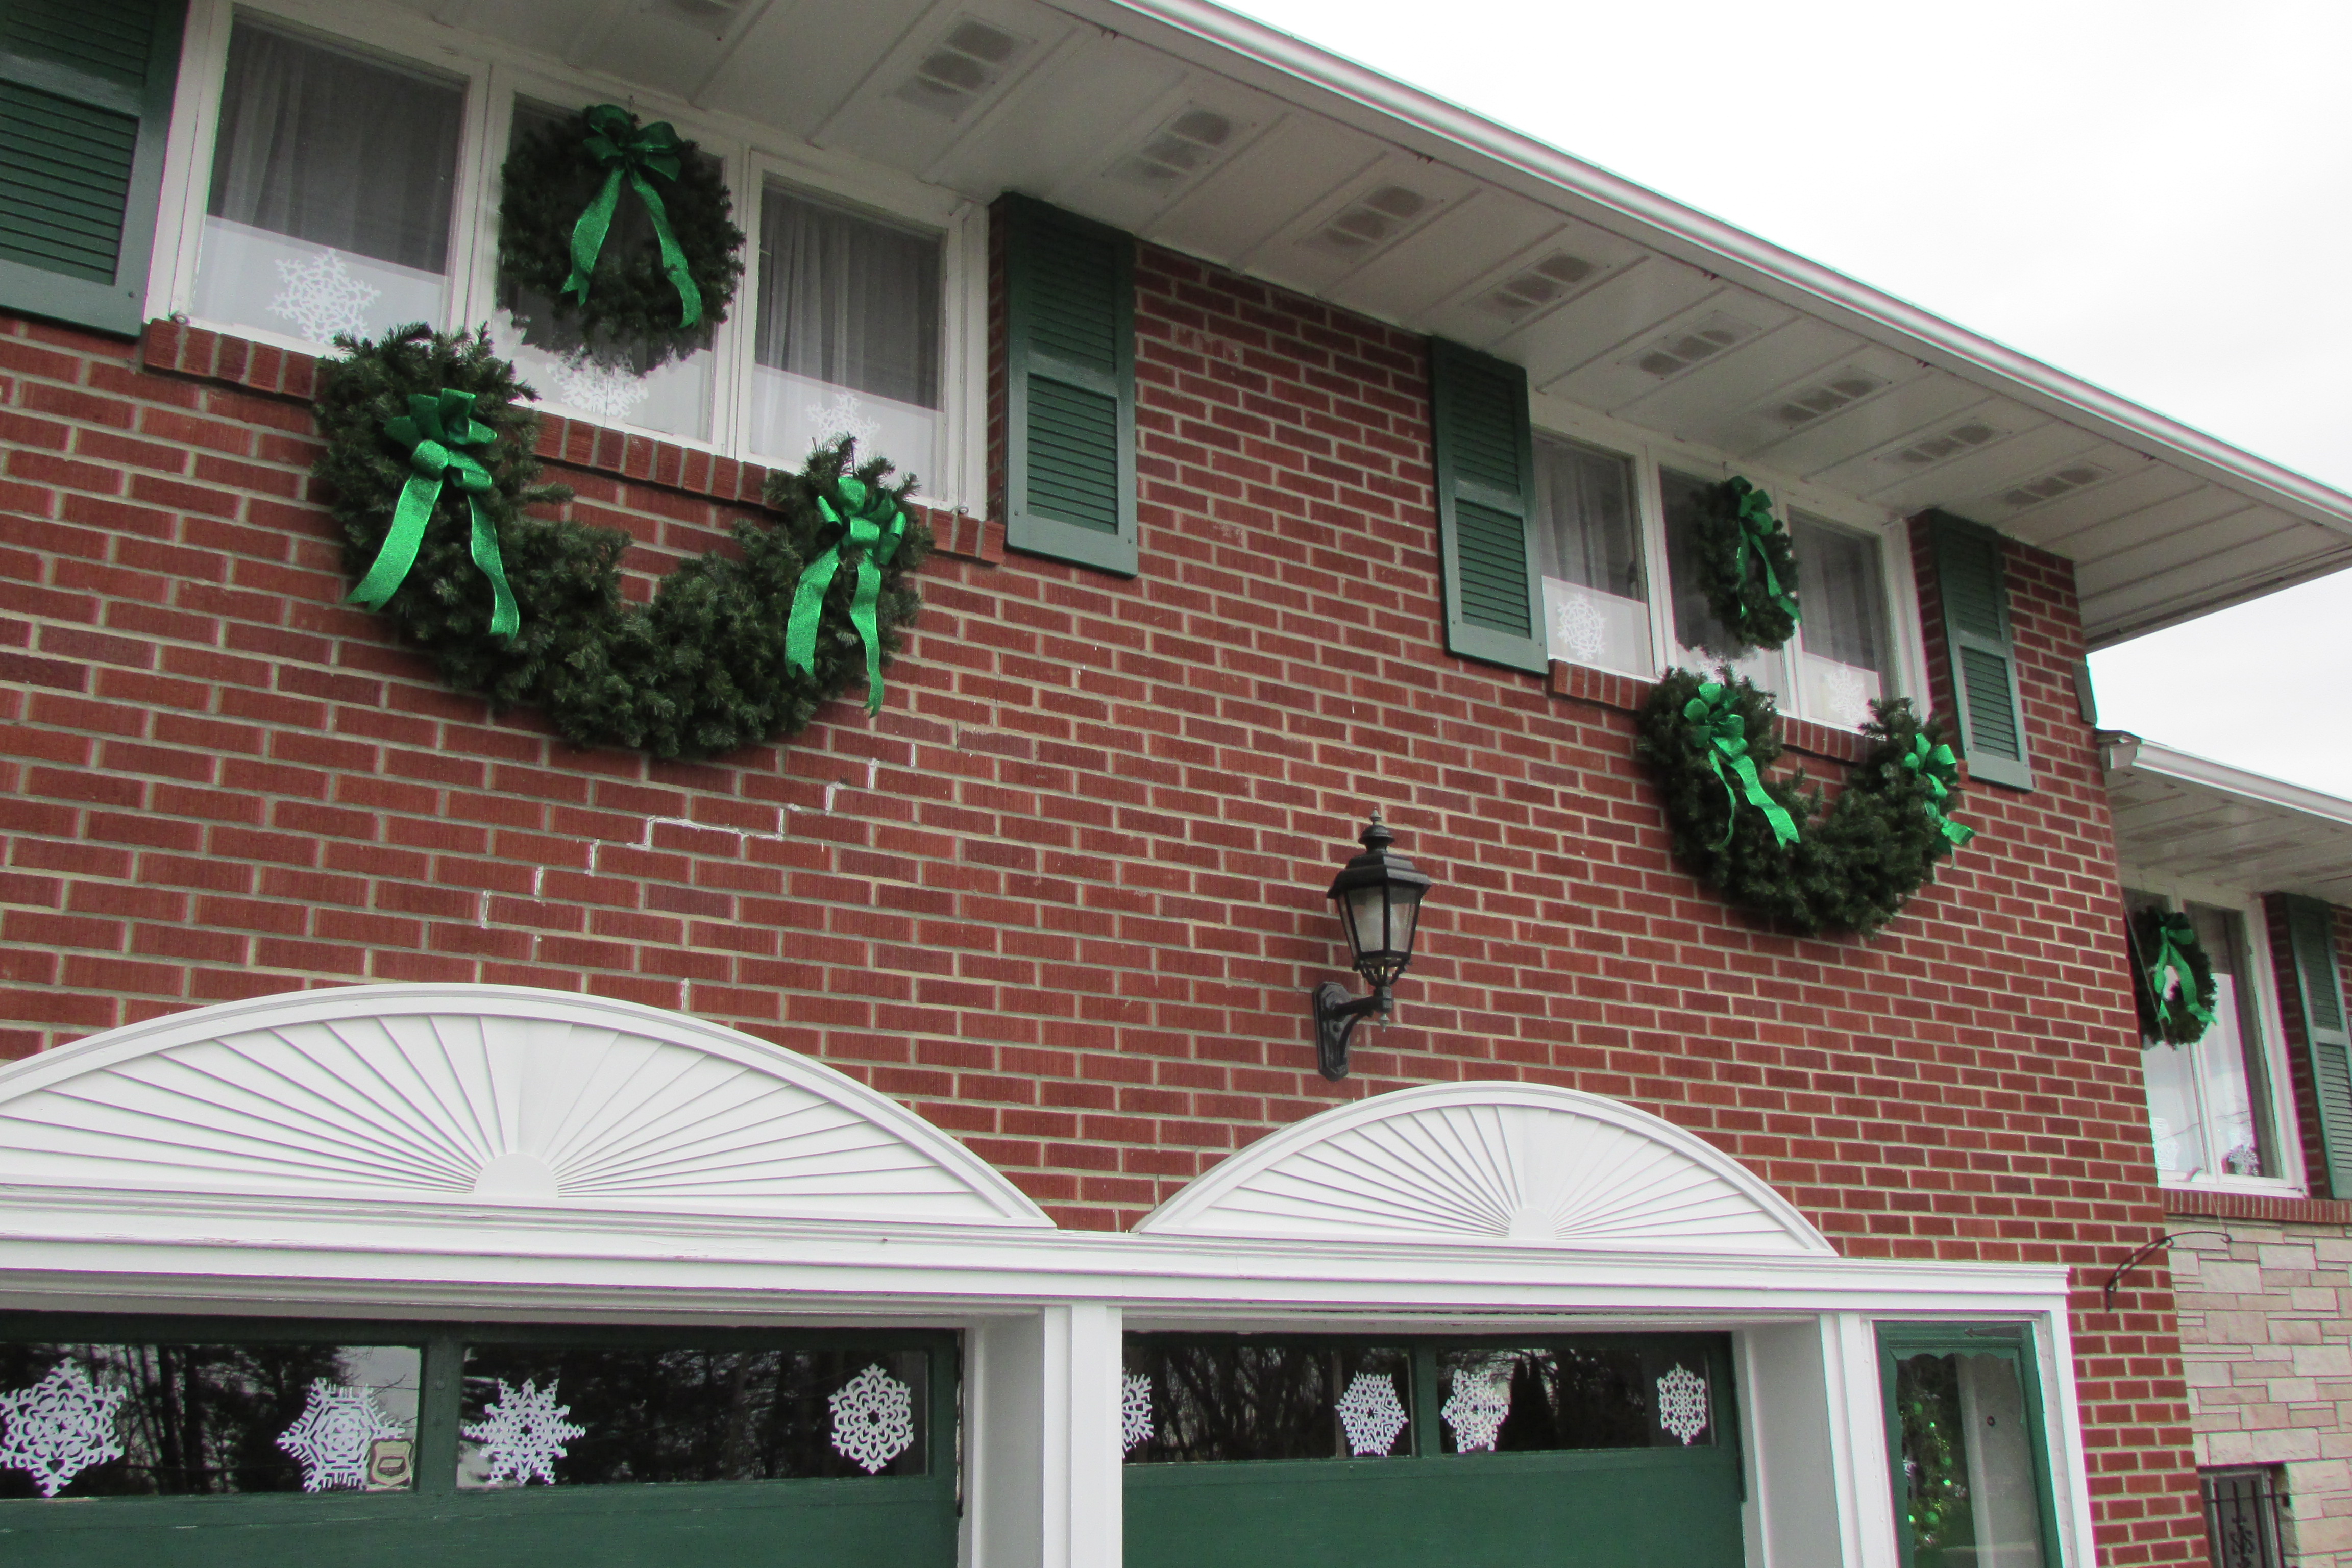
and large artificial evergreen swags and cut paper snowflakes add visual interest to the front facade of my house.
Christmas will soon be here, and this year I decided to do things a bit differently. A while back I was wandering through the holiday shop of a local garden center, and found three flocked artificial fern fronds that caught my eye, and they instantaneously inspired this years decorating scheme. The three flocked fern fronds brought to mind the words White Christmas. With the words White Christmas dancing through my head, I thought about things that were of course white, but also silvery and glassy like ice. Having collected a lot of different Christmas things for over 32 years, and even having some things that I had from childhood, I knew that I had enough product to work with to make a festive holiday display. So now let’s look at what I’ve come up with.
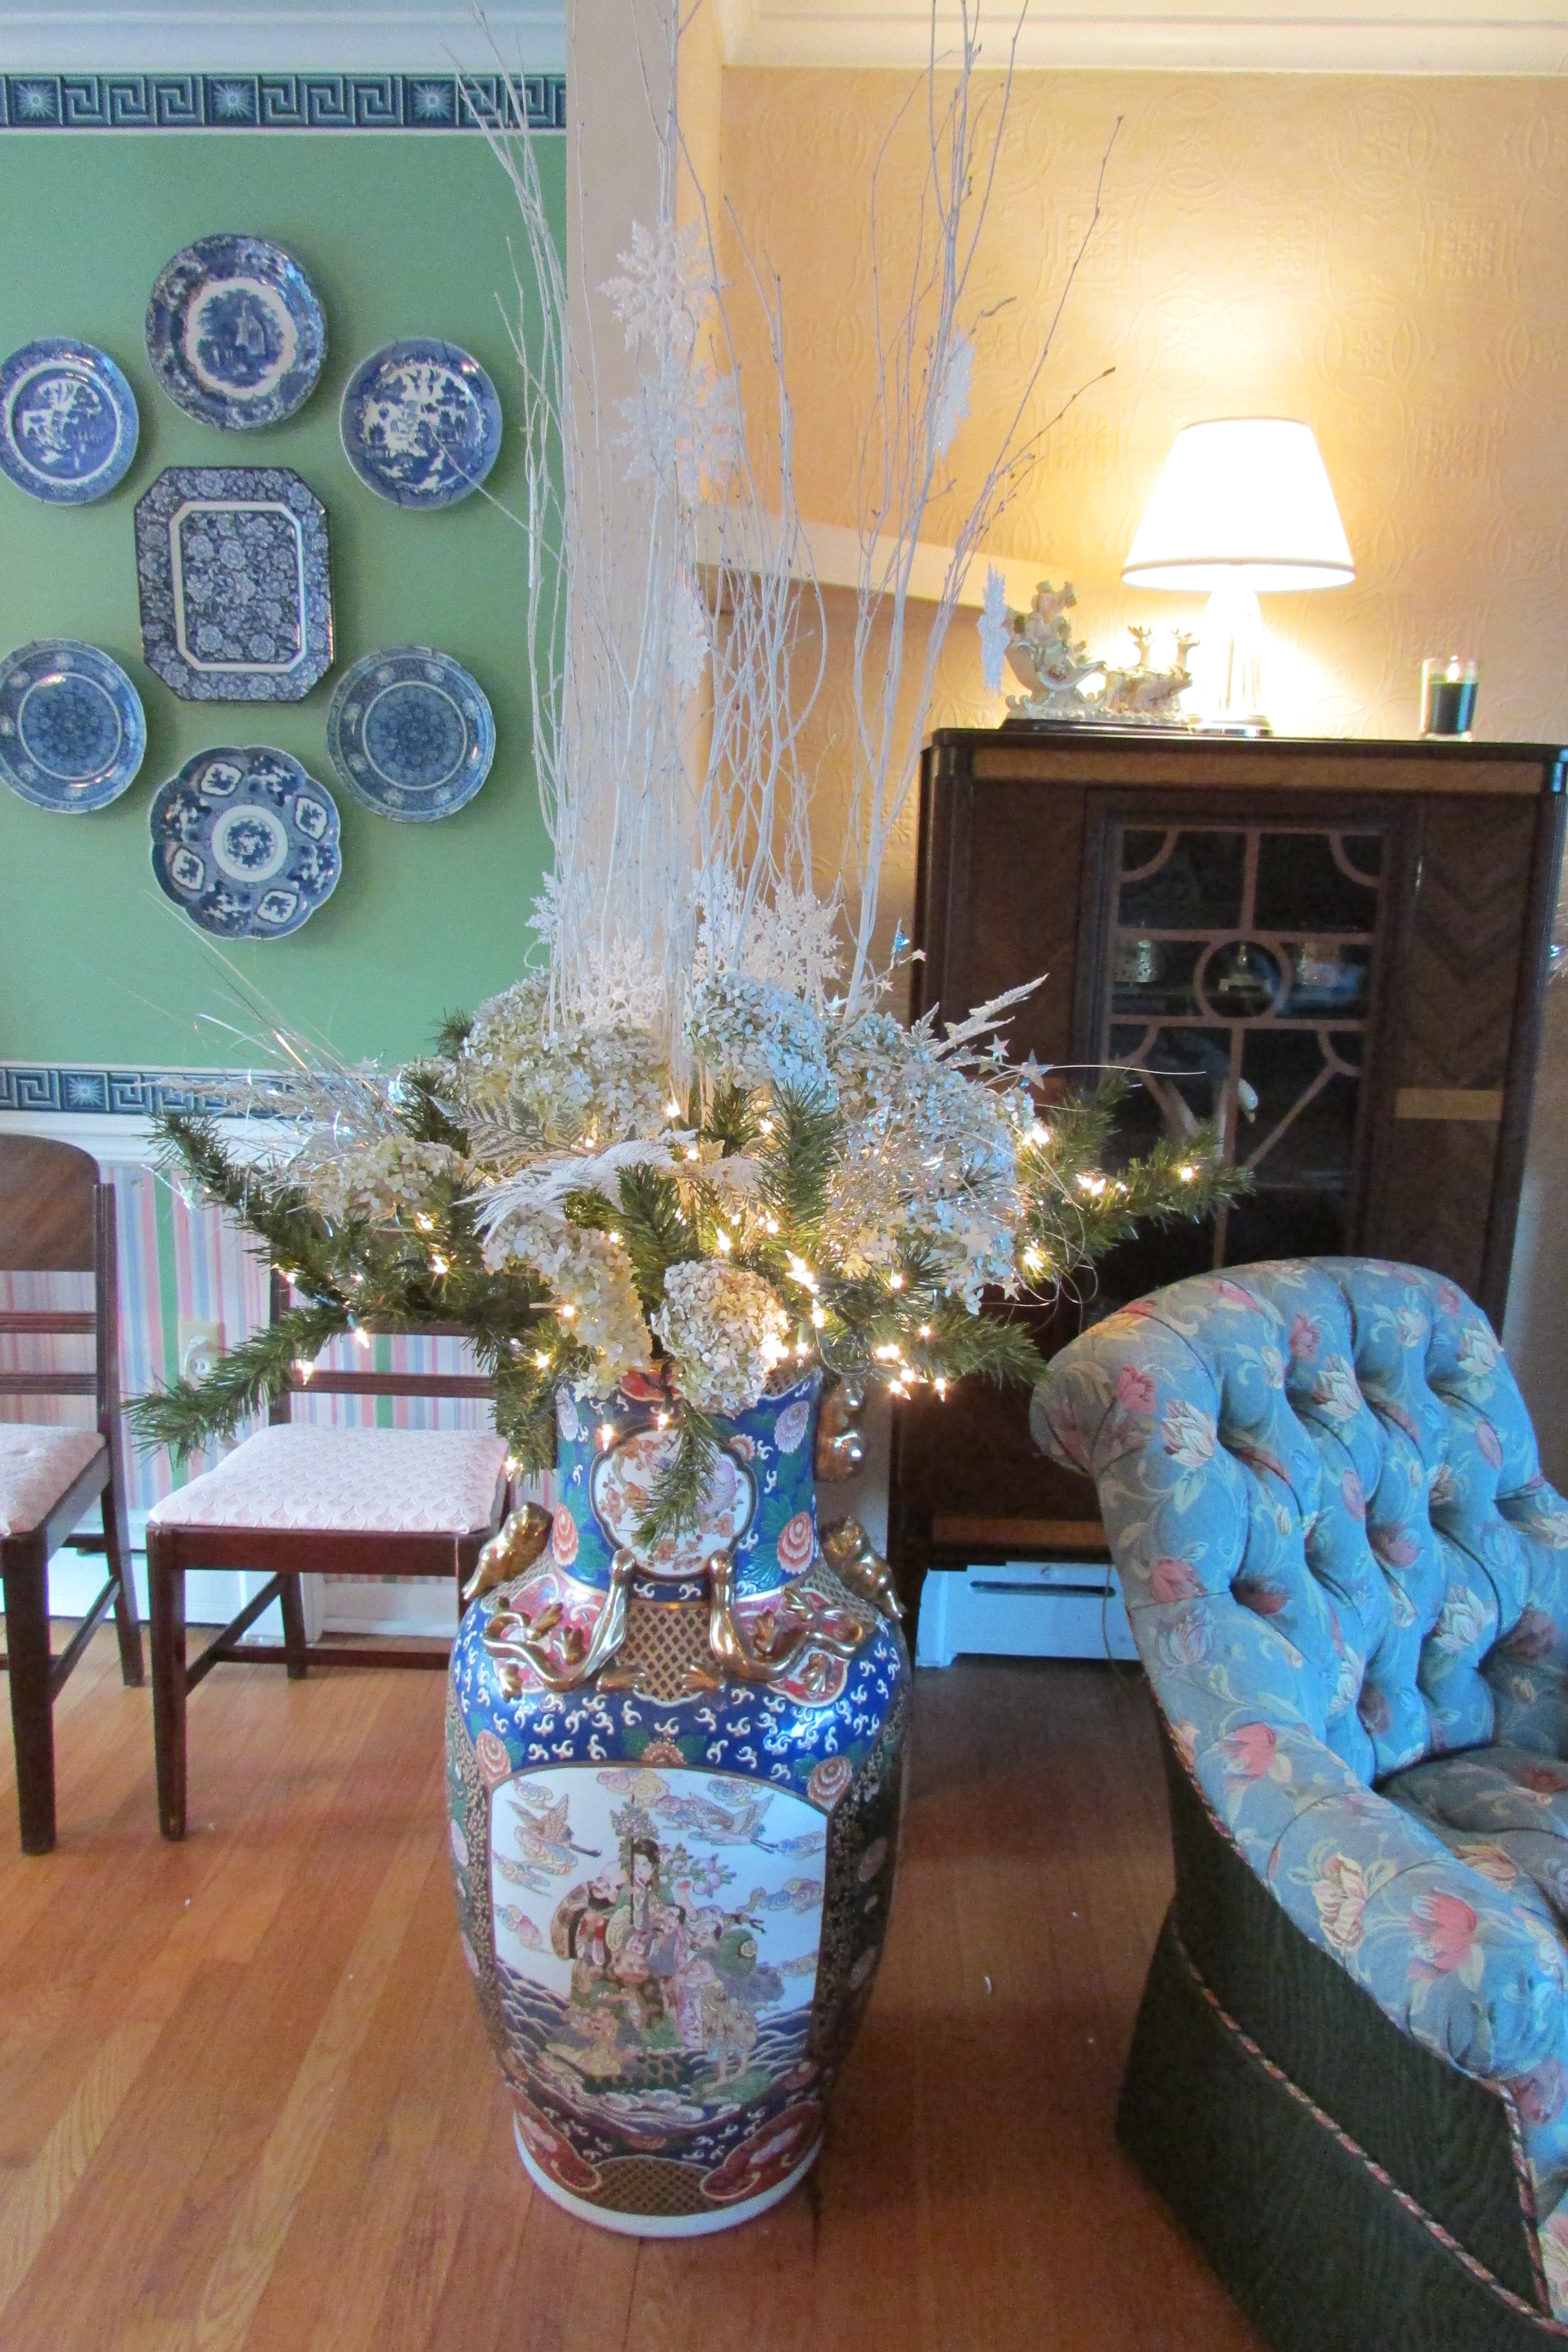
A large Chinese floor vase filled with wintry plant materials.
For years I’ve put up a large artificial tree in the living room, and some years even put up a second tree in the dining room. The trees were beautiful, but not being able to be seen from the road by passersby, I only lit them when I was hosting a holiday party or had someone over. These days I re-purpose my large artificial tree, using its parts as the base for many of the different arrangements that I place throughout my house. (To know more about decorating with an old Christmas tree read my post Some ideas for Repurposing, Reusing, Recycling and old Christmas Tree).
The above photo shows a large Chinese floor vase, that is in a space between my living room and dining room that I’ve filled with artificial greenery (branches from my old Christmas tree), the flocked fern fronds that inspired this years decorations, white-painted branches, white plastic glittered snowflakes and white sprayed hydrangea flower heads that I picked from my garden. (if you like, click on all the photos in this post to enlarge)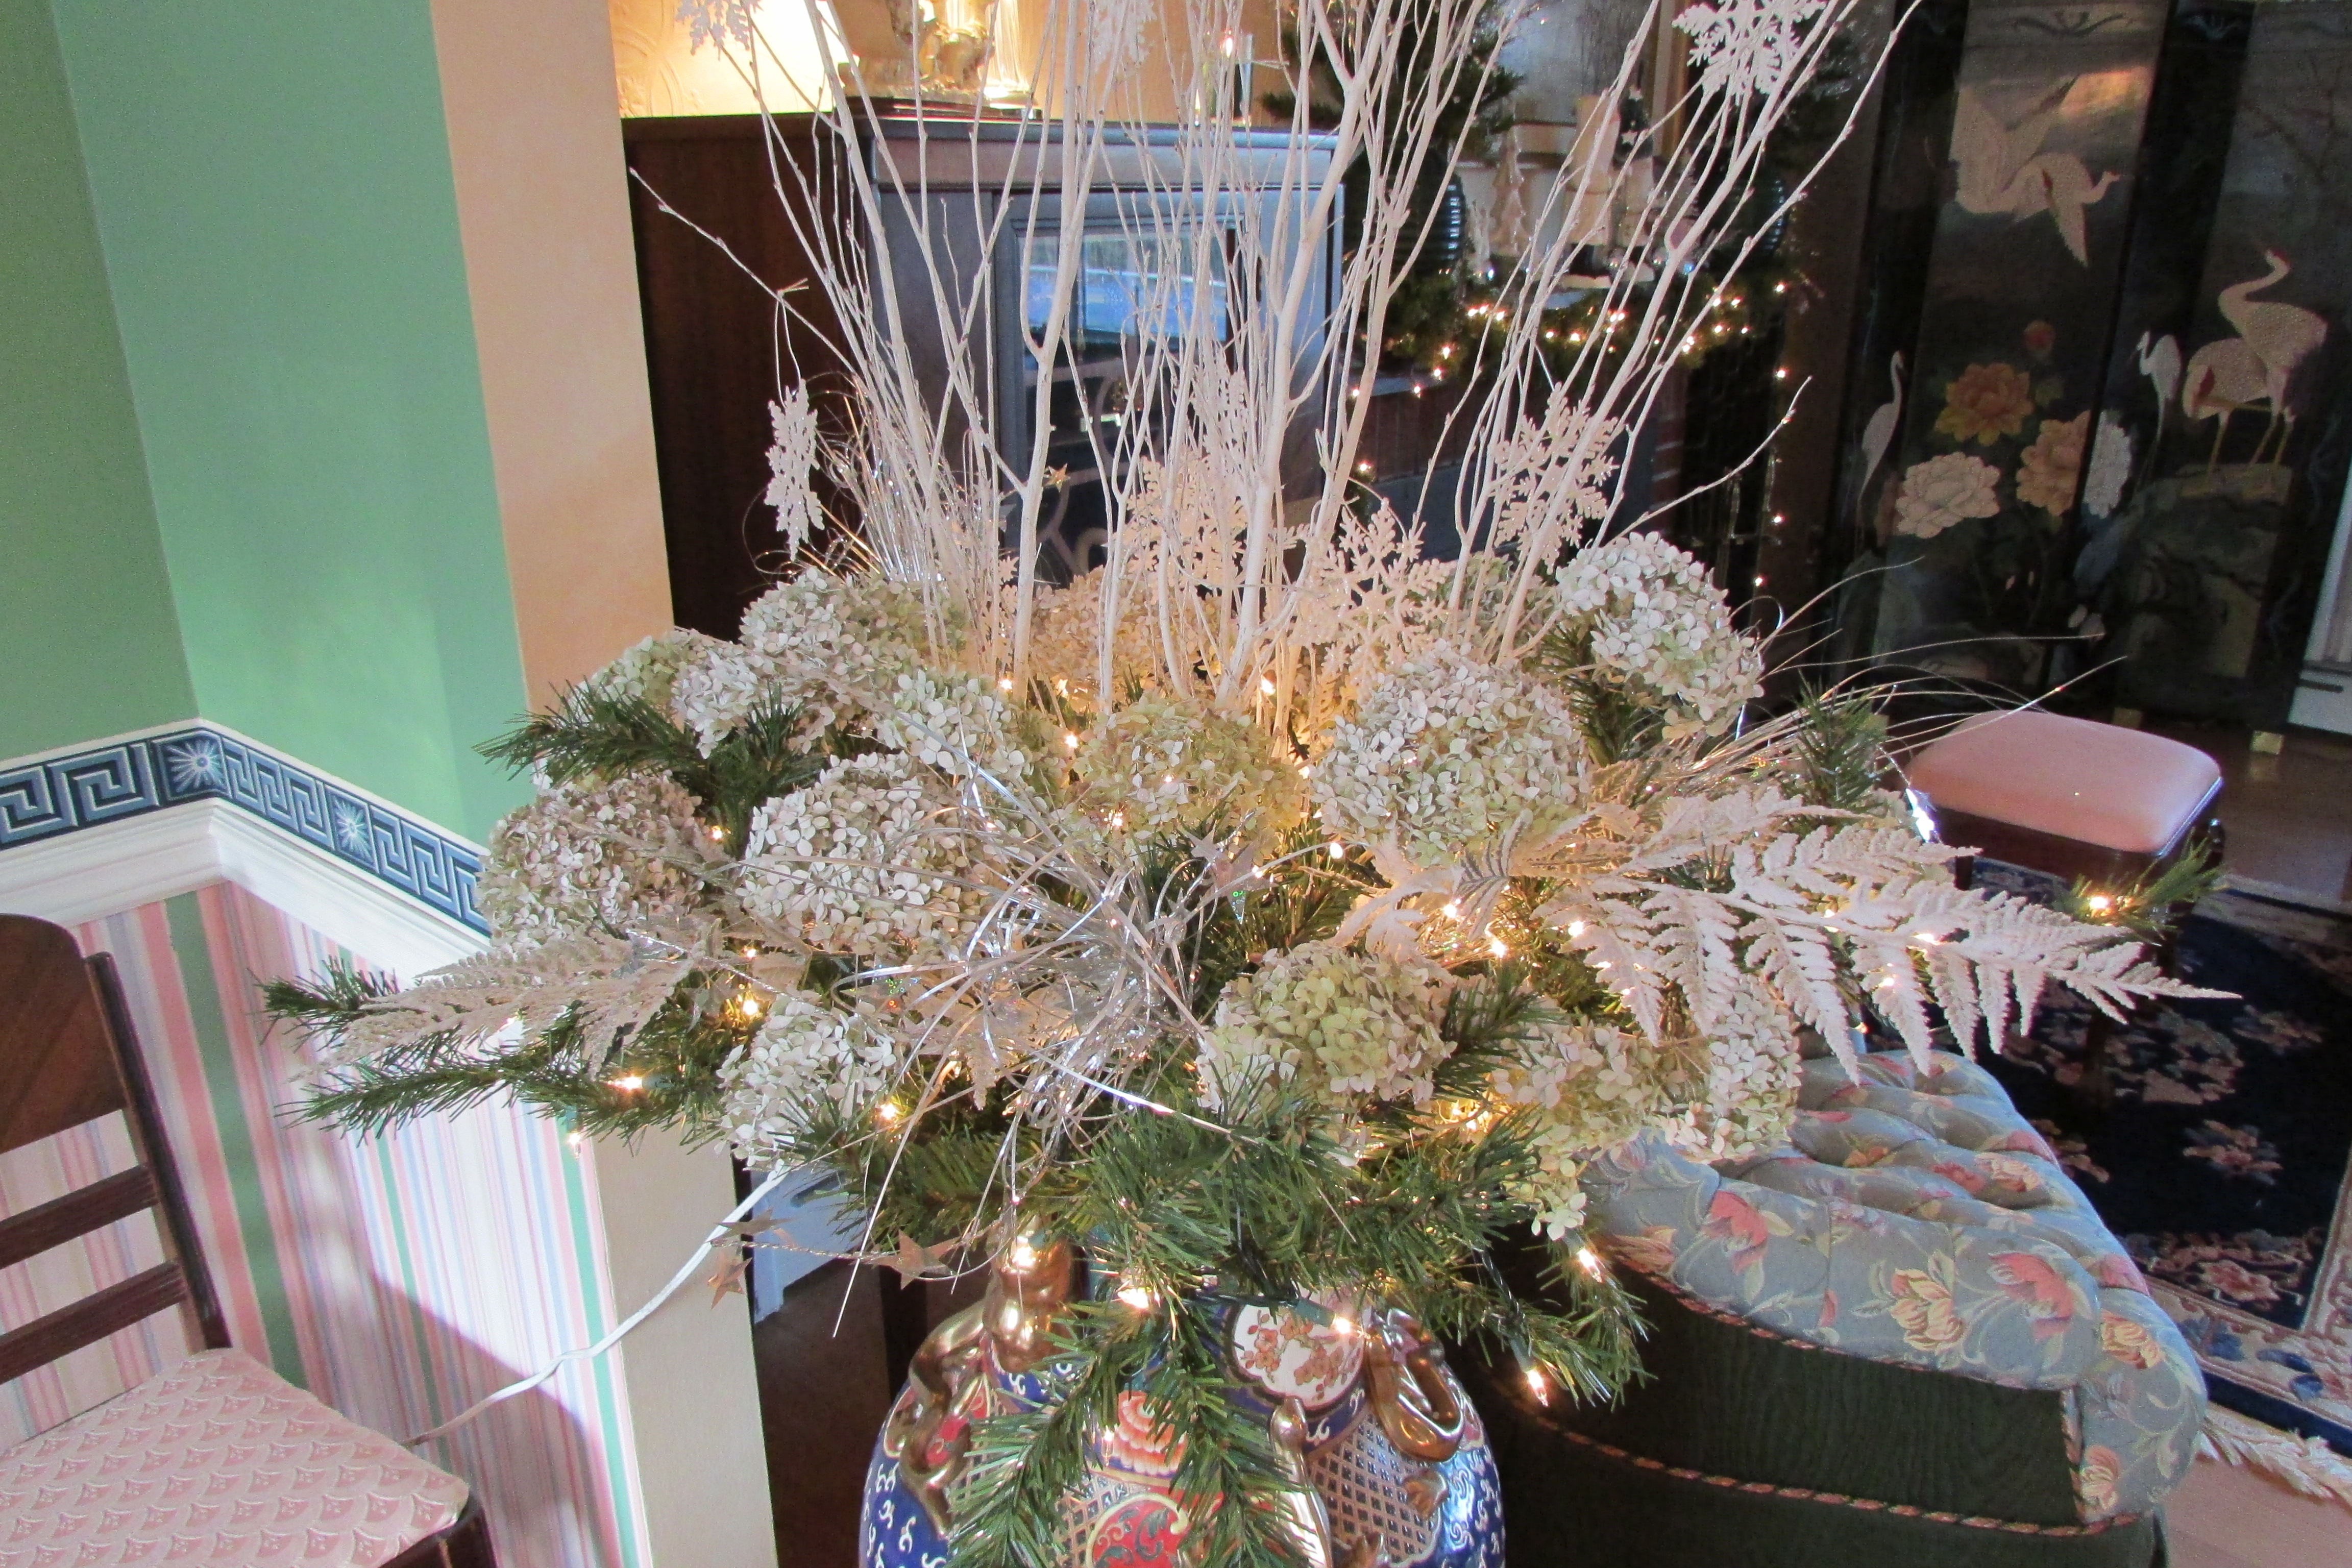 This is a closeup of the large living-dining room arrangement, which is a major focal point in the two rooms, and inspired all of the other decorations in those two spaces. Looking at the photo you can see that, for extra sparkle, white lights were strung throughout the evergreen base and sprays of thin tinsel-like silvered metallic decorations with stars were also added. The hydrangea flower heads in the arrangement were first sprayed with white paint, then after they dried two coats of Aqua Net hair spray were applied to firm them up which makes them easy to work with.
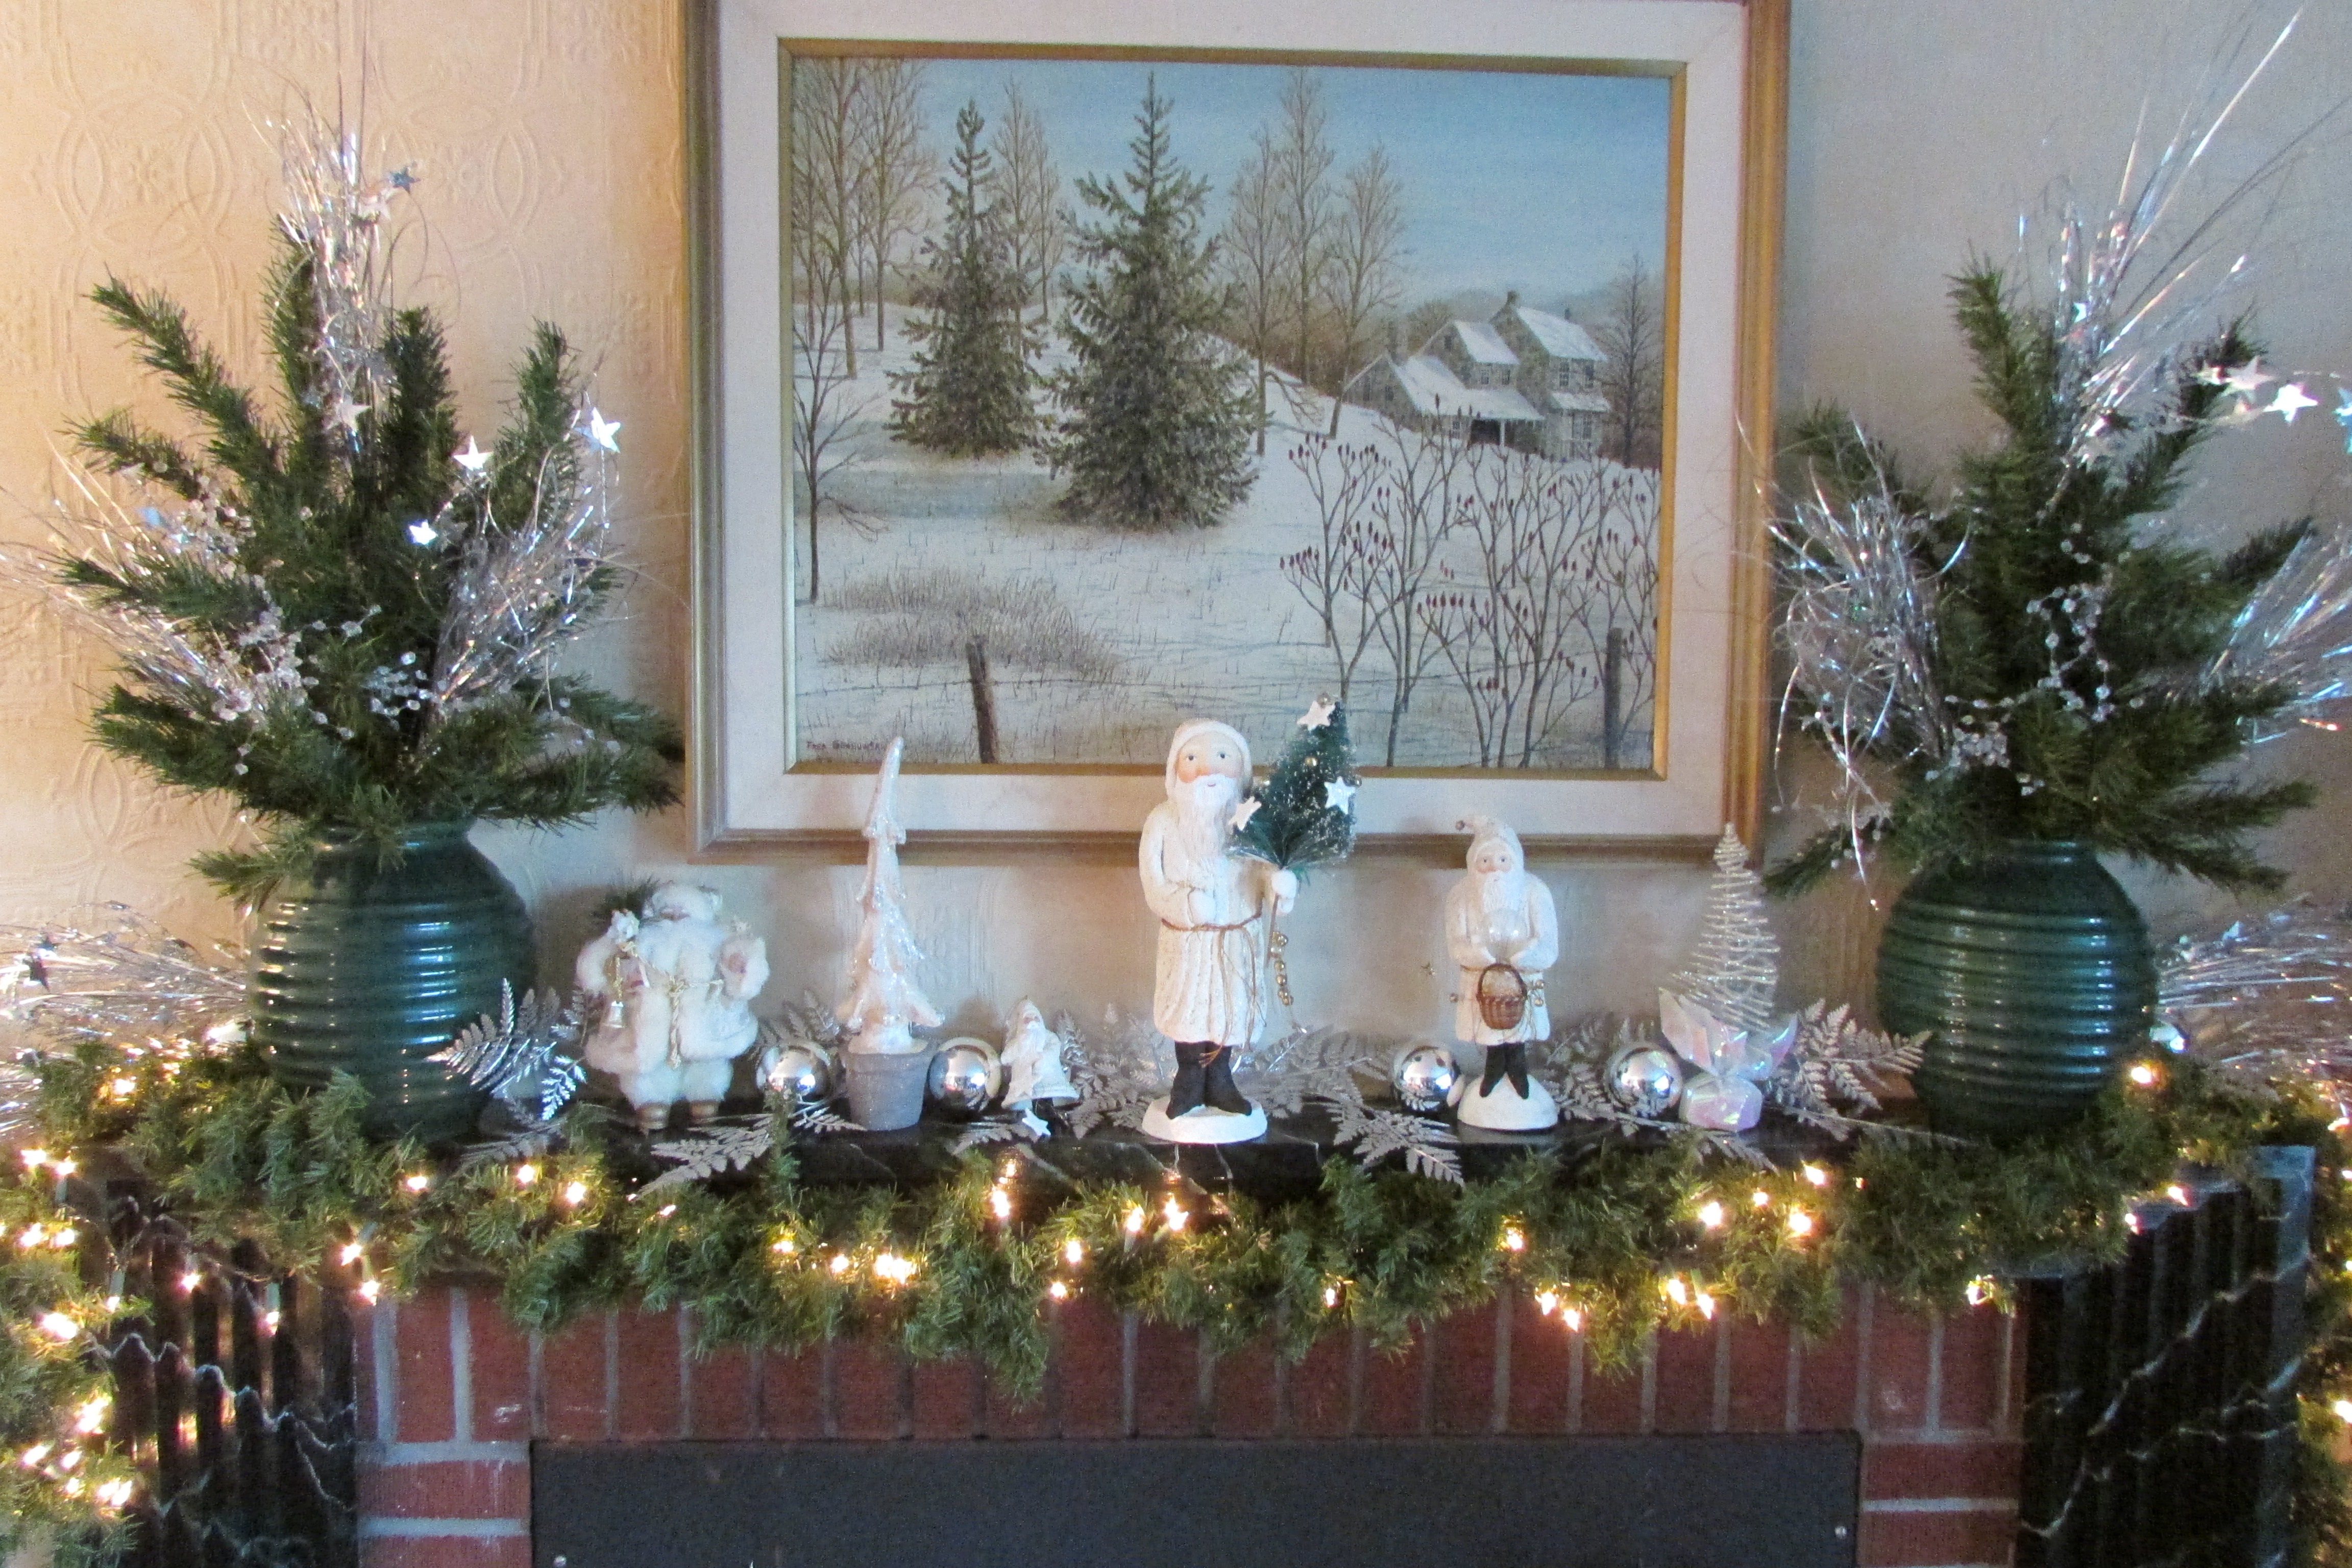
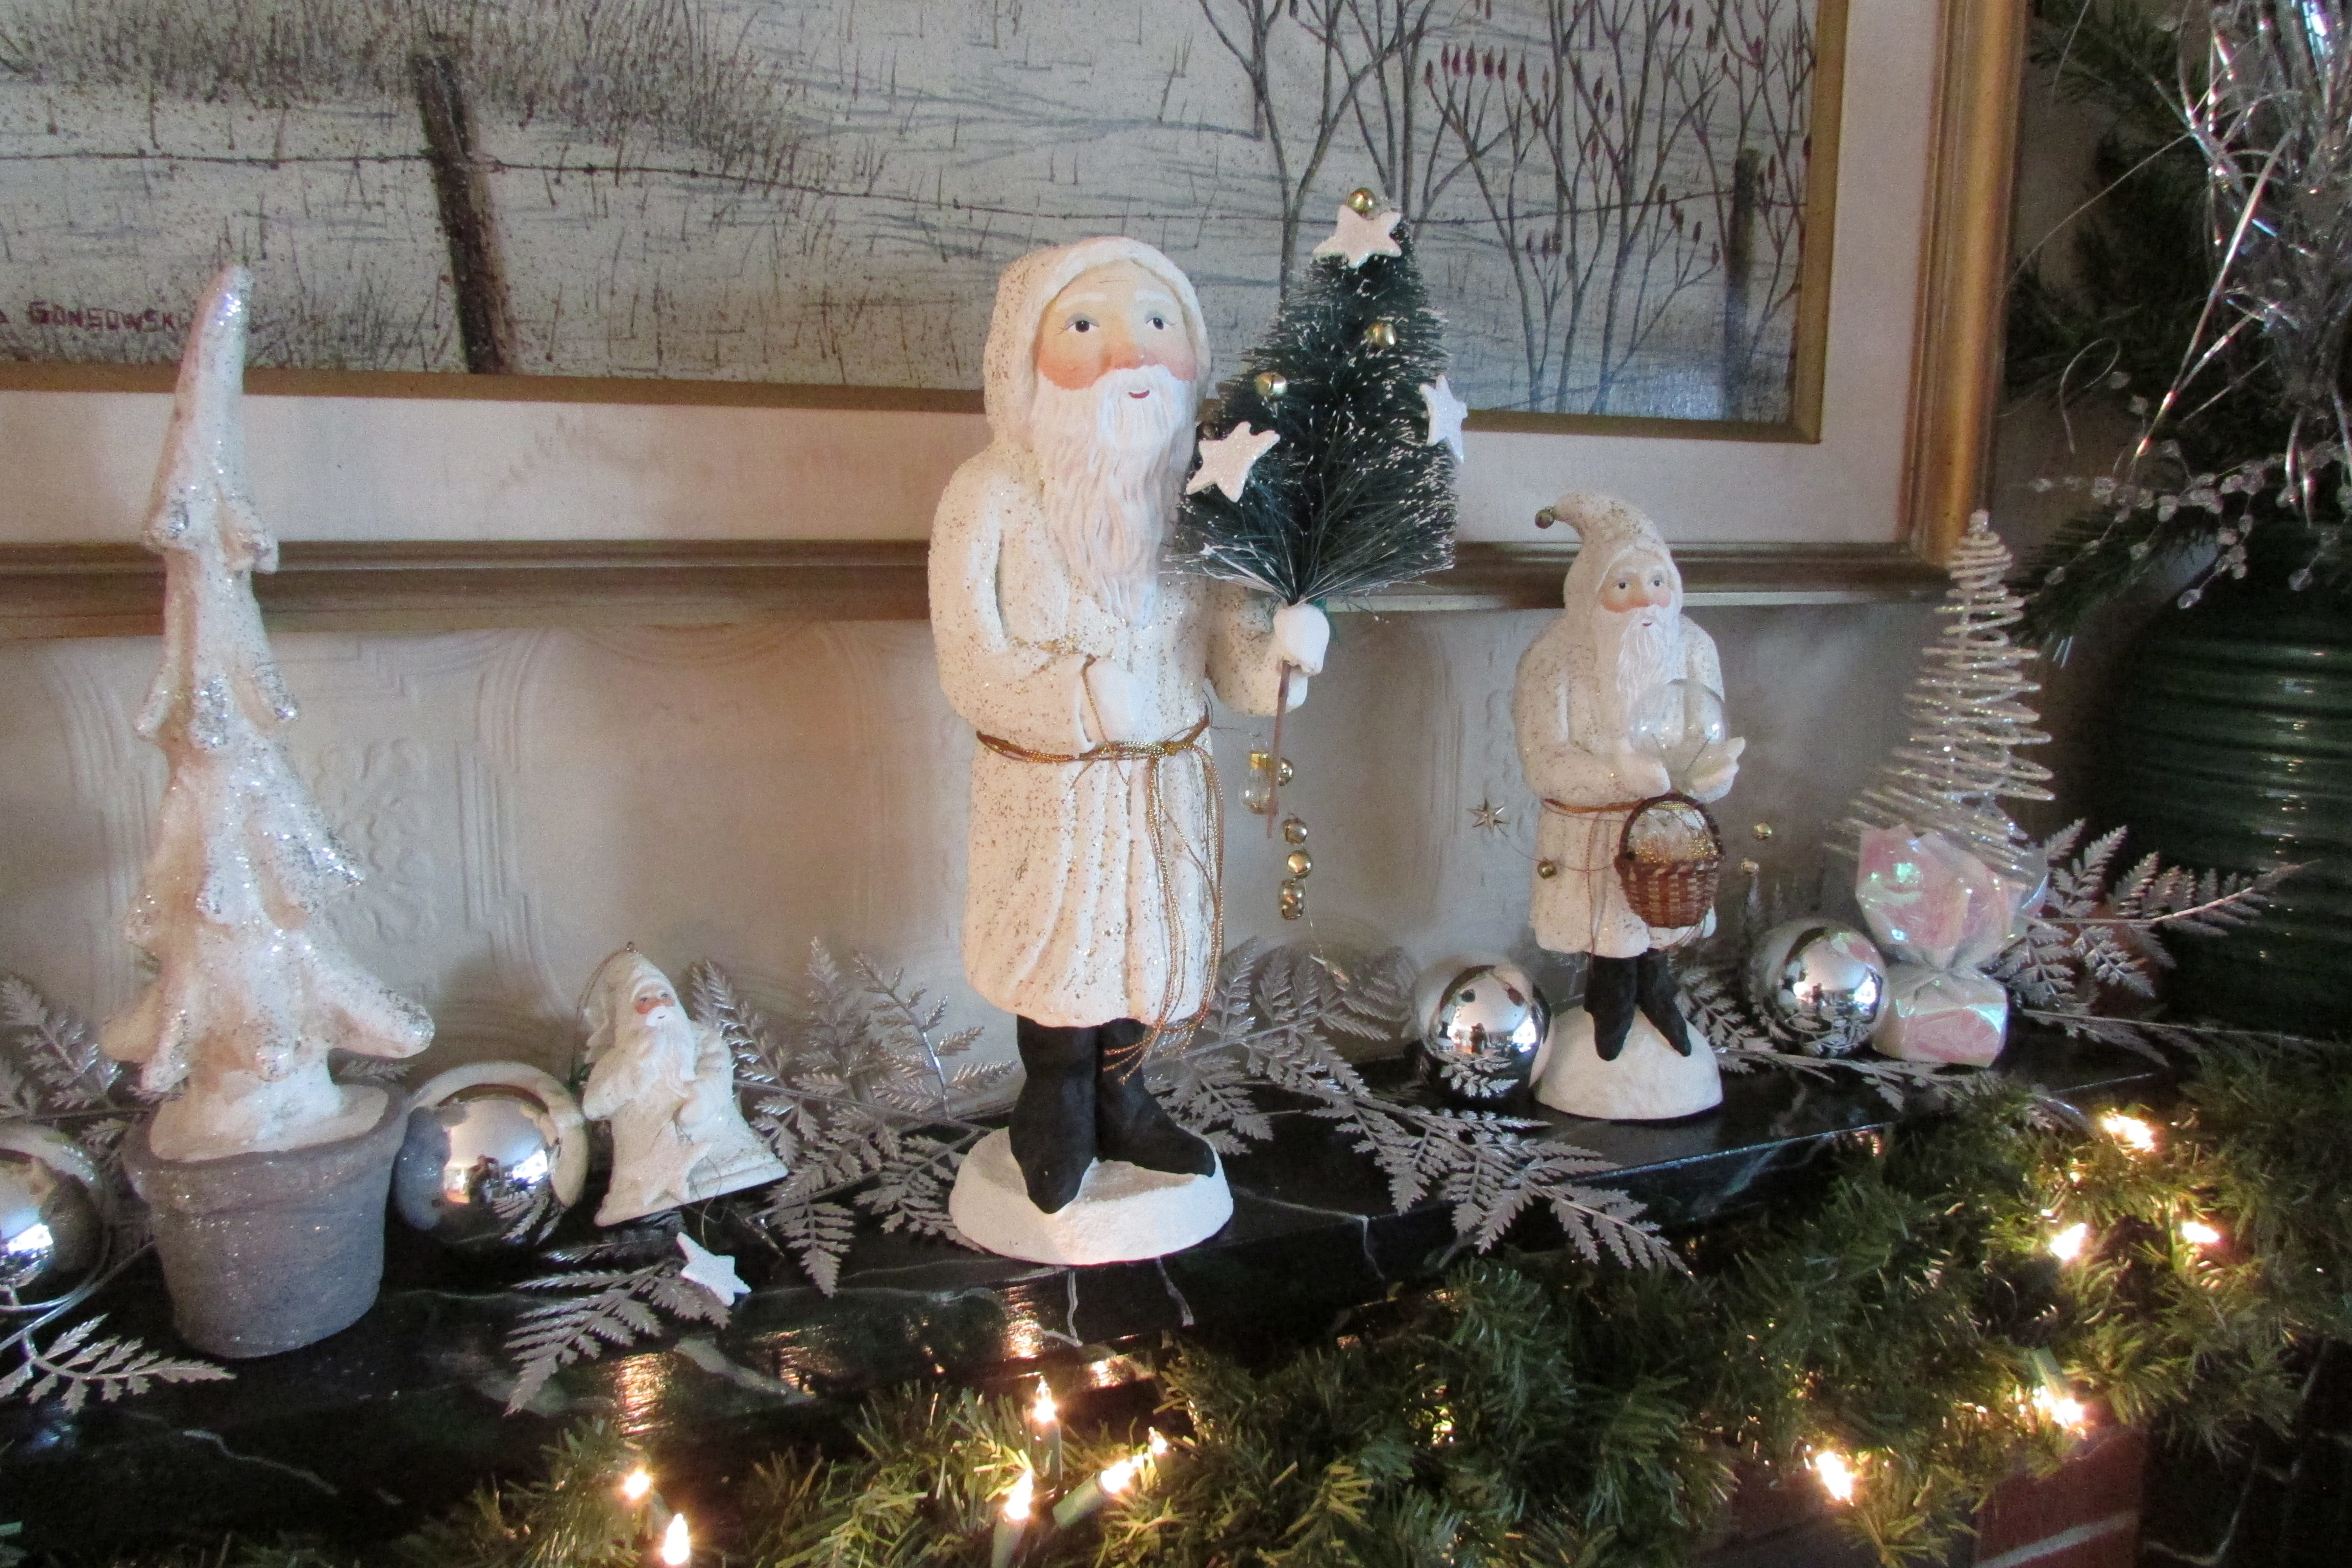 The next two photos show a collection of white chalk-ware Santas on the fireplace mantel in the living room. Looking between the first shot and the detailed closeup of the second photo, notice how the silvered plastic fern fronds move the fern shapes from the large arrangement in the Chinese floor vase to the mantelpiece, and how the silvered sprays from the large arrangement in the floor vase were also used in the green vases on the mantel and at the ends of the display; also notice the scattering of the silver bulbs. (For those of you wondering about the painting over the mantel, it was made by me, sometime in the 1980’s).
 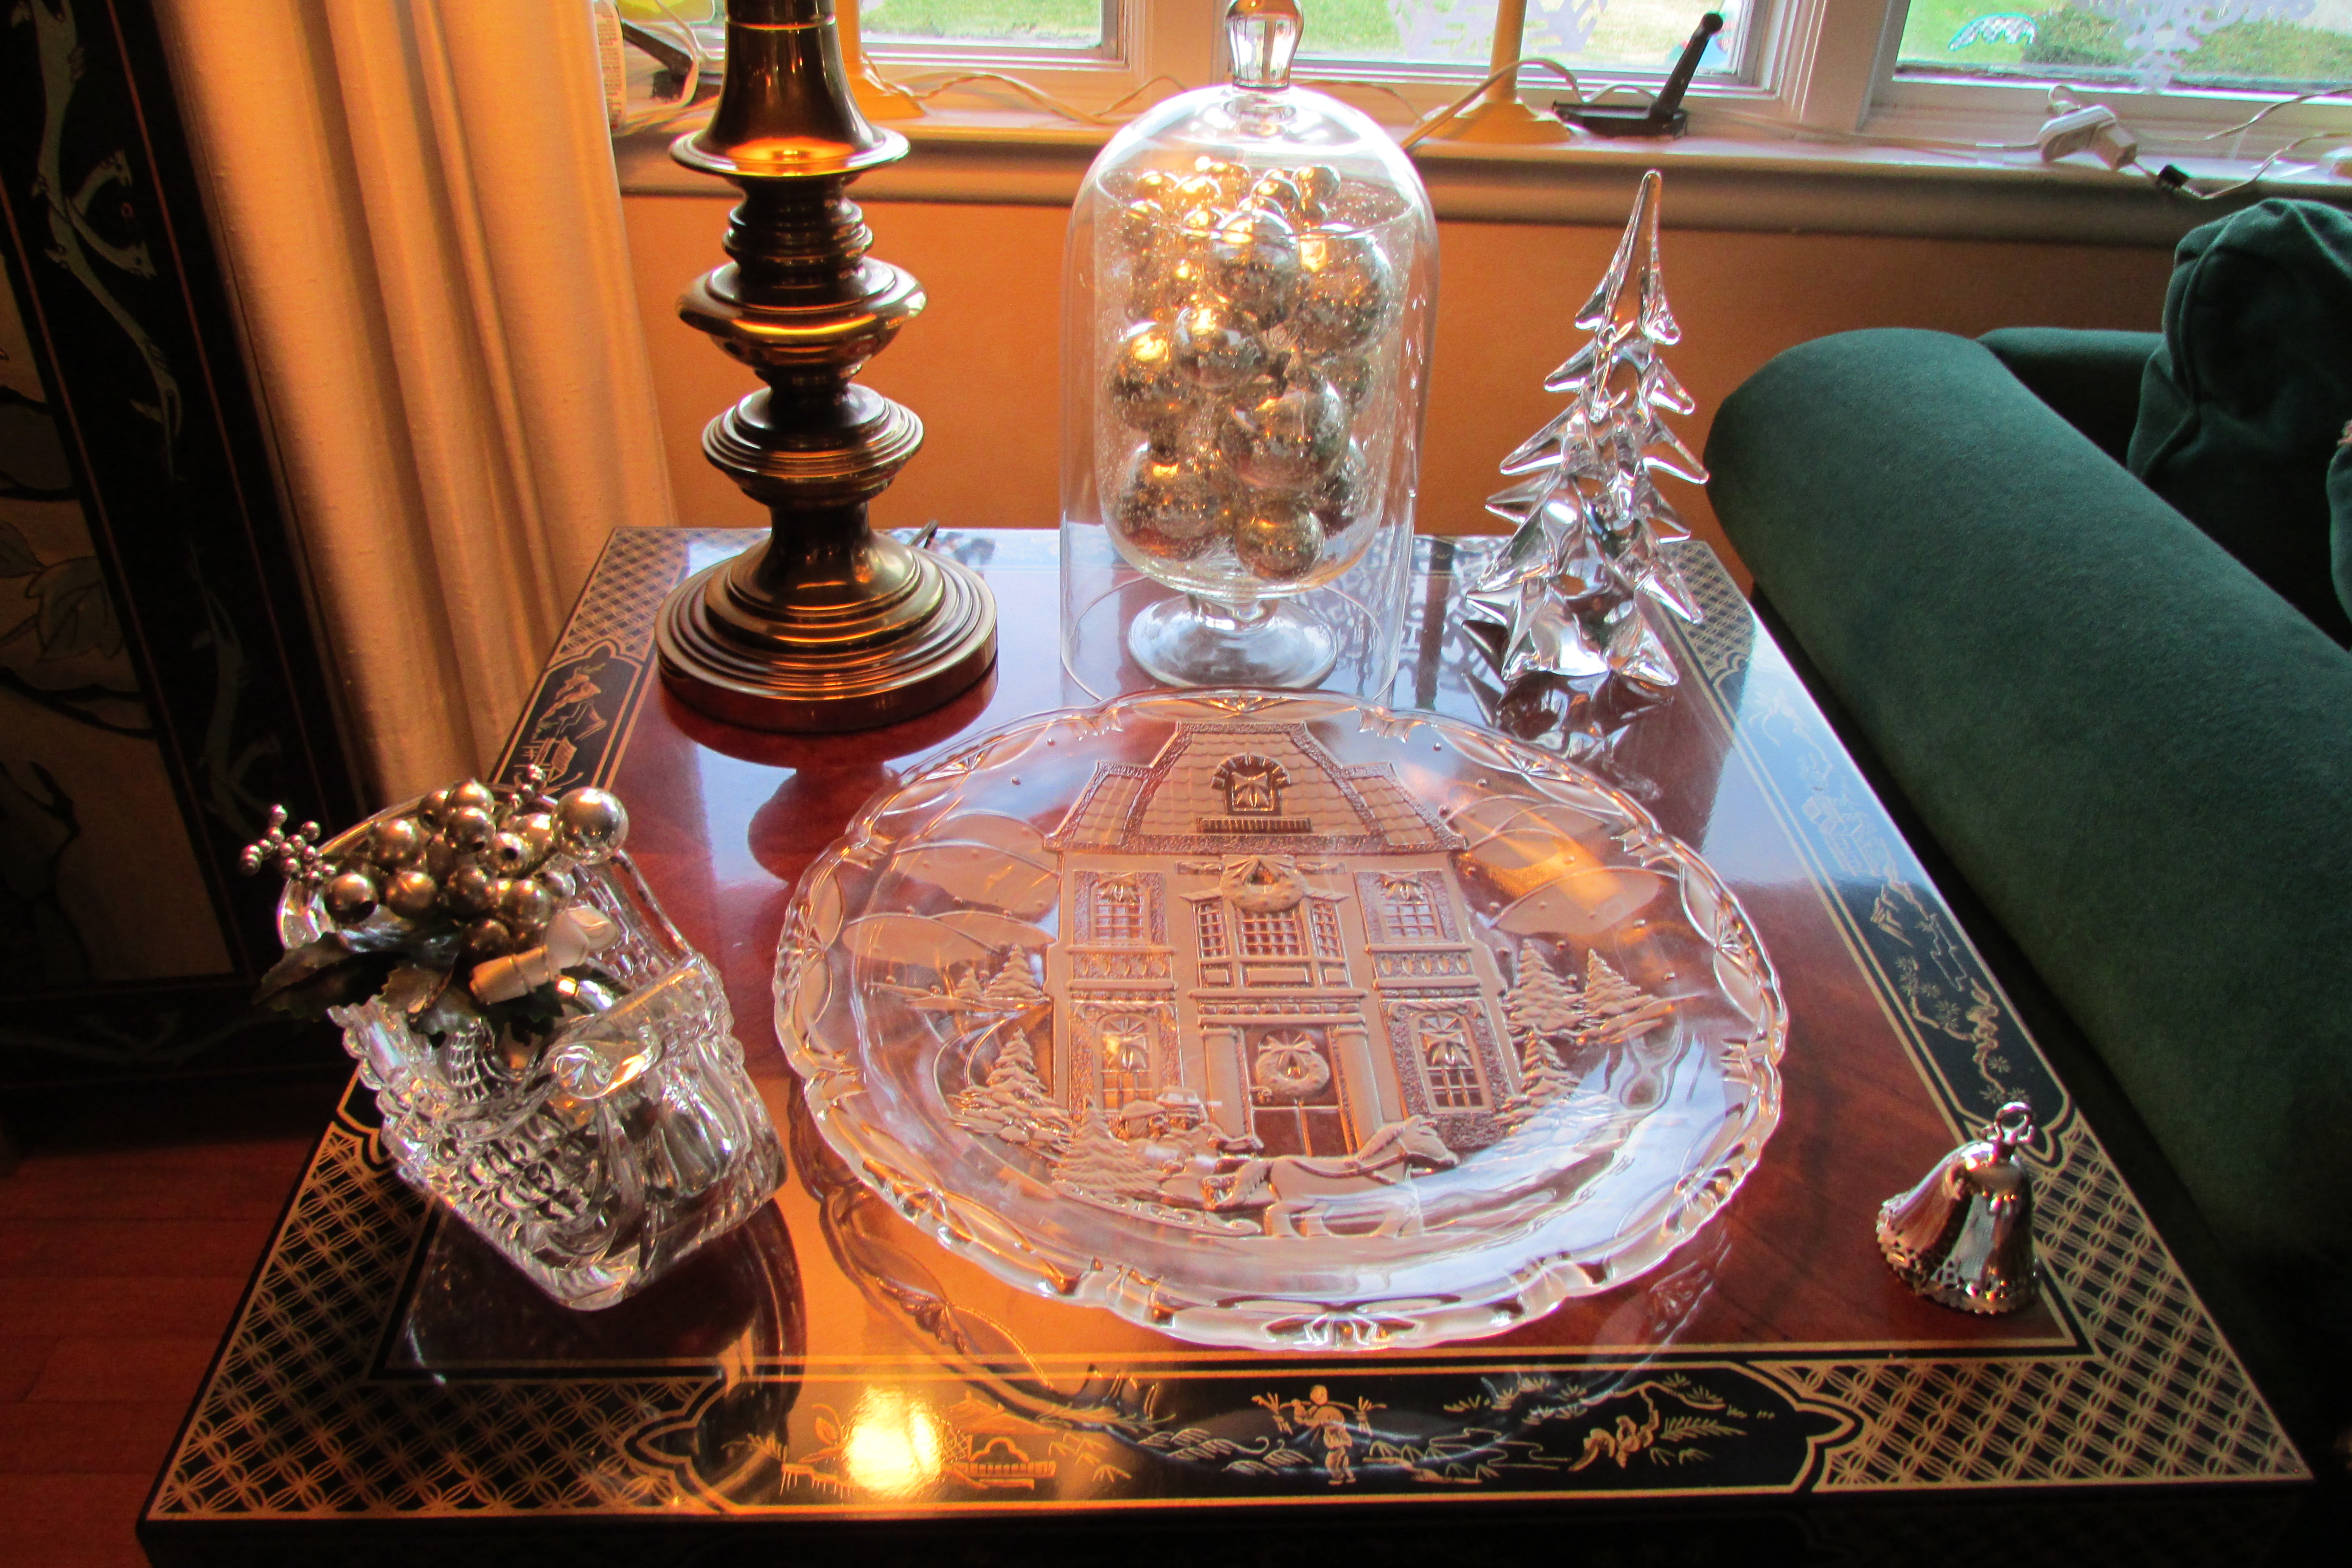 Now we have moved on to an end-table that is next to one of my sofas. A collection of icy glass objects and silver ornaments keep the White Christmas theme moving around my living room. Here I’ve taken a bubble vase and filled it with different sizes of silver tree ornaments, then covered it with a dome. Look at the silver ornament in the glass sleigh, it is an old Christmas corsage worn by my maternal grandmother. (To know more about making groupings of objects read my post Arranging your Decorative Accessories (Knickknacks and Collectables).
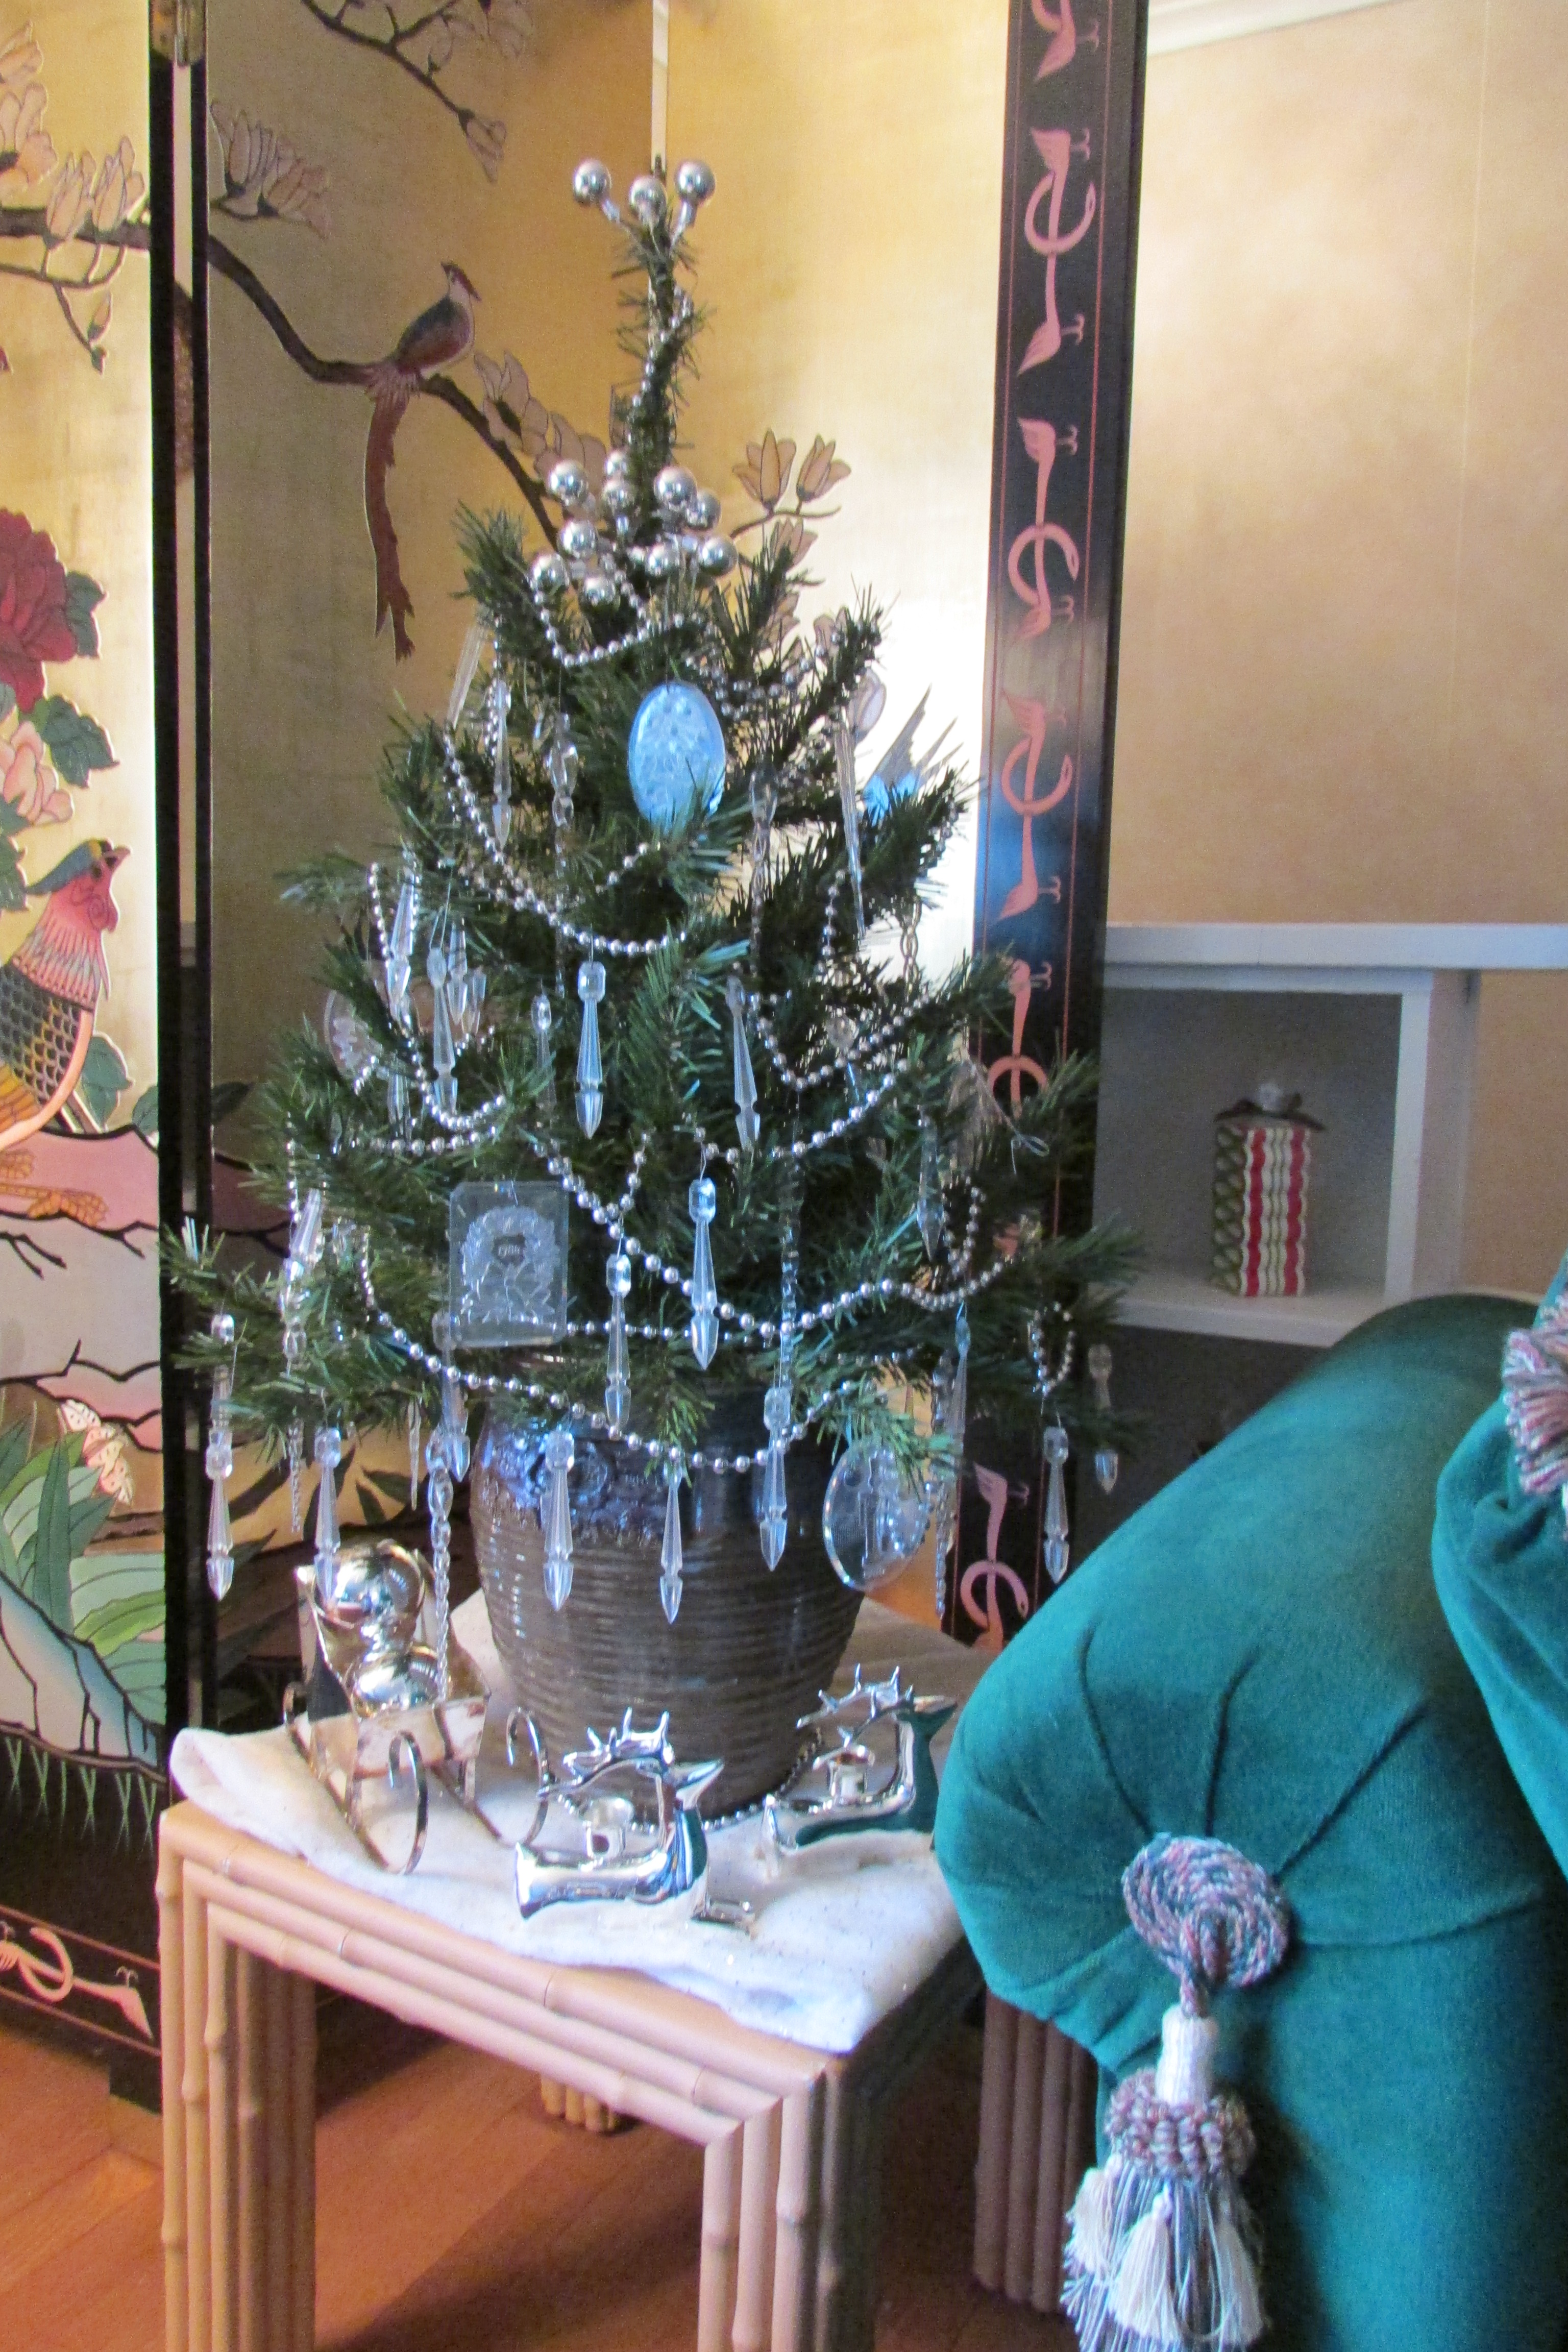 This photo shows how the top of my large Christmas tree has been turned into a table-top tree. The tree sits in a vase that I made in college. Clear plastic prisms (bought in the 1960’s), clear plastic dated ornaments (mostly from the 1980’s) as well as silver beads and small silver bulbs decorate it. A silver sleigh and two reindeer are at its base; a gift from my sister.
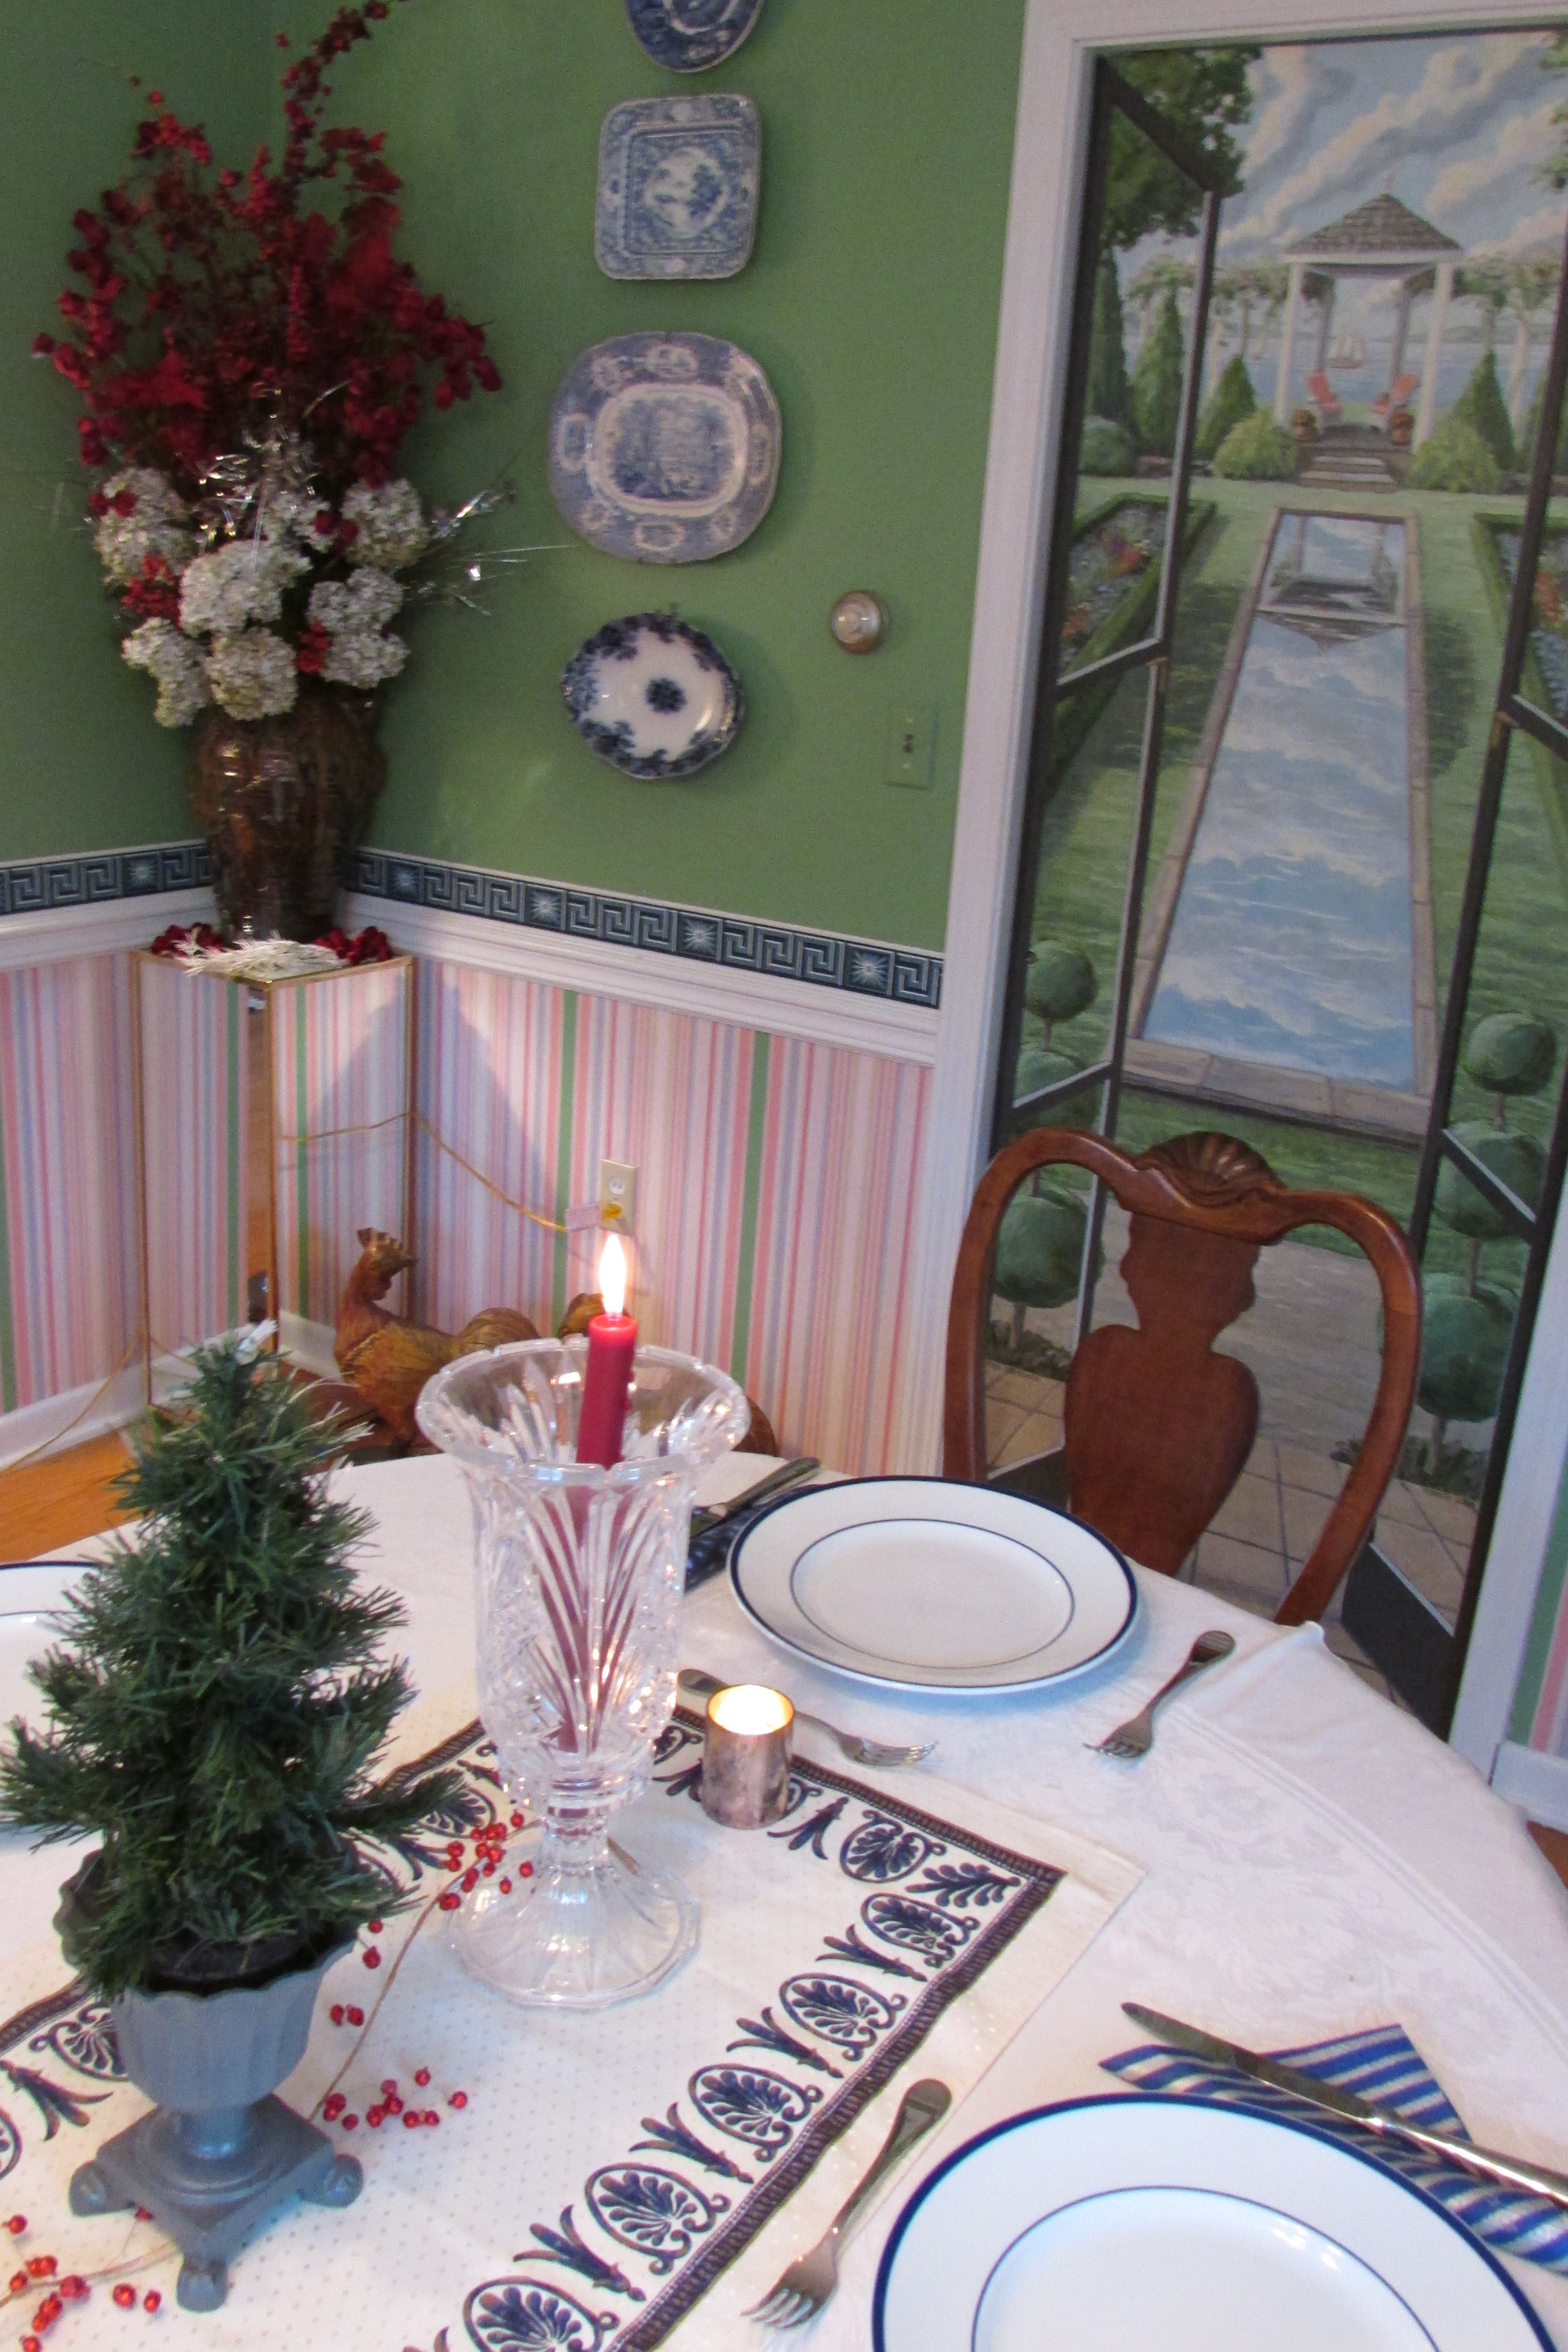
 Now we are in the dining room where the table has been set for a holiday meal. A pair of crystal hurricane shades, the mostly white table runner and the dinner plates keep the white theme going. Look at how a garland of fine red metal bells runs under all of the elements down the center of the table and then winds around the bases of the hurricanes. By doing this, red is moved from the red of the candles, to the table top and then to the arrangement in the corner of the room. Notice in the second photo how the white sprayed hydrangea flower heads are incorporated into the arrangement on the pedestal. The white hydrangea heads keeps the plant material, that was seen in the large arrangement in the Chinese floor vase, as seen at the beginning of this post, working through the dining room.
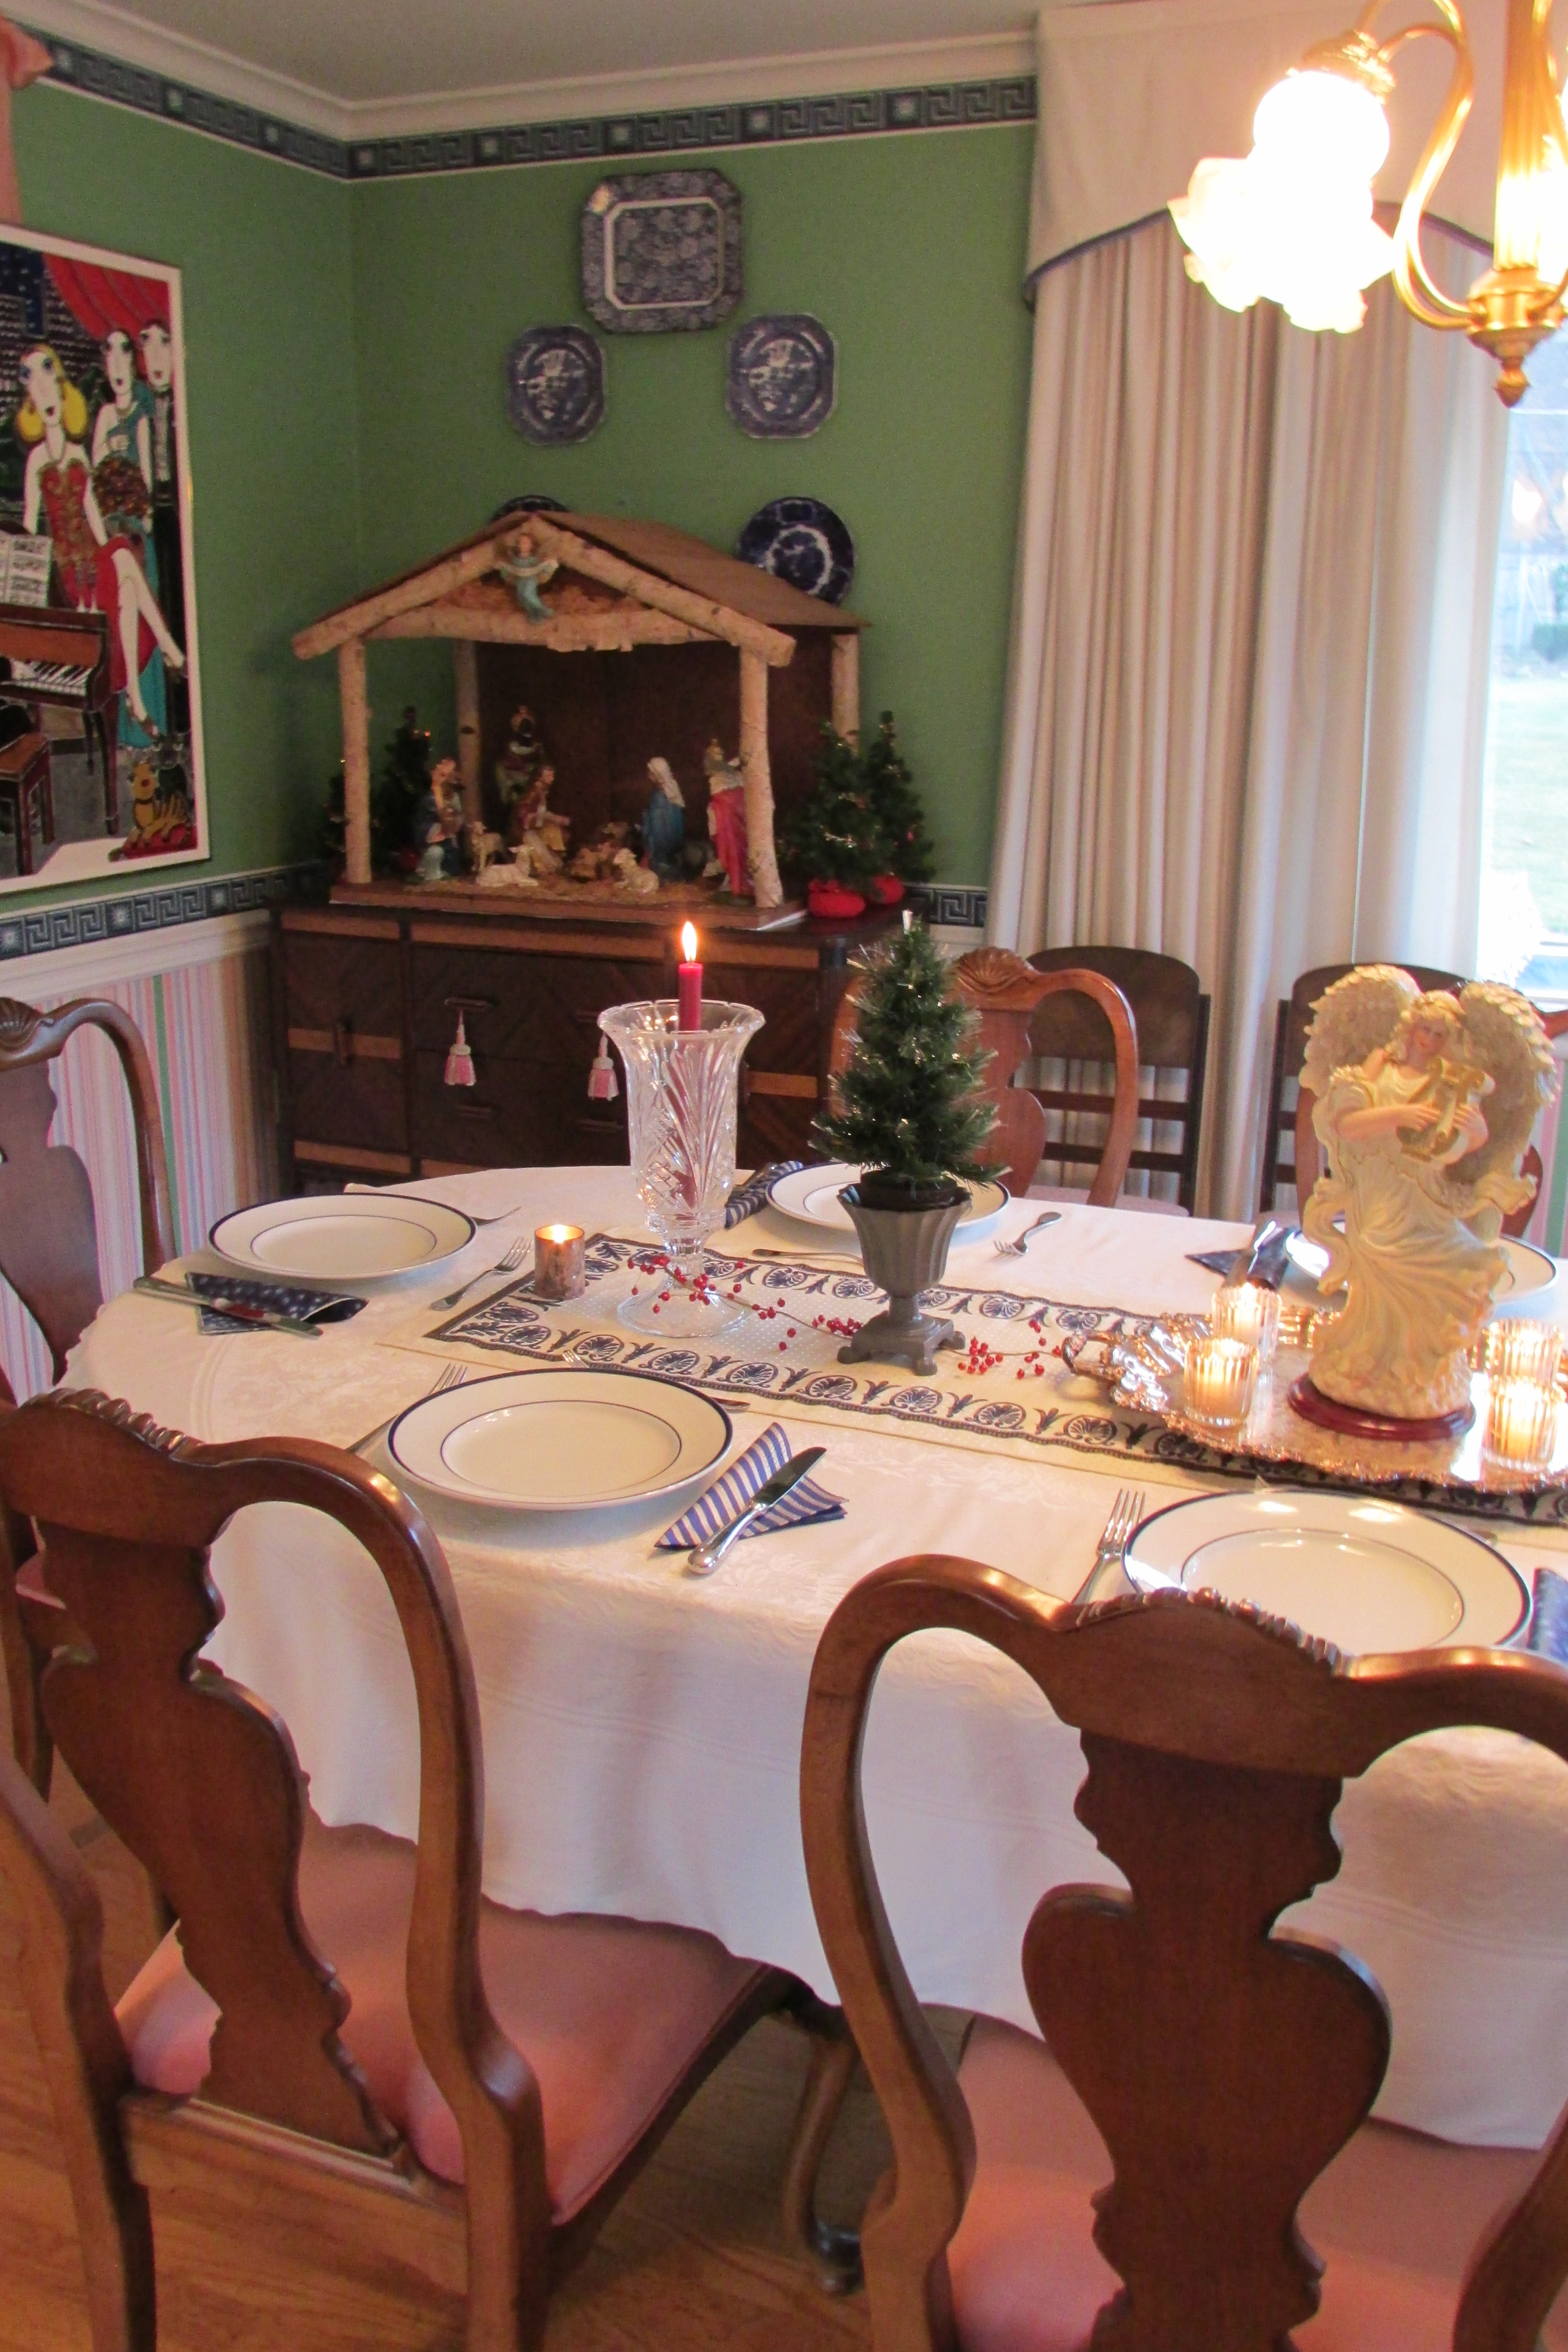 Looking from the other side of the room you see an angel wearing a white robe, used as a table centerpiece, that picks up the white of the manger in the corner of the room.
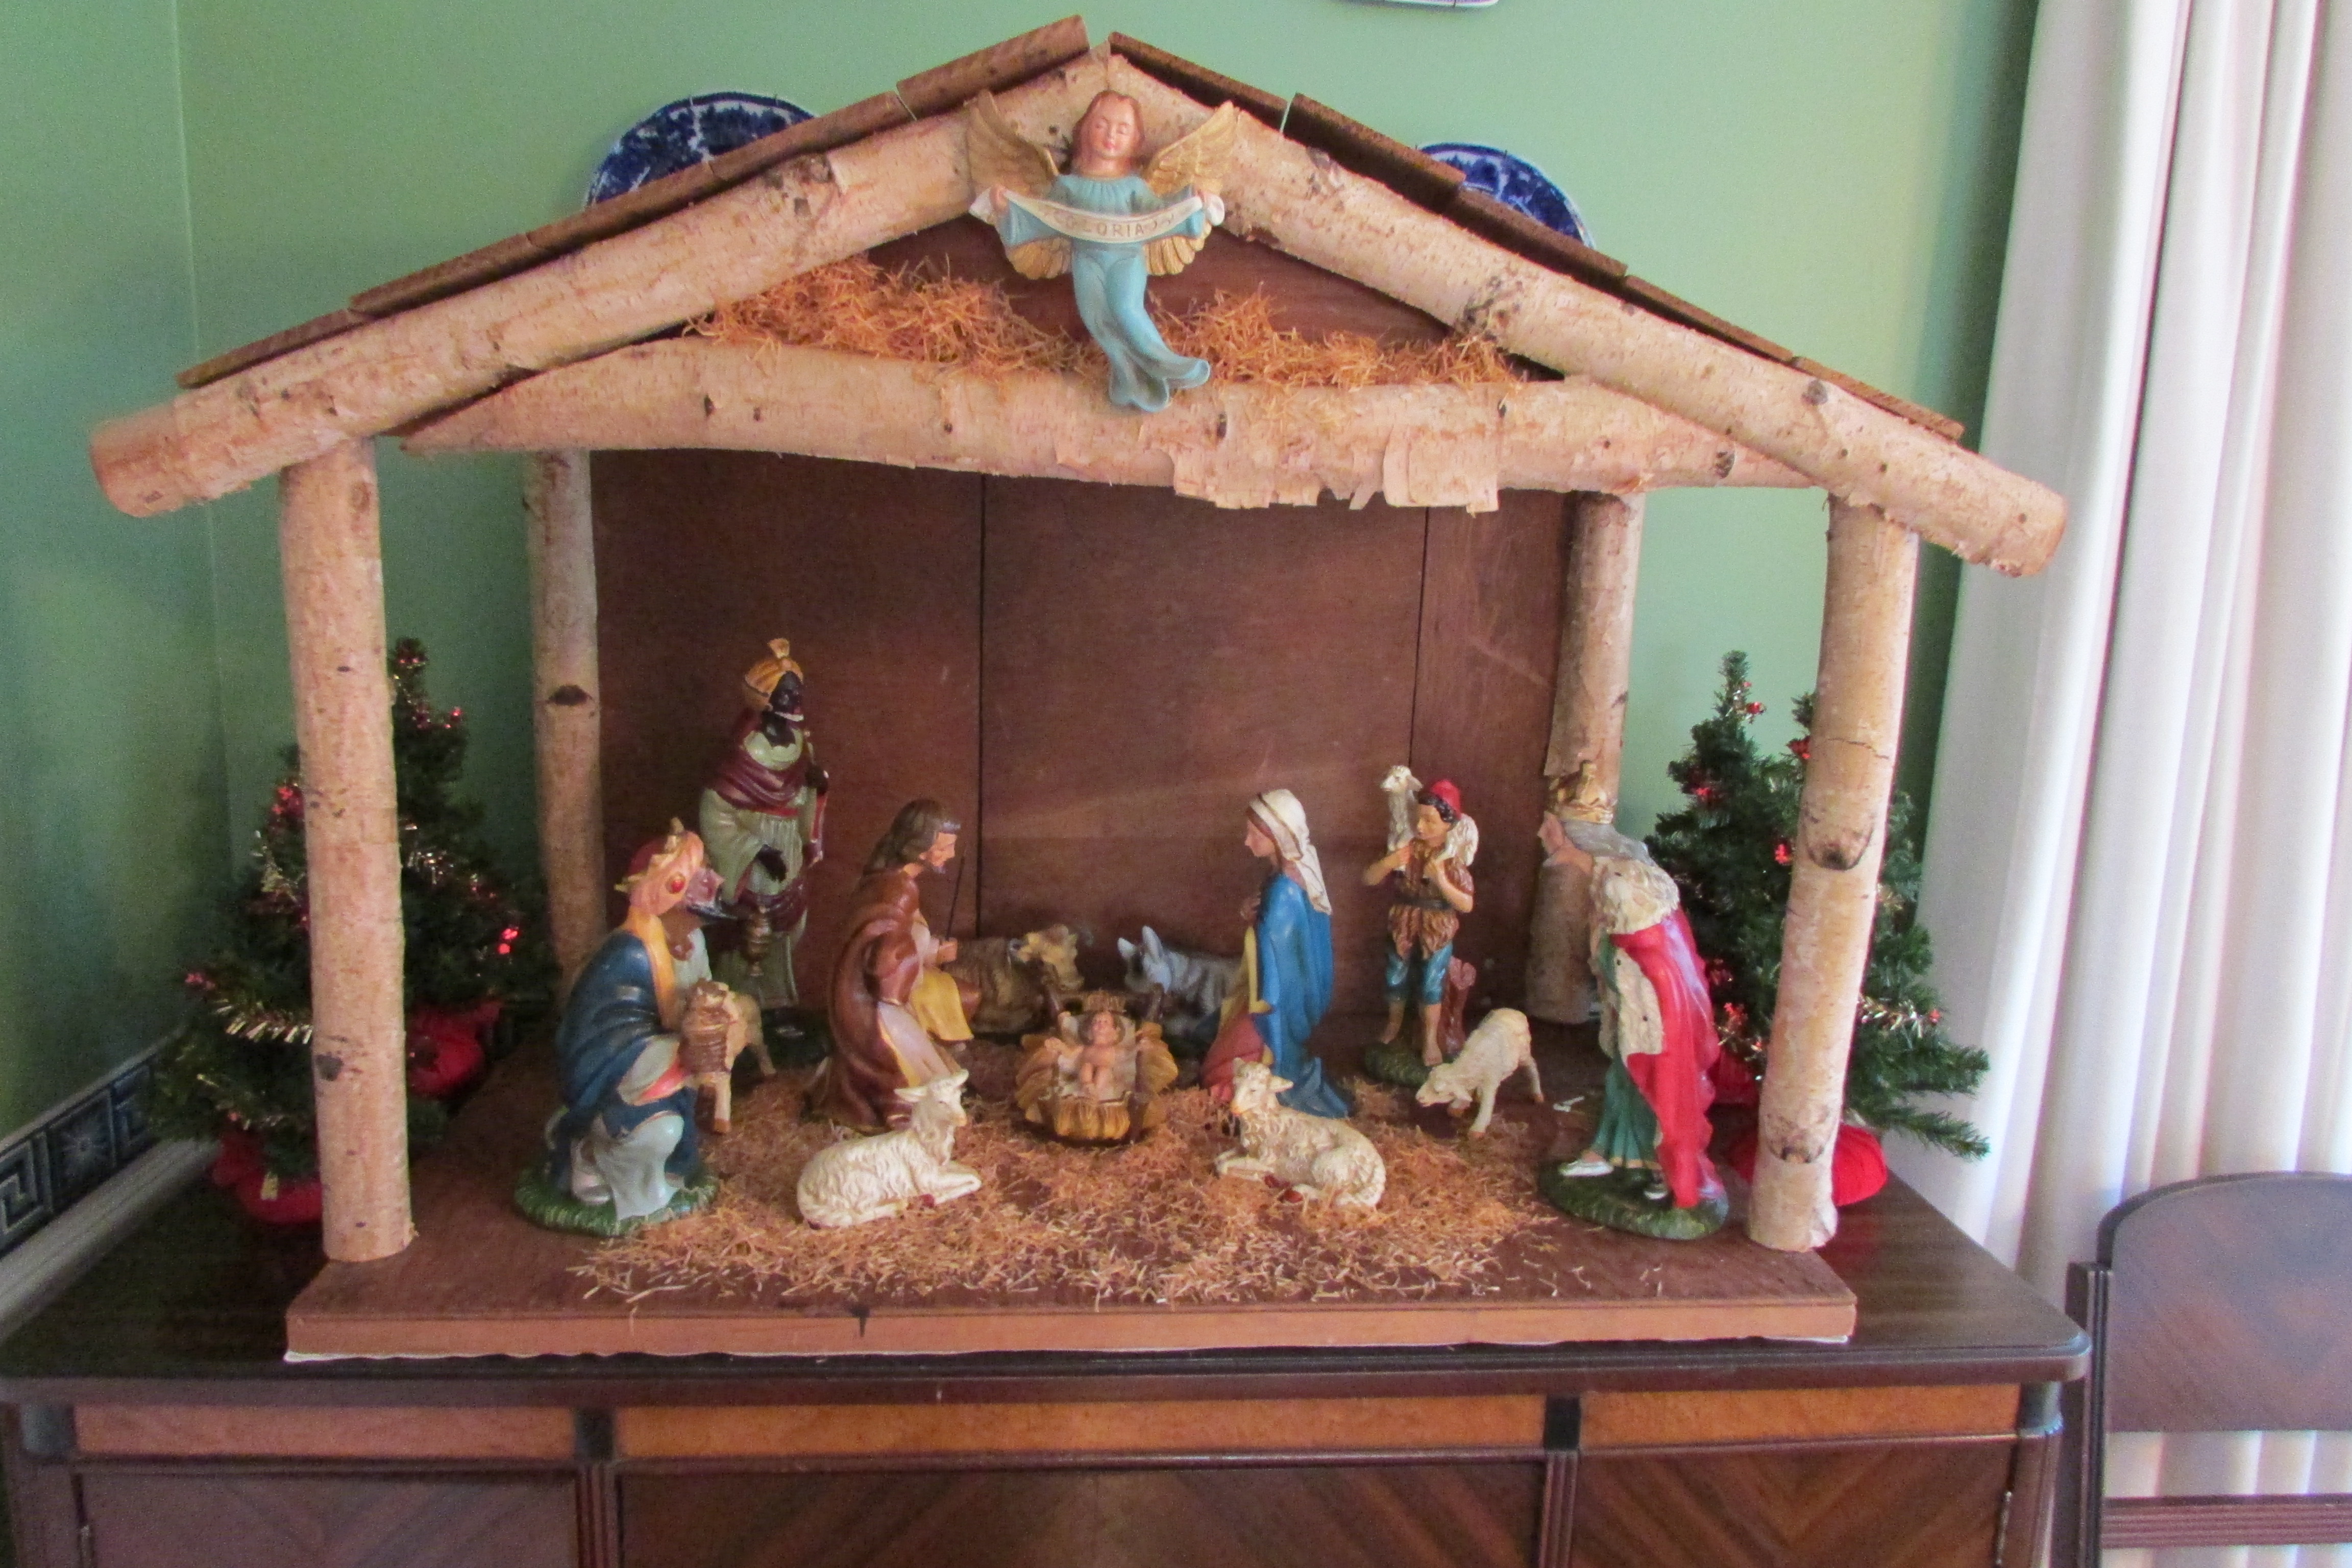
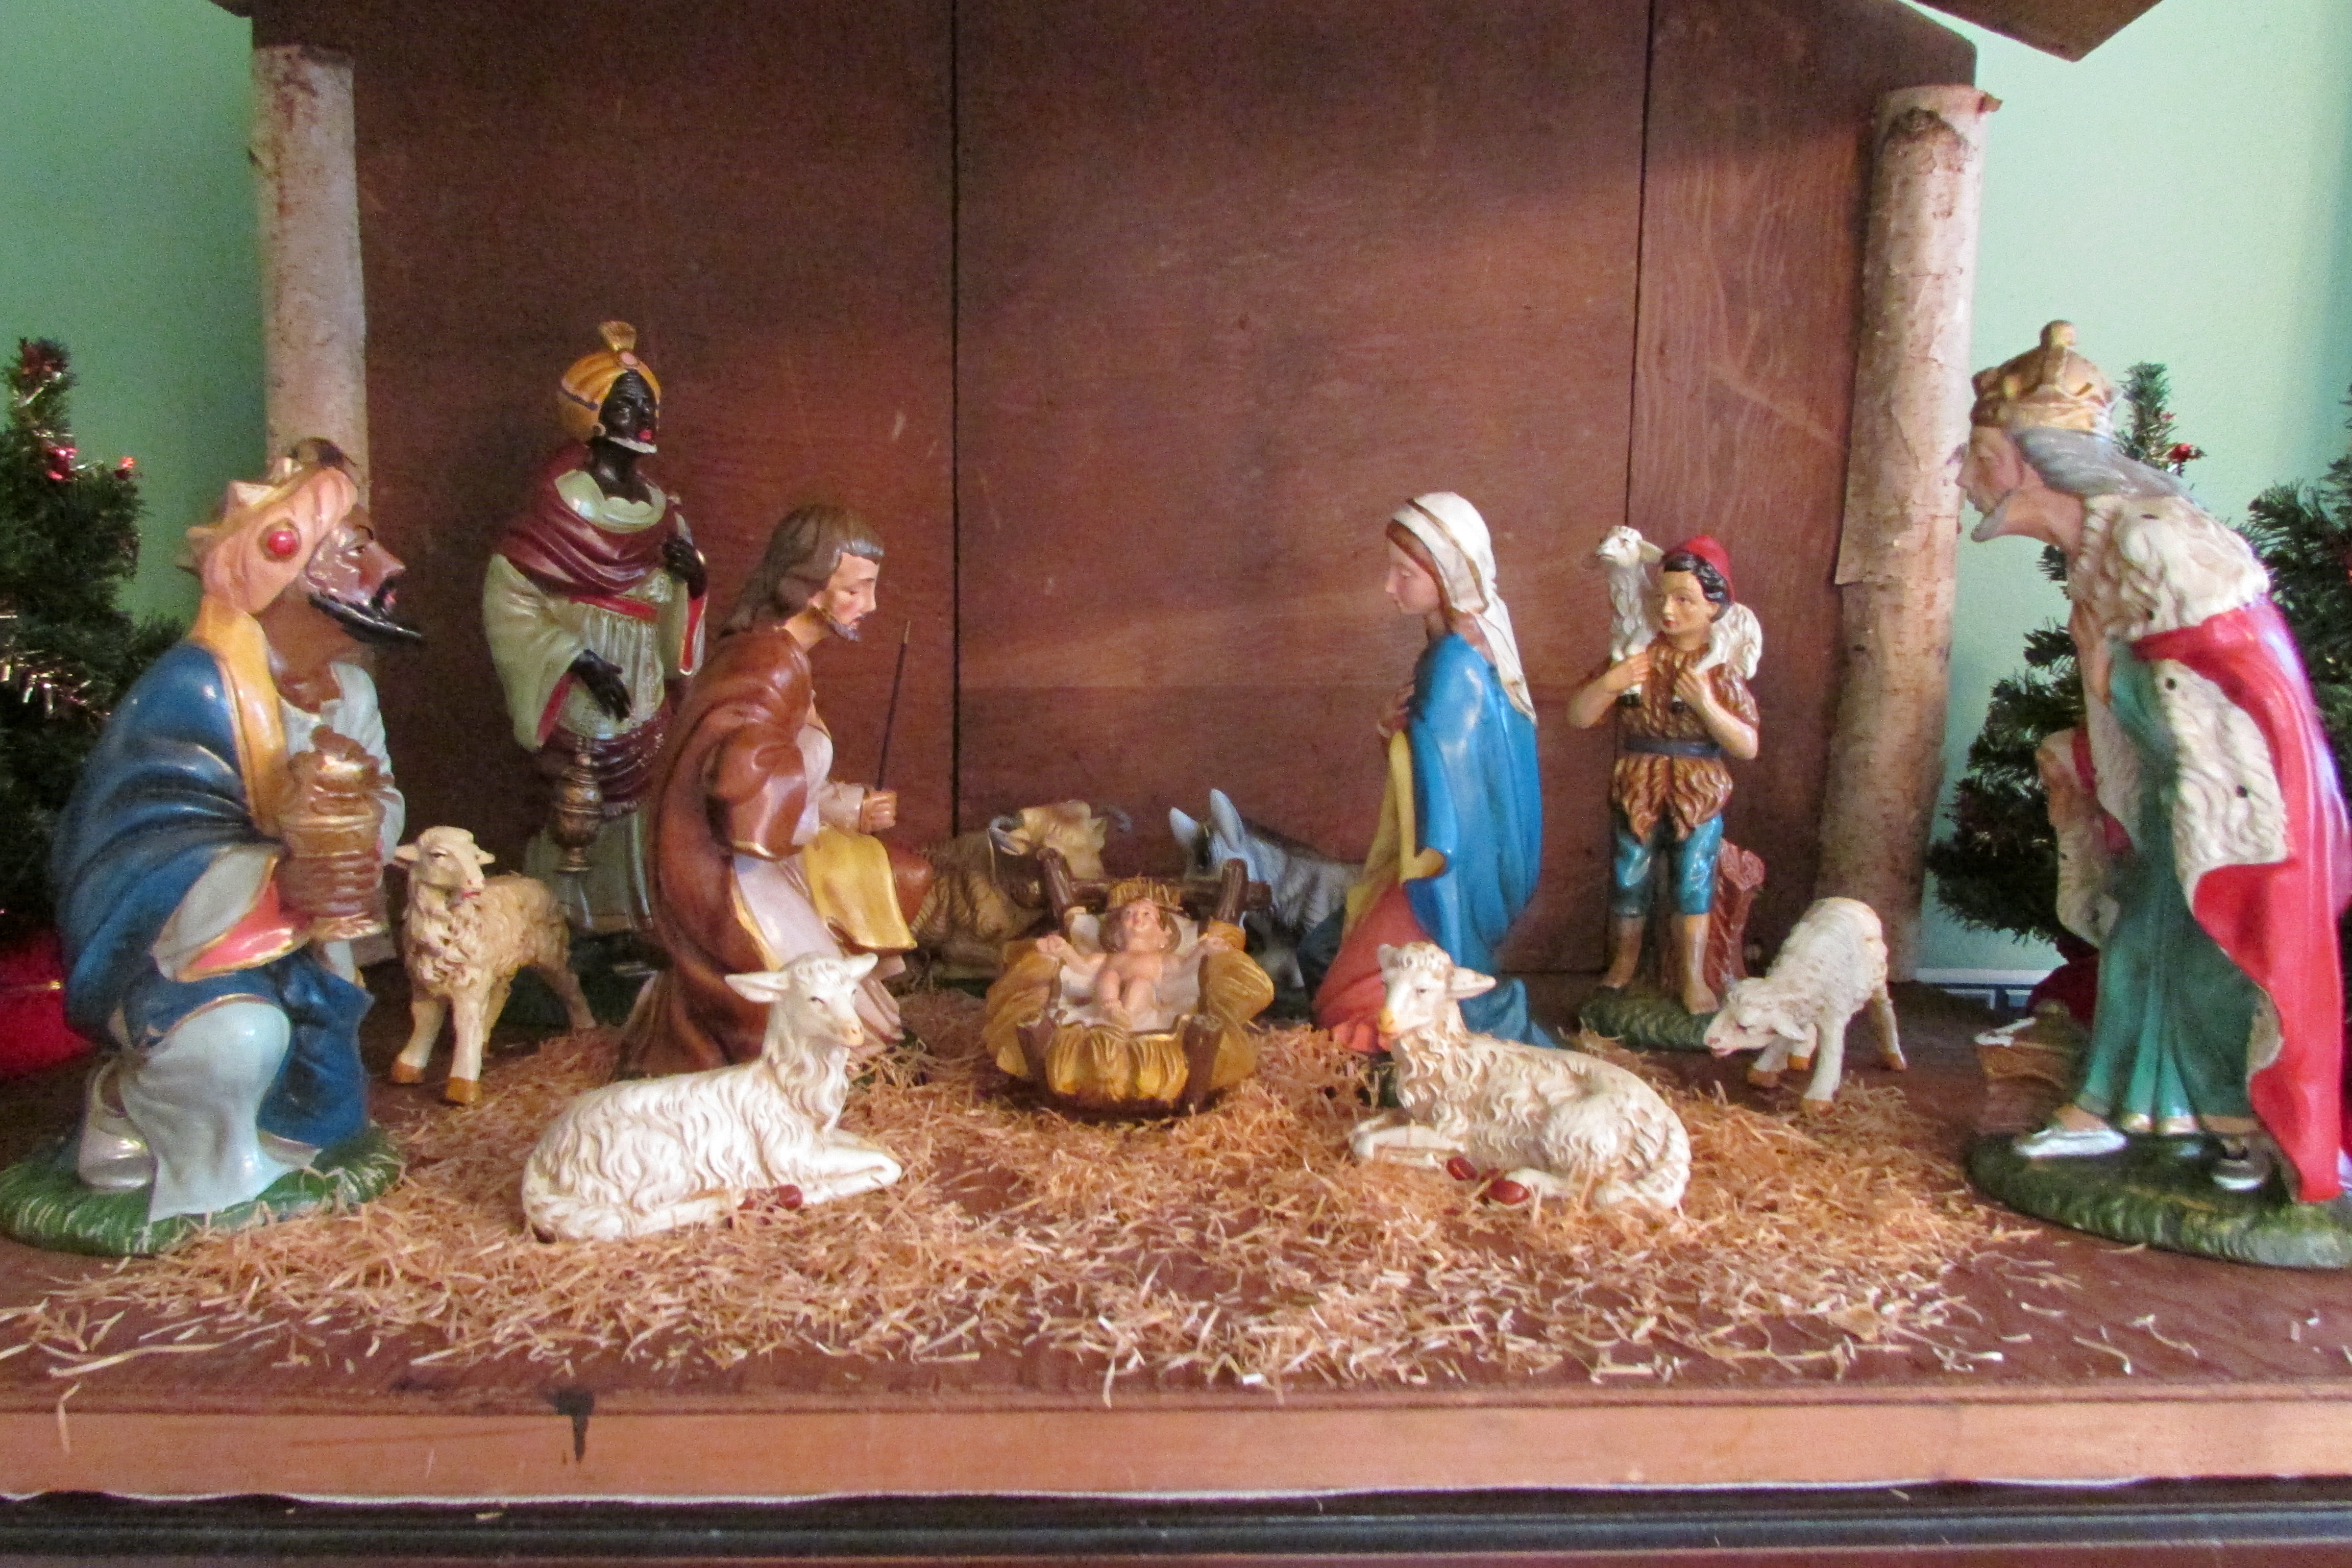 The nativity set is probably 50 years old, came from Montgomery Wards and cost $9.99; the largest figurine, one of the kings, is 12 inches tall. My father, with a hand saw (he did not have an electric saw at that time) designed and fashioned the stable from plywood, the tops of wooden vegetable crates and white birch branches cut at his parents farm in Melrose, NY. I remember dad cutting the plywood, in an unheated back room, in our old house.
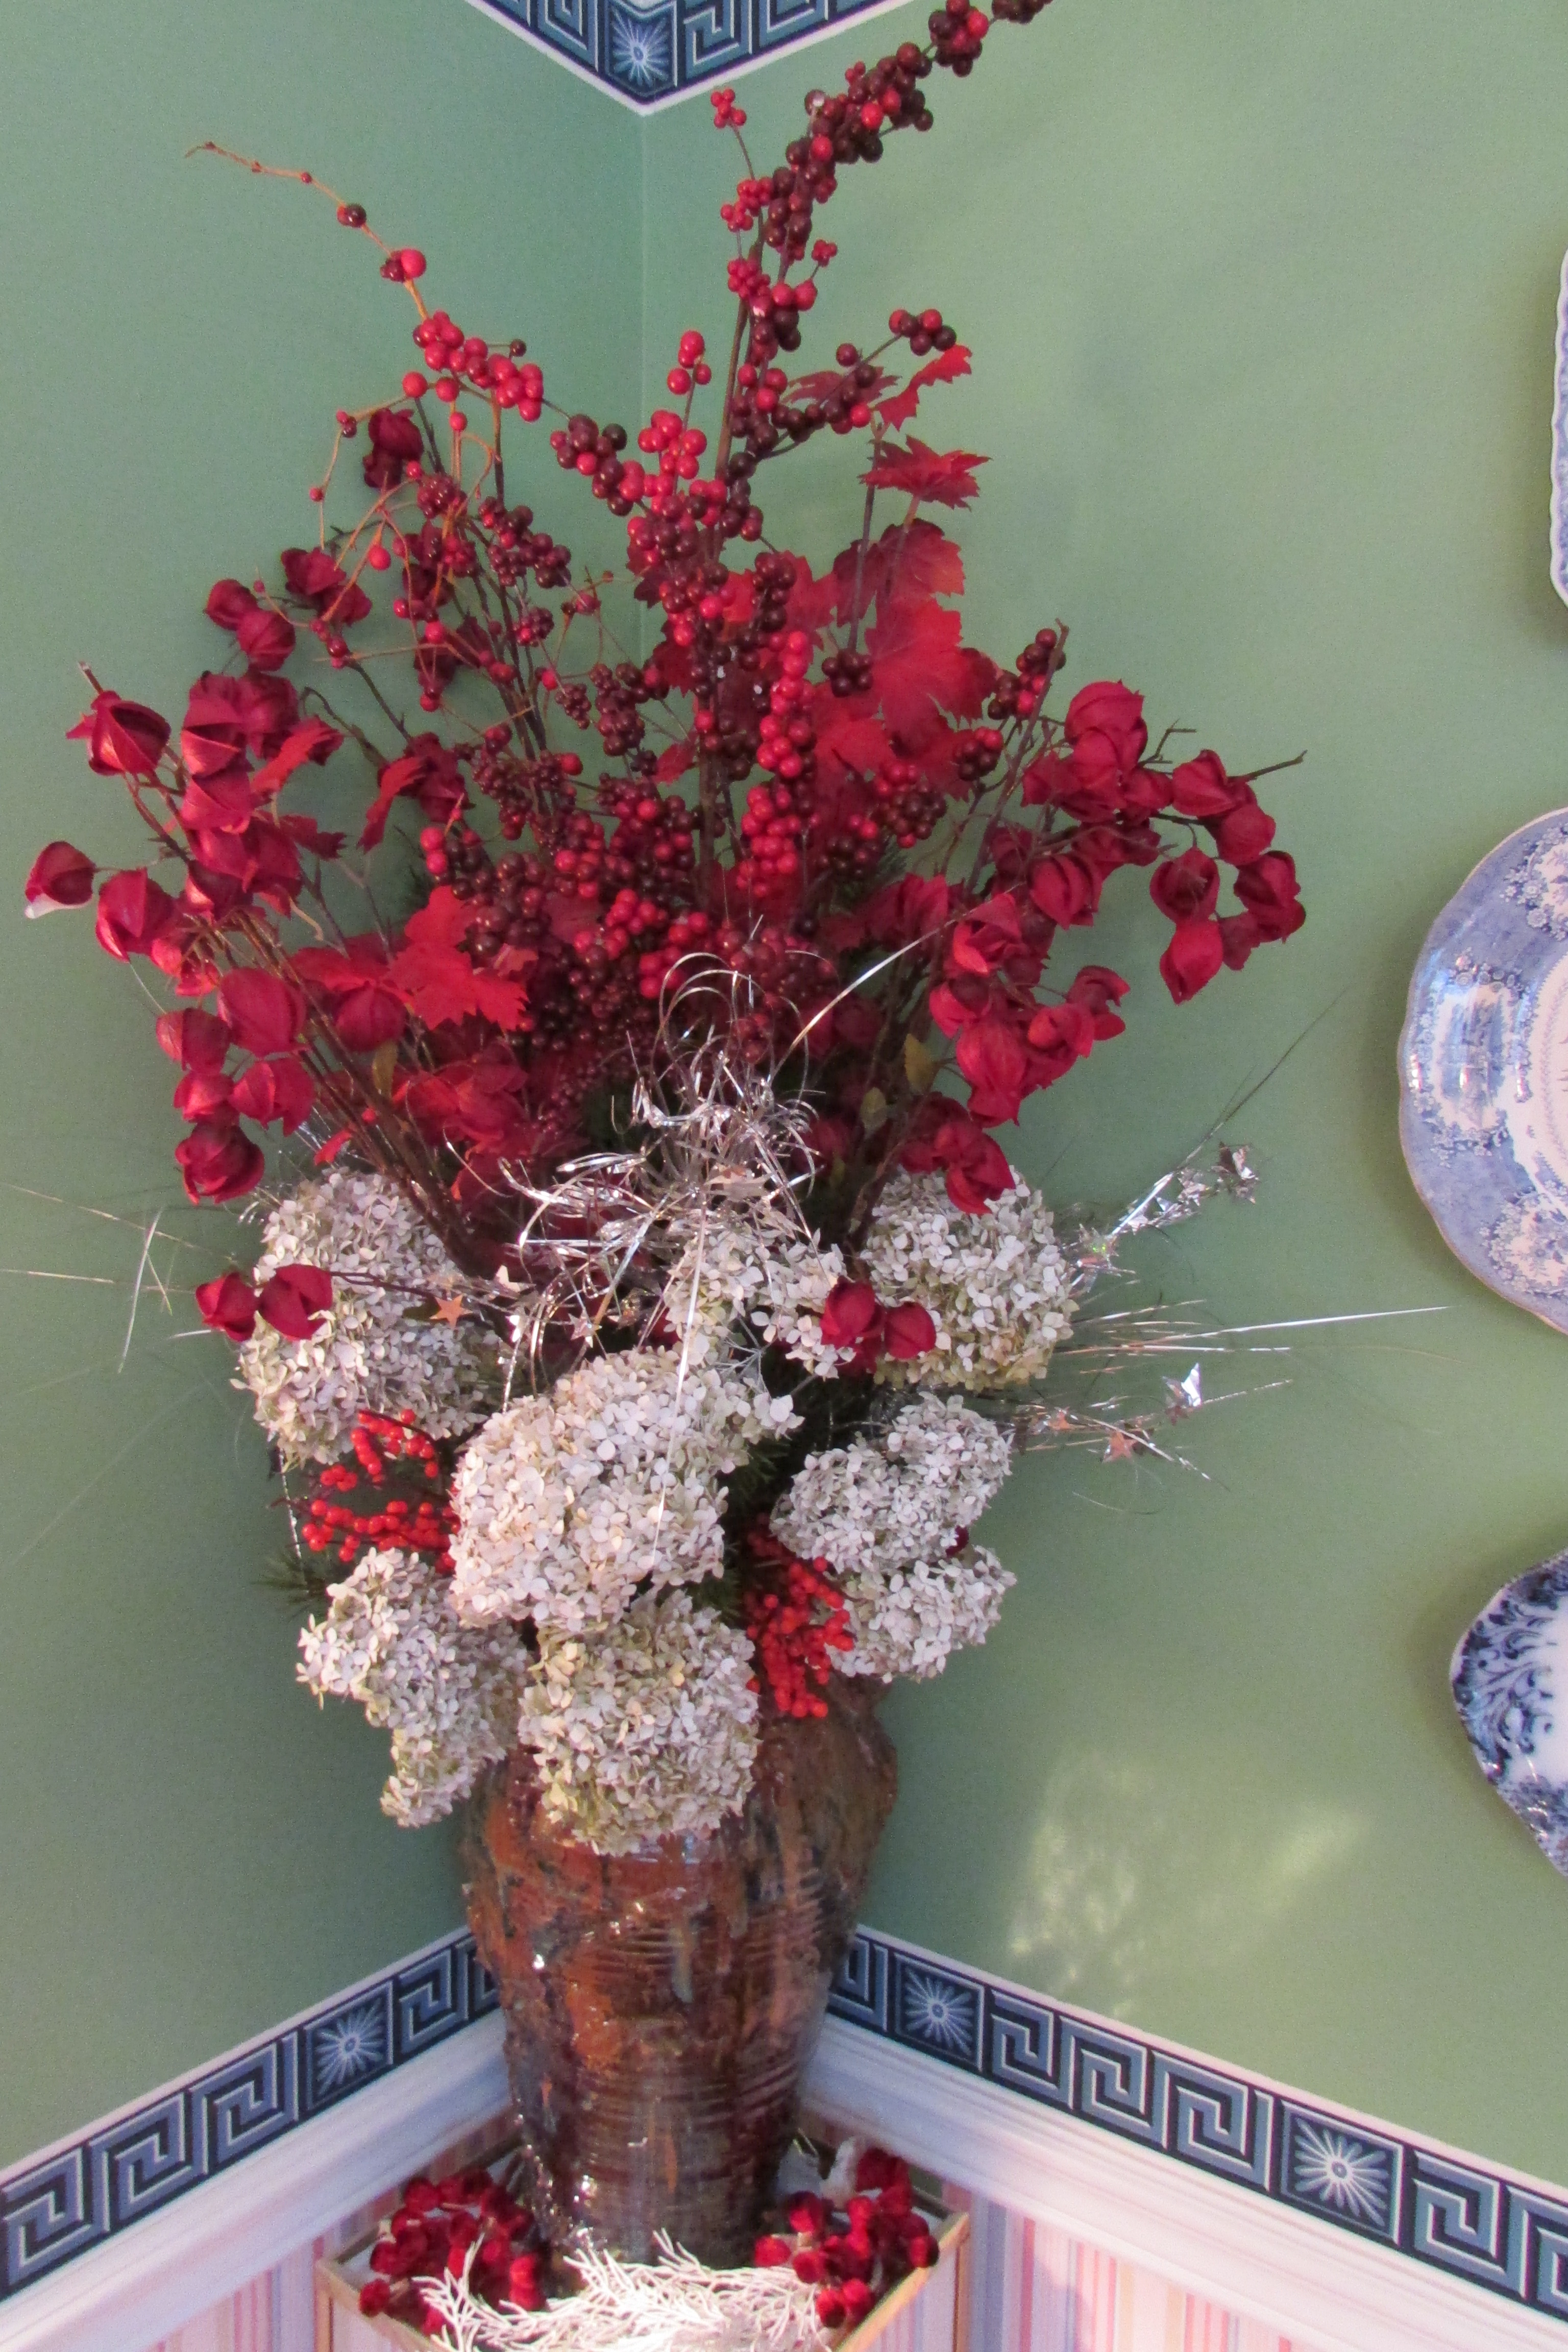
 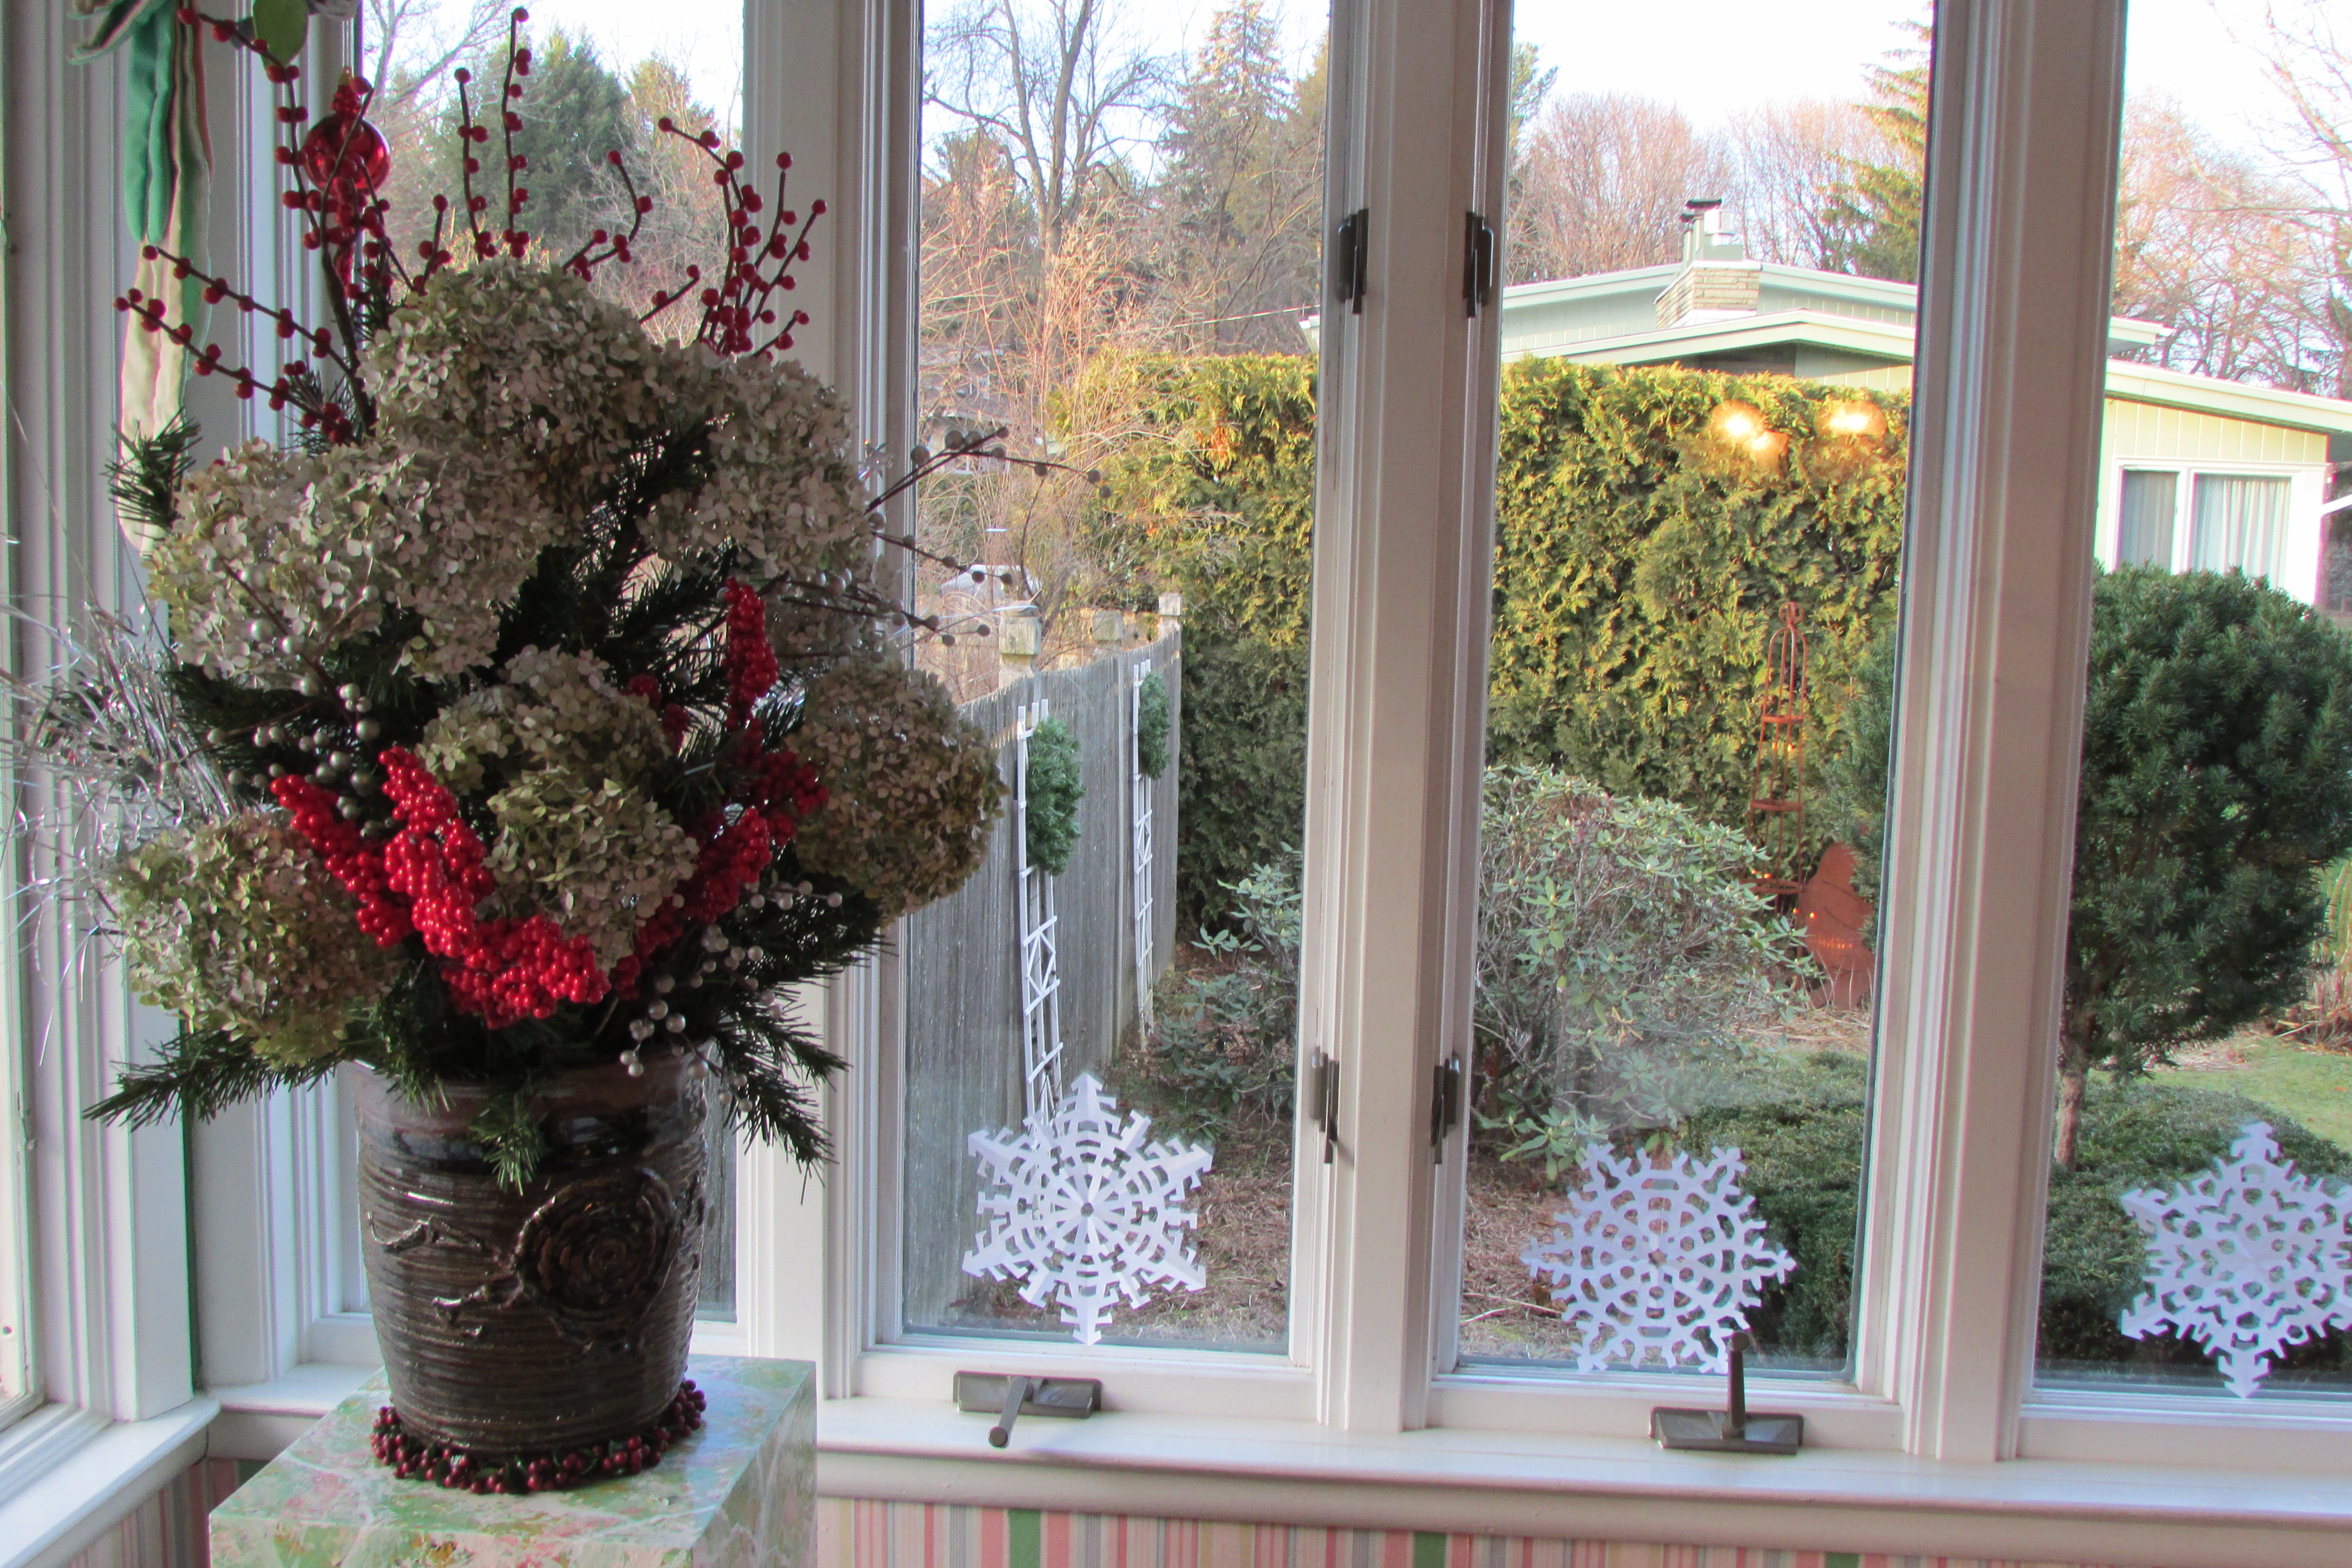 On the other side of the dining room I’ve placed another large arrangement incorporating the painted hydrangea. White paper snowflakes are taped to the bottoms of the windows, as they are in the living room and all the other windows that face the front of the house.( To learn how to make paper snowflakes read my post Cutting/Making Paper Snowflakes)
 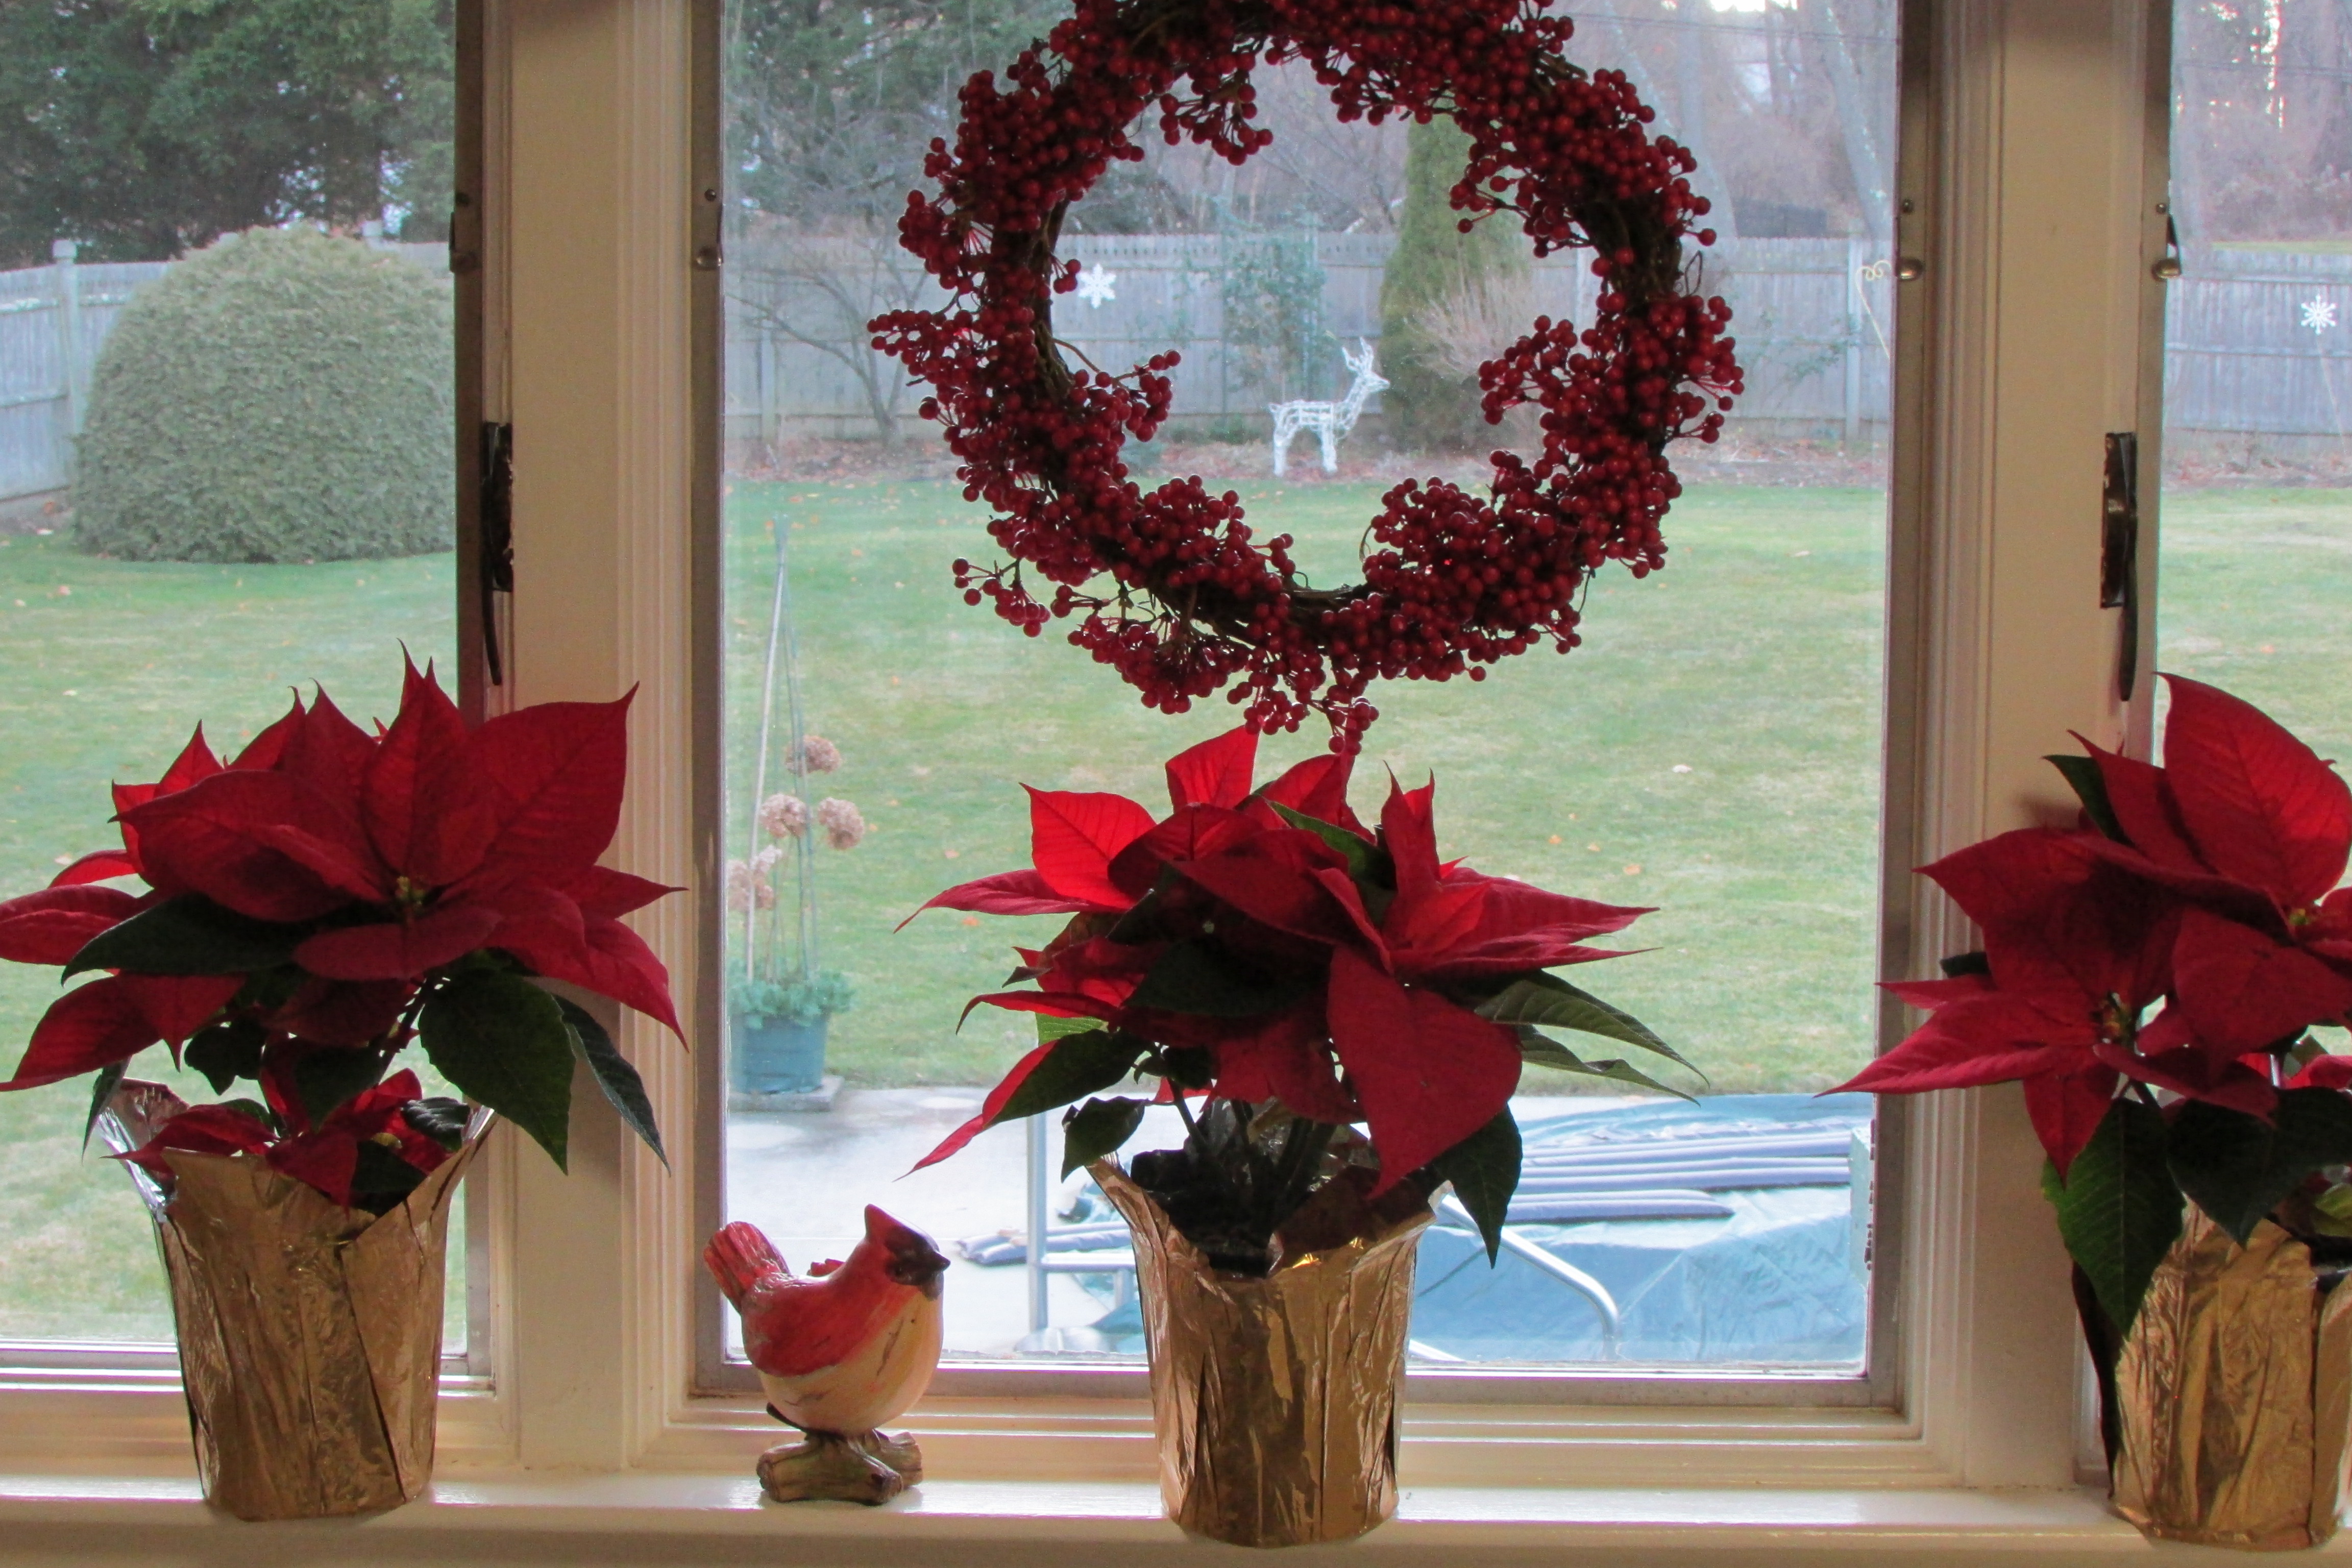 In the kitchen poinsettias, an artificial winter berry wreath and a red cardinal decorate the windowsill above the kitchen sink. Look carefully and you will see in the center of the wreath one of a pair of white wire deer and wooden and metal snow flakes that decorate my back garden during Winter. (For more ideas about decorating your outdoors for Winter read my post Some Christmas Decorations projects that you can leave up ALL Winter)
 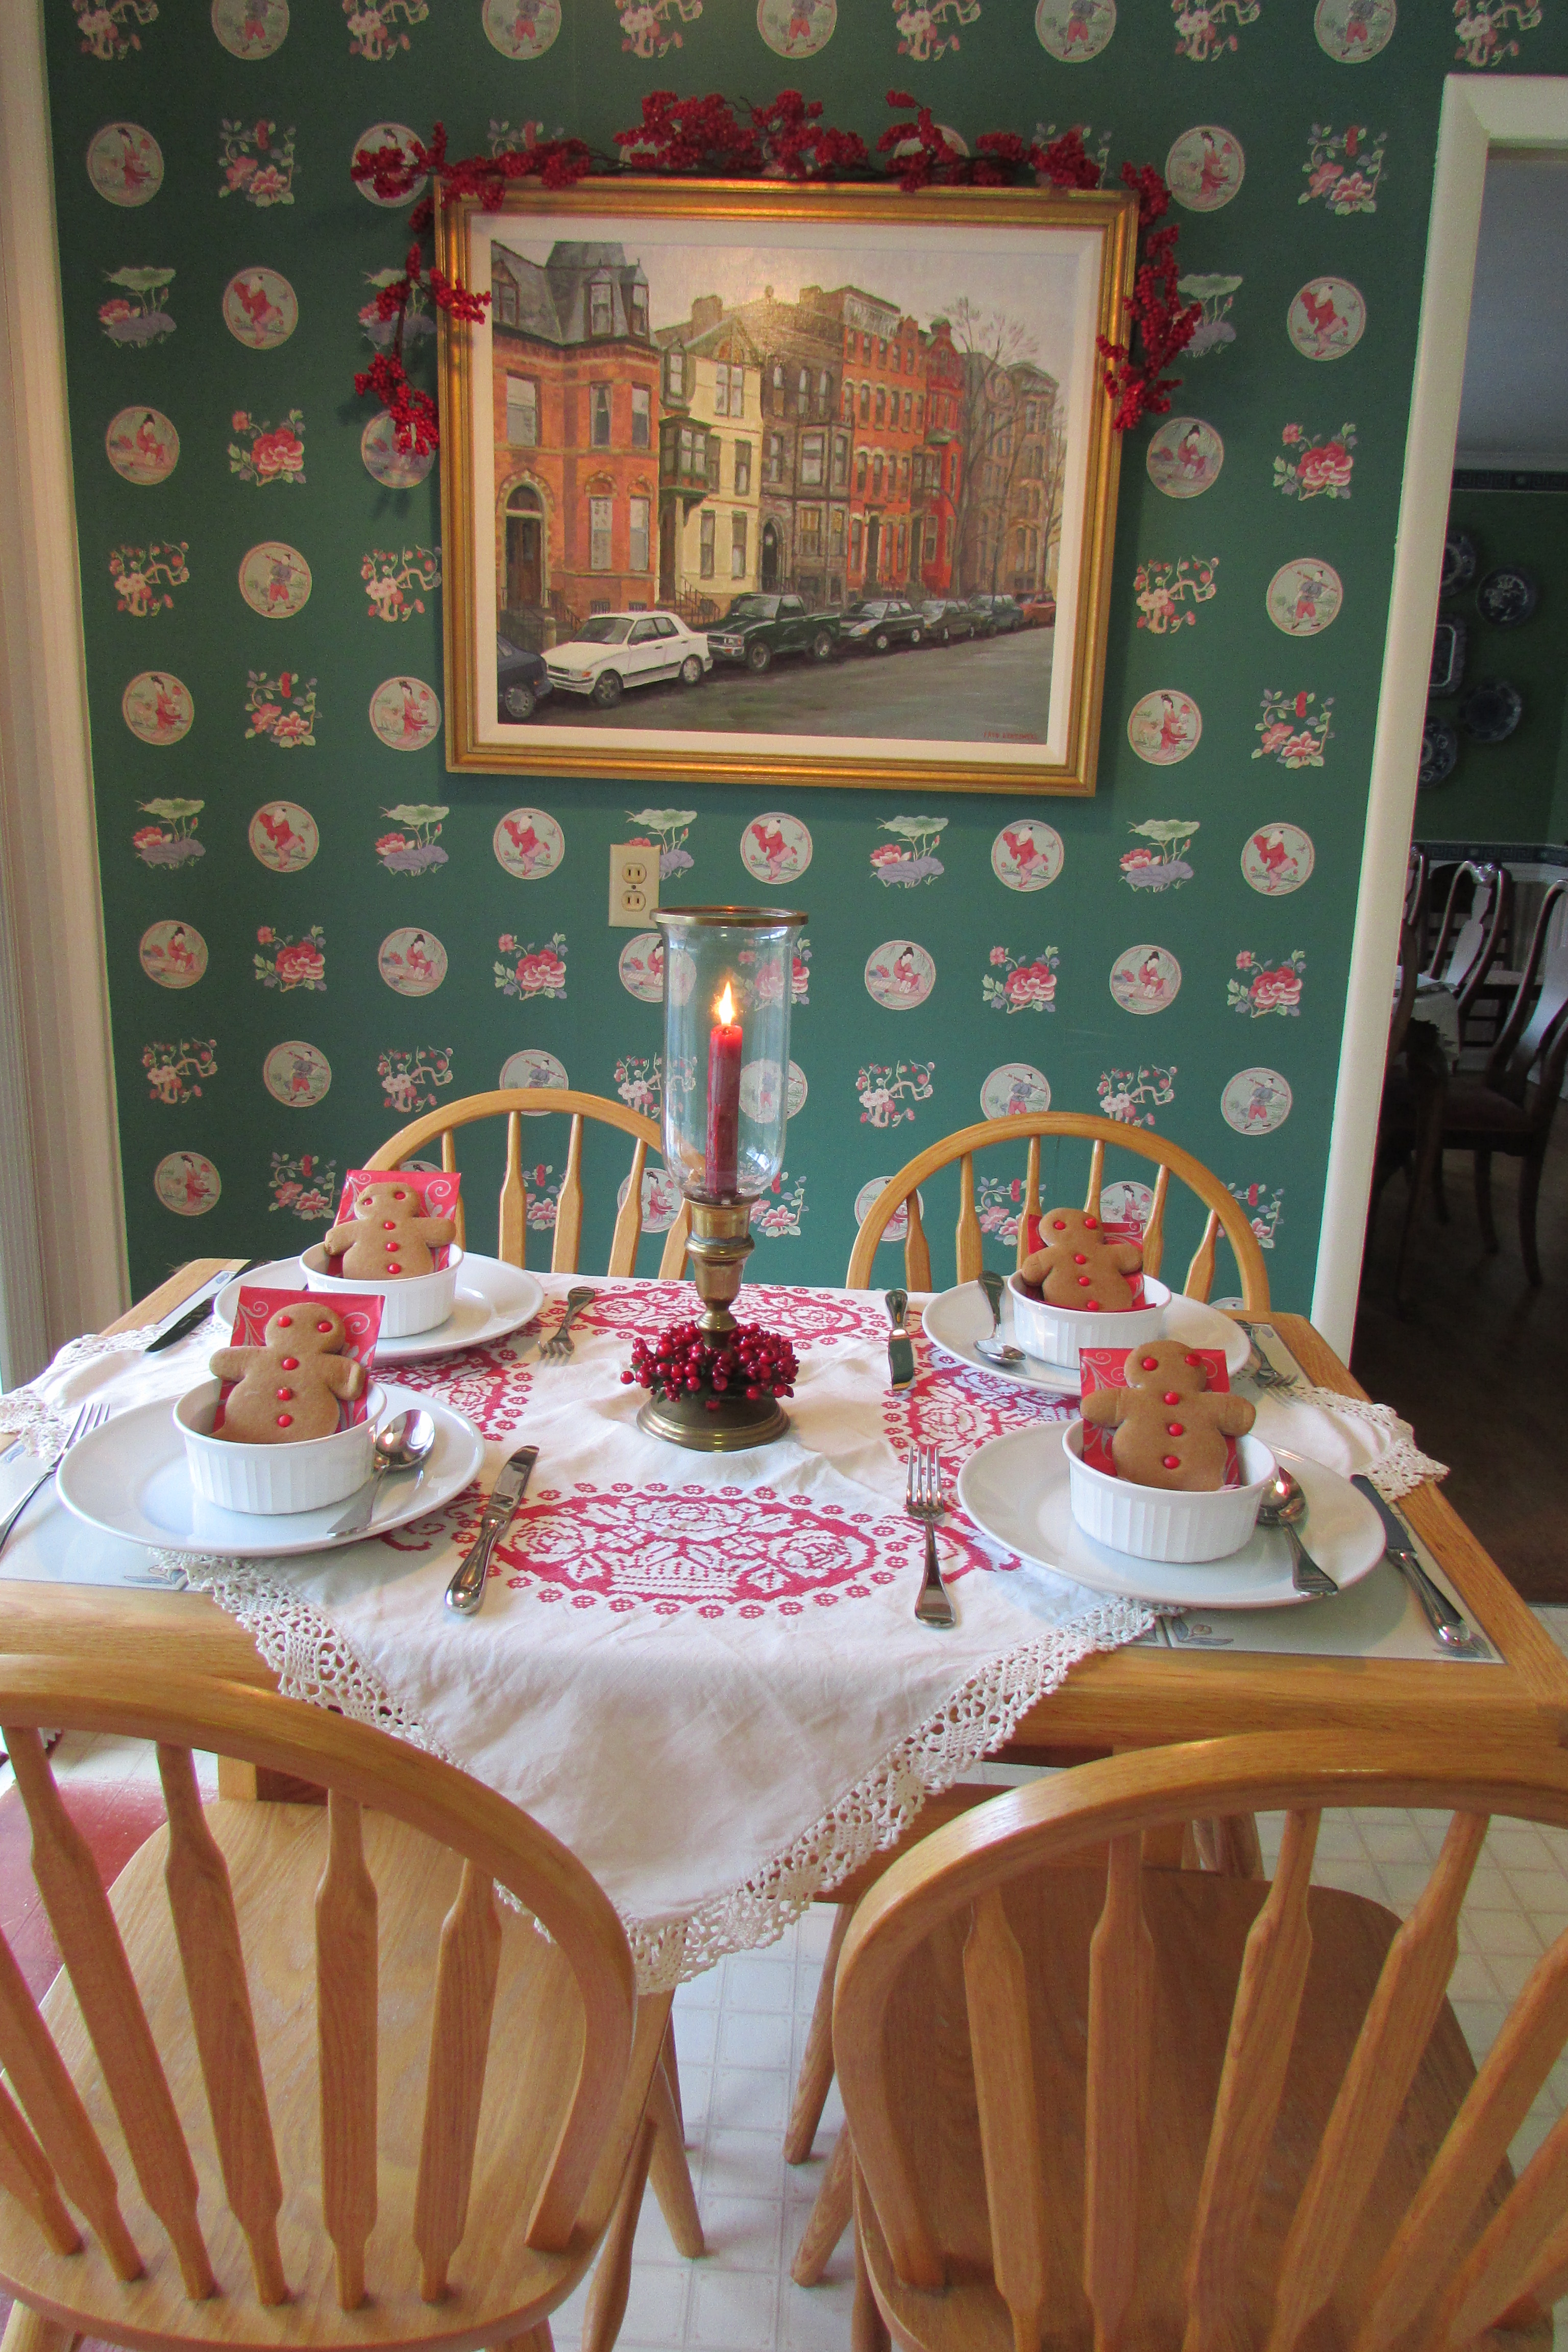 At the other end of the kitchen, the table is set for a light lunch for a few friends. Gingerbread cookies serve duel purpose as both table decorations and later as part of the dessert. Notice how the winter berry is a reoccurring theme in the room. It was first seen as the wreath over the sink, now as a garland hung over the painting made by me, and at the base of the candlestick. The counted cross stitch table cloth is from my maternal grandfathers family, it is probably about eighty years old.
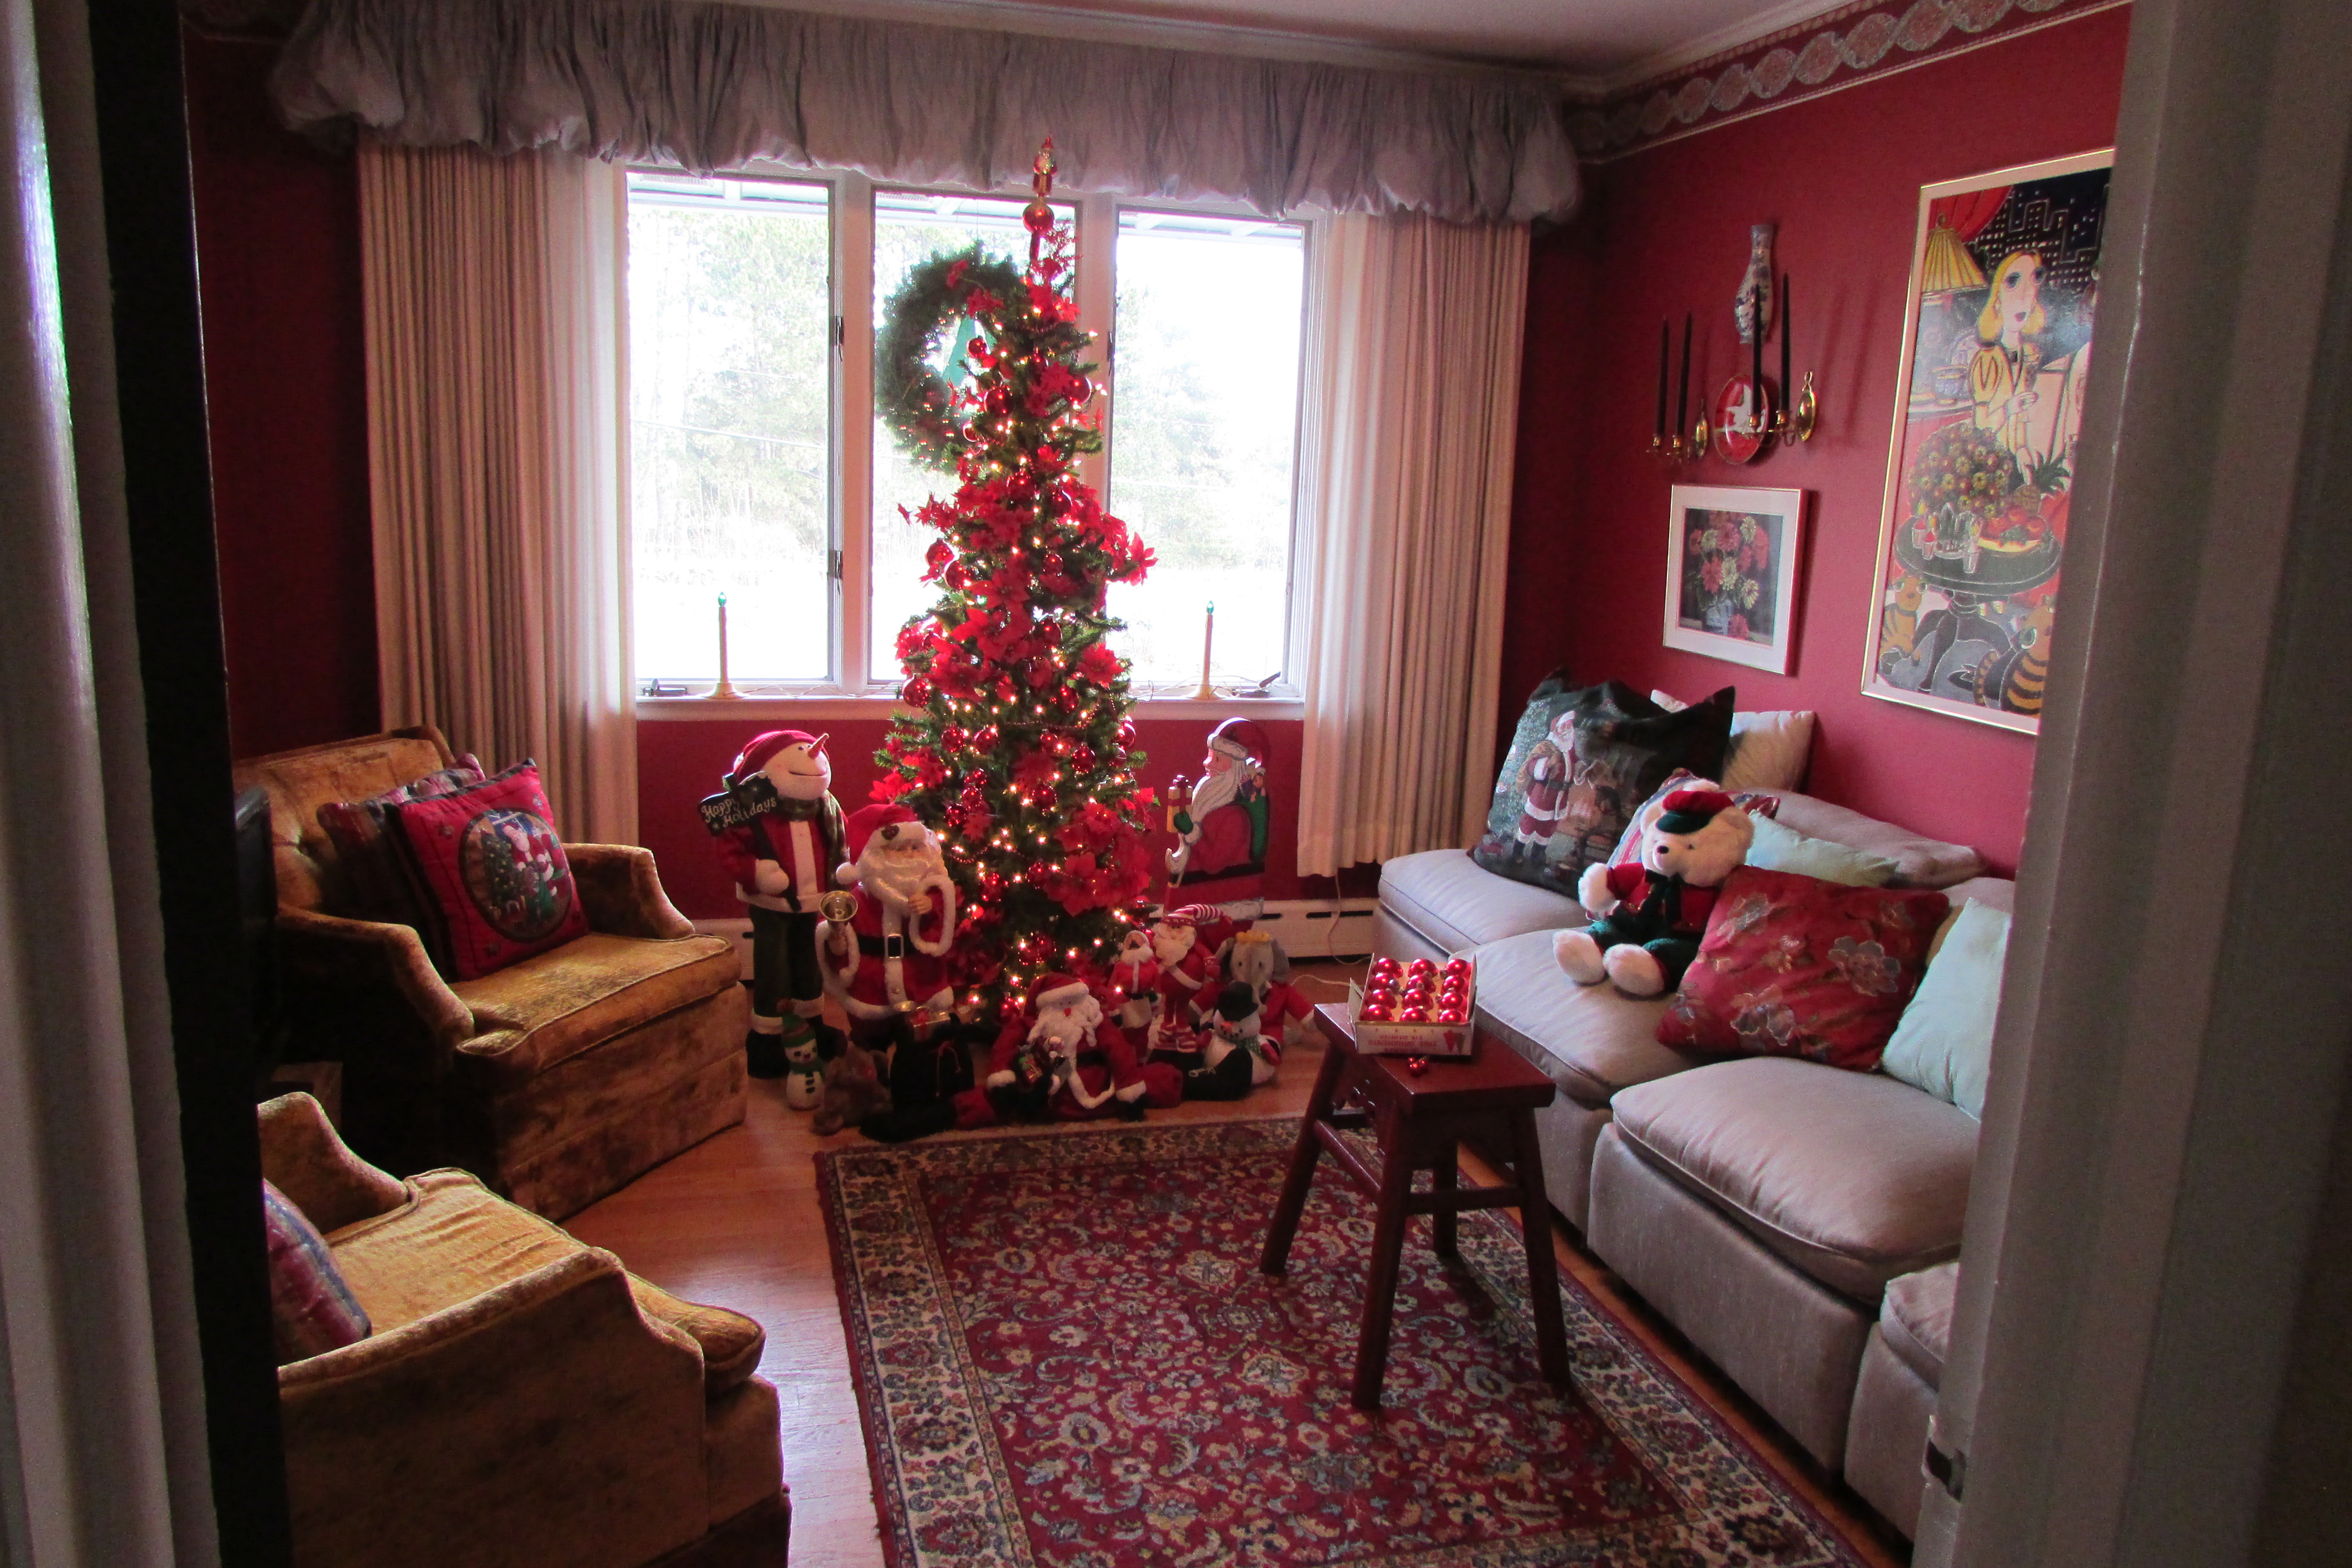
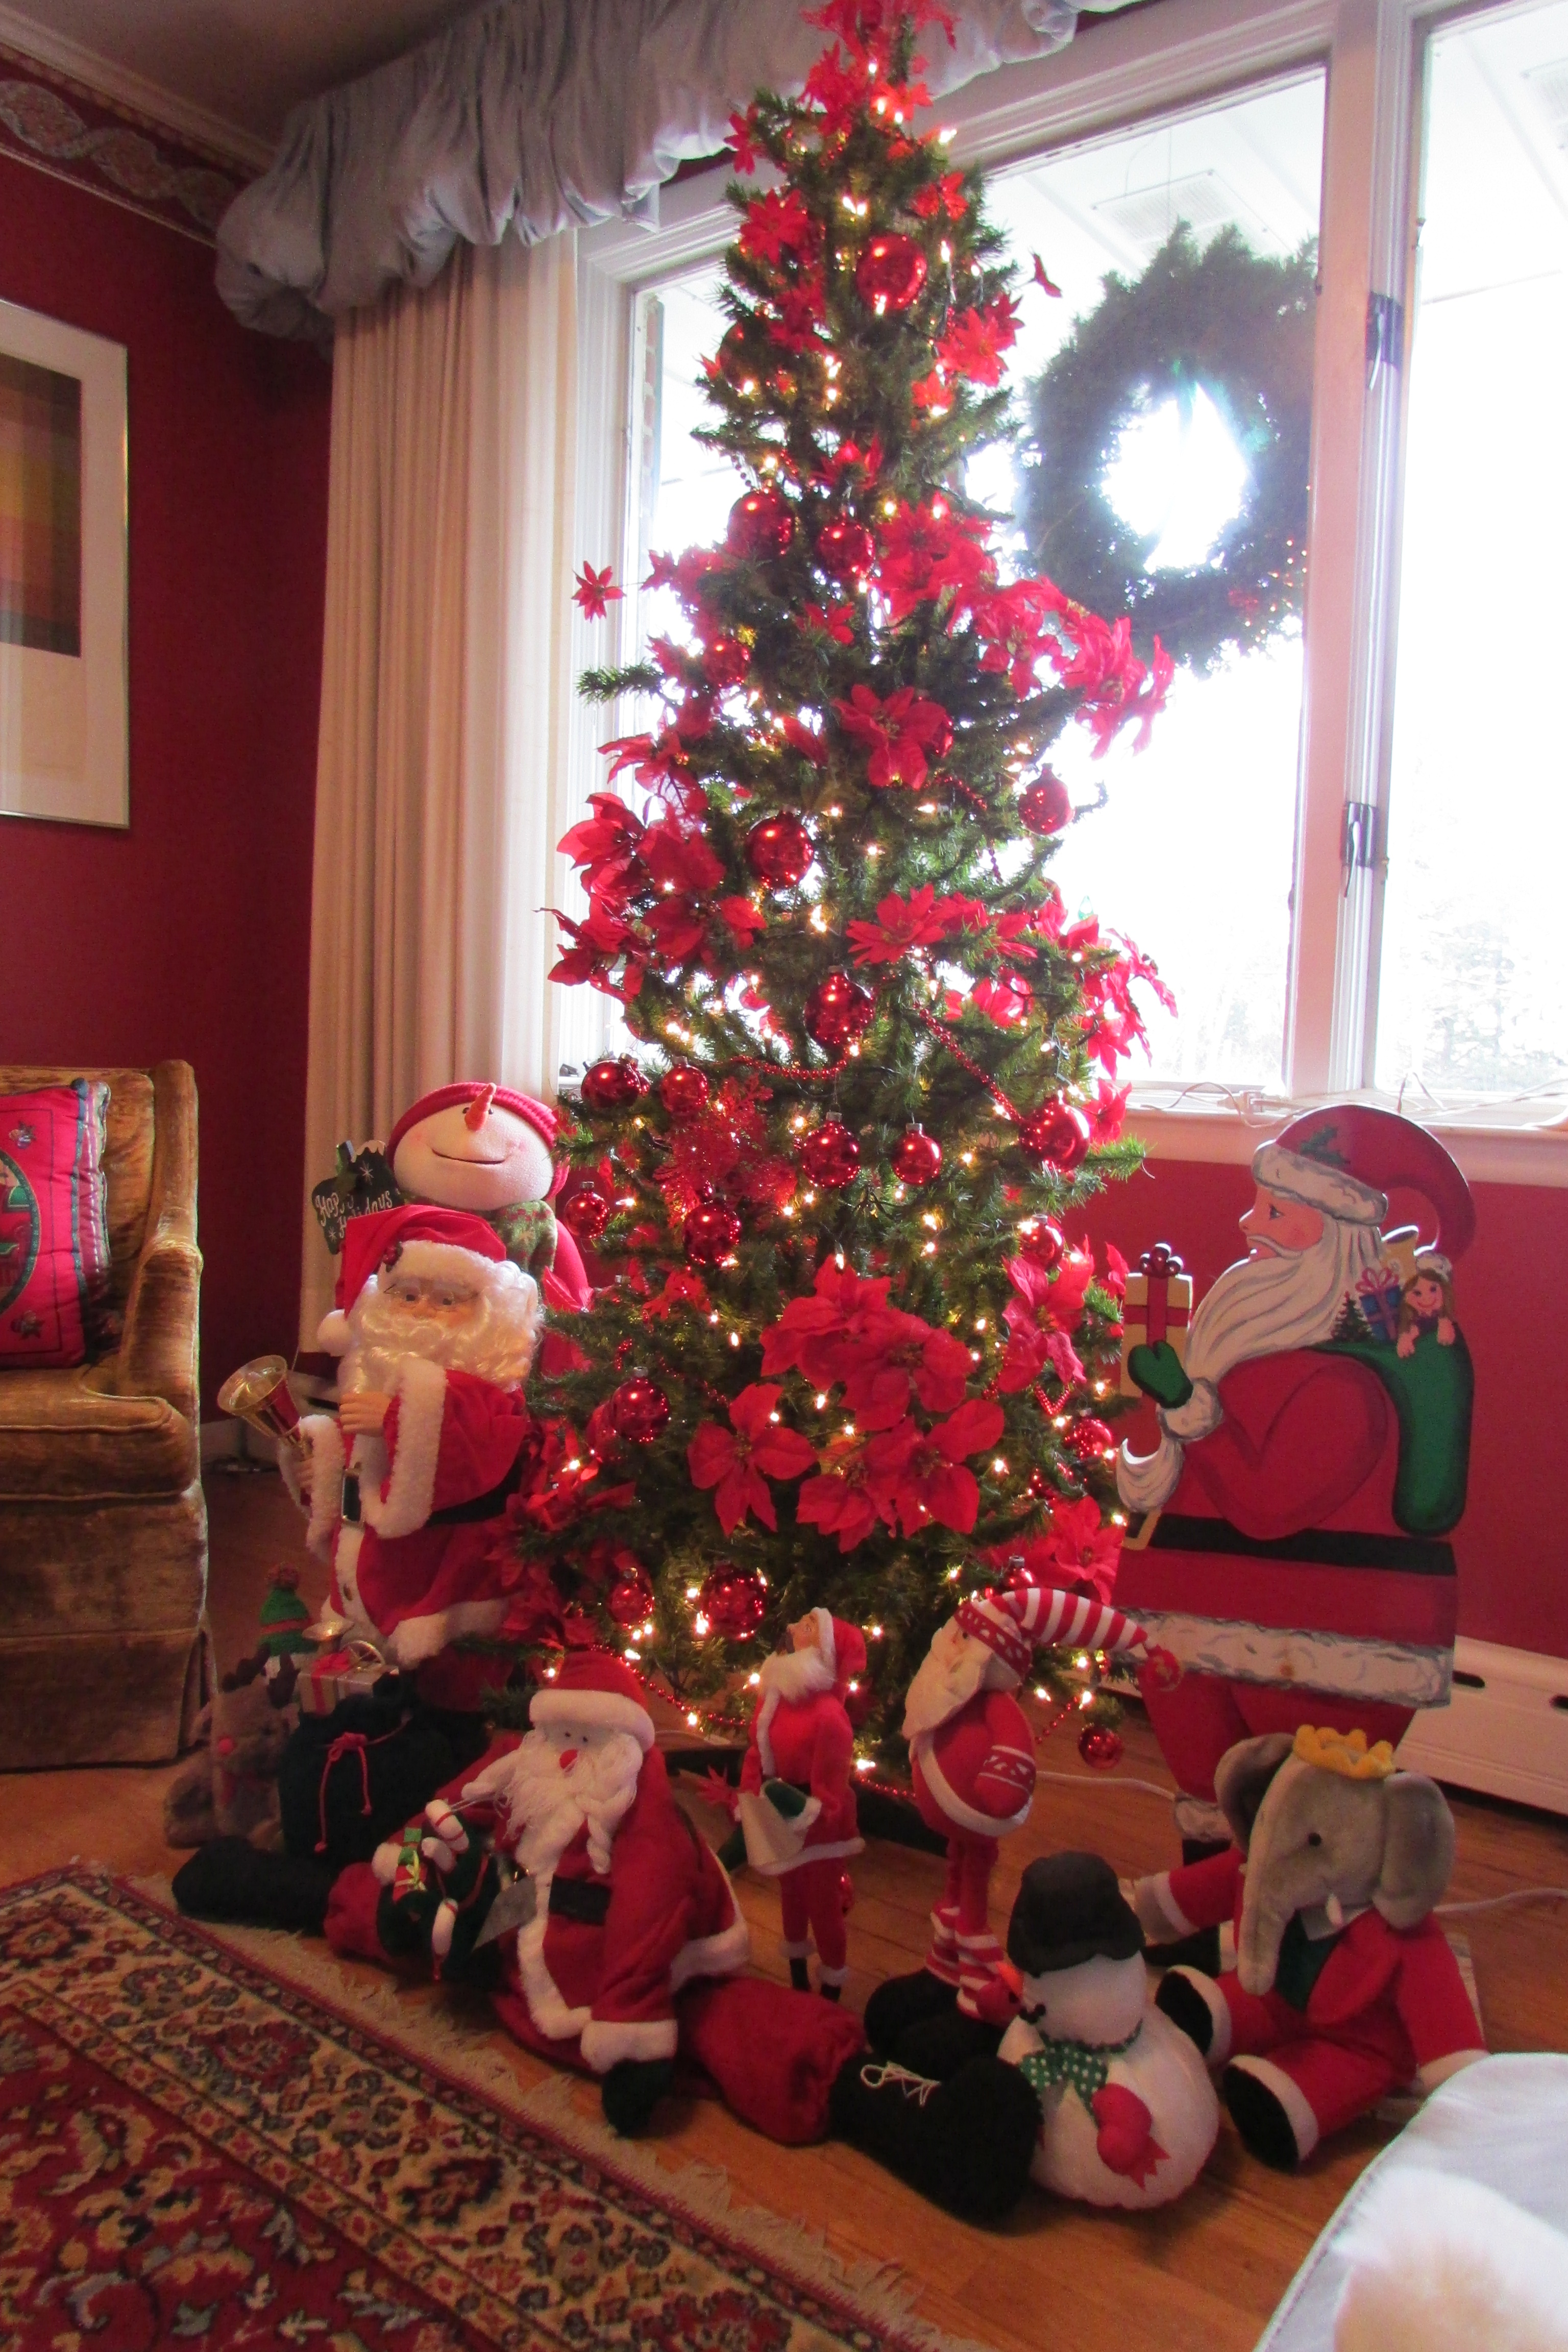 Our final interior spot to examine is my Ming Red TV room. This year my 31-year-old Slim Canadian Spruce is covered with white lights, red bead garland, assorted sized red metallic bulbs and all different sizes of silk poinsettia flower heads and bouquets. Most years the poinsettias are used in arrangements, but this year they have been re-purposed as tree decorations.
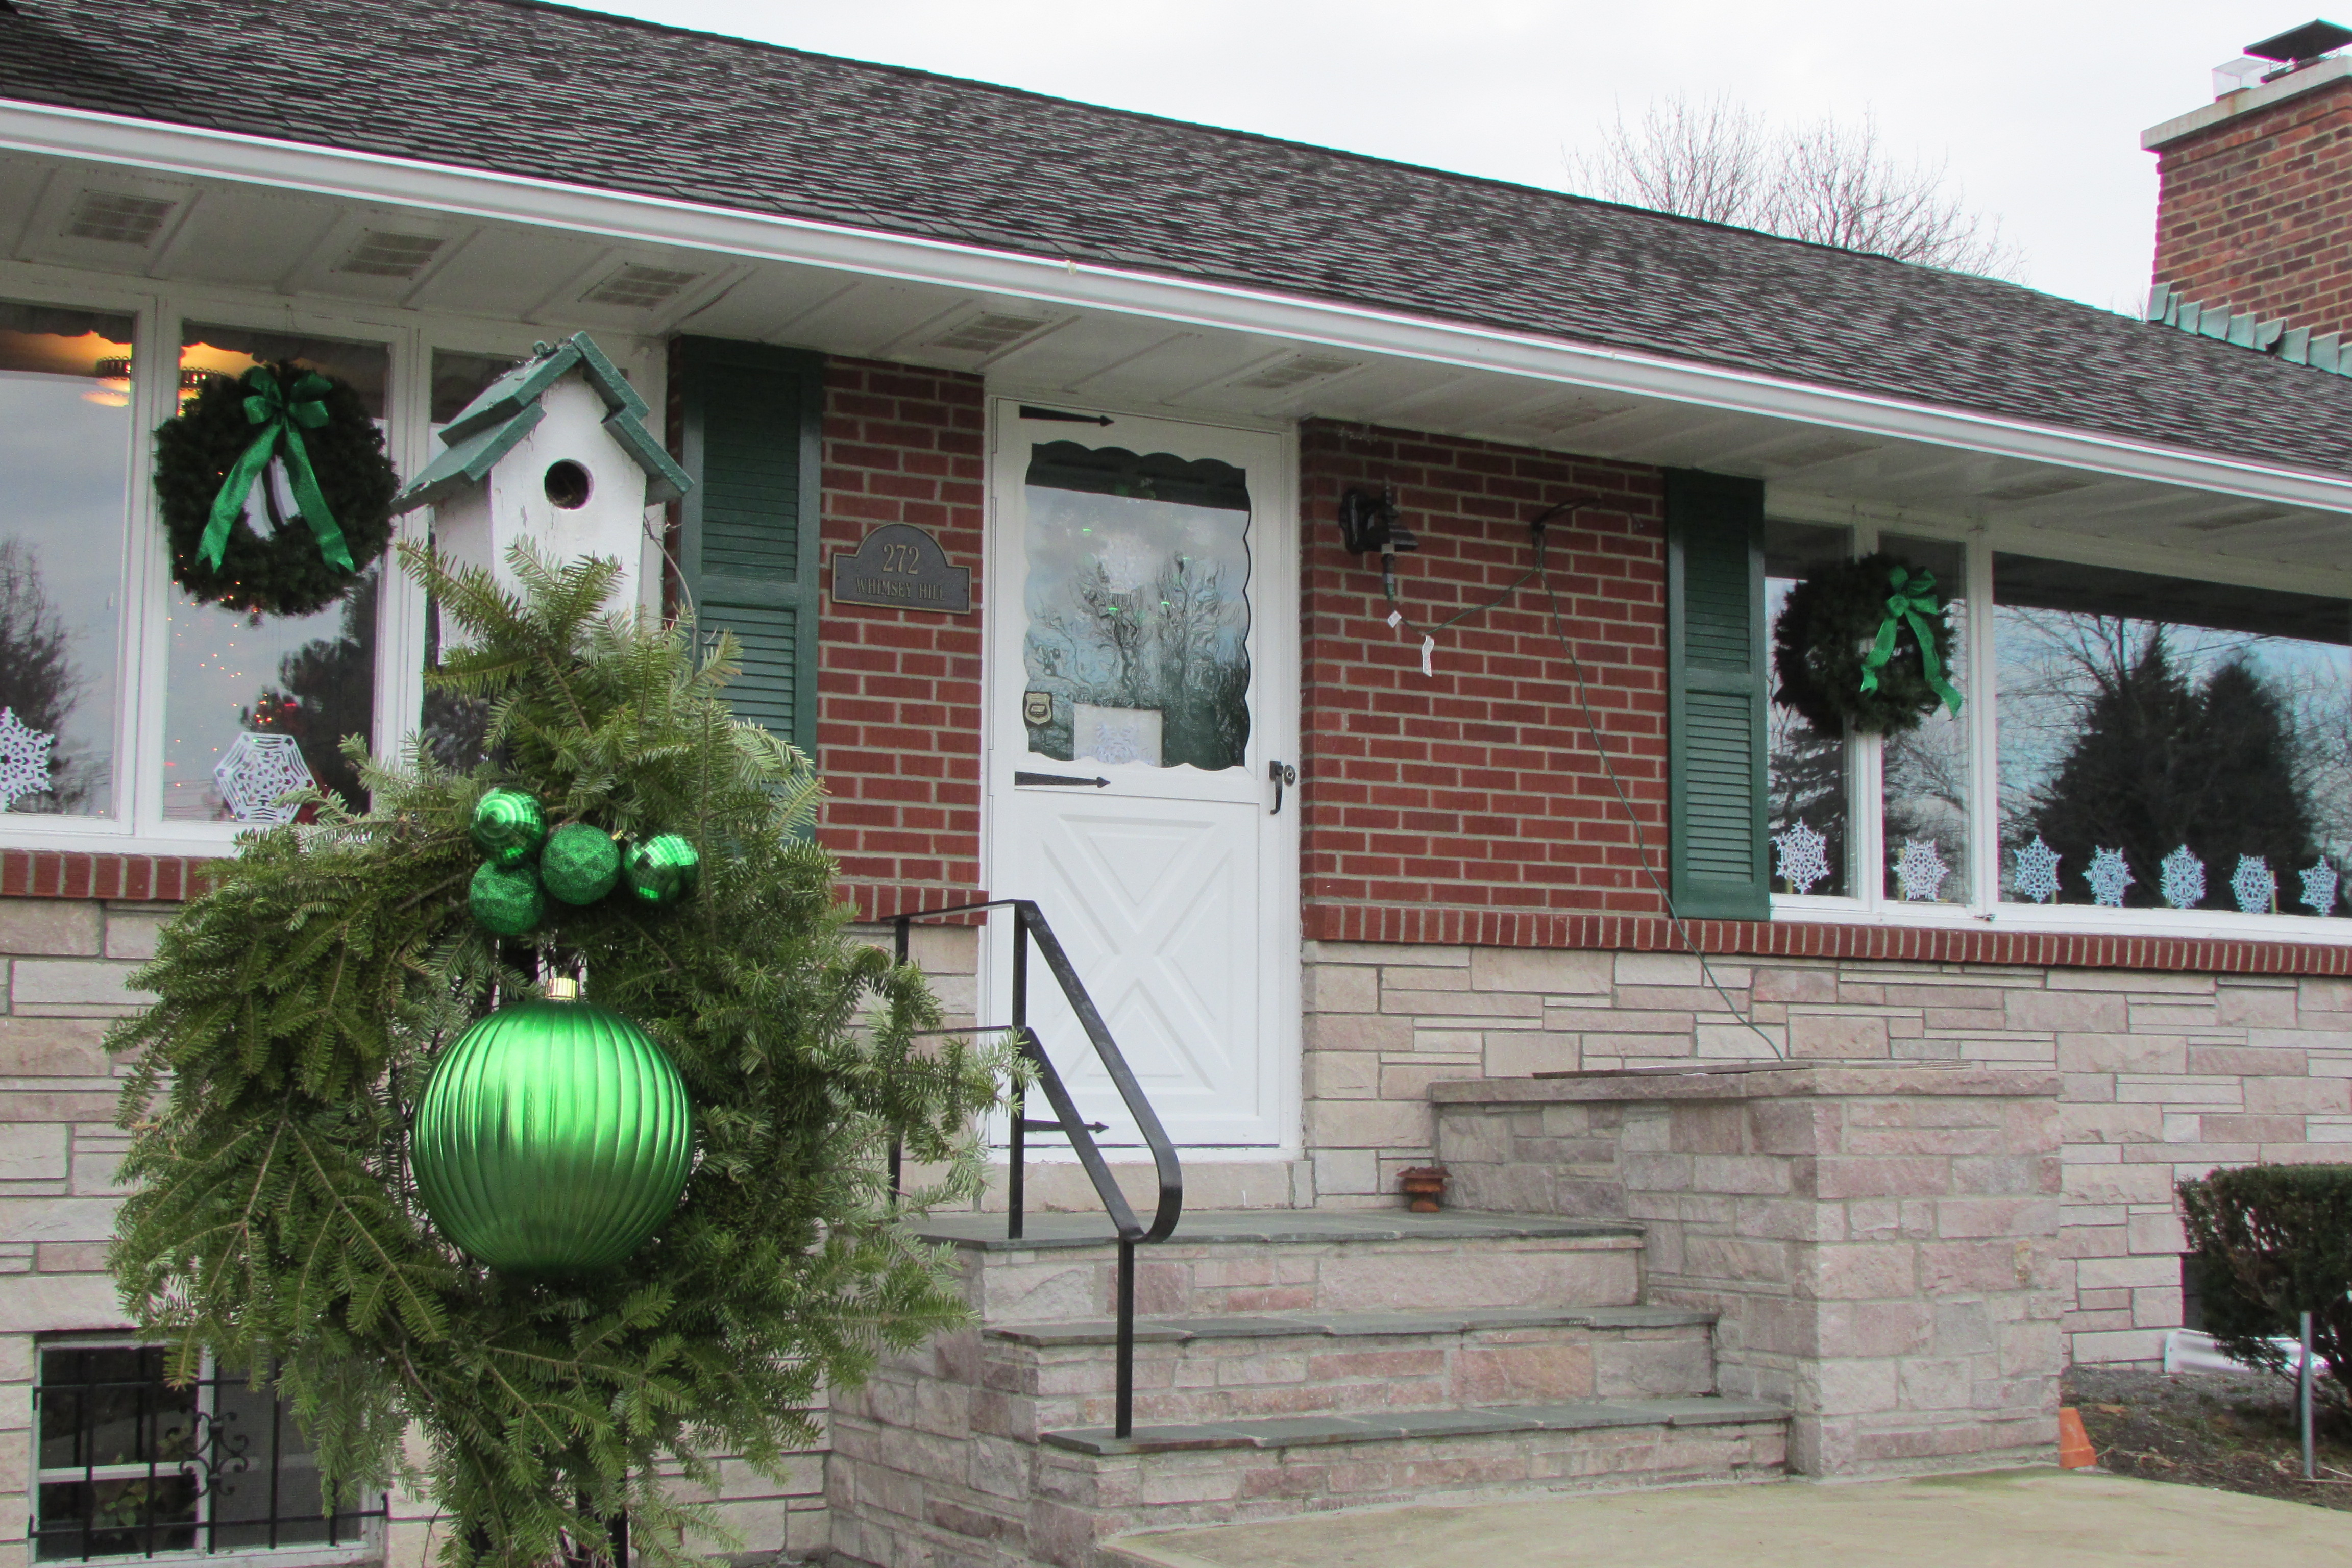
The bottom photo shows a collection of stuffed fabric Santas that are just a small part of my Santa collection, which this year I am not putting out.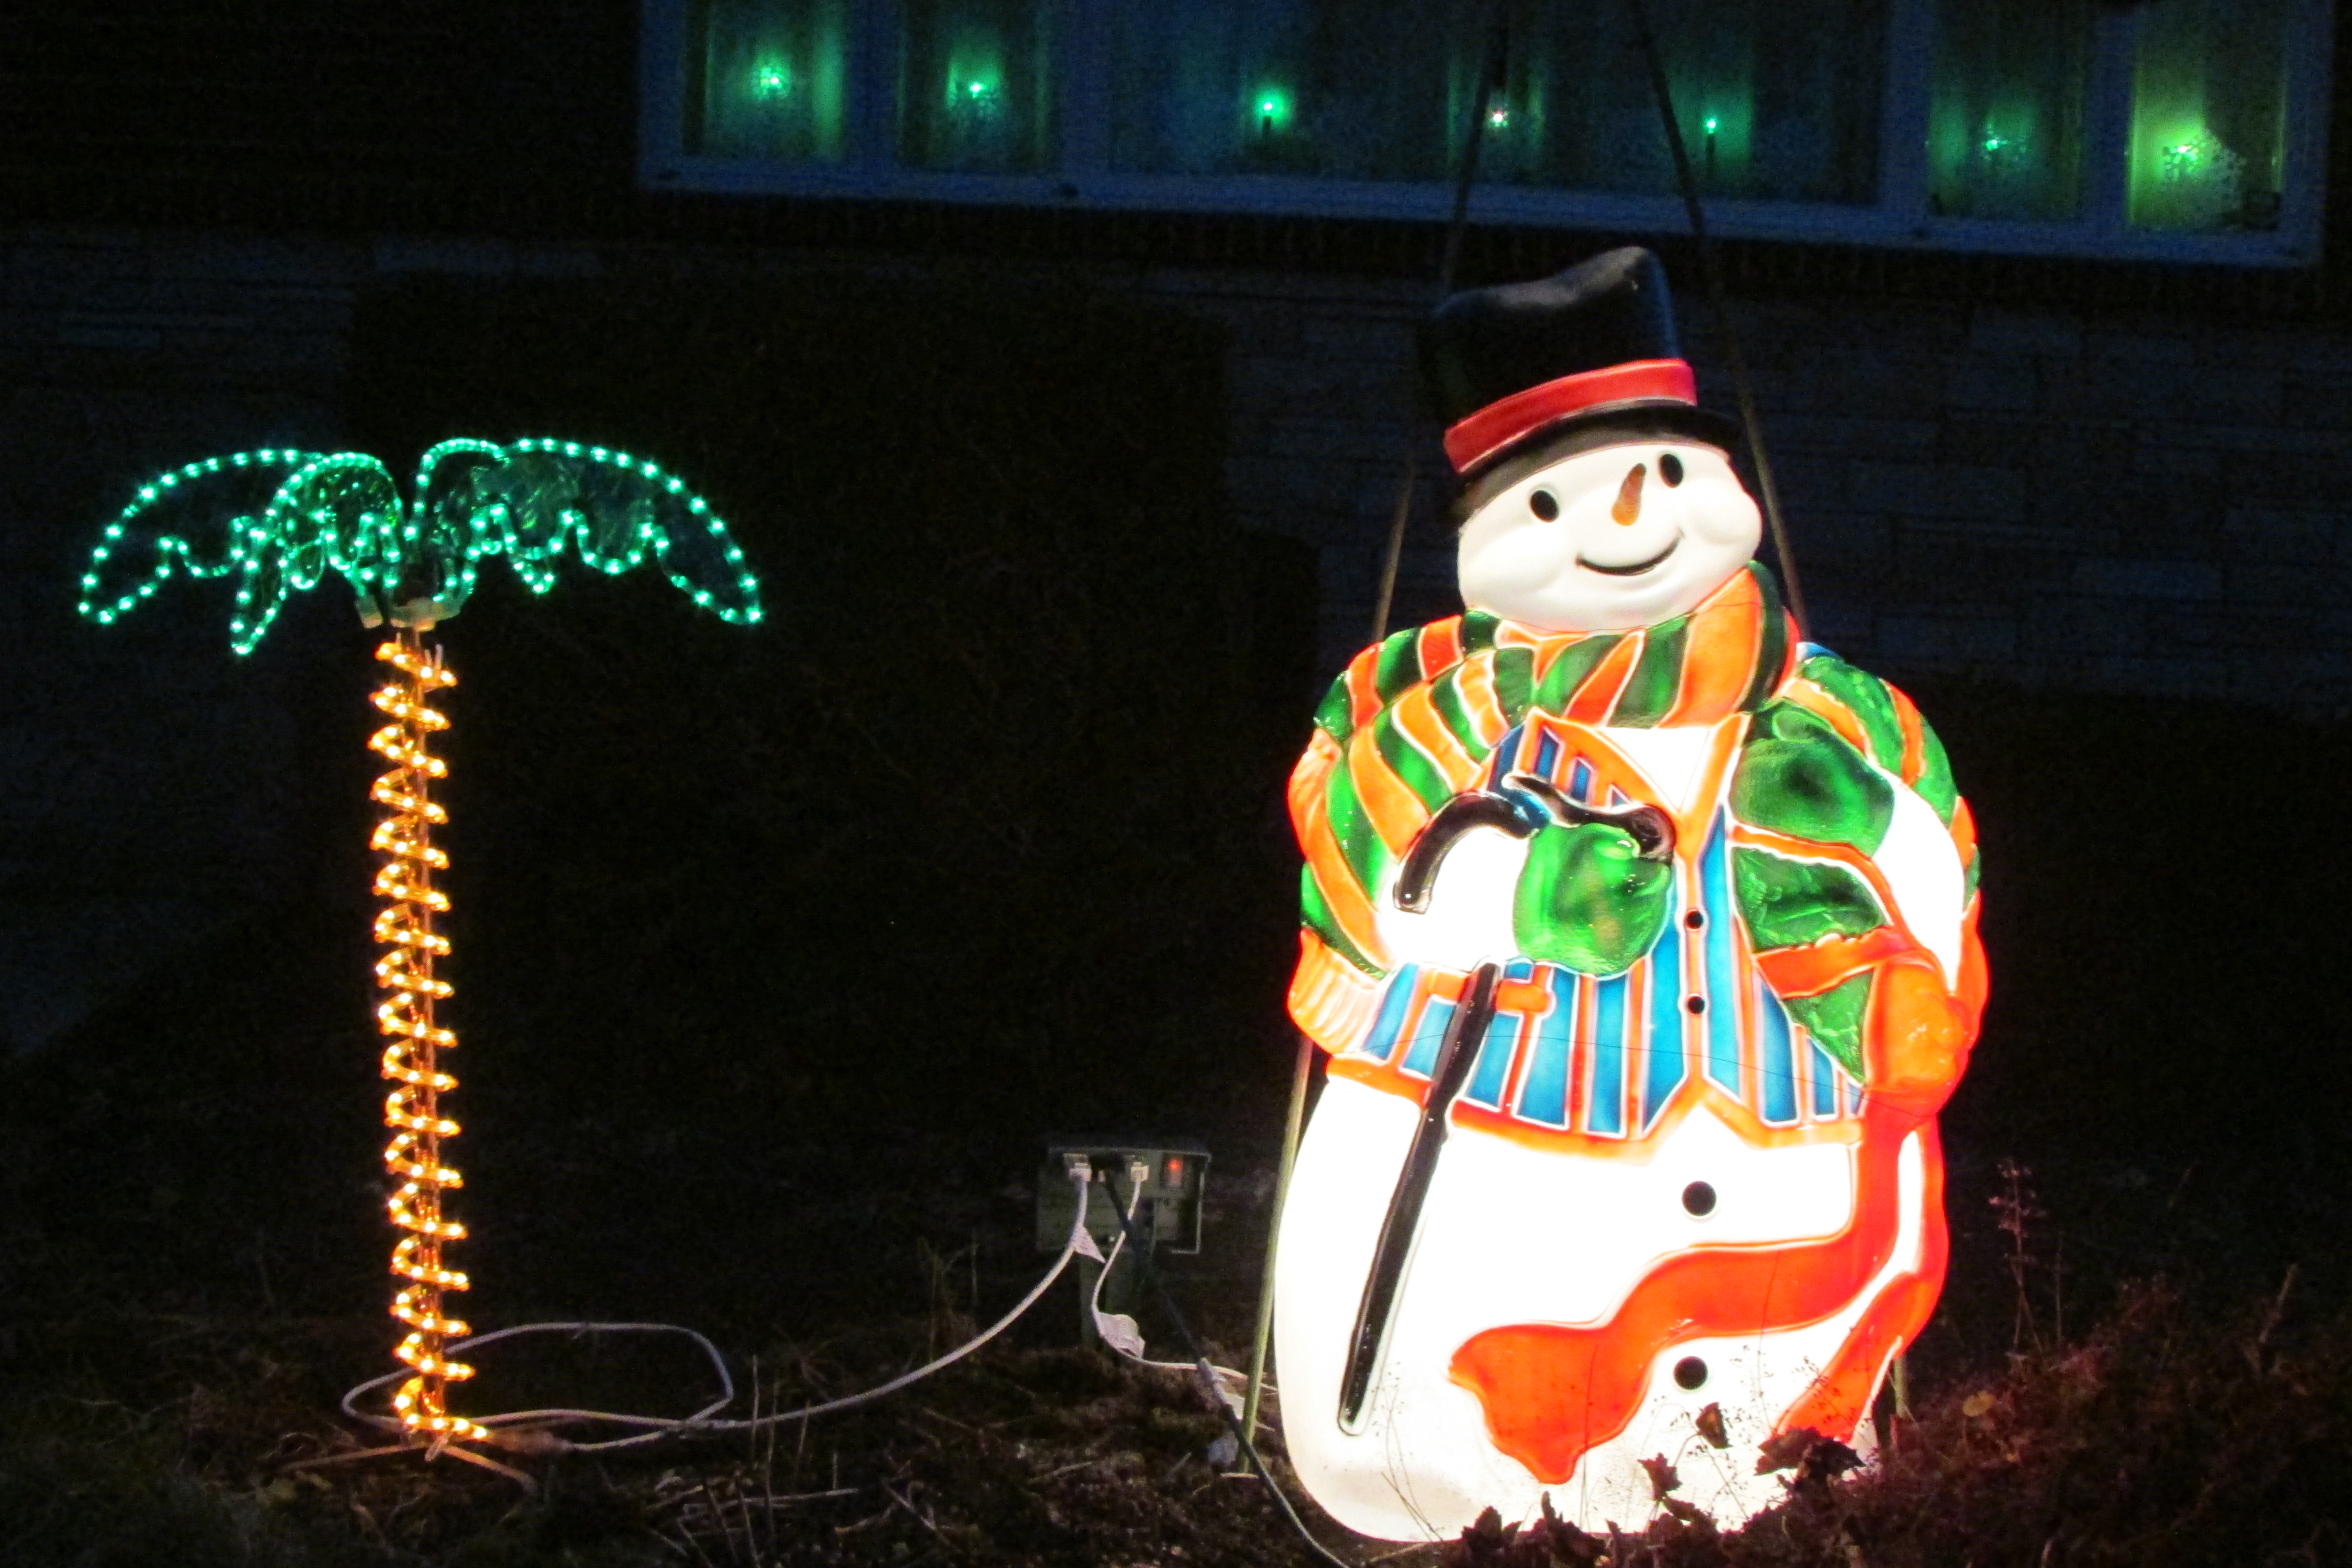 Now we’re outside. What says Christmas and Winter more than a light up Snowman next to a Palm tree to greet guests at the front door.
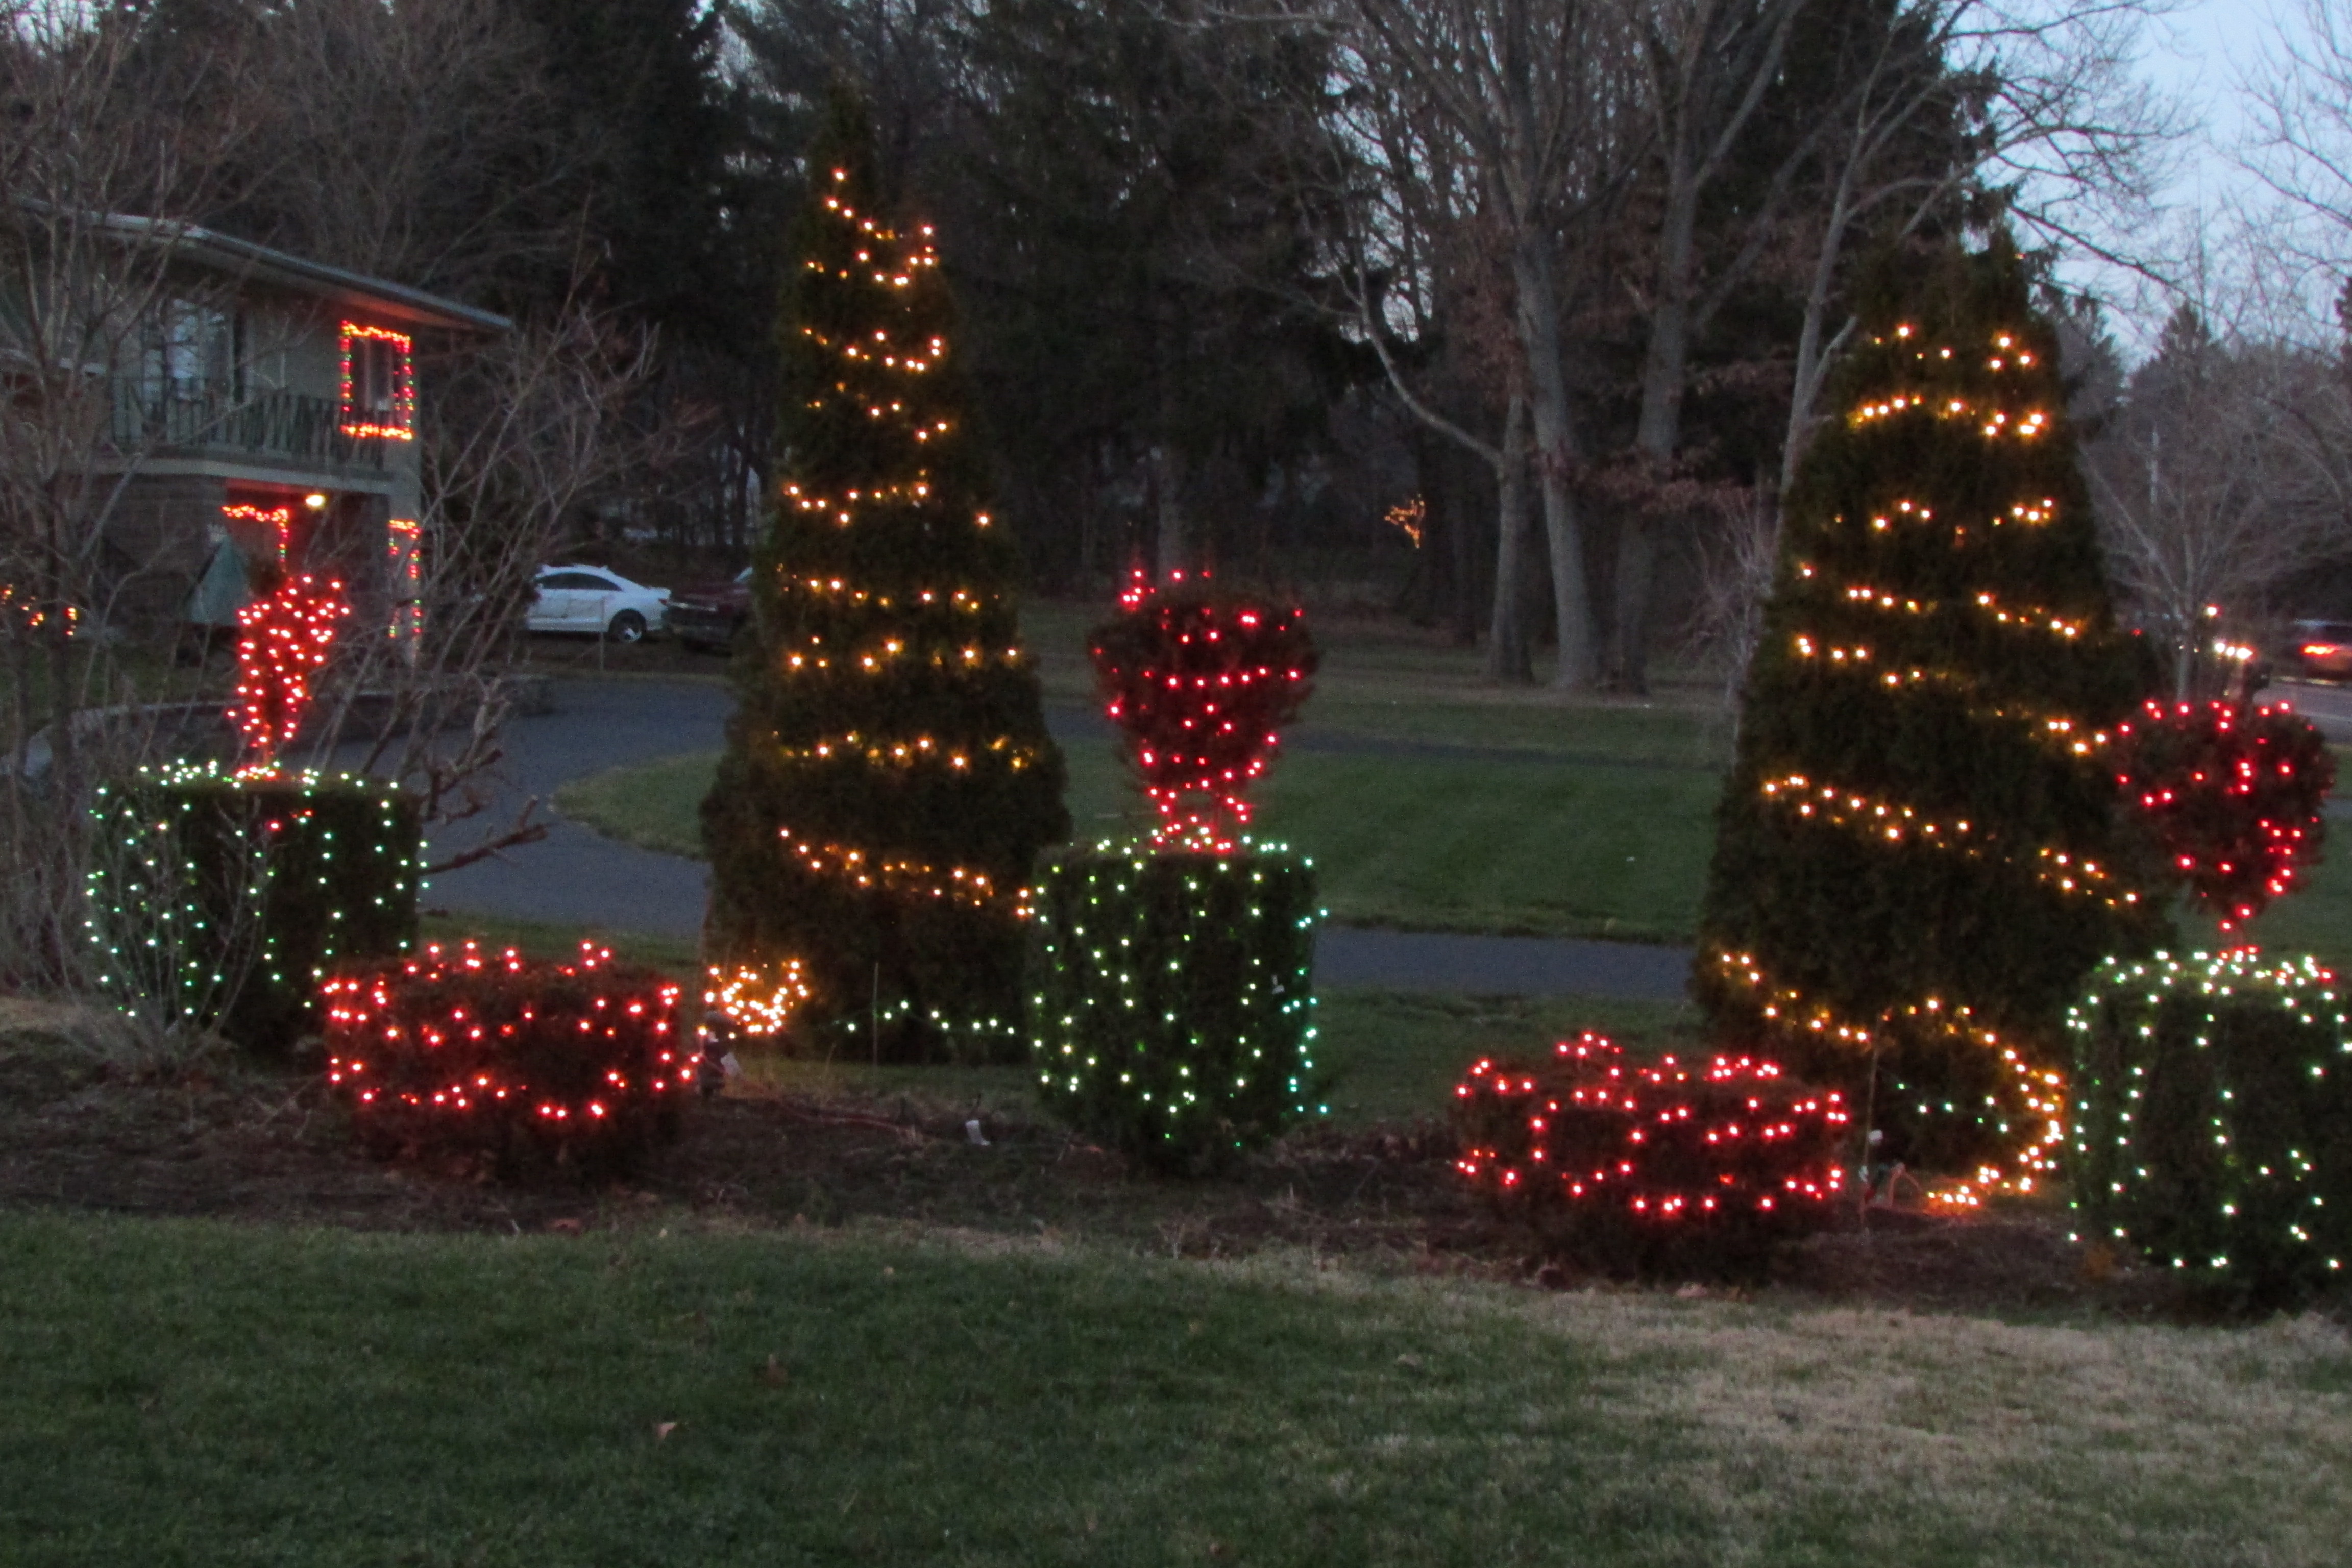 I live in a suburban area that I feel is a bit like country by the city, but I have a major road, with a lot of traffic, that passes by my house. Each year I try to put out lights, down on the lawn, out by the road, for people in passing cars to see. Don’t the upright yews, that I’ve trained as topiary look a bit like green Christmas packages with red bows.?
So there you have it, a look at my 2015 Christmas decorations. I hope that in some way, something that I’ve done inspires you with your creative process. Merry Christmas and Happy 2016 to you all!
Companion Posts on Fred Gonsowski Garden Home.com
Putting Lights on a Christmas Tree..The EASY Way 11-3-2011,
It’s Easy to Fluff a Fake/Artificial Christmas Wreath 11-30-2011,
Christmas Tree Decorating…Step-by-Step, Like a Pro 11-13-2011,
How to Decorate a Christmas Tree with Tulle 10-20-2012,
It’s Easy to make a No Tie Bow for your Christmas Wreath 12-8-2011,
Turn your Paper Snowflake into a Snowflake Snowman 12-14-2011,
Have a Joyful Holiday Everyone 12-19-2011,
Seasons Greetings from Whimsey Hill House12-21-2013,
Happy Holidays Everyone 12-20-2014.


Beautifully done, and yes the upright yews definitely look like gift boxes. I’ve enjoyed all of your posts very much, you put so much thought into your designs. Merry Christmas & Happy New Year to you too!
Hi there Margaret, My sister, also named Margaret was the first one to comment on them looking like gift boxes. Like names might think the same;-} Merry Christmas and Happy 2016 to you also!.
Merry Christmas Mr.Gonsowski !
I love reading your blogs, especially the Christmas ones !! I have 16 trees in my house (all sizes) and love to decorate for the holidays !! I love how you did the arrangement in the Chinese vase and I wanted to ask you if it was difficult to spray paint the hydrangas. I would love to try to duplicate yours !!
thanks so much !!!
Rosemary
Hi there Rosemary, here are the things I want you to think about, if and when you spray paint the hydrangea flower heads..
(1) Spray paint the flower heads outdoors, on a grassy area, on a windless day.
(2) Spread an old sheet, blanket, or big piece of cardboard on the grass to protect it.
(3) Have a number of plastic garden pots that bushes come in, old plastic buckets, or old pails to hold the flower stems in while painting. PUT a heavy stone or brick in the bottom of each container, so it can not be moved if wind comes up.
(4) Position the flower heads in the buckets so they are not too close to each other, so you can easily spray them from all sides.
(5) Wearing gloves and some kind of face/nose dust mask, spray the hydrangea heads lightly with the spray paint. You don’t want to spray the paint on too thick. Spray all of your heads once, then go back and see if they need extra coverage. Let them stay outside for a while, while the paint dries.
(6) Bring the sprayed heads into a garage and leave them there overnight, or for a day of two, until the paint smell completely goes away.
(7) Wearing gloves, you can do it in a garage with the door open, spray the hydrangea heads once with the Aqua Net hair spray. A few minutes later spray them again. Let stay in the garage overnight, or until the smell dissipates.
You can then bring the flower heads indoors to arrange with no problems. I hope my instructions help you to decide if you will be doing the project this Holiday Season or not. Merry Christmas and Happy 2016 to you!
Everything looks so beautiful, Fred! You’ve inspired me. Kath and Glenn
Hi there Kath, it was soo nice we were all able to be together for the two events, in the past few weeks. Merry Christmas and Happy 2016 to both you and The Mountain Man (Mr. Glenn).
Hi Fred, i just adore the kitchen table set with red and white cloth and gingerbread men cookies! You’ve inspired me to bake some gingerbread myself!
Suzanne, the premise of this post is to inspire, so I’m glad you found an idea here. I do love a homemade gingerbread cookie; but alas, mine shown in the photo, came from Fresh Market ;-} After posting the photo, I thought what a wonderful presentation it would also make for a Christmas Breakfast, especially if it is at Grandmother’s house. Wishing you a happy 2016!
Just found your “how-to-do-most-anything-Christmas blog. Thanks so much. I’ve had a great time. I plan to revisit often.
Hi there Sarah, thanks for your comment, Happy New Year to you! Hope this blog is inspiring to you on other levels besides Christmas.