
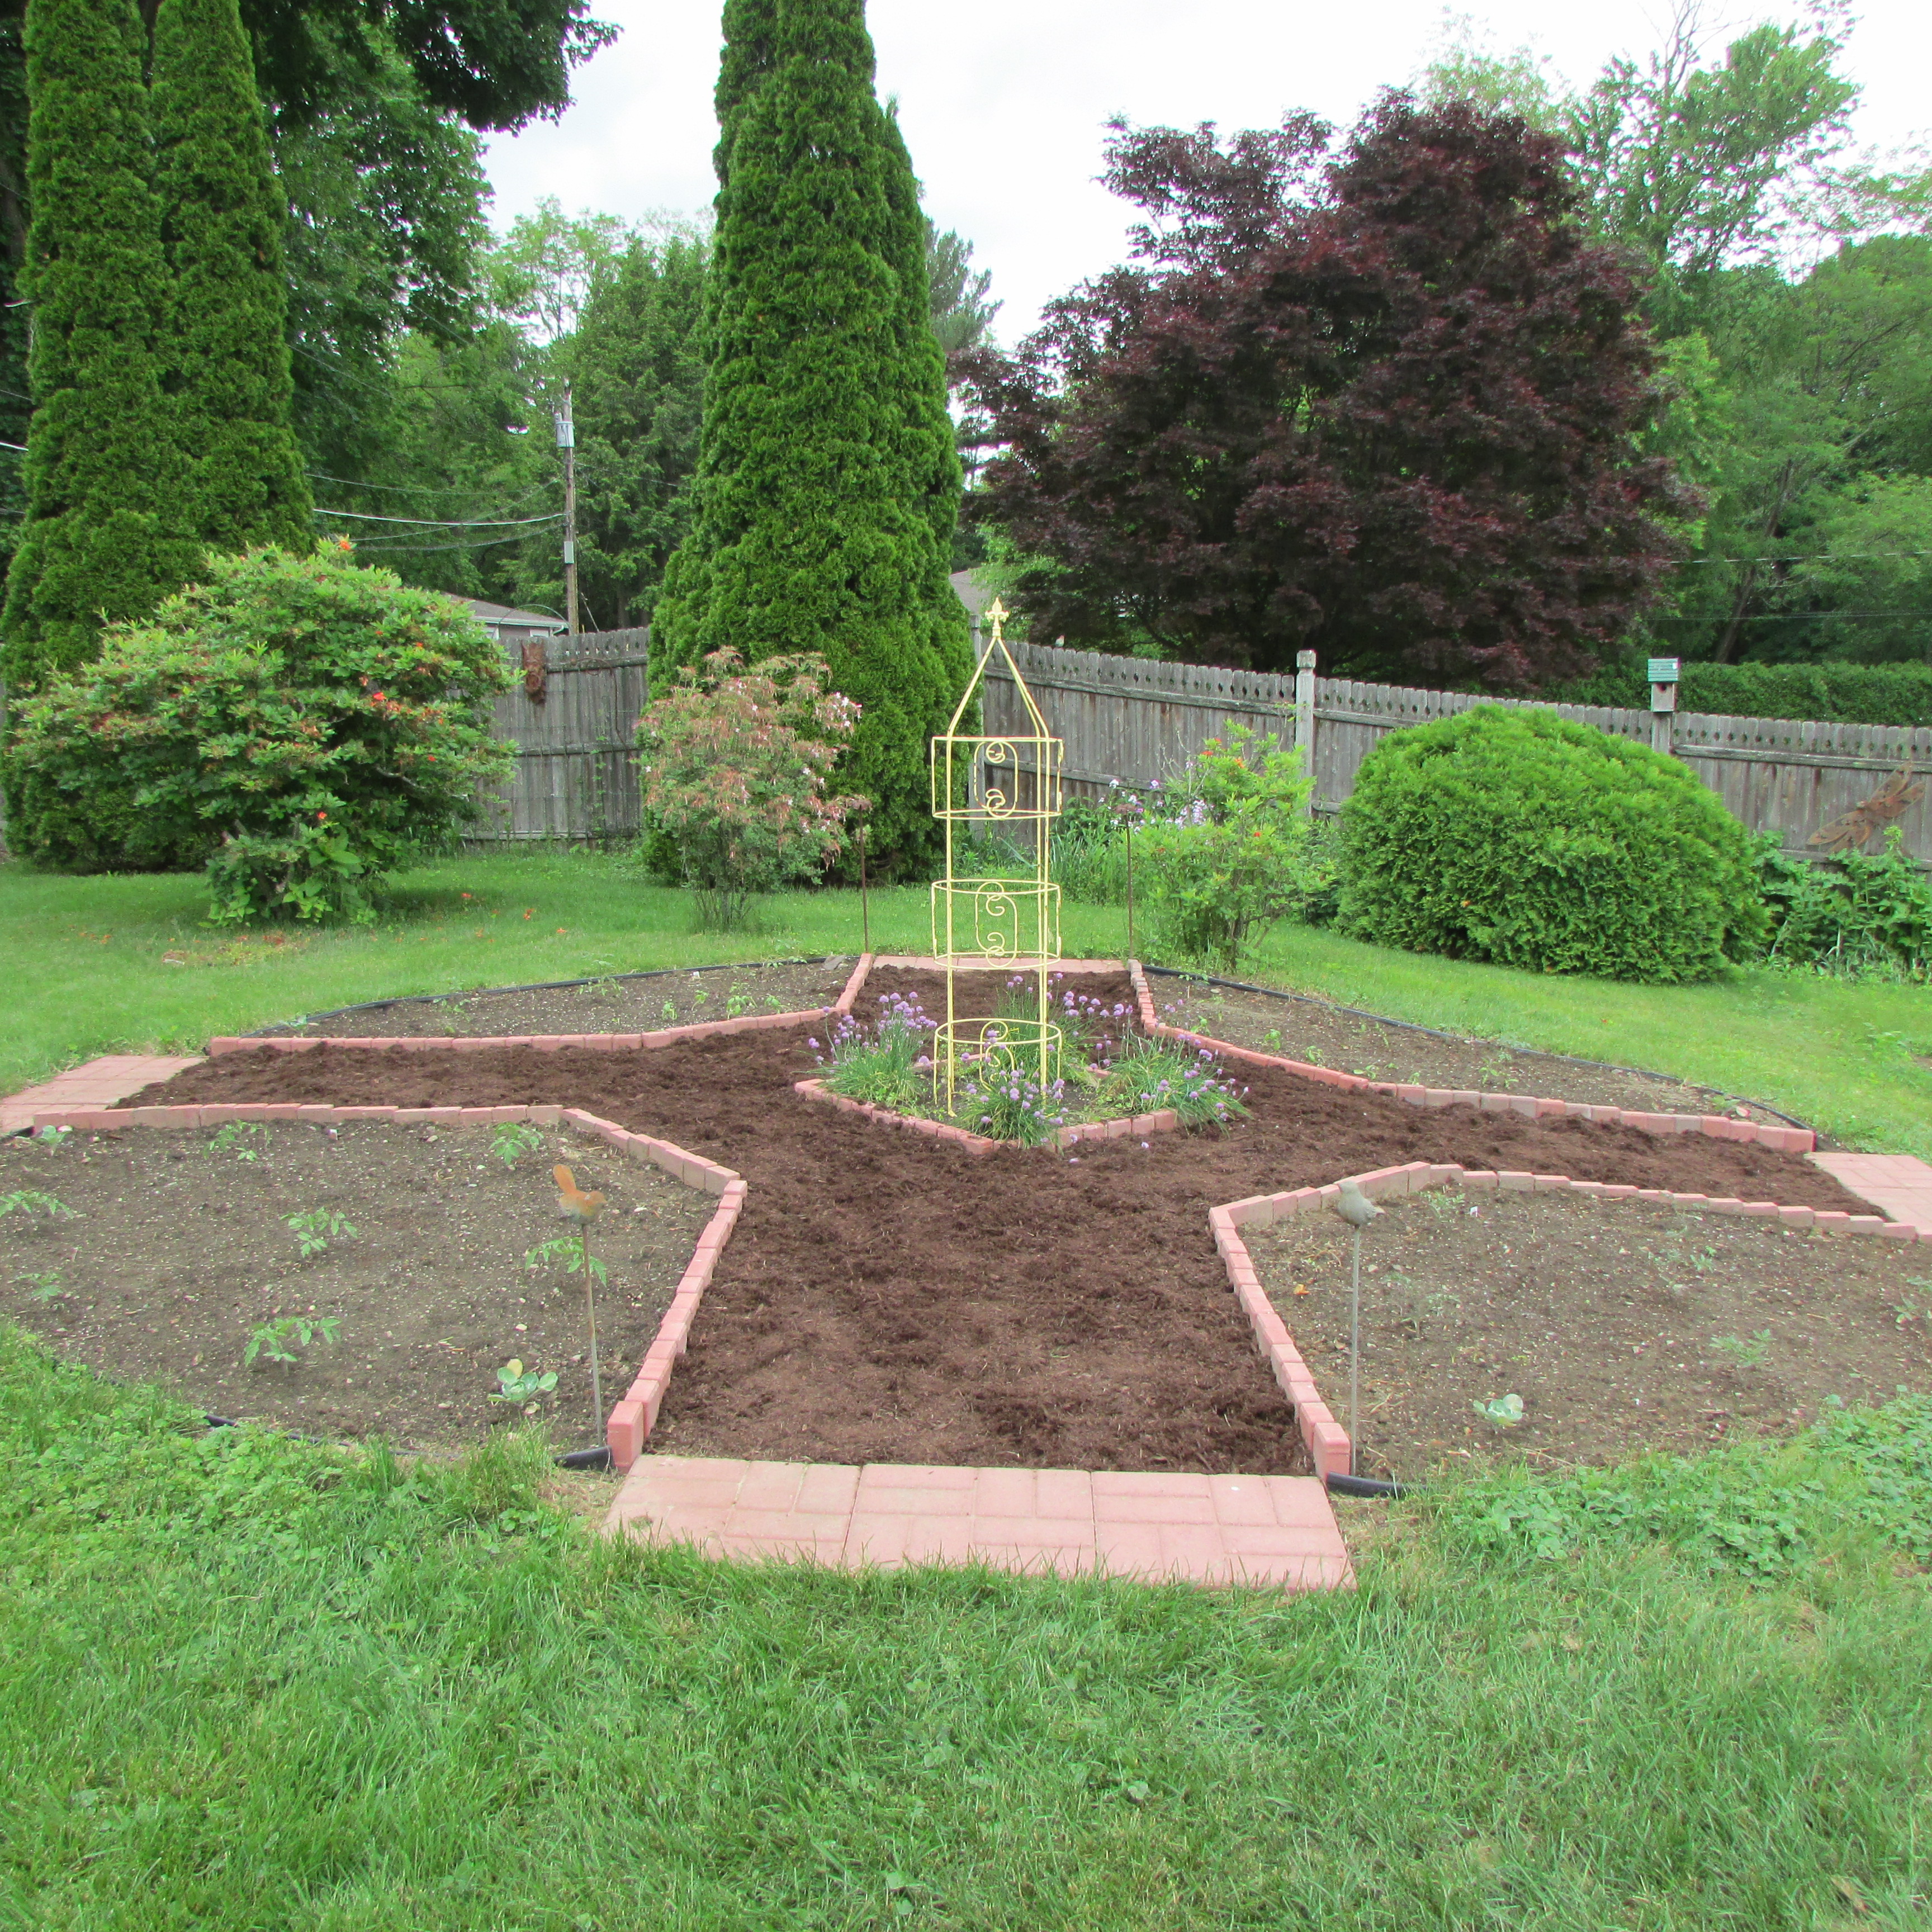
 One of my many projects that I’ve so far tackled this Spring was the redesign and outlining of my vegetable garden in brick. For years, I just had the planting spaces surrounded by black plastic edging, but finally it had come a time for a visual upgrade and this post shows how I did it.
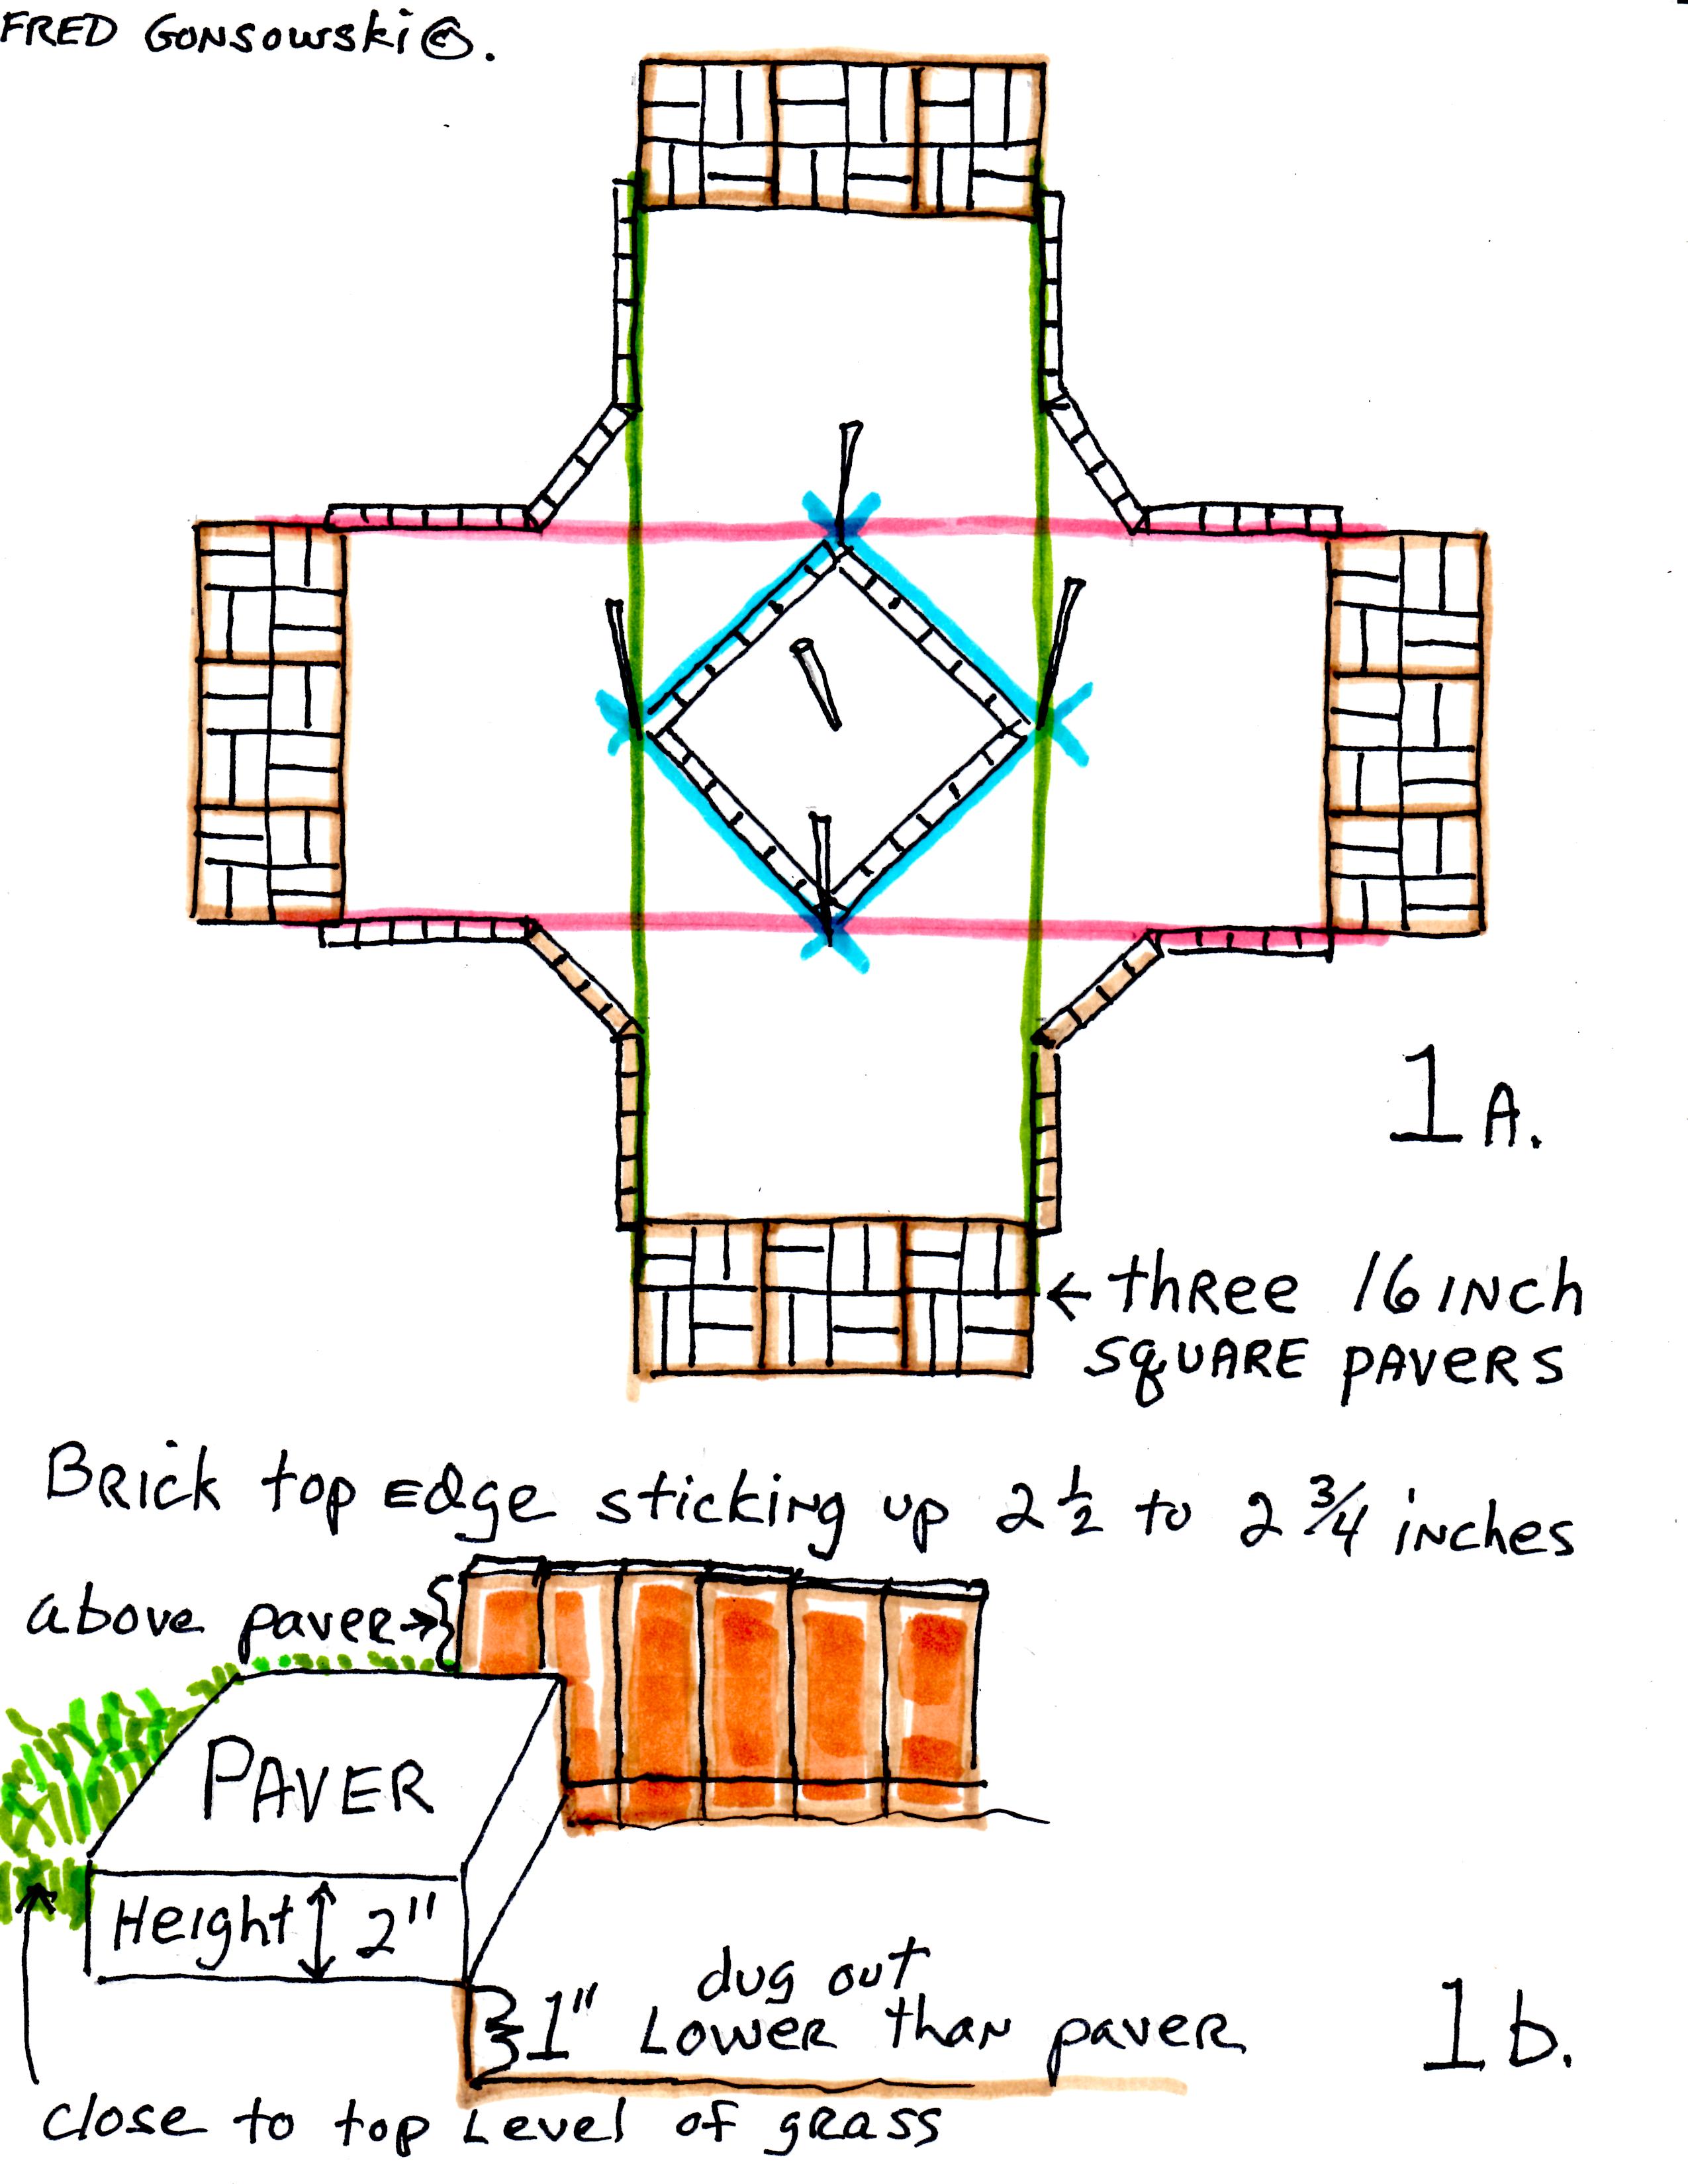
Laying out the garden using the pavers, bamboo sticks and string…
The above illustrations shows how I laid out and built the garden. Let’s first look at the top of the drawing labeled 1a.
The first thing that I had to address was the placement of the three 16″ square brick patio pavers, that are laid next to each other, on the four sides of the garden, as they mark the entrance to the garden at those points. I also had to position the first three pavers, so they lined up with a path that runs by a dahlia garden that I made this year, the raspberry patch, and by the daylily and grass bed that finally ends close to the house, as all these planting areas placed next to each other create a walk on the north side of my property.
Looking at illustration 1a, you see the placement of the brick patio pavers on the four sides of the garden. The first pavers I placed were the ones on the right, which lined up with the other gardens along the path and then the ones on the left were placed, (you can see how they line up with each other by looking at the coral-pink lines).
The placing of the first three pavers took a bit of time, because I had to make sure that they visually lined up with the garden path they were part of. Many times I would place the first three pavers, then walk back to the other side of the garden to see how they looked, and they were just not right. I would then go back, in some cases, and move them just a half-inch, until I finally had them were I thought they visually looked best. After that I worked on placing the three patio pavers on the left, which also had to be adjusted a few times until they properly (visually) seemed to line up with the pavers placed across from them.
After the pavers were placed on the grass where I thought they should be, I took bamboo garden sticks and poked them in the ground on the sides of the pavers and took jute string and tied it to the bamboo sticks and ran it from one set of pavers to the other, as illustrated in coral-pink on the drawing.
Next, I measured the space between the two sets of pavers from their inside edges (edge of paver that the cedar mulch garden path will be touching) and divided that number in half. That number gave me the center point of the garden, marked by a bamboo stick seen in the blue diamond on the illustration.
Step two, I had to now place the pavers at the top and bottom of the garden, shown on the illustration, that are marked by the green lines. Knowing that I wanted the garden to have an equal length from north to south and east to west, I started at the center of the garden, marked by the bamboo stick, and measured up and down from there, (using the measurements from the above paragraph) which told me where to place the inside edge of the pavers. That part of the project had to also be done a few times, because it really was no different from the initial placement of the first sets of pavers. After the pavers were finally placed in the right positions, bamboo sticks and string were run between each other as I had done before.
Step three, I next had to figure out the placement of the central diamond. Having the jute strings stretched across the garden, as illustrated by the coral-pink and green lines, I measured each side of the square separately formed in the center, and divided that number in half for each side and then poked a bamboo stick in the ground to designate the center point of that side. I next ran jute string from one bamboo stick to the other, forming the diamond seen in blue on the illustration. 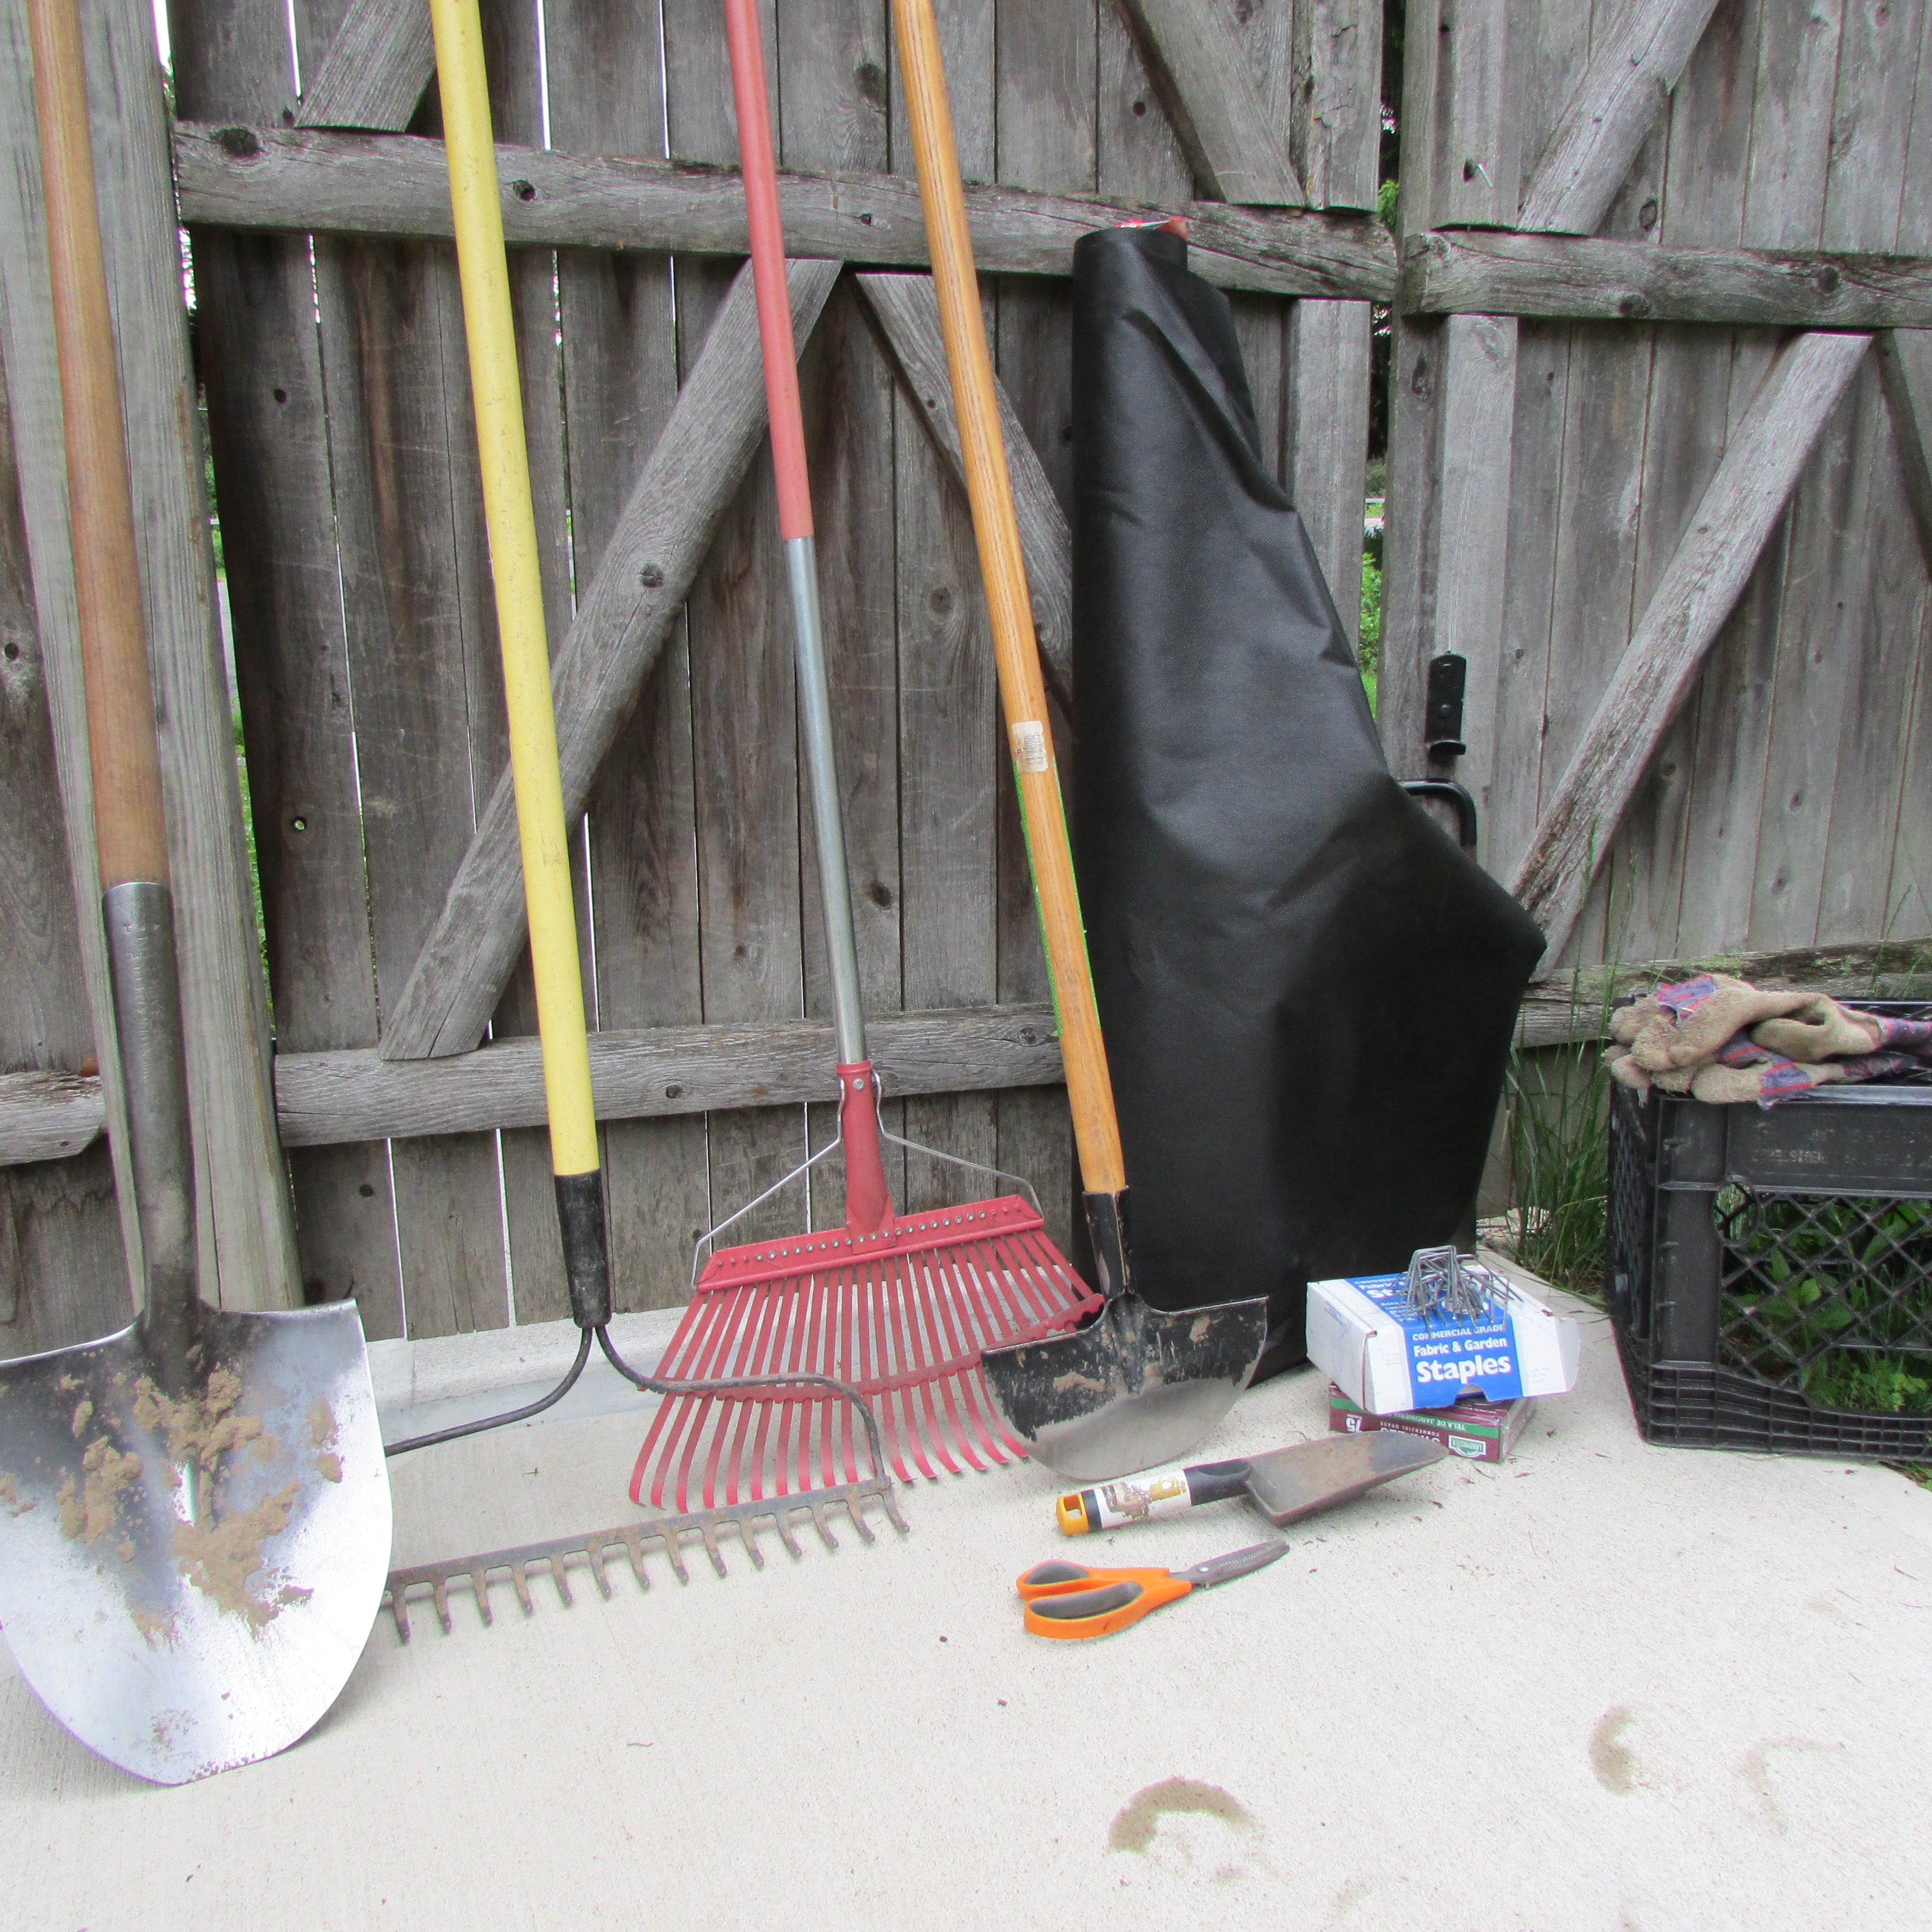 The above photo (click on photo to enlarge) shows the garden tools that I used to do the project: a shovel to dig out the garden paths and to work the garden beds, two different kinds of rakes to level the soil on the paths and in the planting area, a hand edger to cut around the pavers, scoop trowel to plant the bricks, scissors to cut string and the landscape fabric, 12 year weight landscape fabric, landscape fabric securing staples, a box to sit on while planting the bricks and work gloves.
Setting the pavers and bricks…
The next part of the project was to cut away the grass and dig down about two inches (as seen above in illustration 1b) so I could bury the three 16 inch square by 2 inch thick patio pavers, that make up each entry to the garden, at a level where they were just a little bit above the soil line. I took the hand edger and carefully cut around the pavers as close as possible so as not do disturb them. I then lifted the pavers, dug out the grass and dirt below them. After that I flattened the dirt as much as possible in the hole, tamped the dirt with a brick and put back the pavers. I had to lift the pavers out of the hole a few times and added more dirt in spots and take away some dirt in other places until they seemed level. I did that for all the entries to the garden.
The next project was to excavate for the garden paths. I dug down two inches, which is the height of the pavers and another inch to accommodate the landscape fabric and mulch that I would be placing on the paths later (illustration 1b shows that). I decided to used cedar mulch for the paths because it is less heavy and easier to get rid of than pea stone if I ever decided to eliminate the garden. 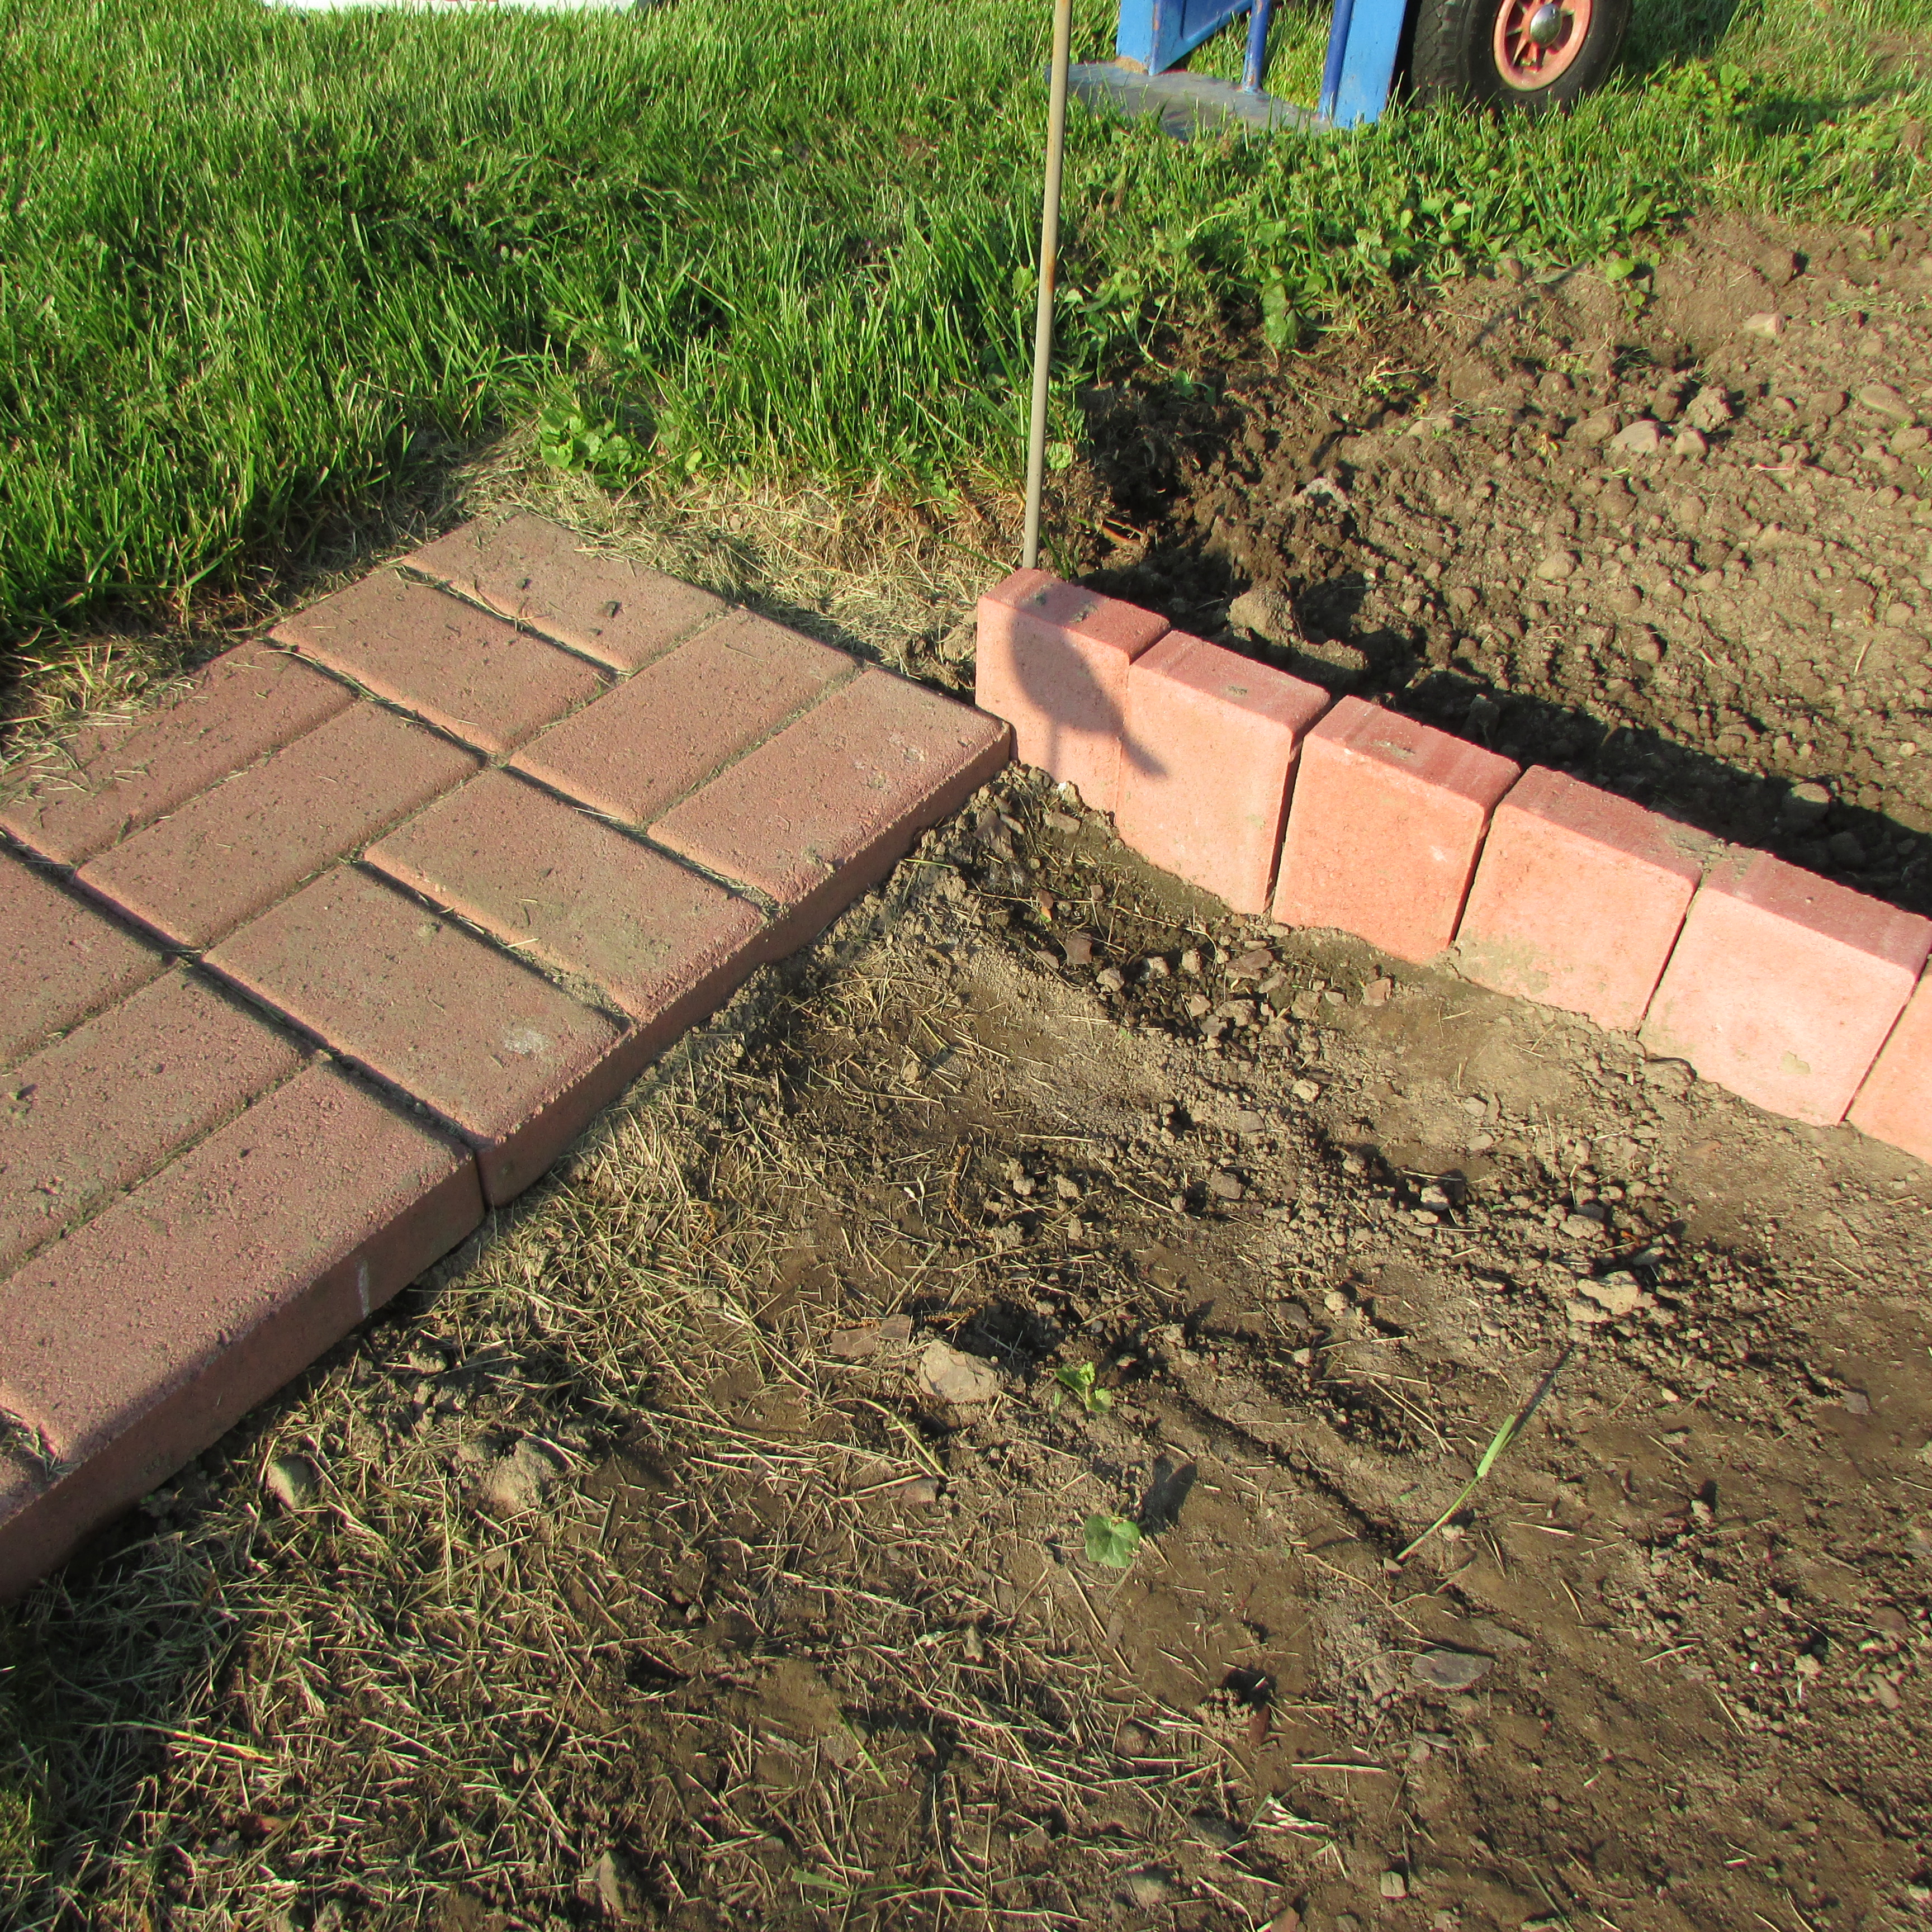
The above photo shows some of the bricks that have been planted, forming the inside edge of the garden. (To dig the holes for the bricks I used the scoop trowel seen in the above photo of garden tools). When I first started burying the bricks I planted them a bit too high, and after stepping back to look, thought I was creating the “Great Wall of China“, which I did not want.
At that moment I decided I wanted the tops of the bricks to be two and one half inches to two and three forth inches above the top edge of the brick patio pavers. Notice in the photo the bamboo stick; it has the jute string still attached to it, which guided me in the placement of the bricks in a straight line.
Also at that time, I realized that I did not have my bricks standing up perfectly straight, so my recommendation is to plant a few bricks, step back and see if you like the way they look and correct them or just continue on. Once you get the first few bricks standing as you like, the others will all fall into place.
 When it came to planting bricks I started out, on each side, working from the patio pavers toward the center. I put the same amount of bricks on each side so everything would line up as best as possible. I also had to stair-step the bricks a bit on one side of the garden so they all looked to be at the same height. Not having the garden on a flat surface, I had to vary, their top edges a bit as they went up-hill on the east side of the garden.
The above photo, first of all shows how I tried keeping everything straight as possible by burying bricks with the strings as my guides. Secondly, I wanted the garden, in the center, to have cut off edges, so I laid bricks on their sides first as a guide to keep the lines straight and then started planting bricks standing up, like everything previously done. 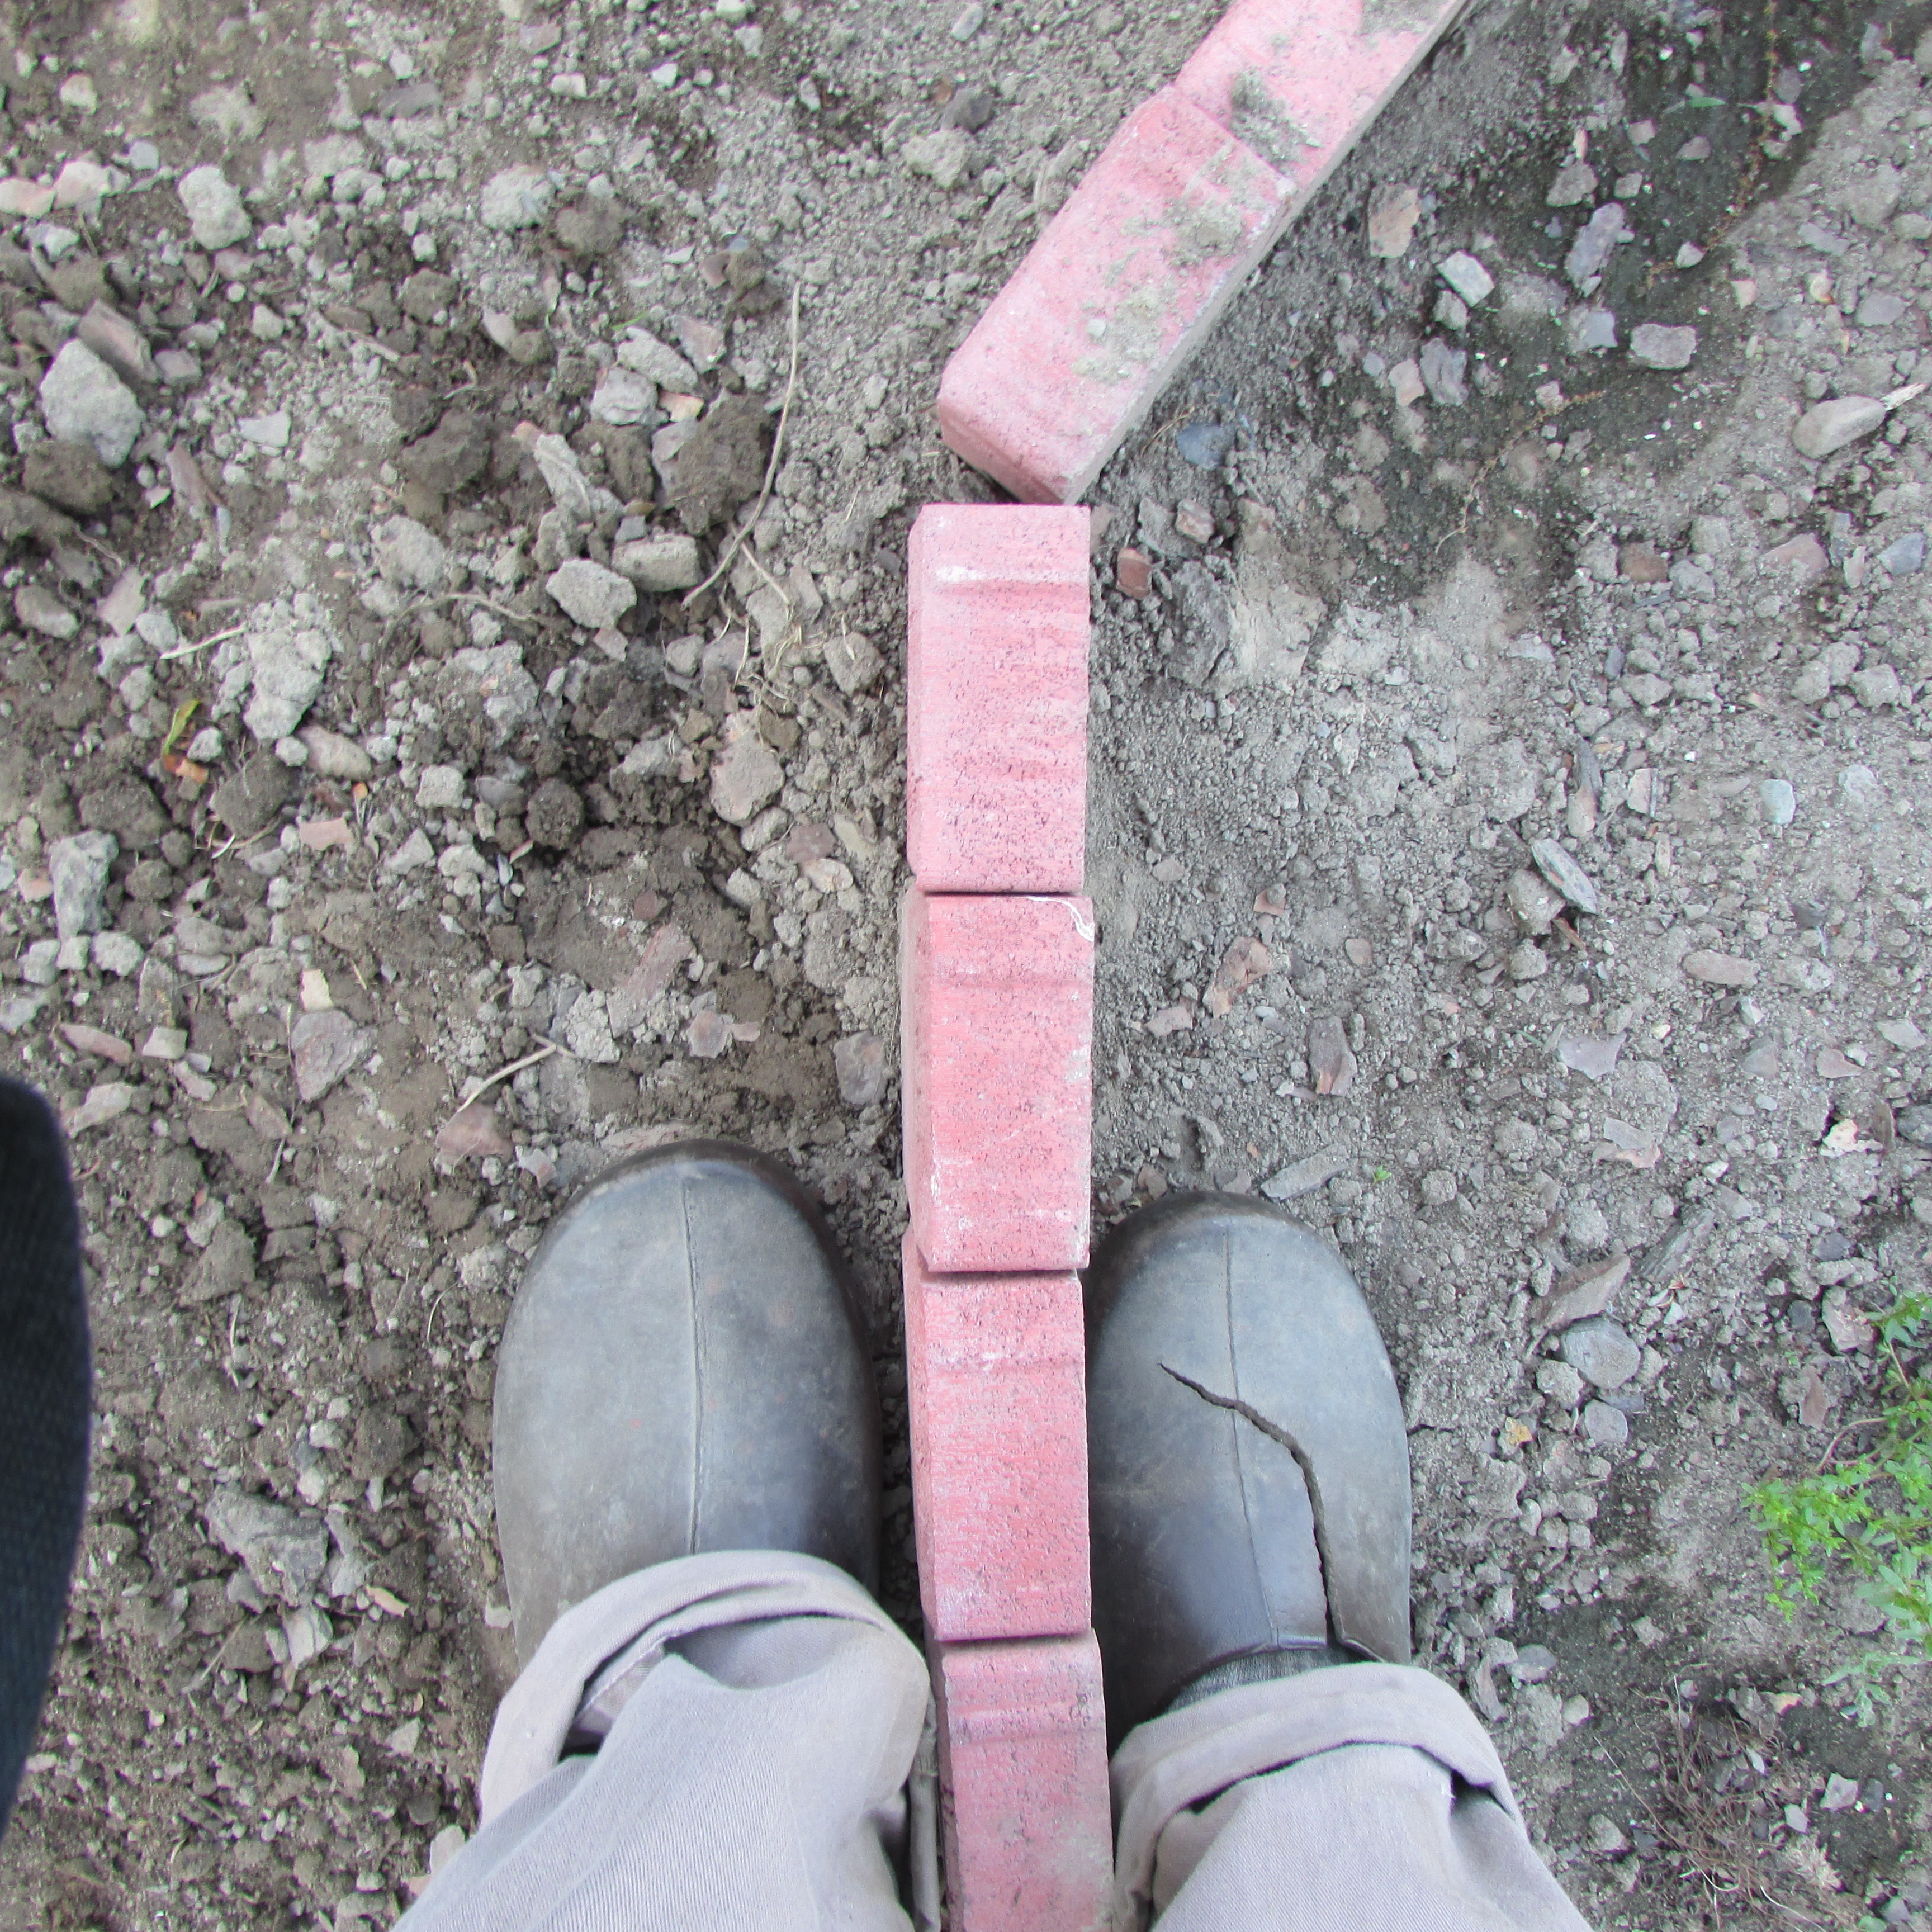 After planting bricks I took my feet and compress the ground around them to keep them straight as possible and in place.
 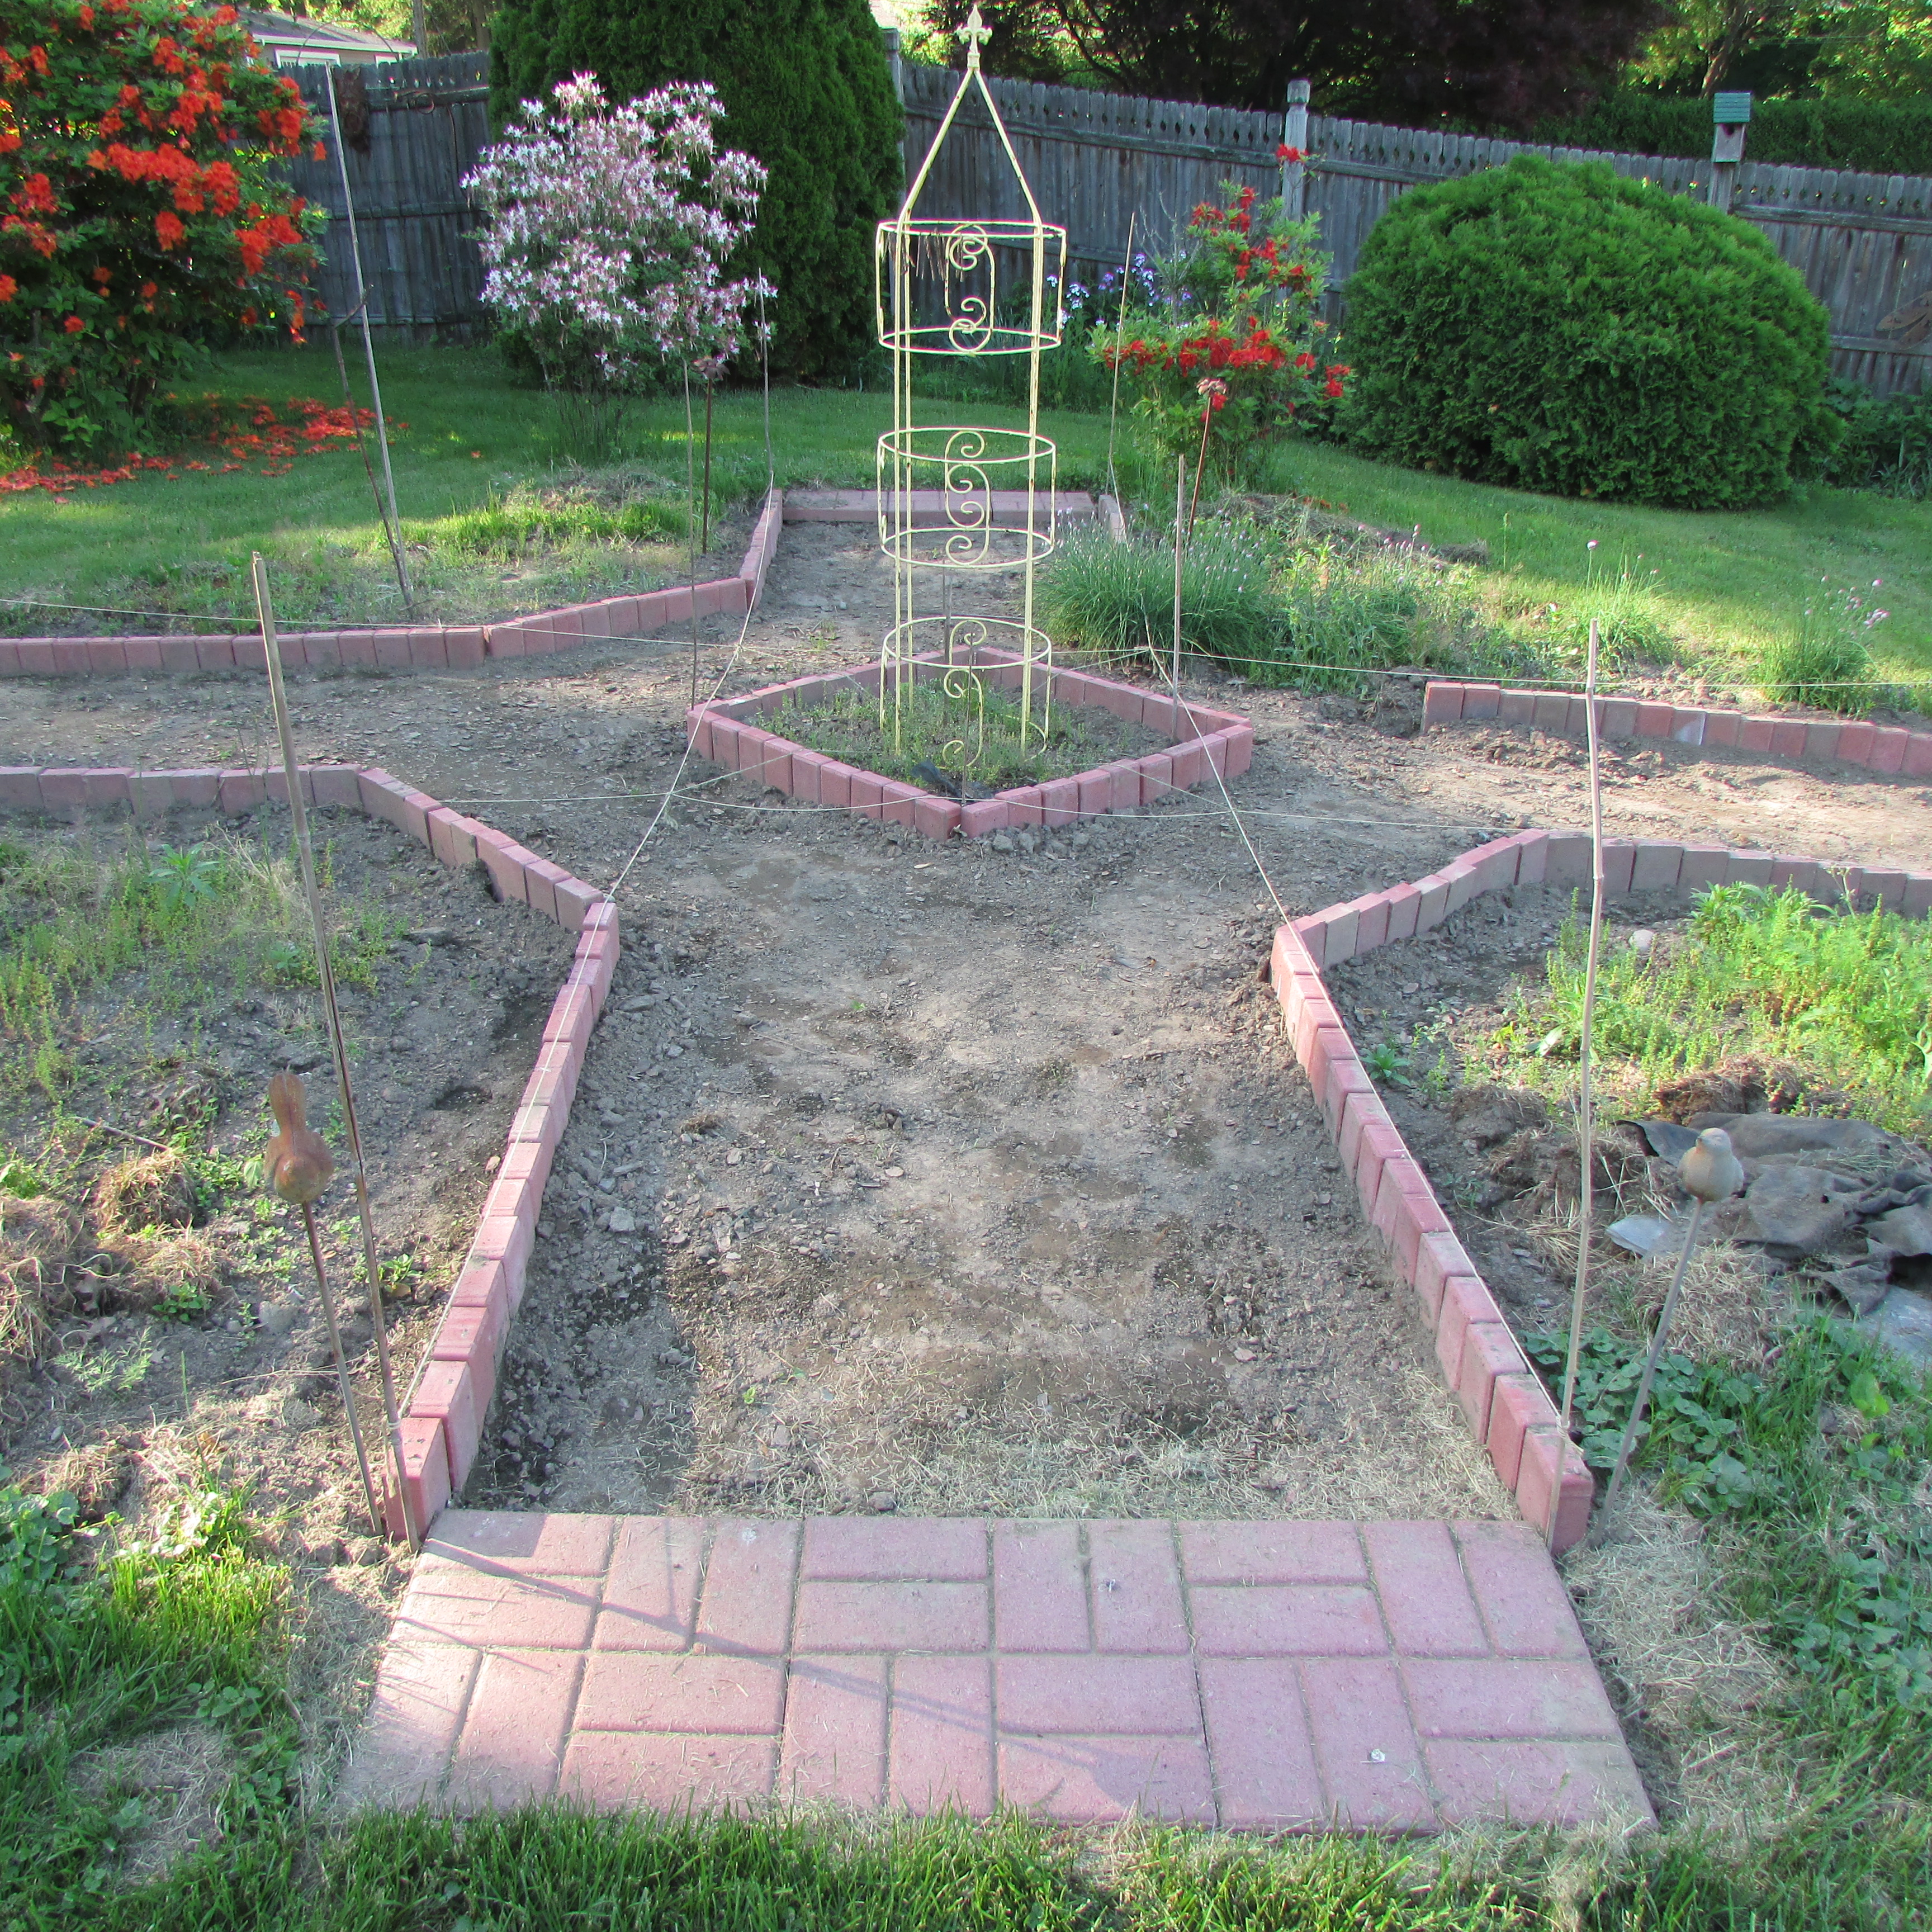 The Above photo shows almost everything in place and you can still see the jute string used as my guide.
 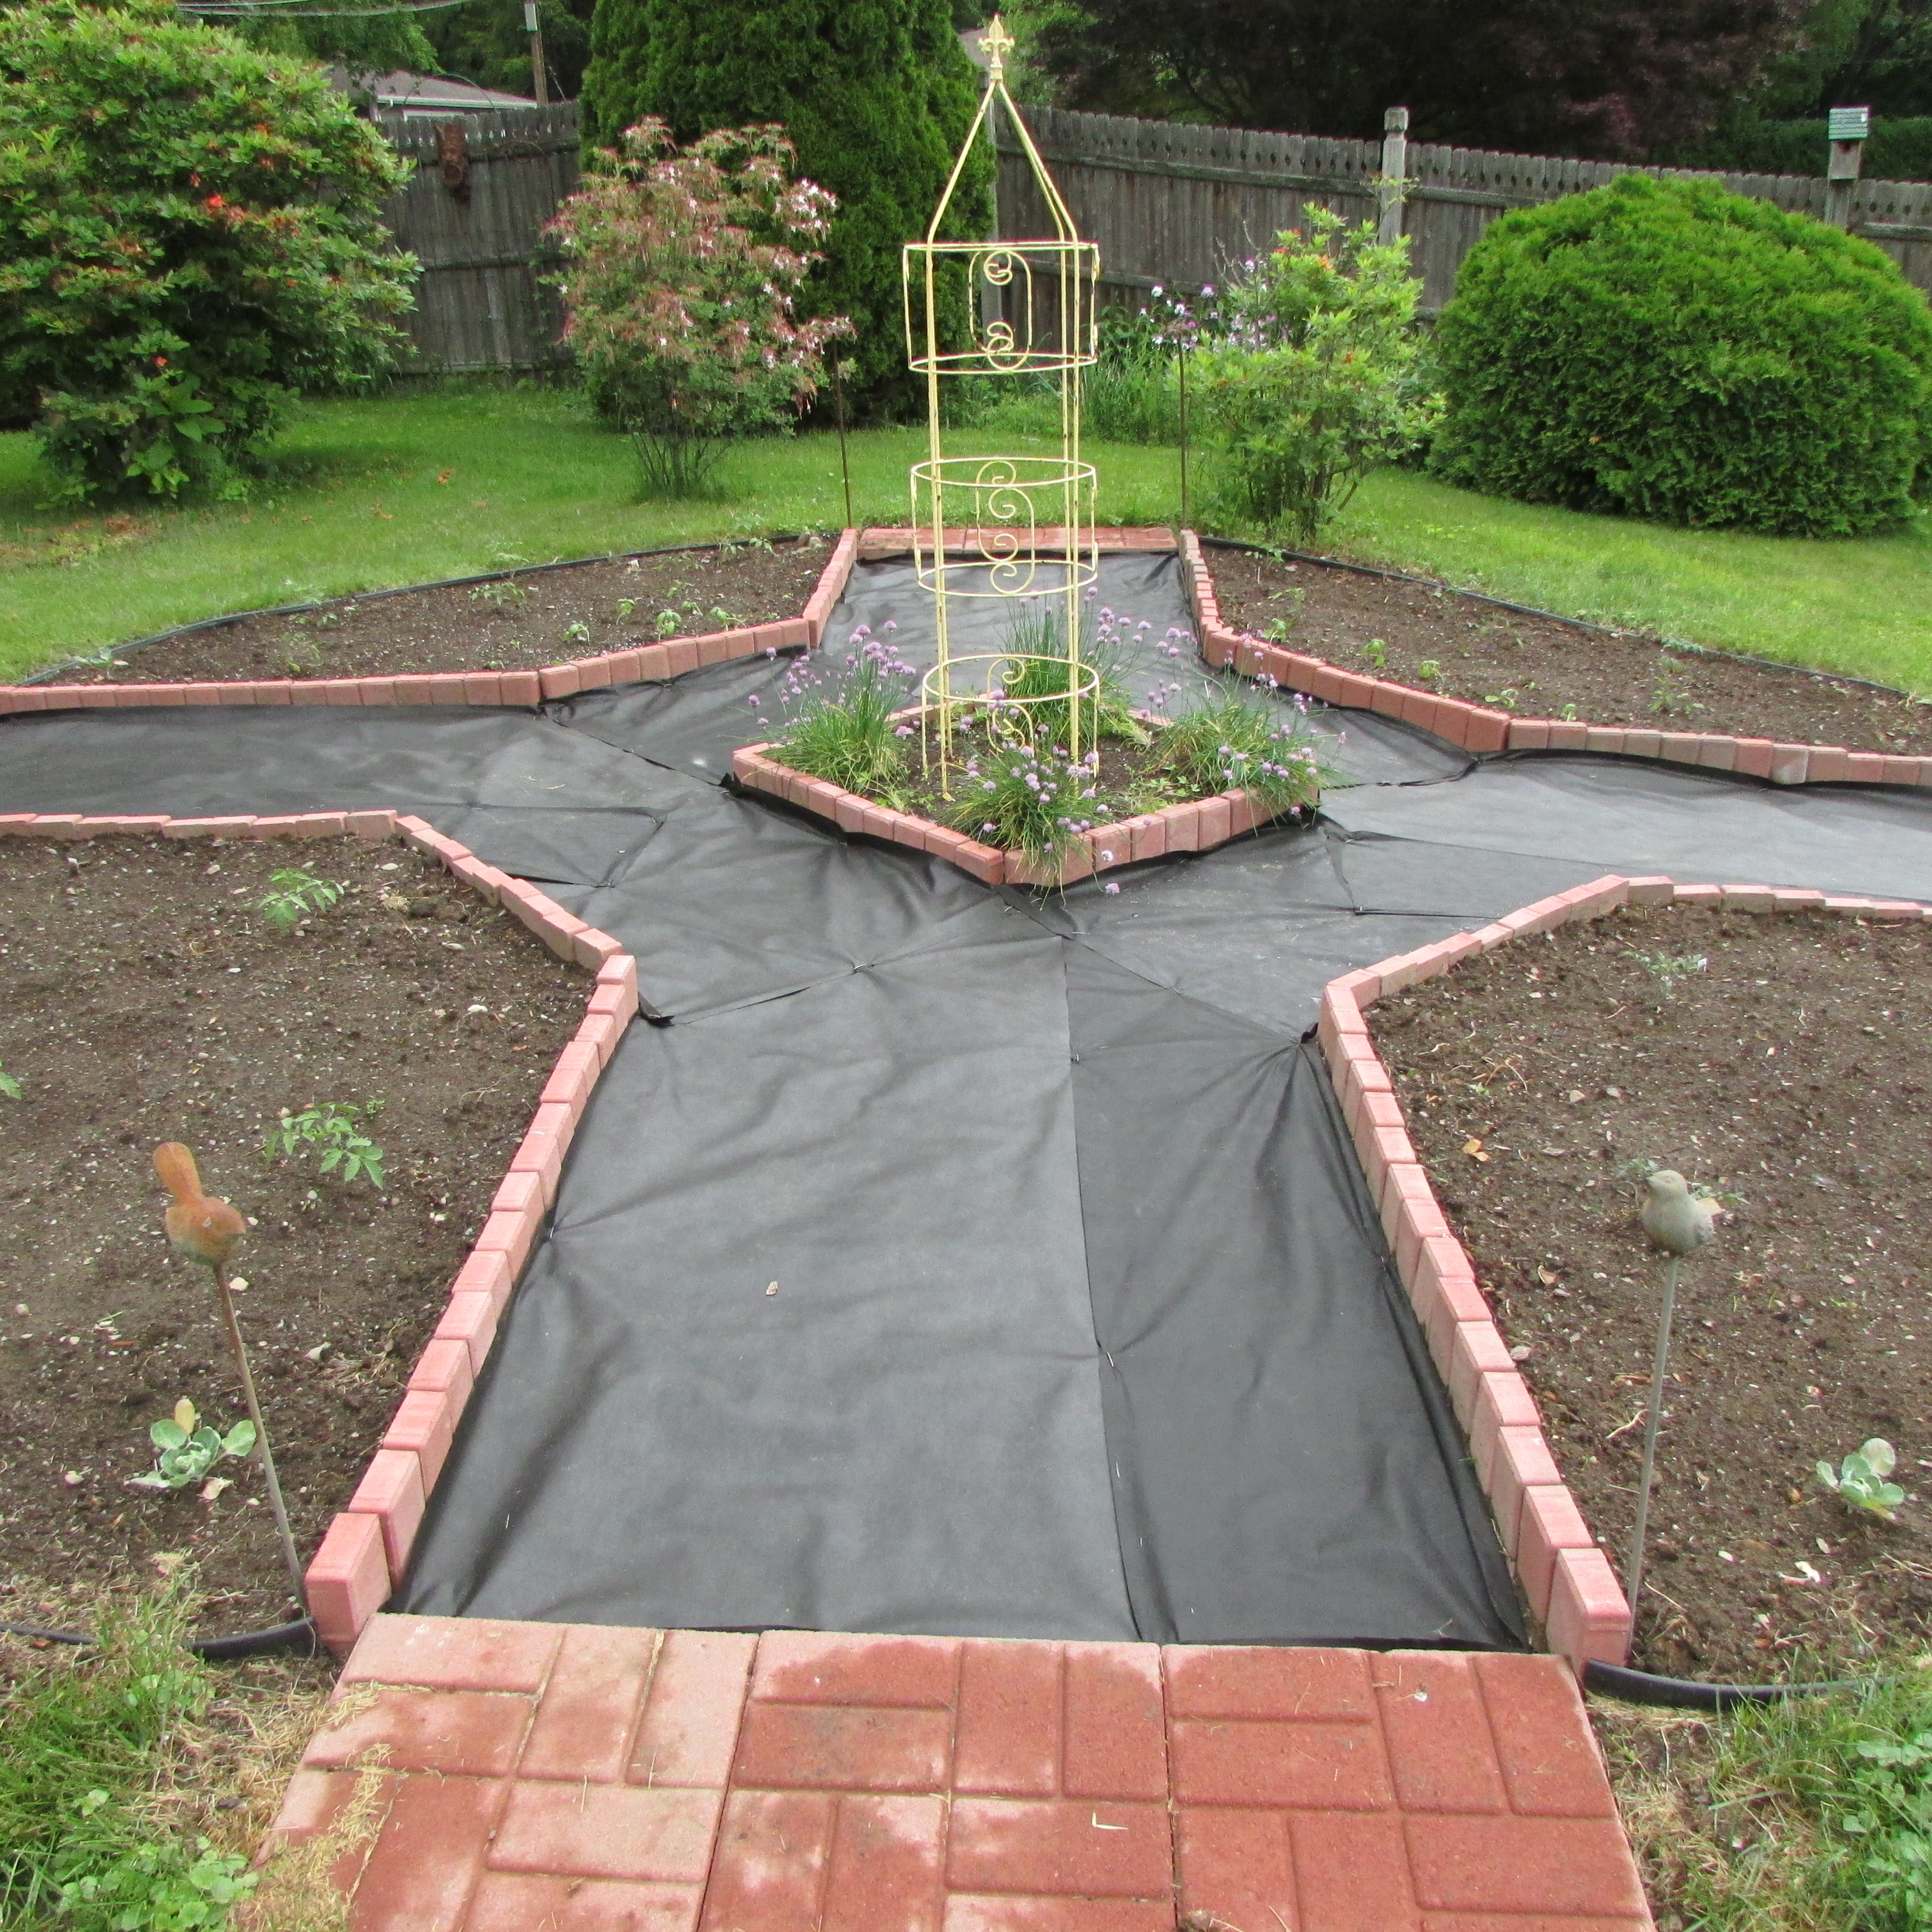 After that the garden paths were lined with DeWitt Weed Barrier landscape fabric 12 year weight and the fabric was kept in place with landscape staples. If you can’t find twelve-year, put two 6 year strength layers one on top of the other. When doing a project like this you don’t want to skimp when it comes to landscape fabric.
 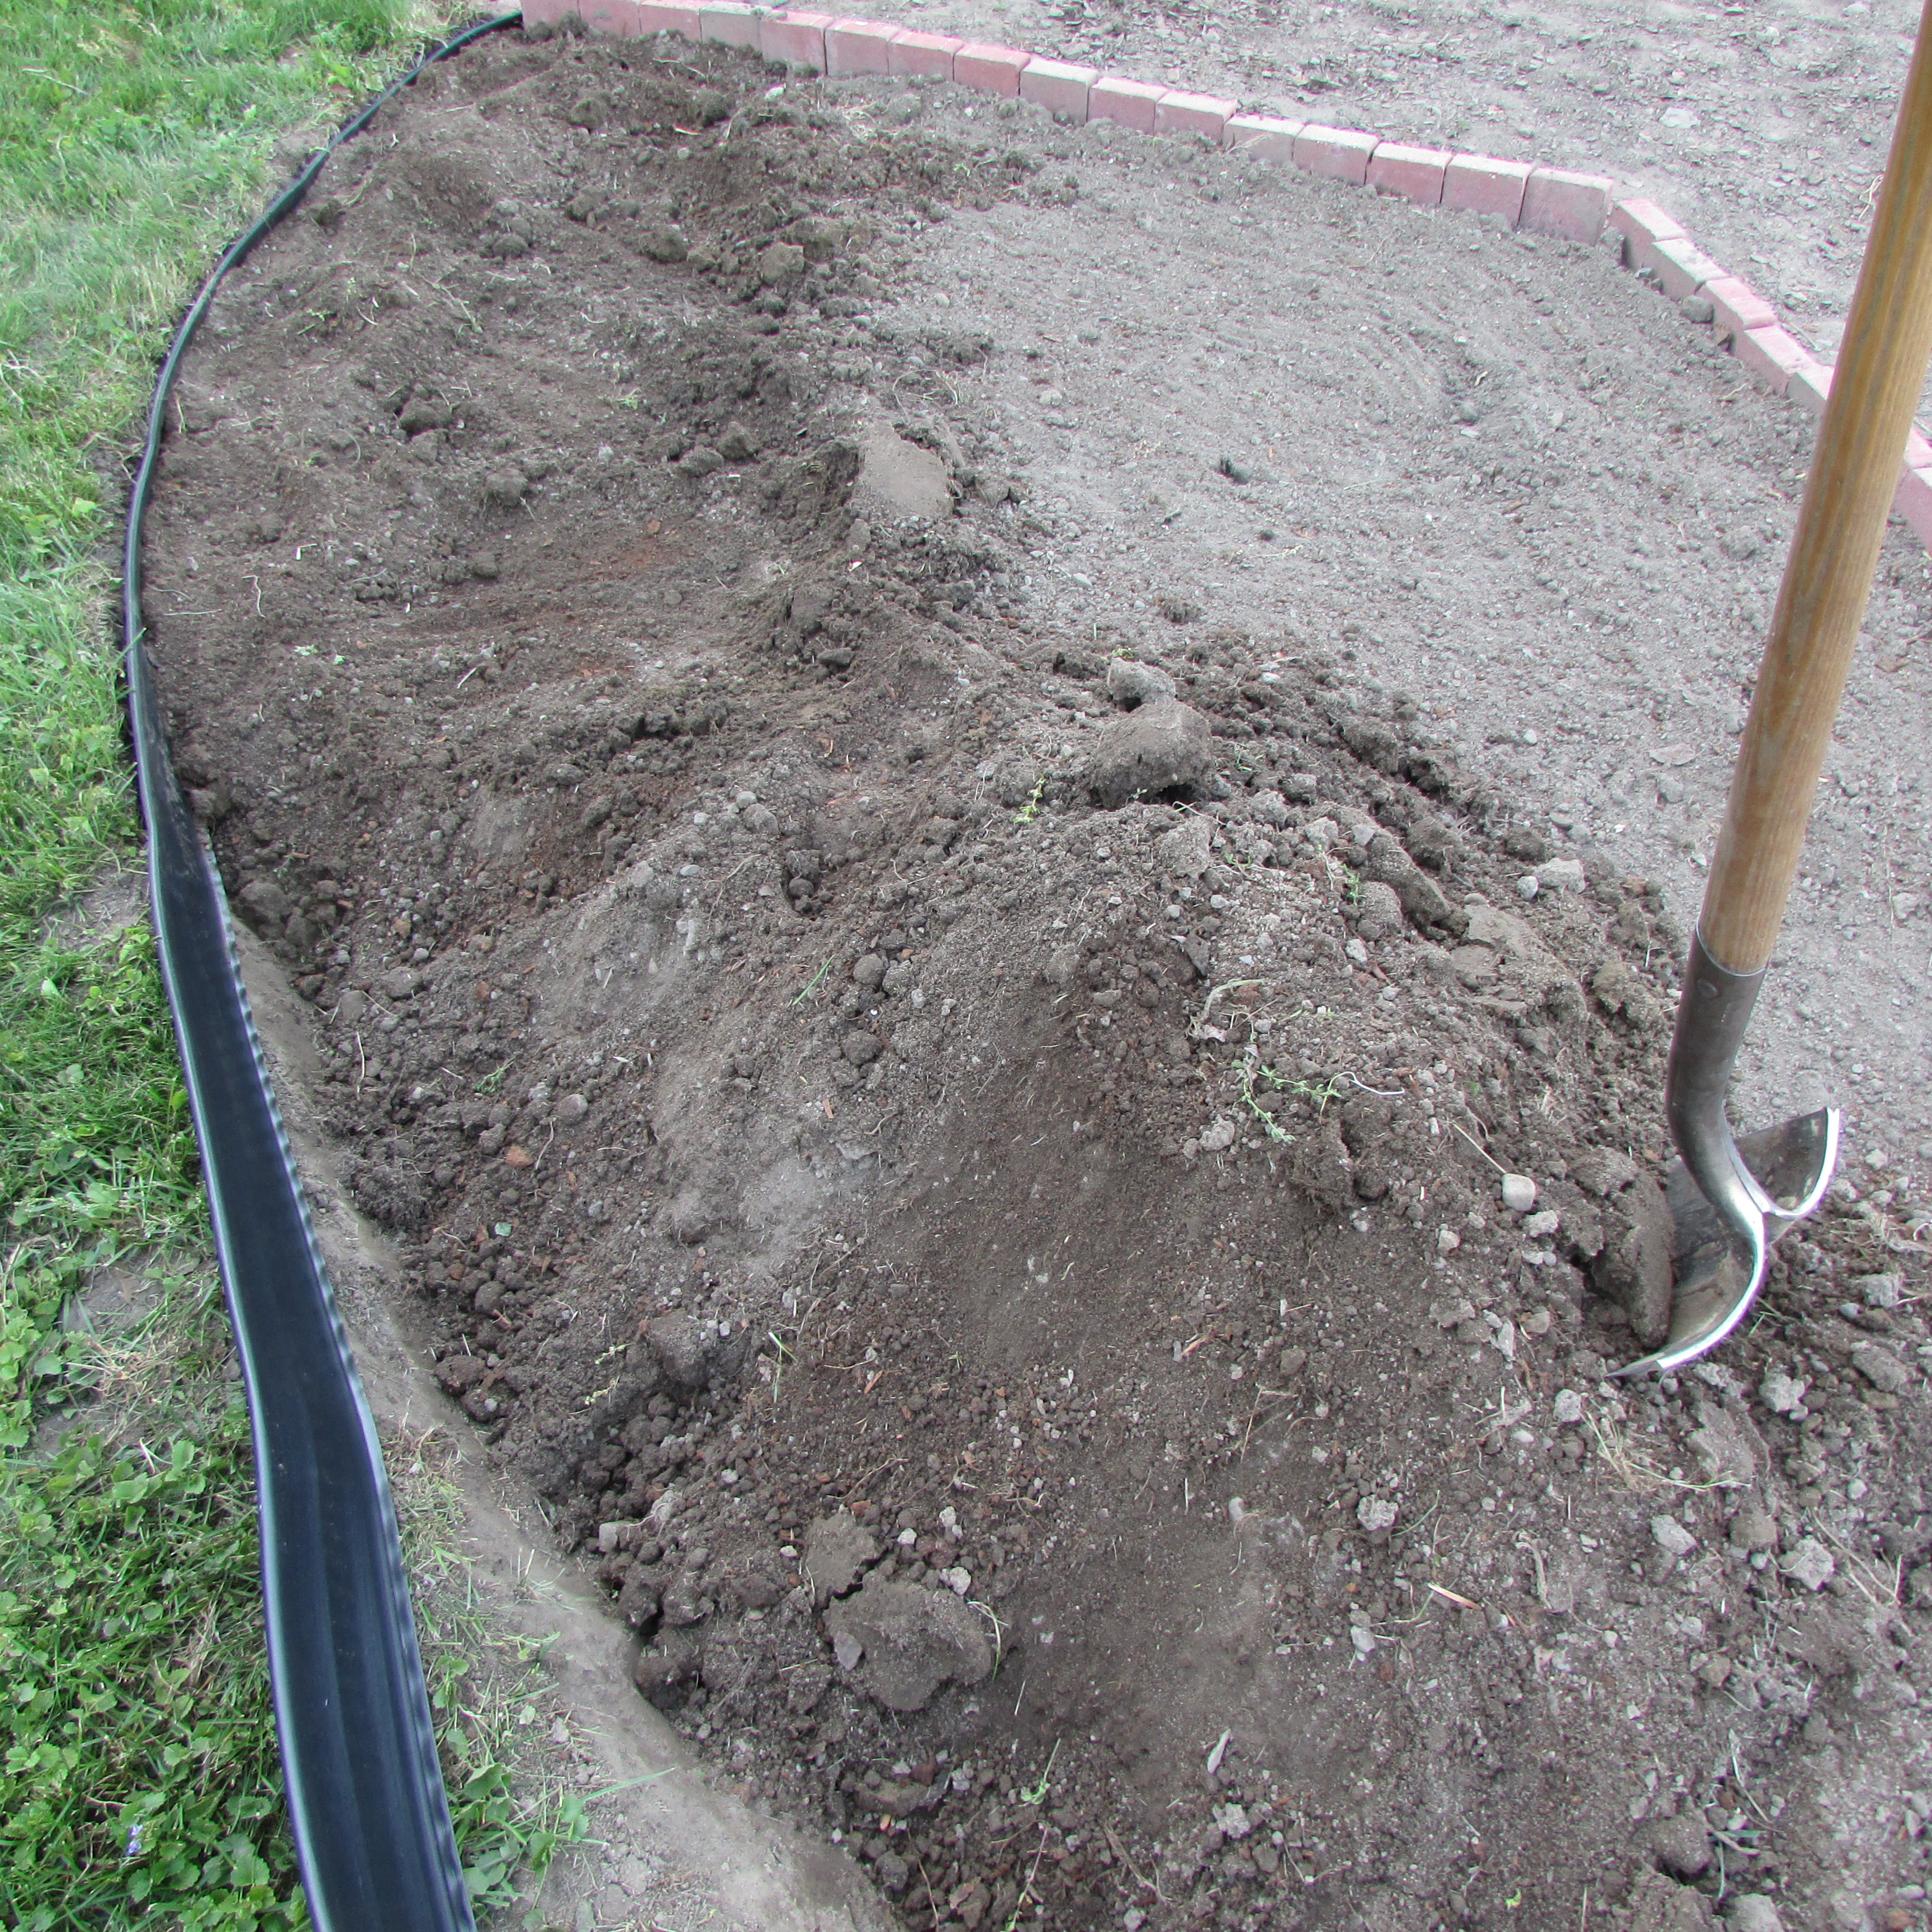 Next came the outside edge. When I was thinking about how to finish the outside edge, I wanted something that I could just run the grass mower up against, versus something that I needed a string trimmer to go around. During the placement of the black plastic edging, it didn’t always lay straight. Taking a good pair of straight cut snips and cutting up from the bottom towards the rounded top edge, I was easily able to bend-redirect the edging as I wished.
 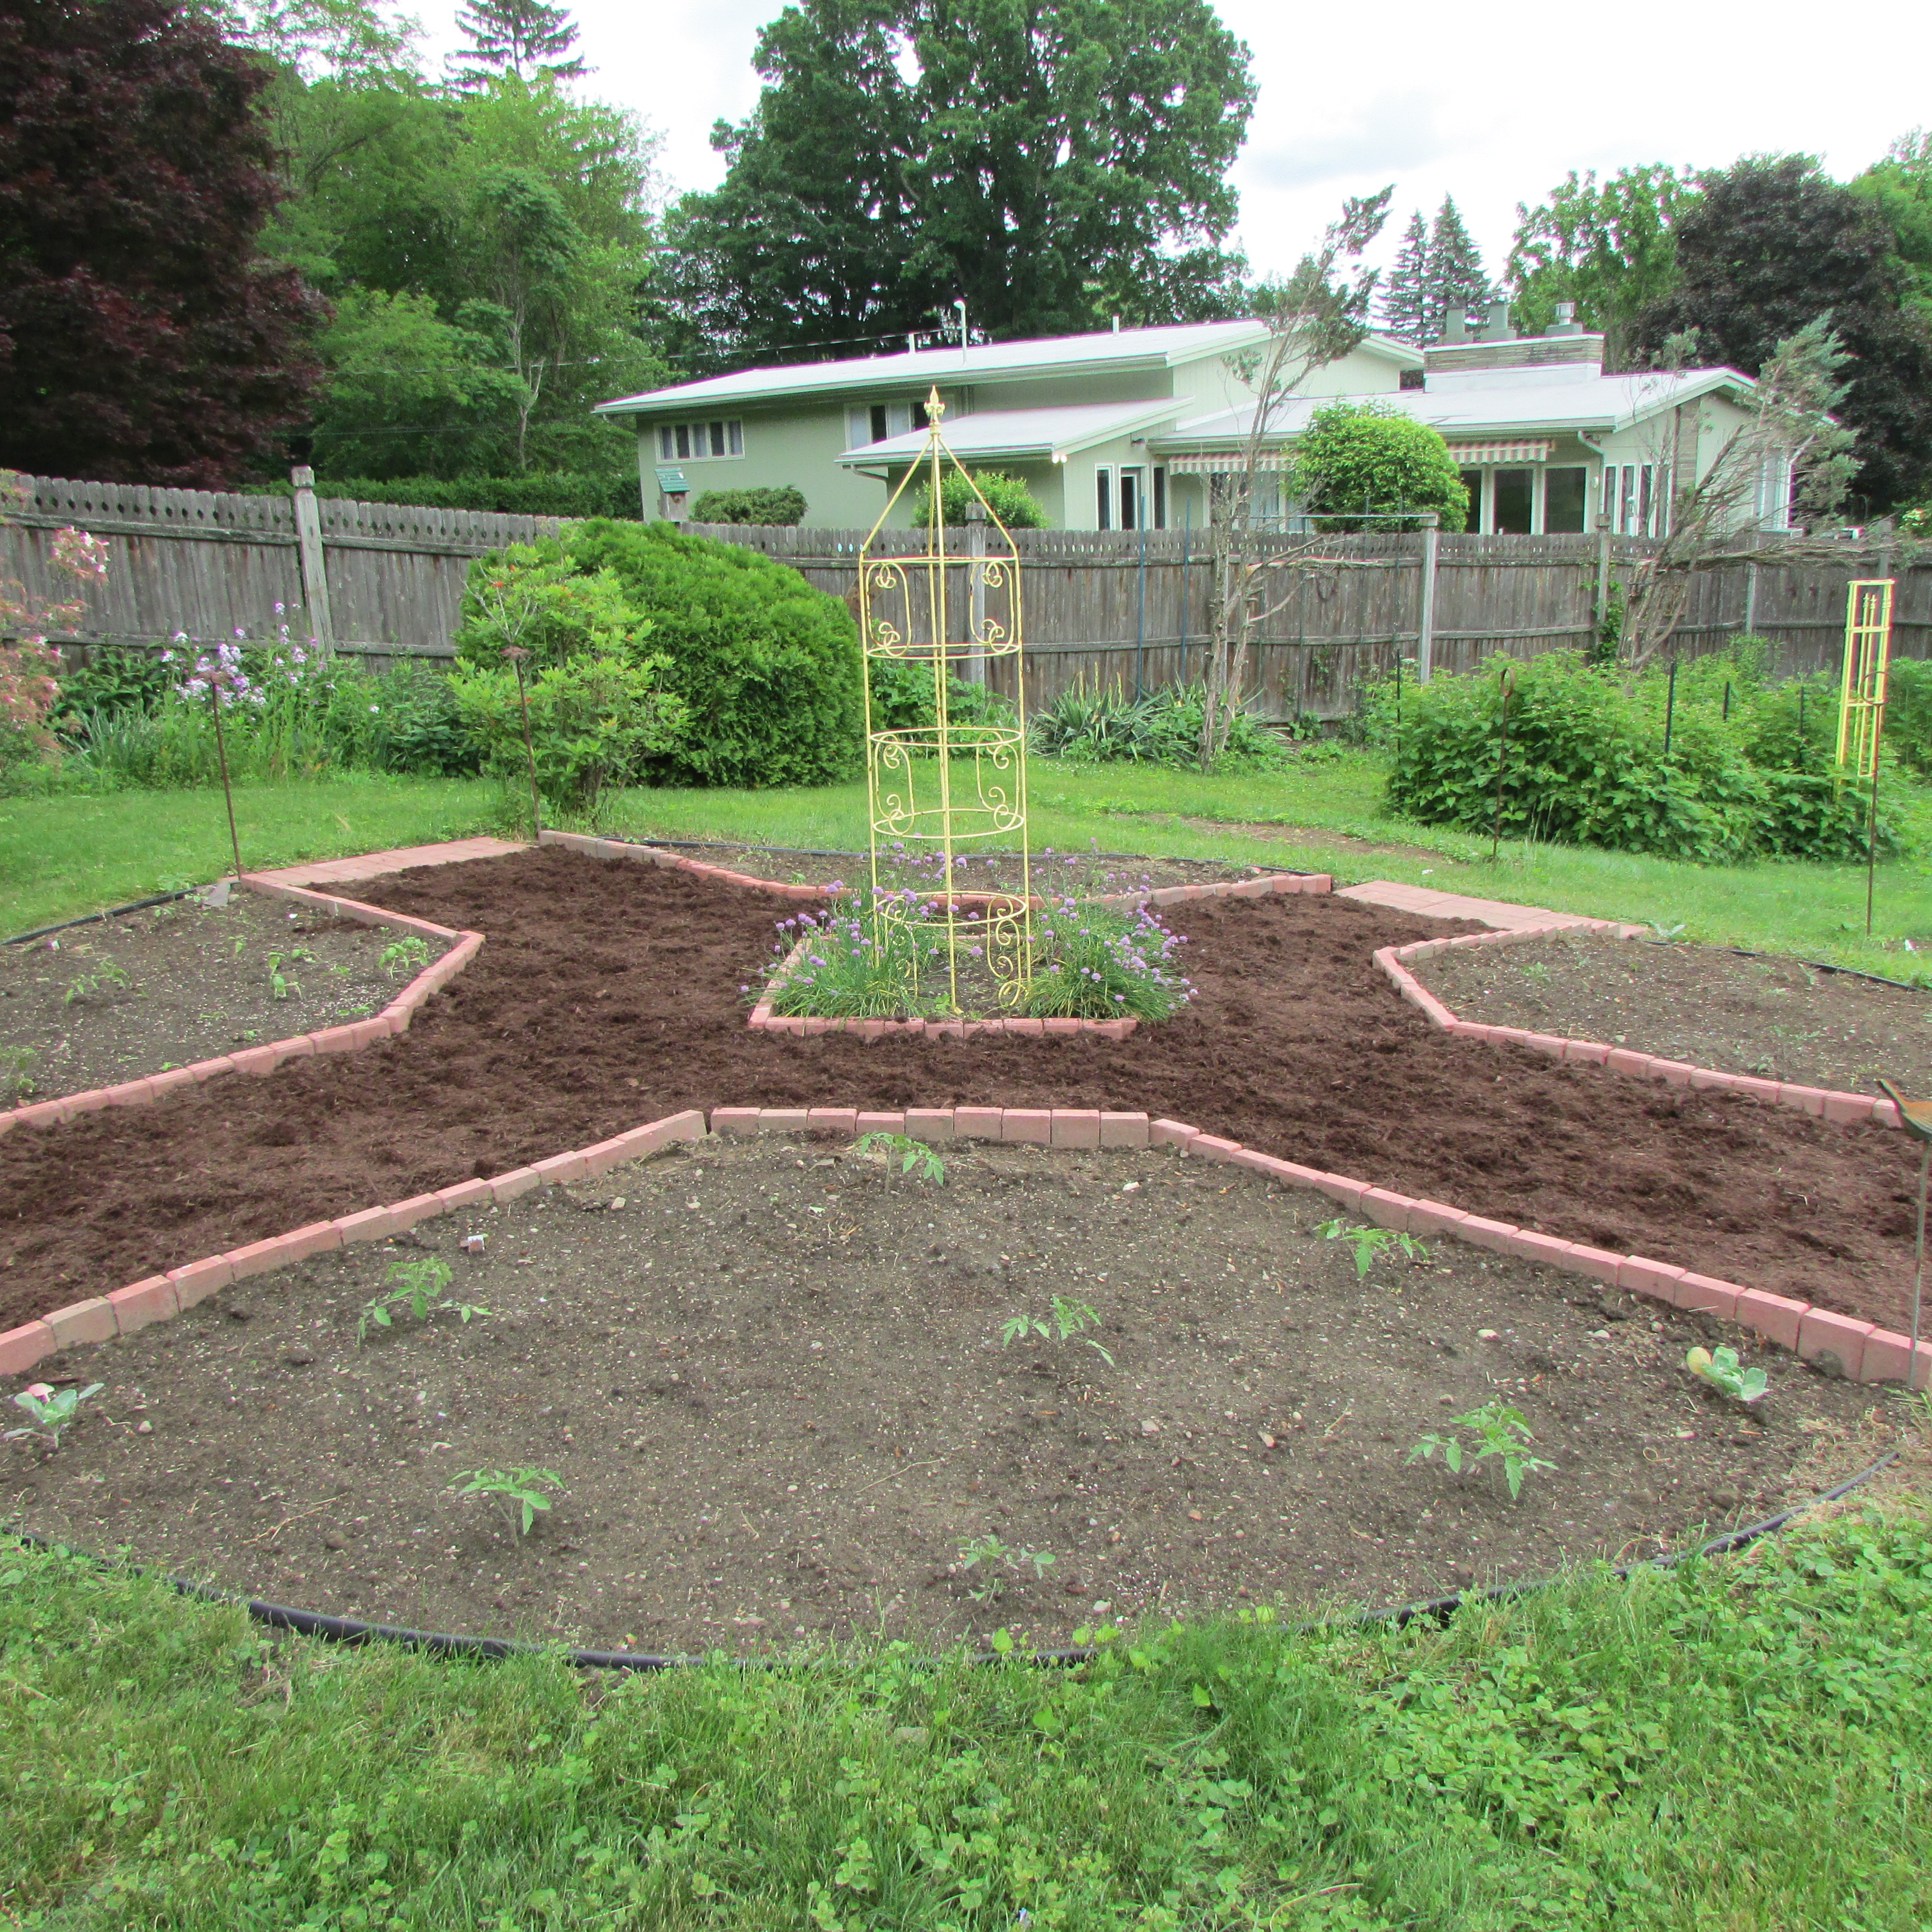 The last photo shows the vegetable garden, seen from its side, with twenty-something bags of dark brown cedar mulch covering the paths and the tomato plants in place.
So there you have it, a look at my new-redesigned vegetable garden. The brick lined garden has become an elegant focal point on my lawn, and I’m quite happy with it. When deciding on what kind of materials I would use on the garden, I chose to repeated the same pavers and bricks that I used to trim my patio area with, so the two different spaces went with each other.
If a person likes the look of my garden and wants to duplicate it on their own property it would be really nice as a rose garden or planted in annuals and perennials.
Companion Posts on Fred Gonsowski Garden Home.com…
Designing/Laying out Flower Beds 5-4-2013,
Plant Tomatoes DEEP in Full Sun 5-23-2011,
Roses..Planting, Pruning and General Care 5-11-2011,
Siting a Garden Shen on your Property 6-9-2012,
Got Grass growing out onto your Sidewalk or Driveway?…Edge It! 8-26-2012,
Distance Foundation Plants from your House when Planting 5-3-2012
Foundation Planting, Laying out Foundation Plants in Front of your Home 9-28-2013,
Planting Foundation Plants across the Front of your house 10-21-2013,
Step-by-Step Instructions on how I Laid Patio Pavers 11-13-2016,
Some ideas about using Garden Ornaments, they add that Finishing Touch to a Garden 6-29-2013,
Thirteen Ideas for Decorating your Country Garden 7-20-2013,
Growing a Topiary from an Upright Yew 6-15-2011,
Some Ideas about Planting Trees by your house for Curb Appeal 4-26-2012,
Planting a Garden Room on your Property 2-17-2013.


Looks fantastic Fred!!
Thanks Magster, eventually you will have to see it in true life ;-}
Holy Smoke! it Really looks awesome and I iKnow How Hard that work is- bravo!
When i did a walkway i dabbed(slipped) a little wet concrete in between and on the bricks – i think they def will help maintain my shape during freeze and thaws- Not Enough that it’s impossible to rip out- but just enuf to make it think a little harder about shifting! great work bud! just sweet!! 👍
Hi there Joy, I think the hardest part was going and getting the bricks and pavers from my local Home Depot and then having to move them from my driveway up the lawn to out back. It will be interesting to see how they act during a Winter, I’ll find that out next year ;-}
Hope you have a truck, Fred! Or at least an SUV! 😊
A Subaru Forester.
Beautiful job! You make it sound so easy, but I know it was a lot of physical labor. I love the “trellis” in the middle. I hope you will add a photo later after everything has been growing for a while!
Hi there P.W. the trellis in the middle of the garden came from a place called Windy Hill which is in Great Barrington, Massachusetts. Windy Hill is an upscale garden center located in the Berkshires which attracts a lot of “weekenders” from New York City and the Boston area. Martha Stewart has bought things from those people.
As for the building of the vegetable garden, it was a labor of love that I wanted to do, my biggest problem was that I had never done something like that before and had to figure it out as I went along, which turned into this post.
What timely information! Apparently your posts have been going to my spam file so I thought you were no longer blogging! I have a lot to catch up on. My hundred year old house has brick edging around all it beds… I think it’s called French edging. There are 2 layers of bricks, 1 laid flat 4 mowing with an inner section for support. However they are not laid on the short Edge as yours are but rather at an angle so one sees a zigzag pattern. It’s very pretty. I mention that it’s timely because I had to remove much of it when redoing this upper level and have been procrastinating and putting them back. Right now I just have one level flat on top of the grass! I guess I’m just going to have to do the work and get it done. At least now I have your post to encourage me! Thanks again! I have a lot of reading to do now to catch up! I can’t wait to see how your garden has been doing. I wish I could post photos of mine to share and get your opinion. 🙂
Hi there Teresa, there is a historic house in my area that has the laid down bricks and then stand up bricks behind them, and I thought that it was really attractive. Martha Stewart at her old West Port, Connecticut home “Turkey Hill” had her gardens edged in bricks all placed on an slant. I had thought about doing that for all of a minute, but my vegetable garden is small and probably would have looked too busy.
Oh, those are those concrete paver bricks.
Old red clay brick became a popular material in the early 1990s because a few old building and many fireplaces were ruined by the Loma Prieta Earthquake. About the same time, the pavers became popular because they were made from recycled concrete from the freeway overpasses and infrastructure that needed to be replaced.
Hi there Tony, thanks for the quick history lesson about where the pavers and bricks came from, did not know anything about how they were made. Was on a garden tour earlier this year and a man had used bricks that were inside of the walls of his house, and he said they crumbled quickly because they were not meant to be outside in the elements of up-state New York.
Oh, not all brick comes from fallen down buildings. There used to be a factory up in Marin or Sonoma County that made brick from red clay, back when brick was still a common building material. It is no longer in use of course.
Tony, it’s interesting from where things come from, and until someone brings it light, no one knows. In a way it’s good that things can be recycled. The thing about using the patio pavers and paving stones is they are readily available, the price is right and you can buy as many or as few as you want at a time. Some places call them “Holland Bricks” to give them a cache of sorts.
A client had a ‘cyclery’ brick patio that was composed of brick from the building that Los Gatos Cyclery was in before it fell down in the Loma Prieta Earthquake. (One of our work vehicles, an Oldsmobile, was squashed by that building.) The price was right.
What a lot of very detailed work! It looks great. I hope you will post photos of it later in the year as things grow and it I closer to harvest.
Hi there Elle, will do, Thanks for your comment ;-}
This vegetable garden with brick looks excellent, and I am thankful that you’ve shared the details about this garden with us. I will follow all your advice mentioned here, and I hope it works out well for me. Cheers!