
The Front Garden here at Whimsey Hill House June 2014
June is a transitional and busy month in the garden. The many hundreds of daffodils that I’ve planted years ago (there used to be over a thousand) have finished blooming, and the perennials have all come up and are doing fine. The main colors in the June garden are pinks, blues, whites and purples that come from the peonies, iris, lupine, columbine and bleeding hearts that used to grow in my grandmother’s garden, and the different colors of the many perennial plant’s leaves; green, blue-green, chartreuse, burgundy and gray. I have many times thought that with the minimal amount of plants blooming, and with the different colors and textures of the plant’s foliage, there is kind of a Zen quality to the beds and borders at this time of year.
June is a super busy month for me, I seem to be working constantly. Besides all the perennials that come up yearly, there are tender bulbs and tubers like canna, elephant ear plants, dahlias and gladioli that I planted on or around May first that start showing up; as well as hundreds if not thousands of annuals that have self seeded from last year like cleome, amaranths, gloriosa daisies and cosmos to contend with, not to mention the pesky weeds and grasses that fill the beds and borders that have to be pulled out and thrown away.
This year I bought twenty six packages of different kinds of annual seeds that I planted up in pots at the end of April to plant in-between the perennials so there would be spots of constant color in the garden until the first frost. Last year I had success starting a few different packets of zinnias and cosmos seeds, so this year I thought I would try some other things. This year I planted many different varieties of zinnias, white and yellow marigolds, alyssum and sunflowers that all came up in abundance with no problems. I thought, when buying my seeds, why not grow things like Bells of Ireland, Brazilian Vervain (verbena) and Heliotrope (Dwarf Marine), you know, the kind of plants that you see selling for five dollars each at the garden center. I now know why they are priced at $5. Those kinds of plants are finicky as hell, and even when they sprout just sit there not wanting to grow a bit. Now I know what the phrase “Hot House Flower” refers to. Along with the annuals I started, I bought four flats of red salvia to plant at the garden’s edge and a lot of Wave Petunias and other things to fill the many hanging baskets, pots and planters that I plant up yearly. So now that I’ve almost completed my Spring planting, I want to show you what I’ve done so far.
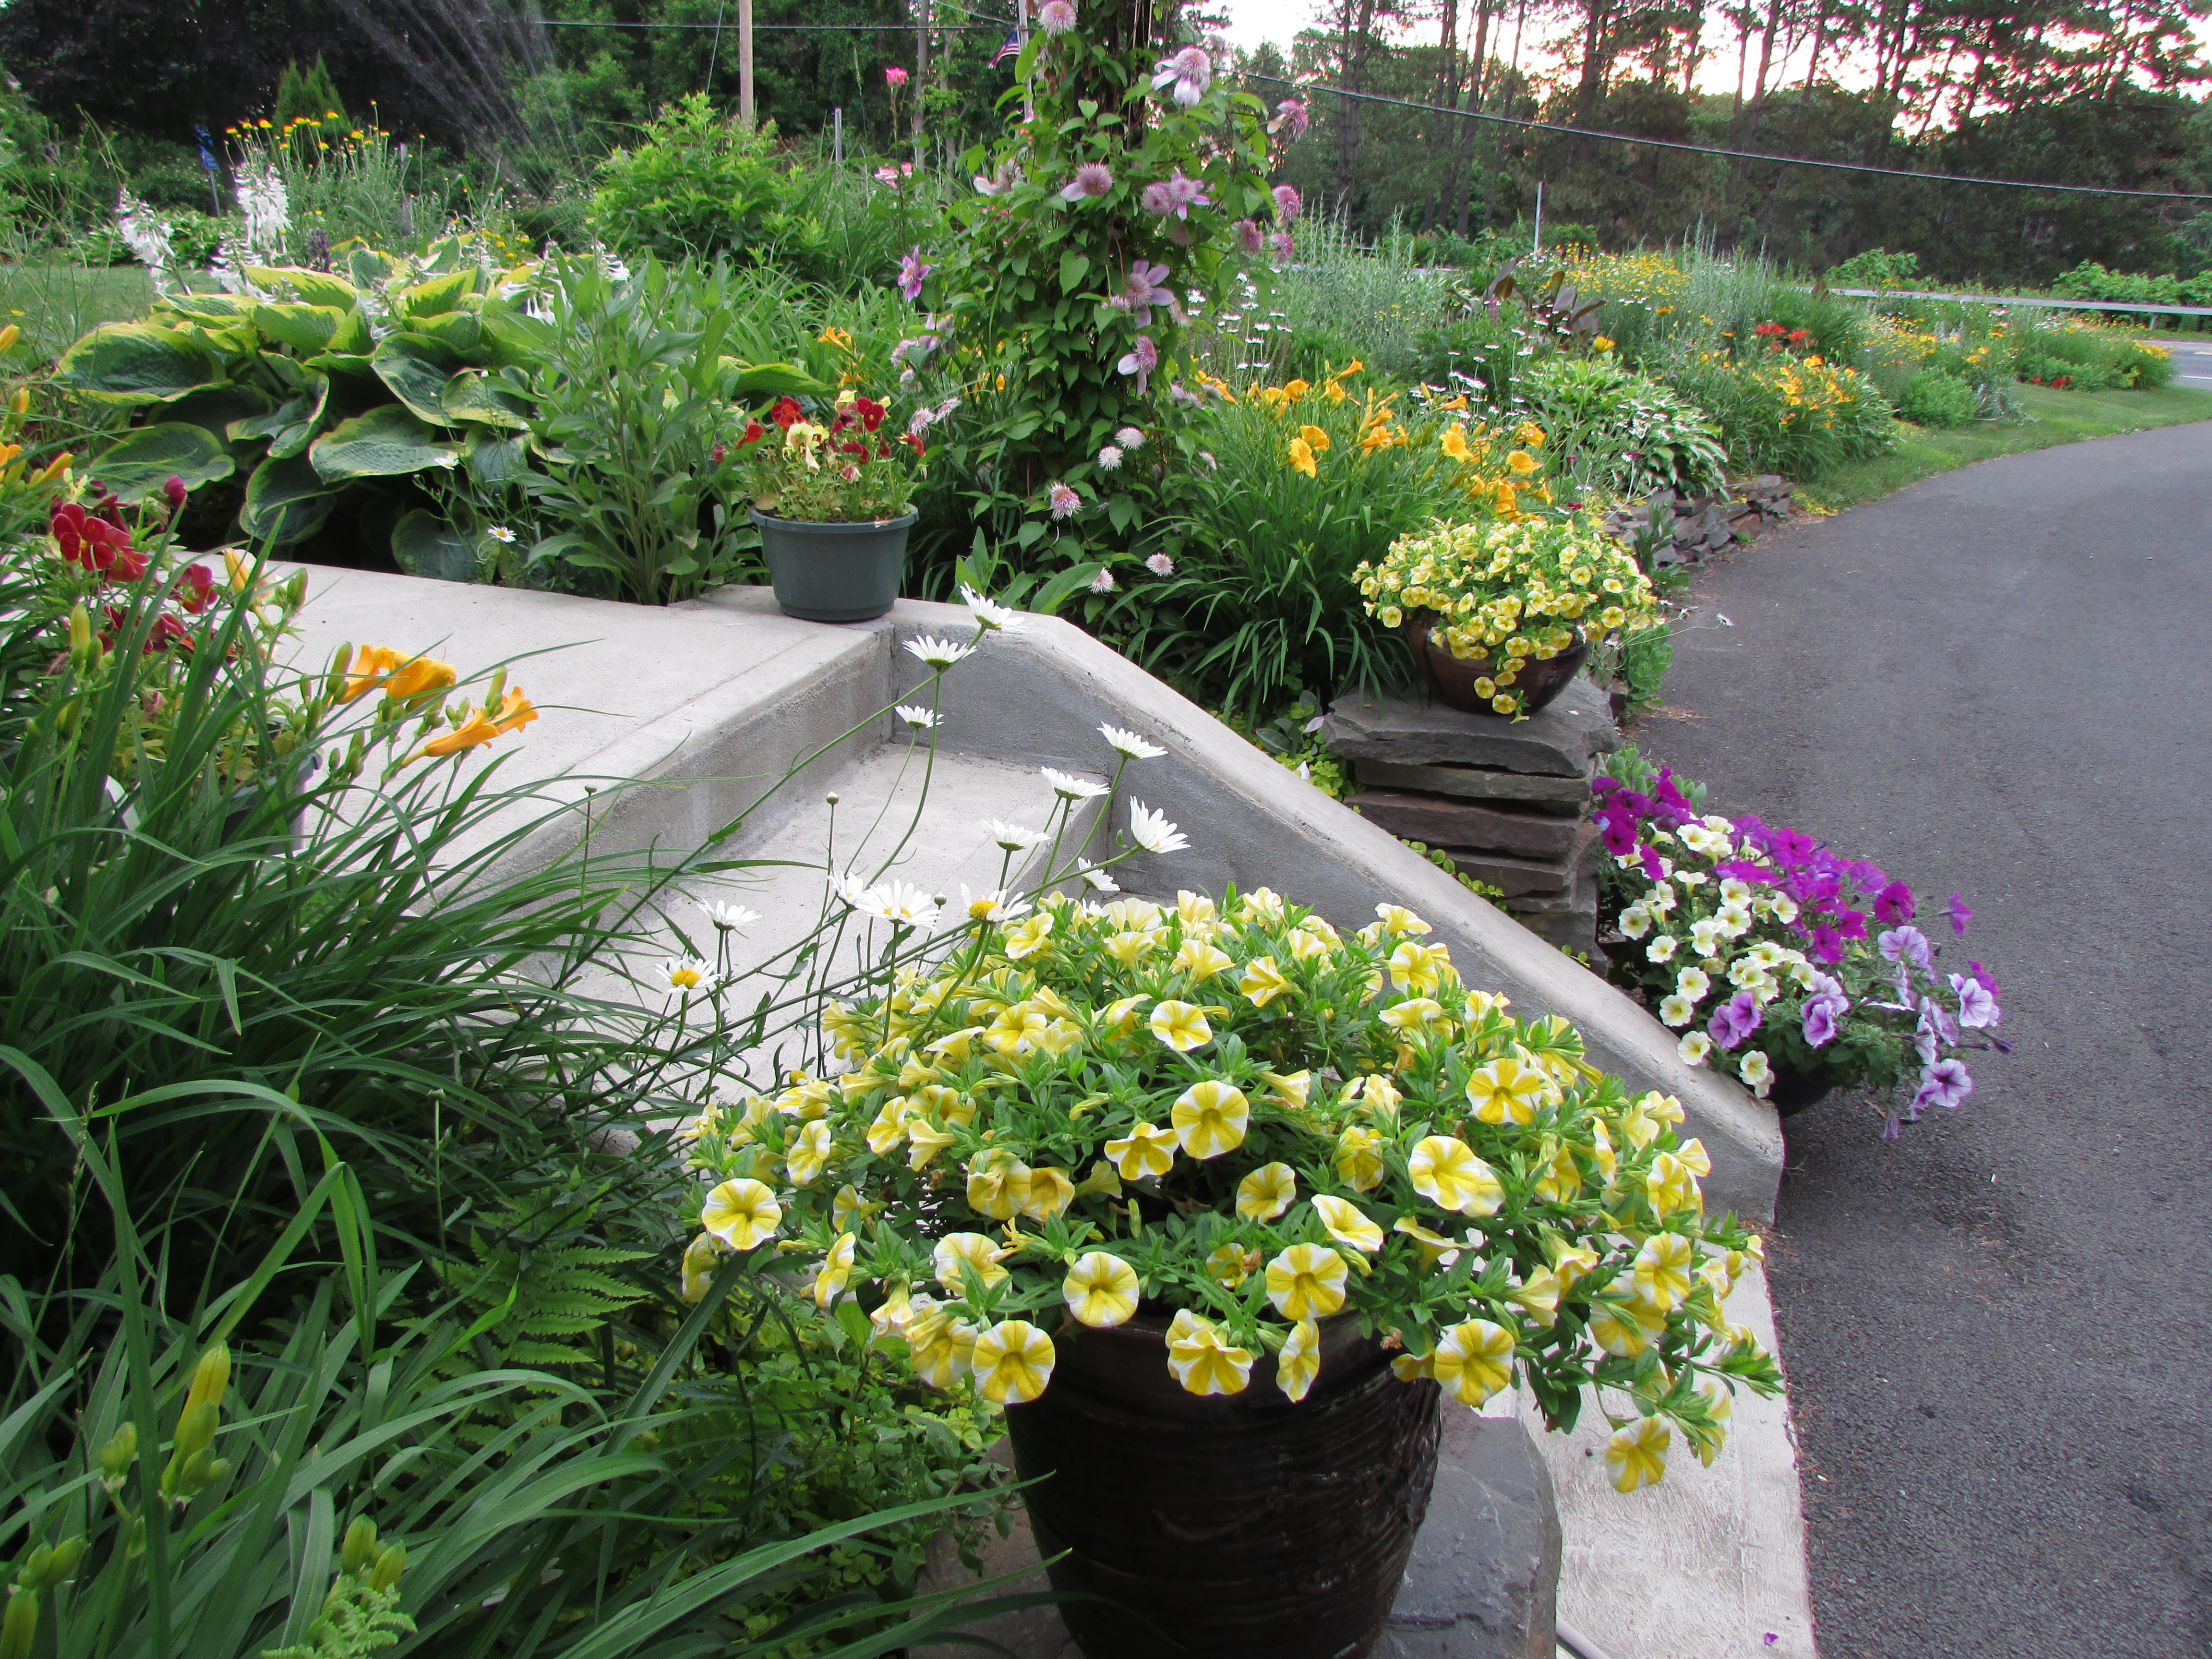
The first photo, the cover shot for this post, shows a view of the steps leading up from the driveway to the front door (click on this photo and all others to enlarge to see details). This year I filled all of my containers with things that are mostly yellow and shades of dark and light orchid. 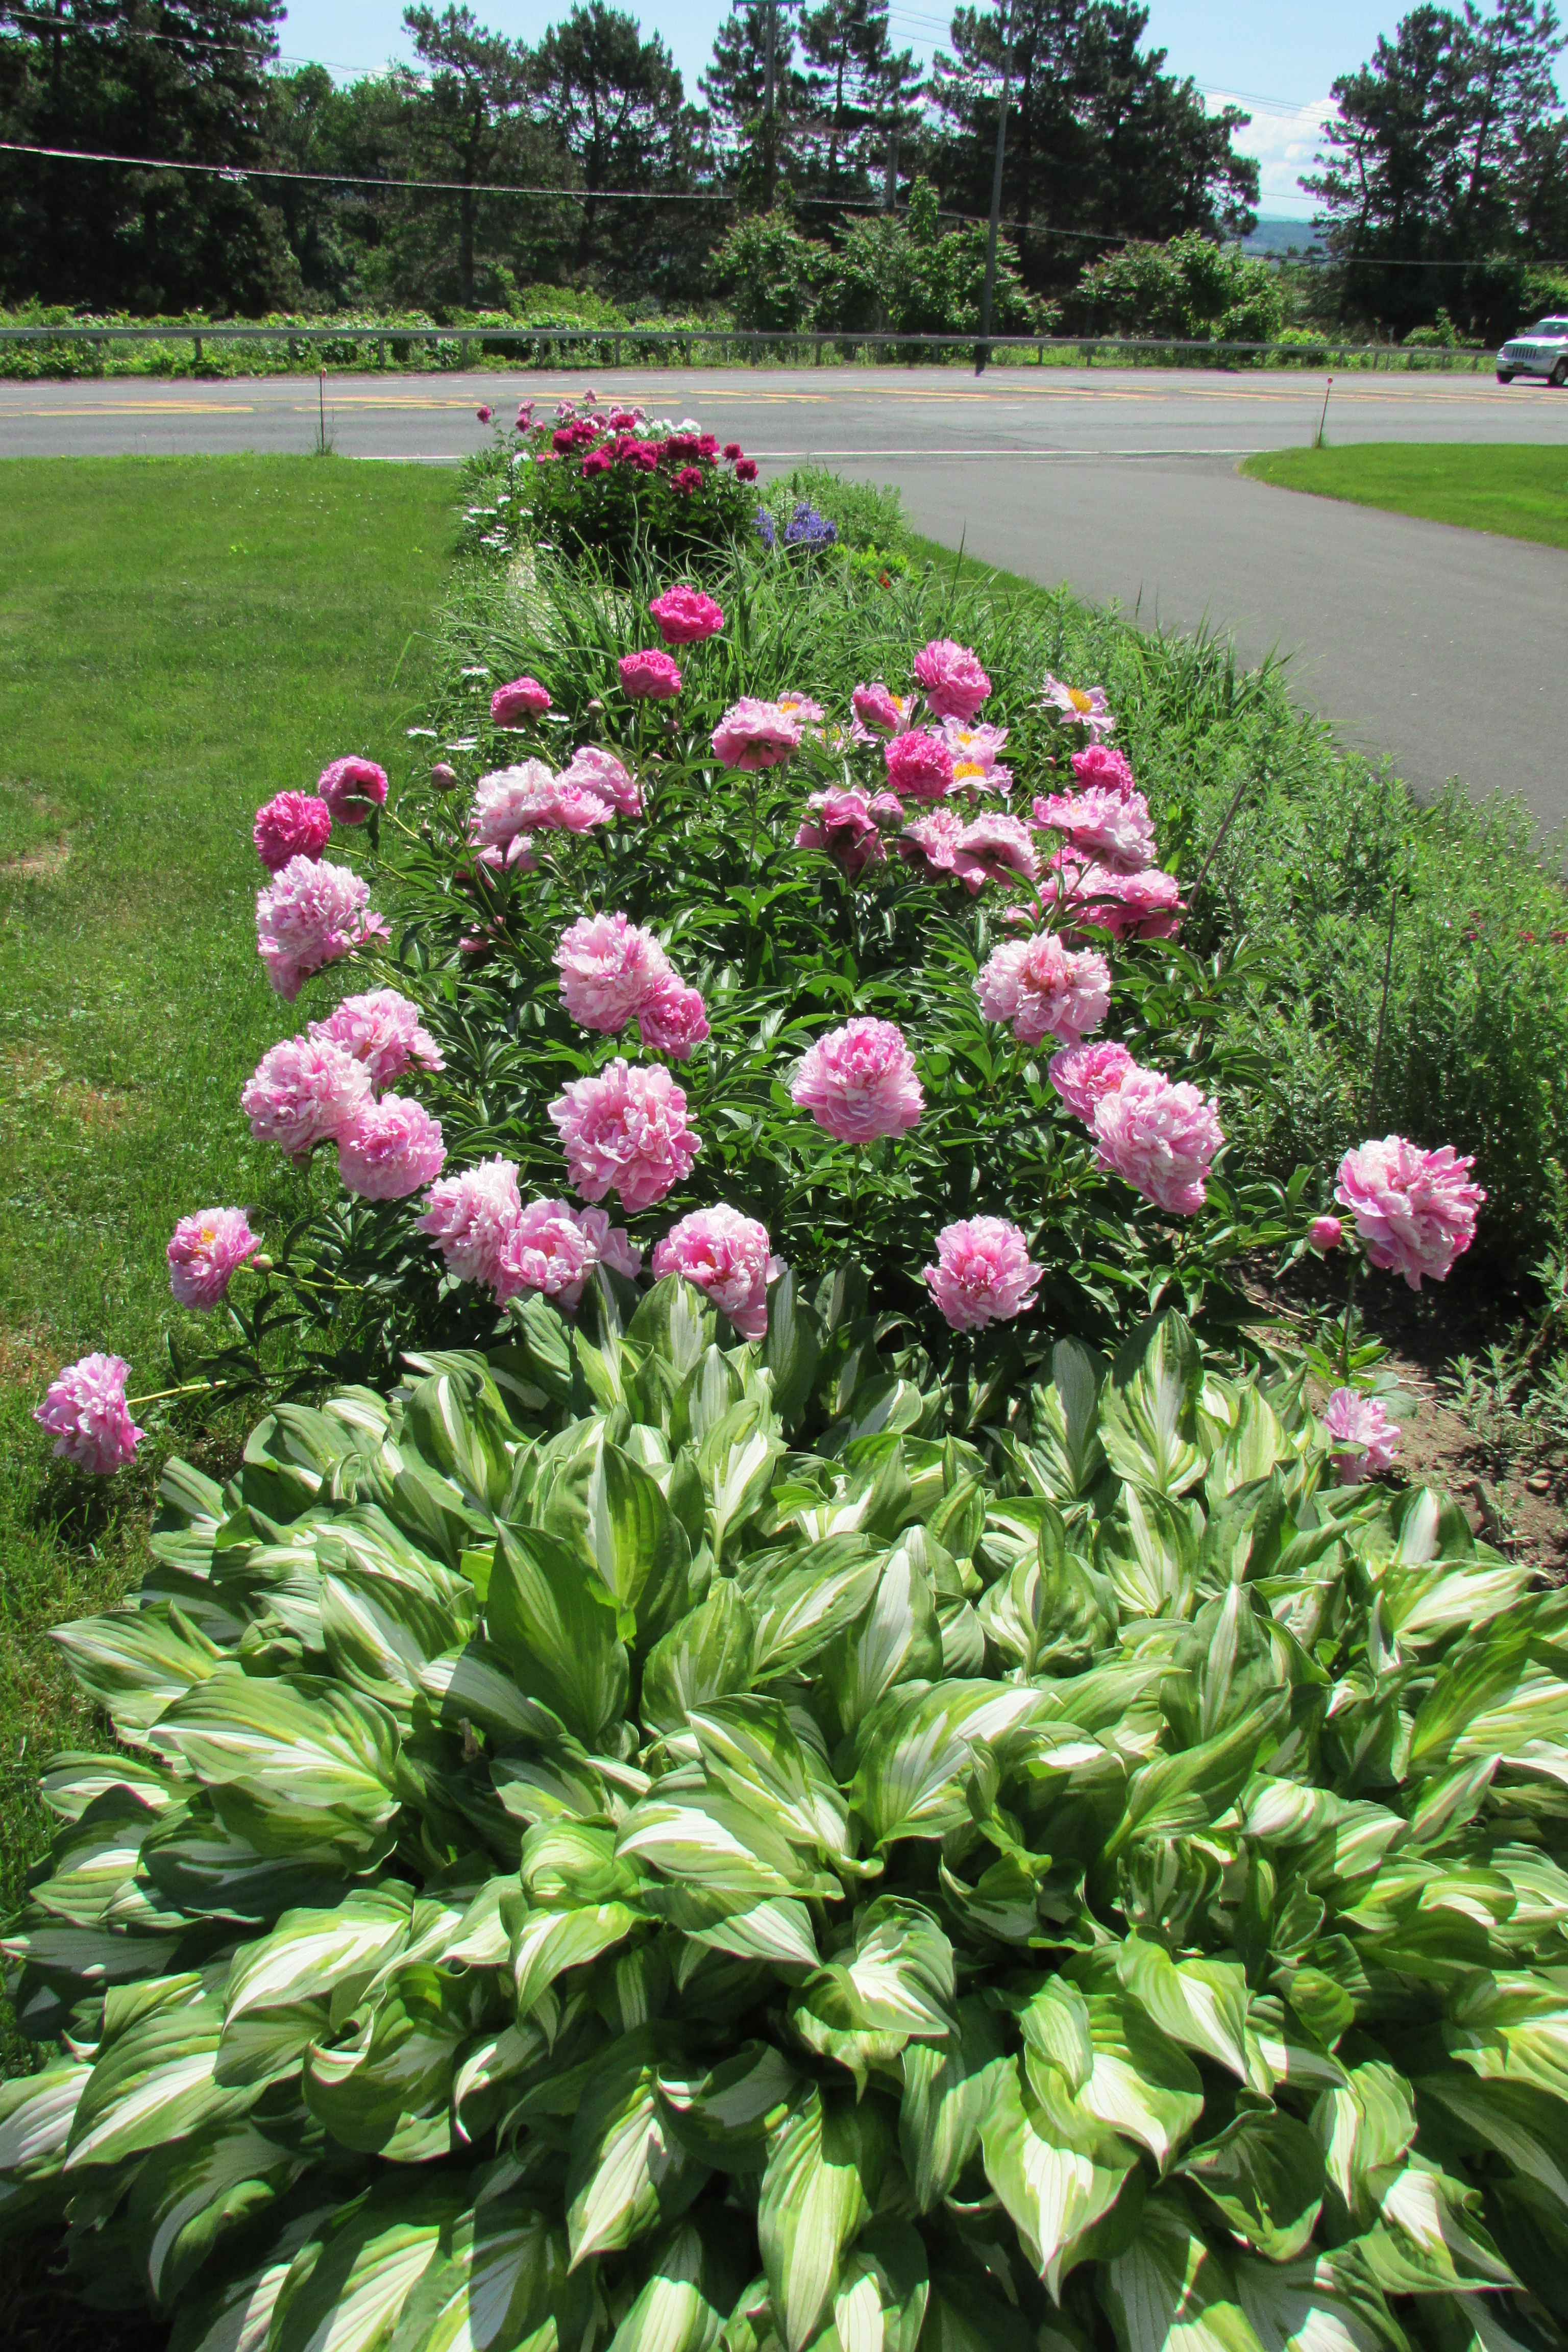 How quickly things pass. Compare this shot, showing the garden with peonies blooming at the beginning of the month, with the next photo of the garden just a week or two later.
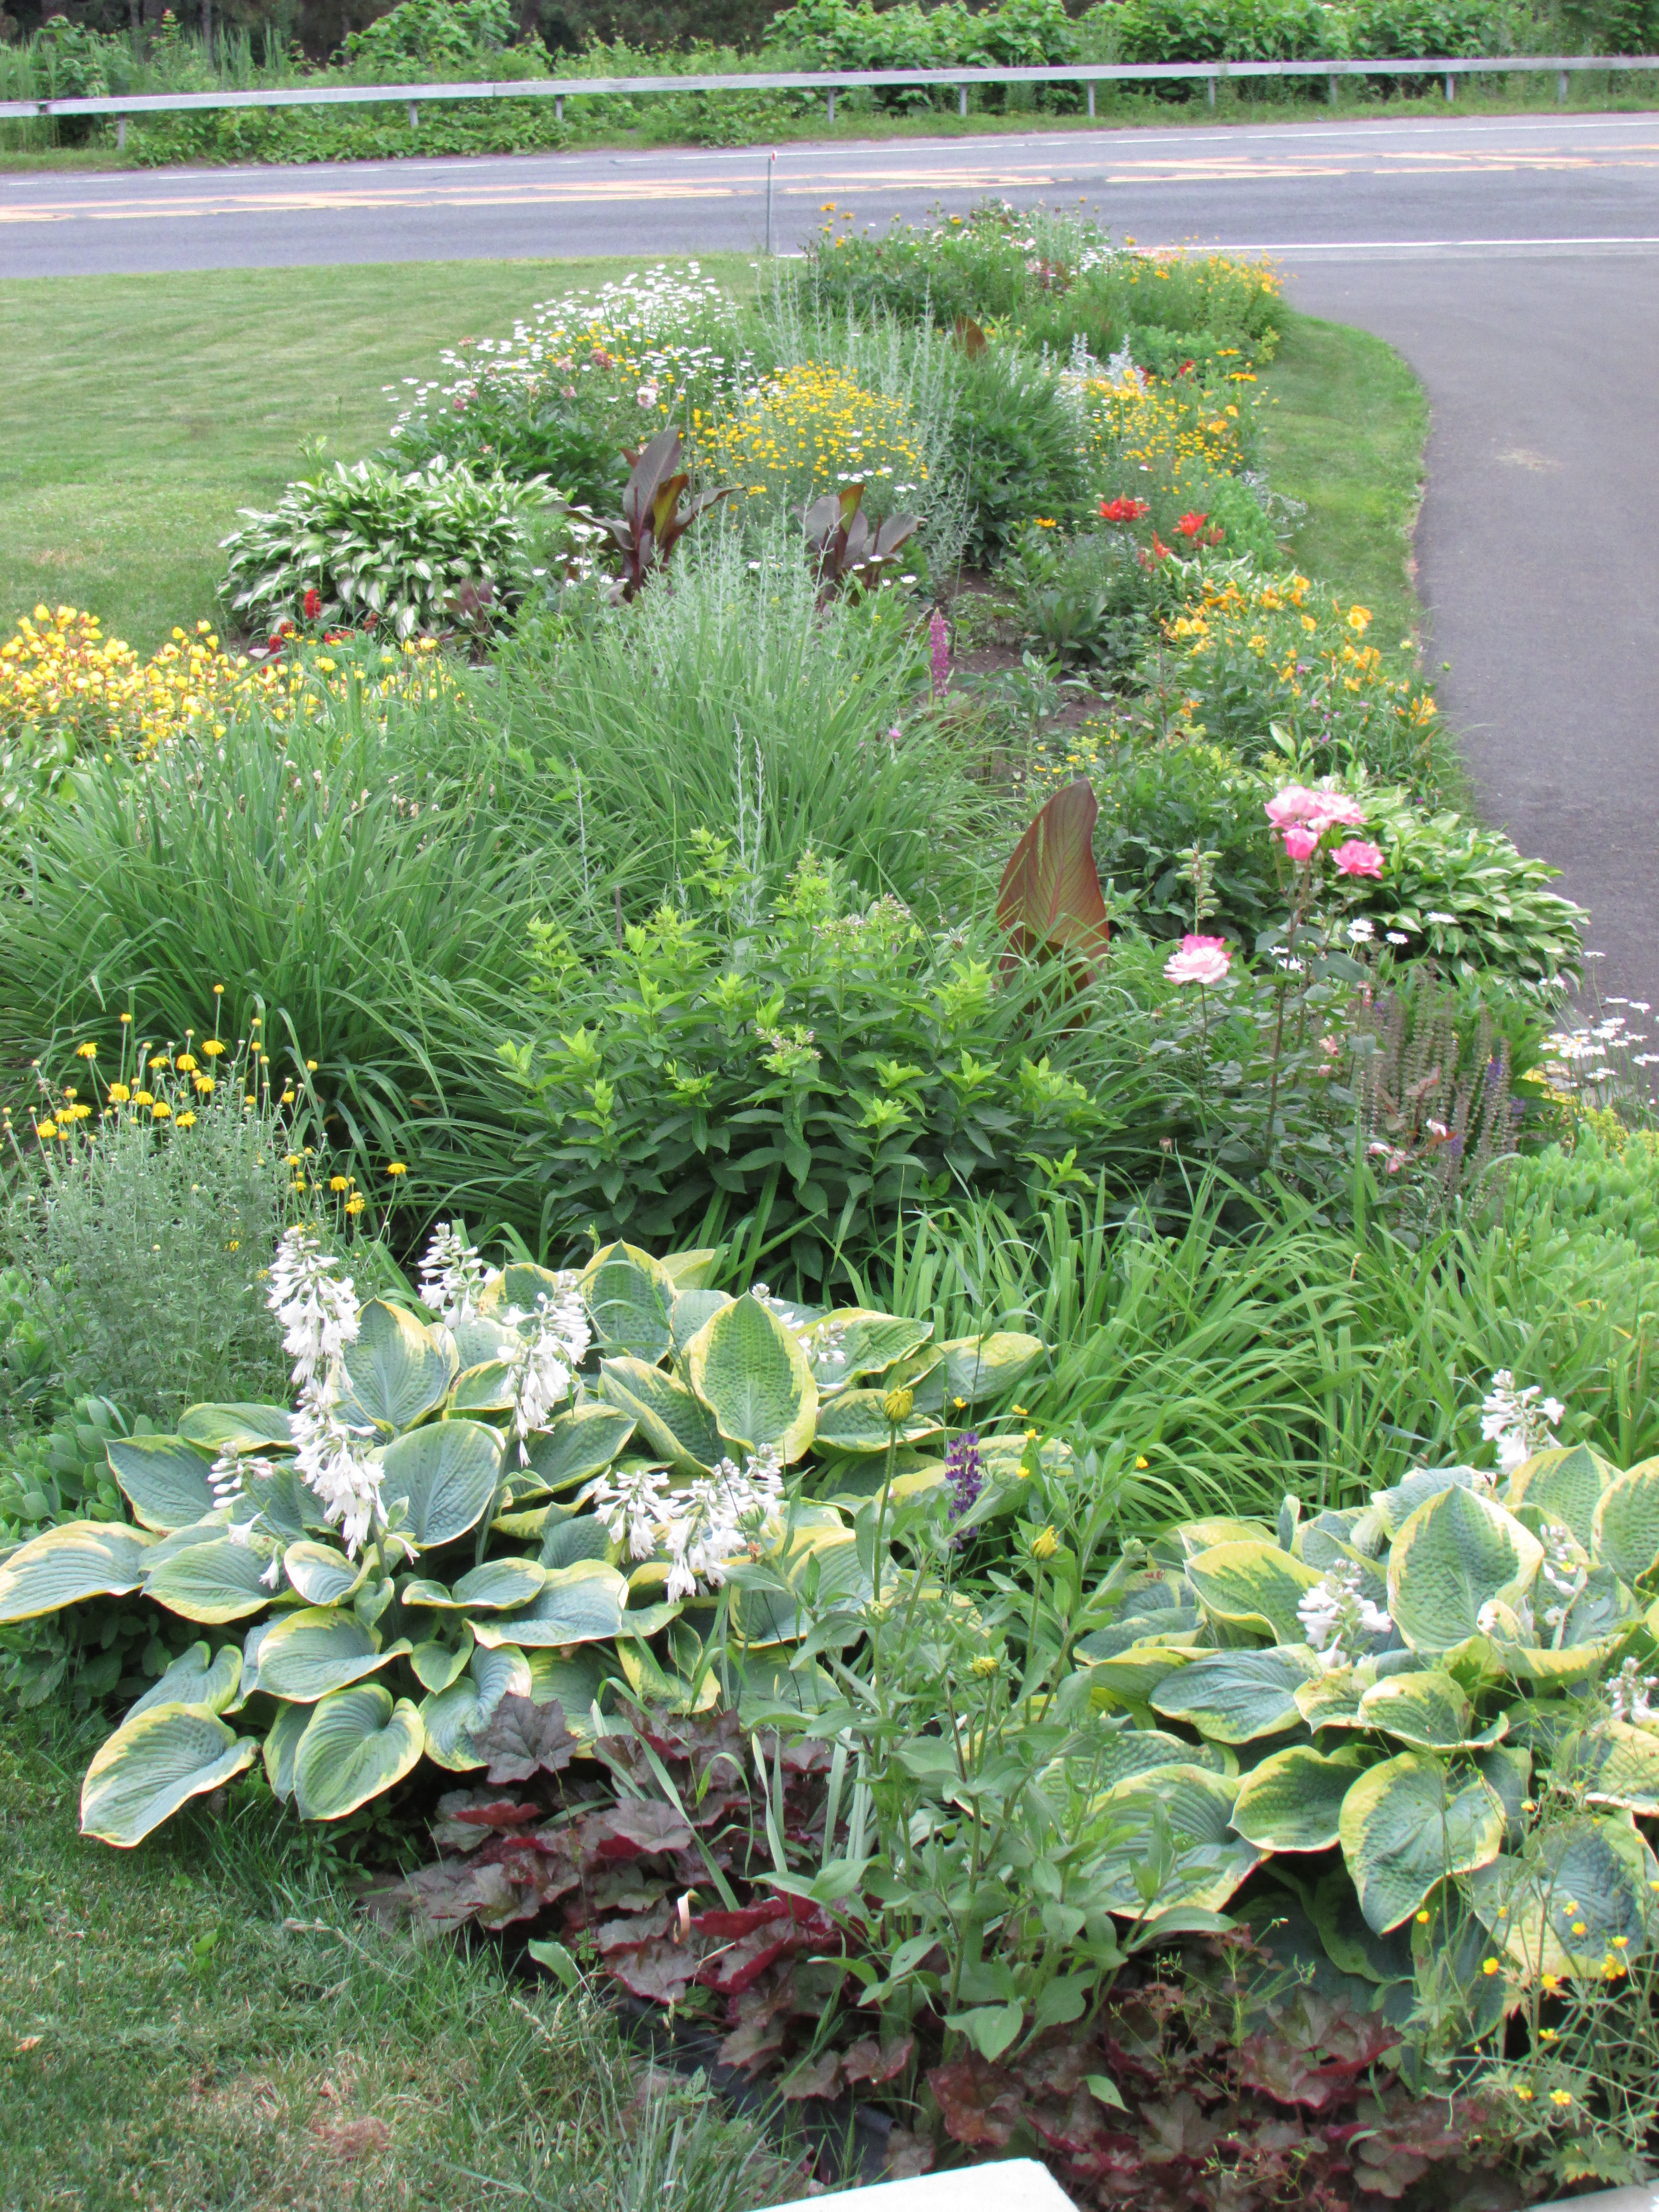 The peonies are gone, but lupine, Marguerite and white daisies, roses and some Stella De Oro daylilies have started coming into bloom. Also notice the burgundy leaves of the canna plants that have started showing up, which were planted on the first day of May.
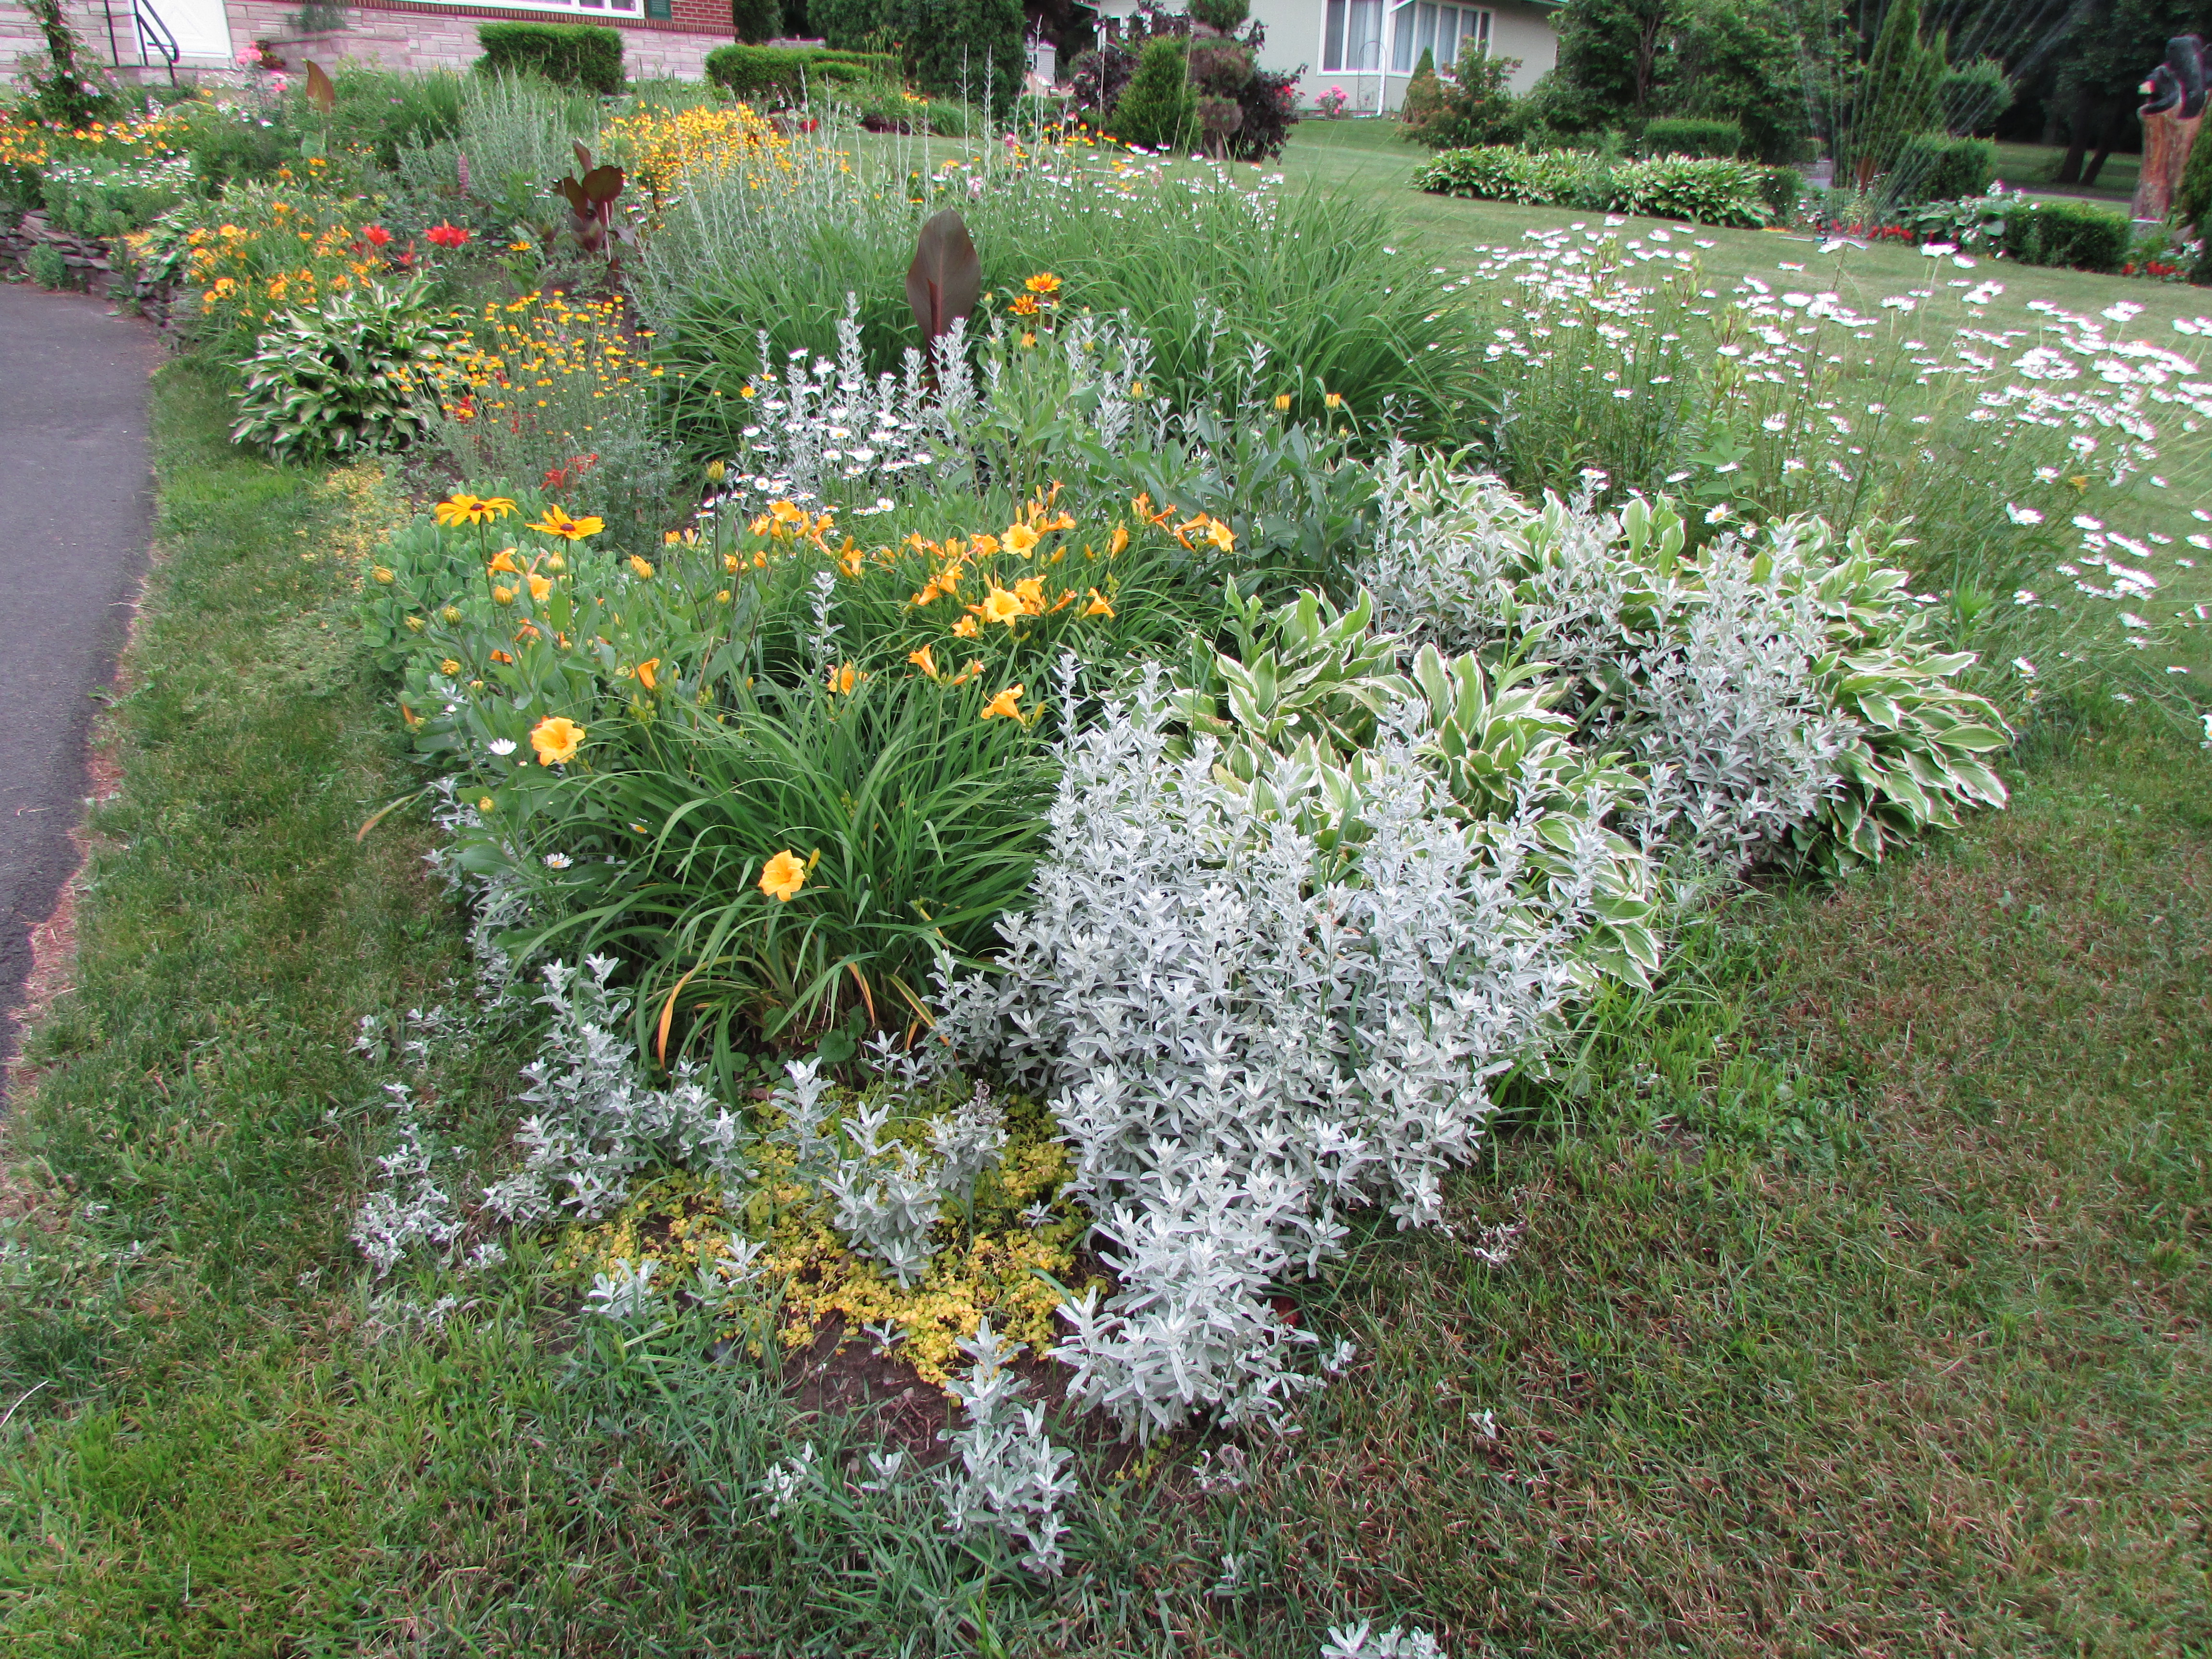 A view of part of the front garden looking back toward the house.
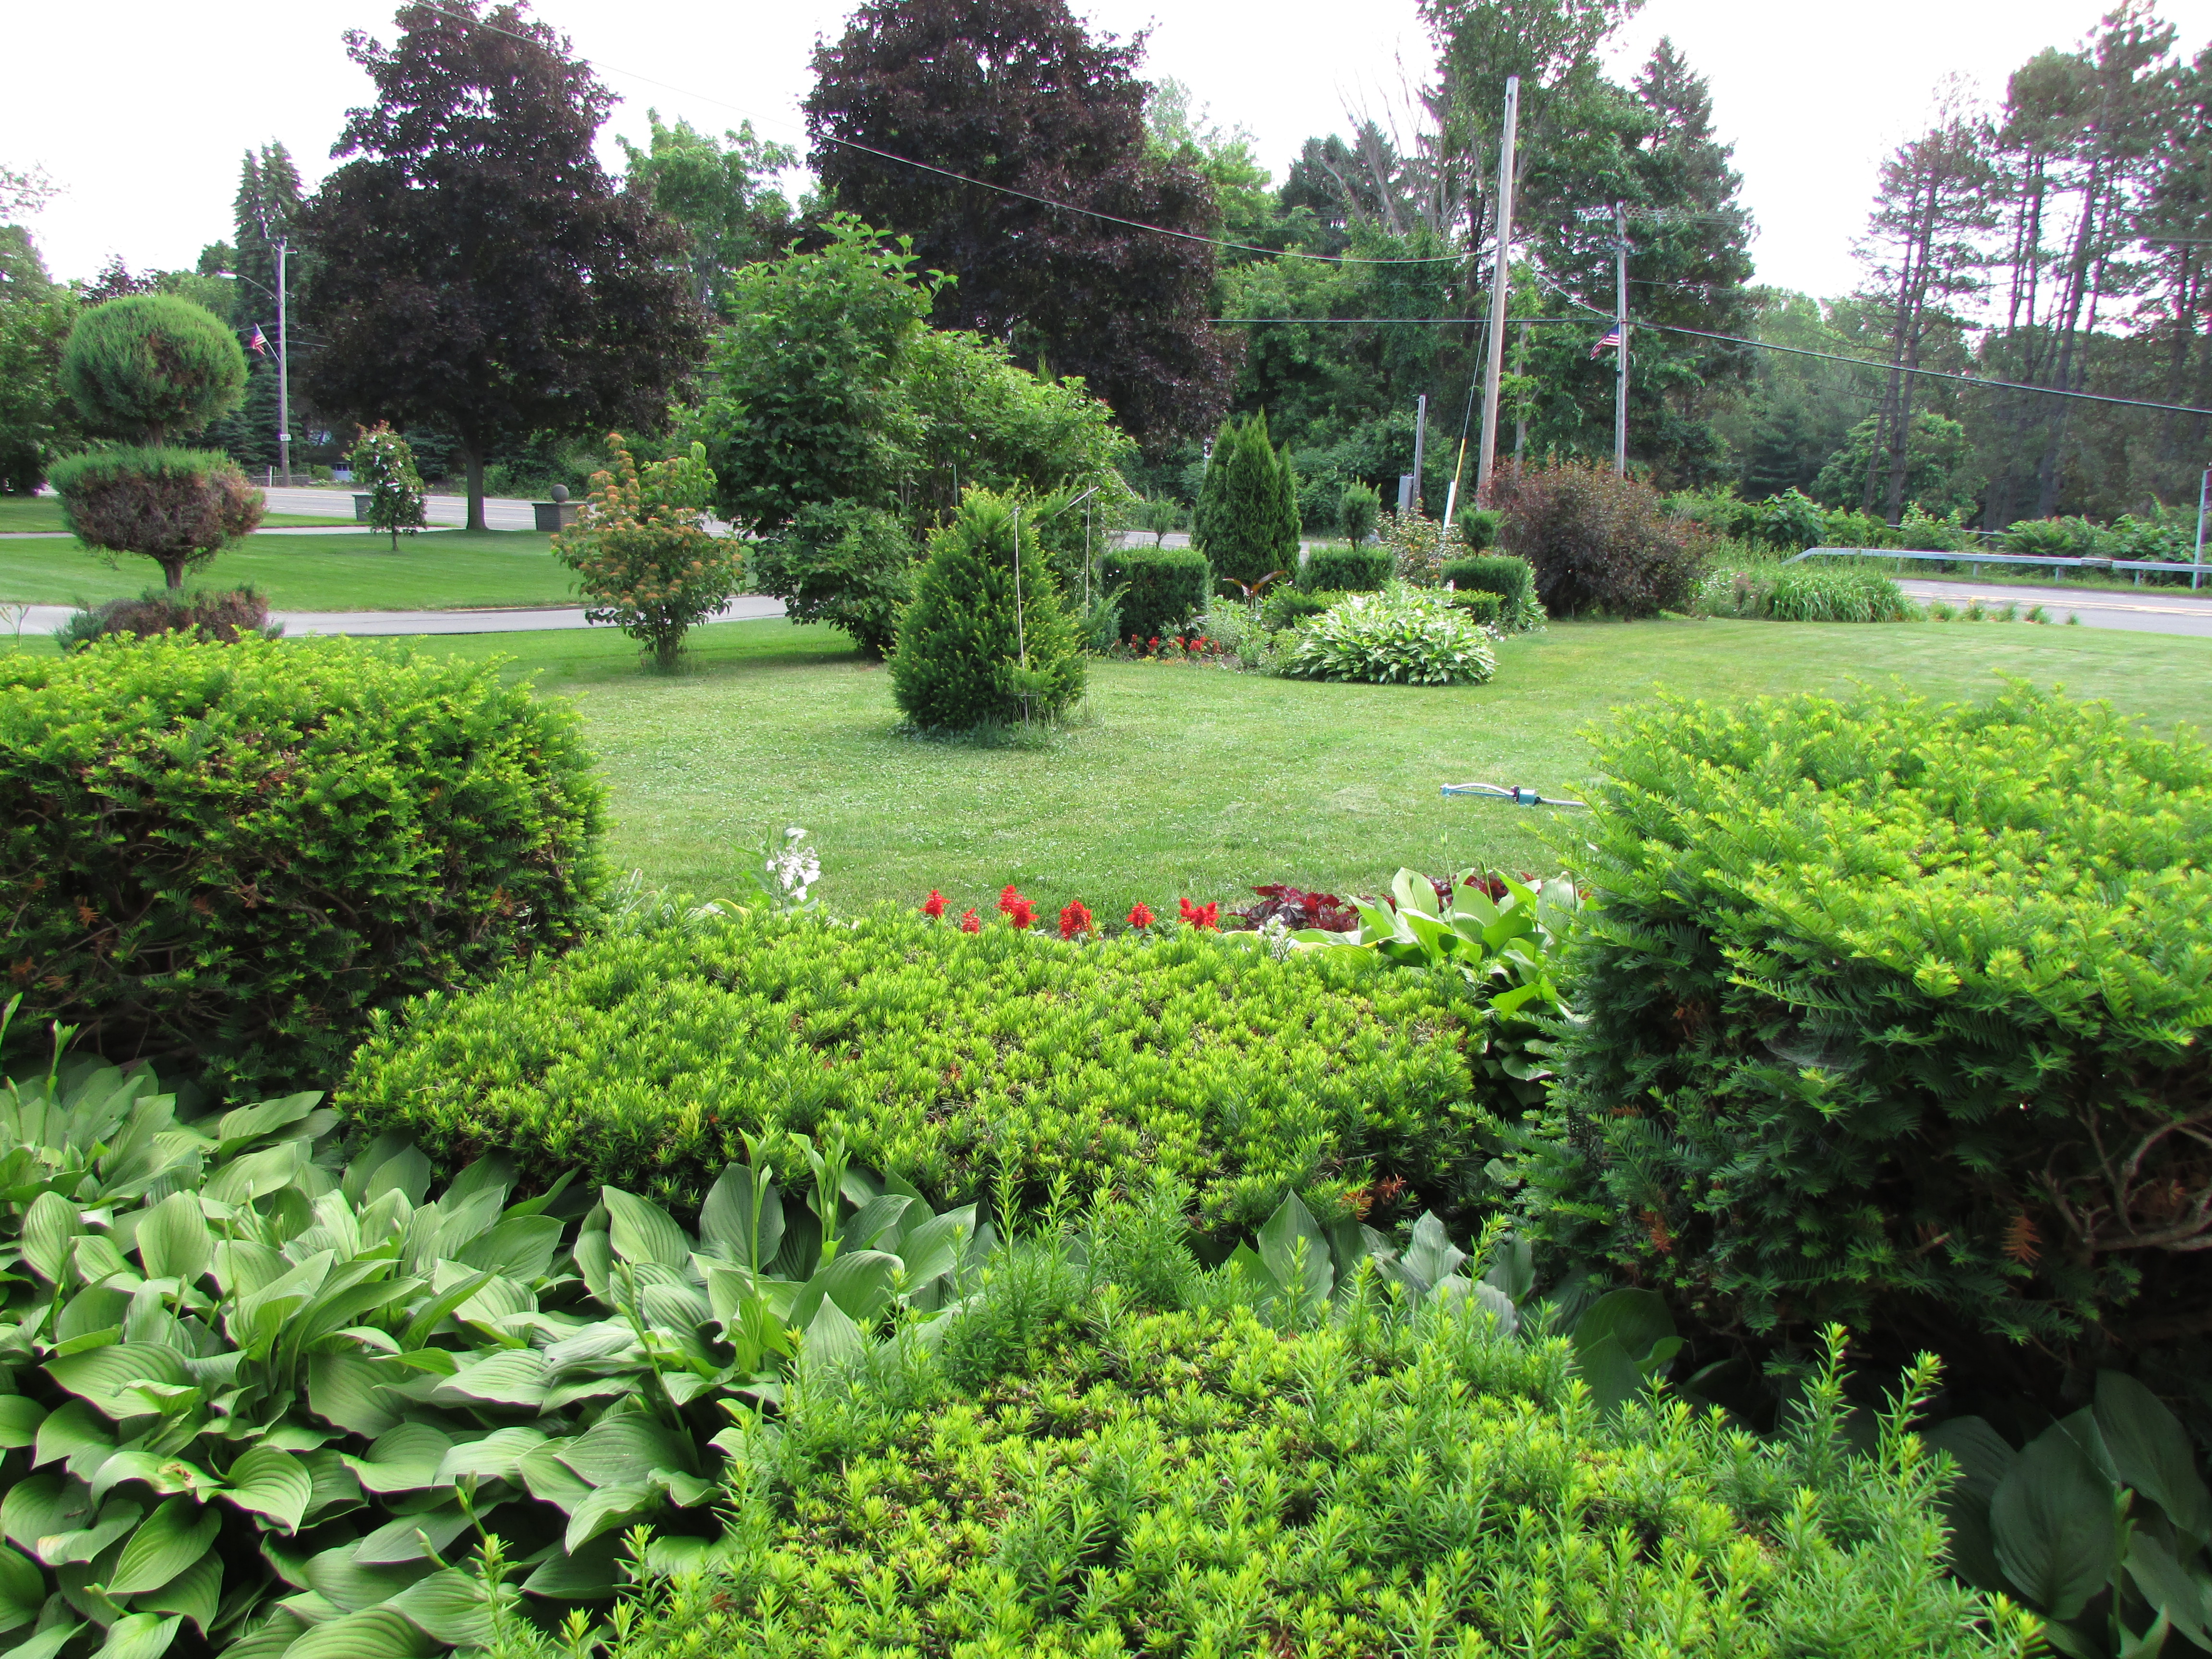 Standing by the front of my house, looking down toward the road, this is a view of the bush border on the north side of my property. Notice the dots of red in the bush border and in the foreground. They are red salvia that I’ve planted. By repeating color and even plant varieties around a garden in many spots, it helps to keep the eye moving and ties the plantings of different beds and borders together.
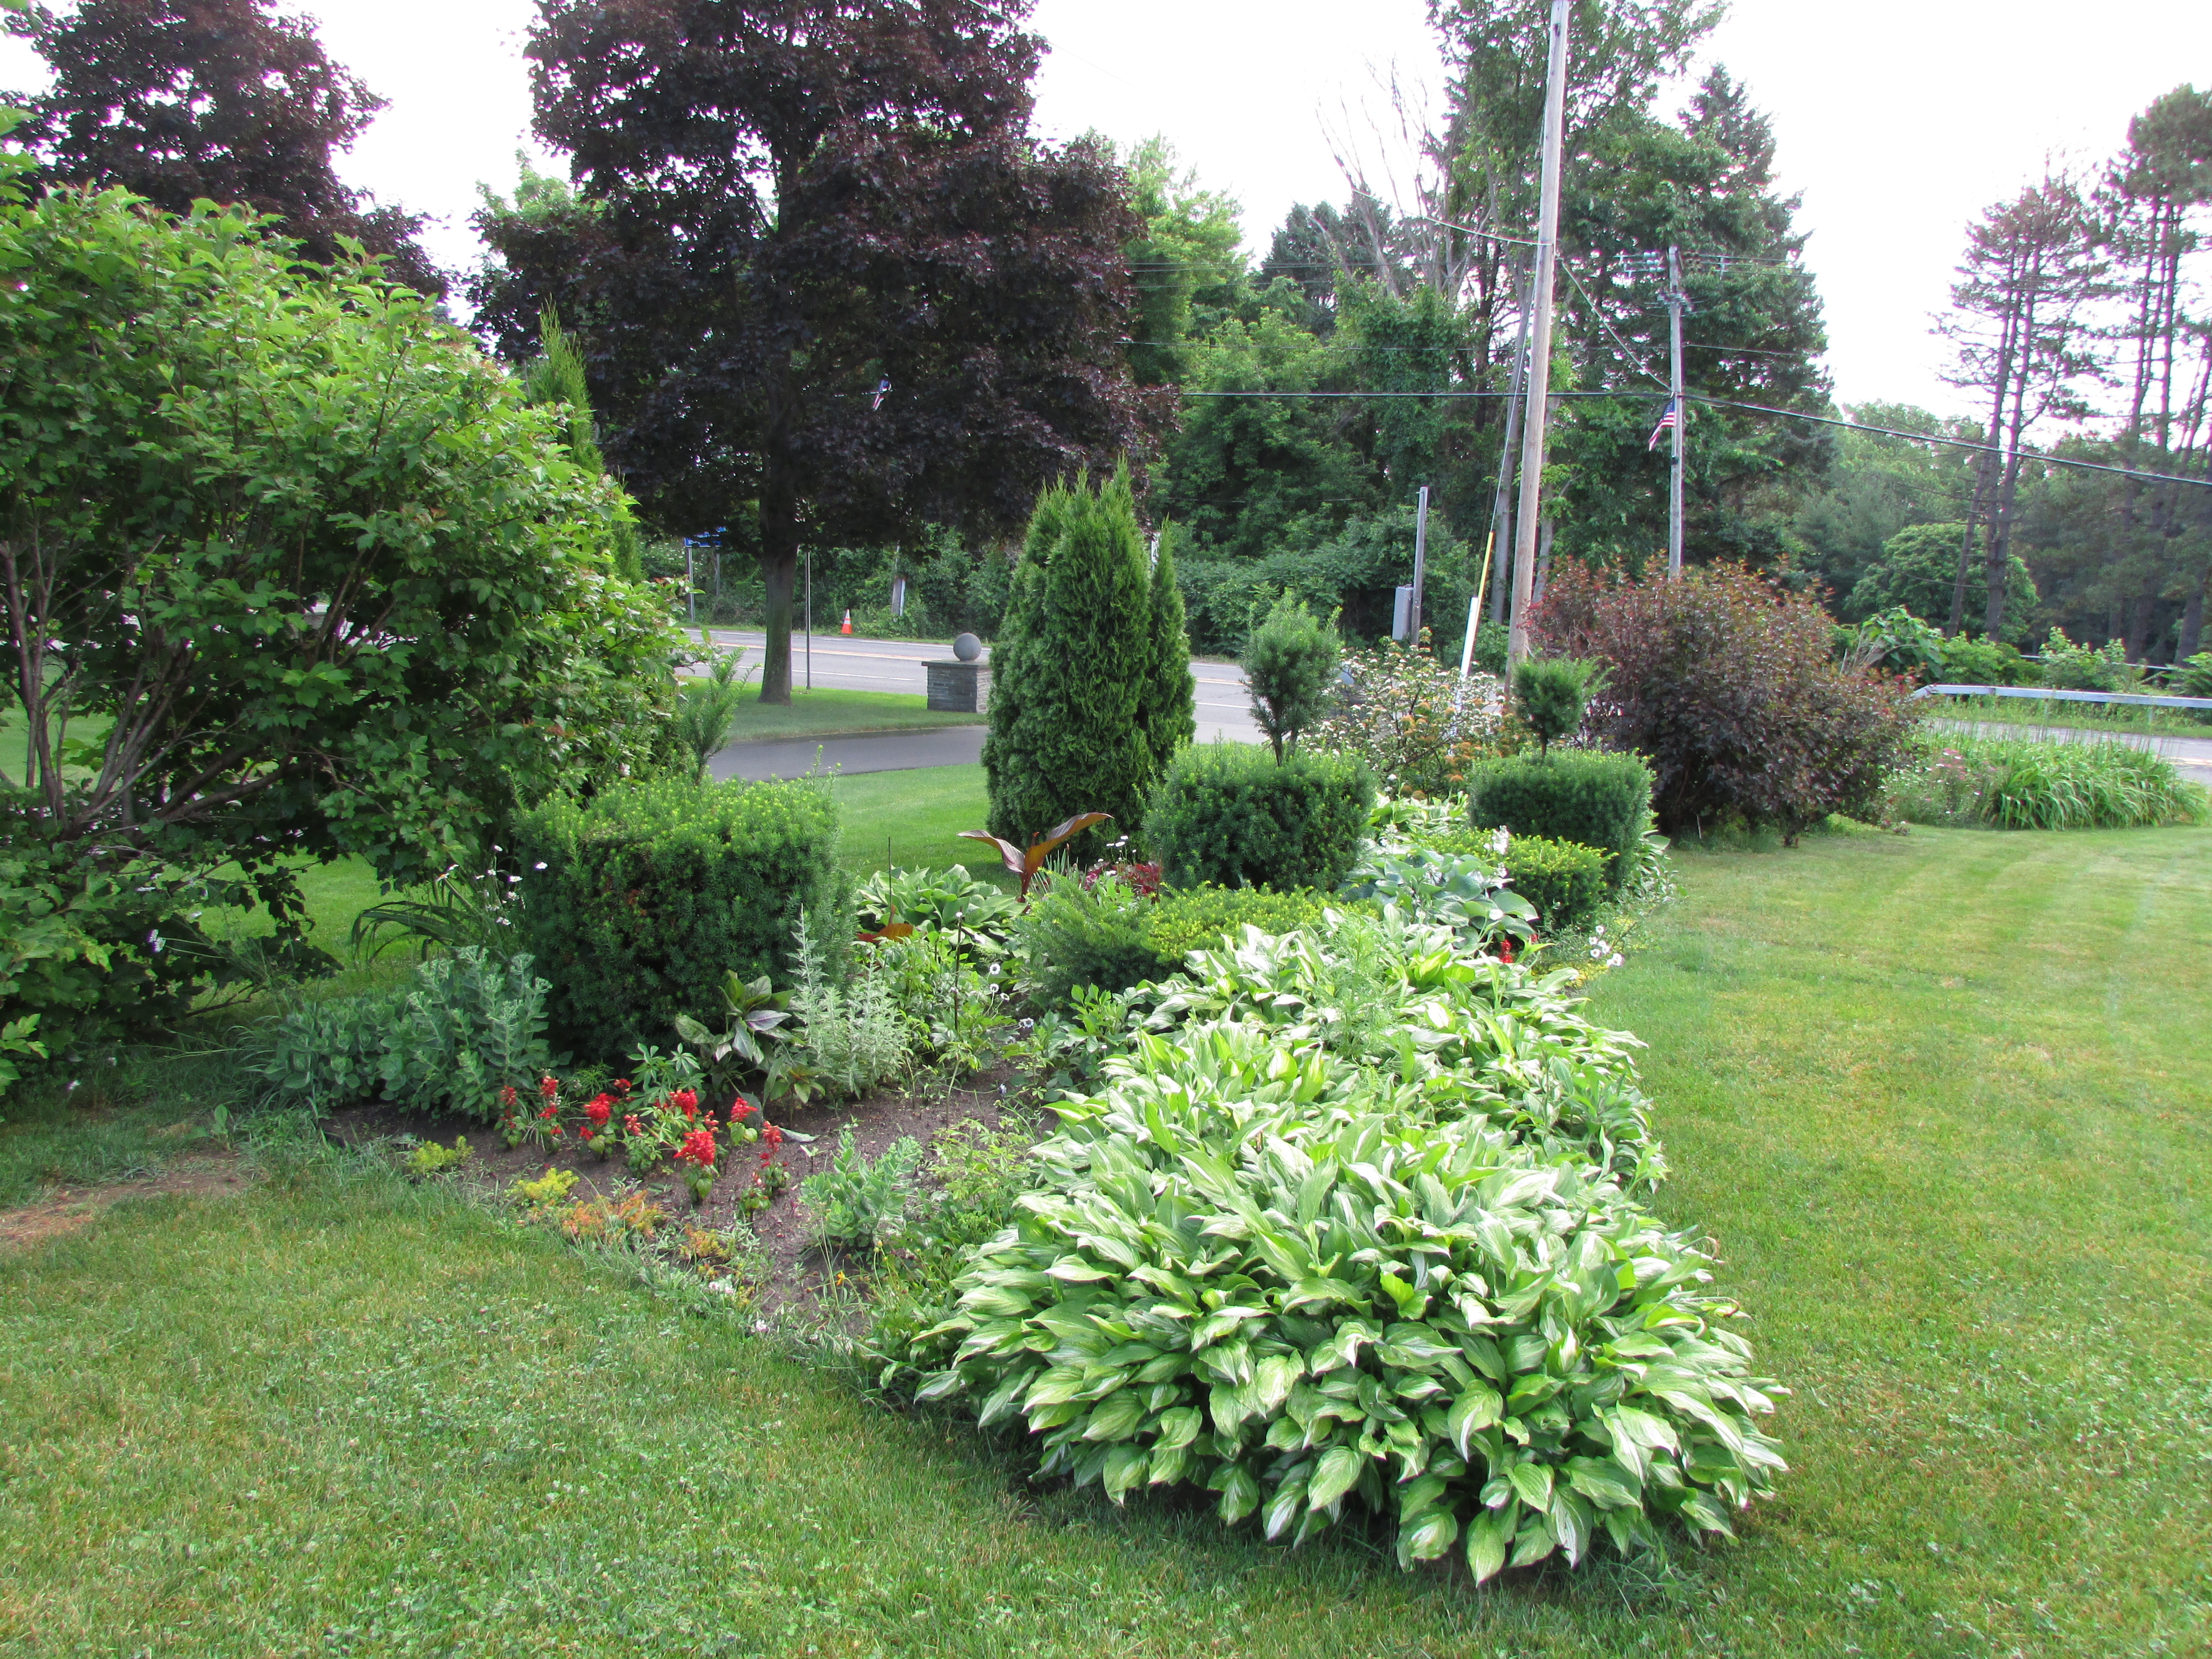 A closer look at the bush border. Who said hostas only do good in shady areas? My hostas, with white as part of the color story on their leaves, do perfectly fine growing in full sun.
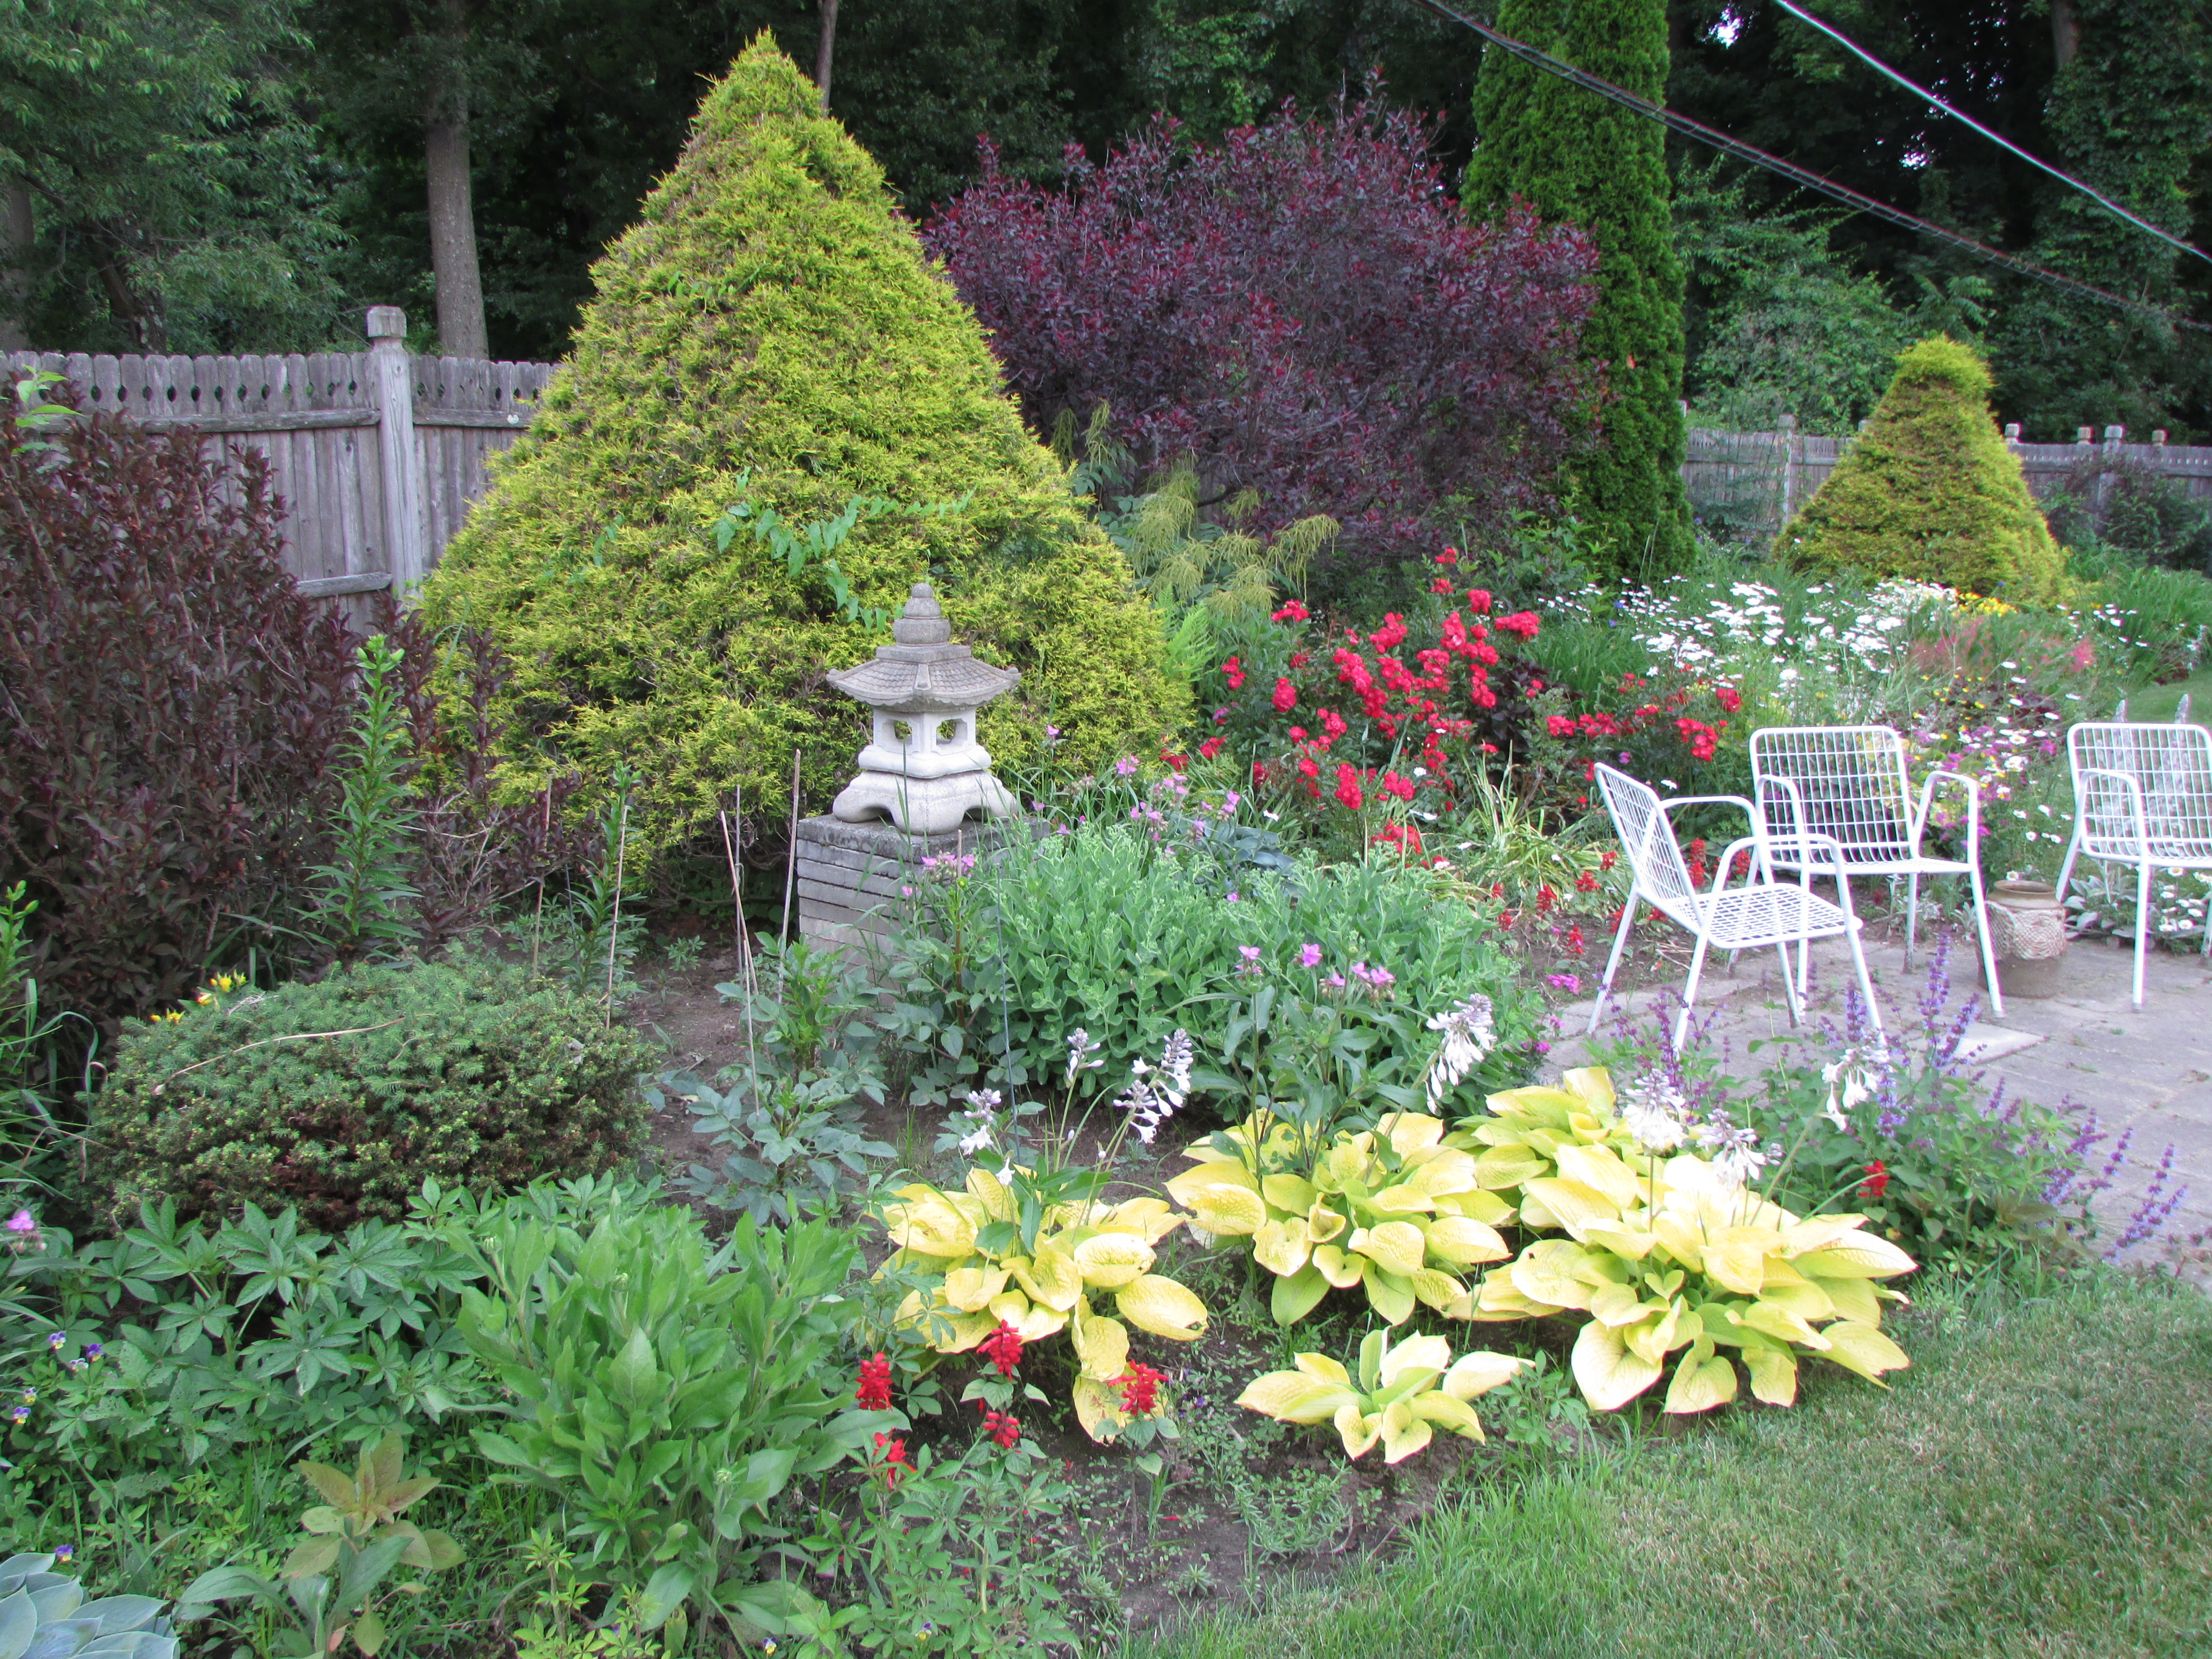
 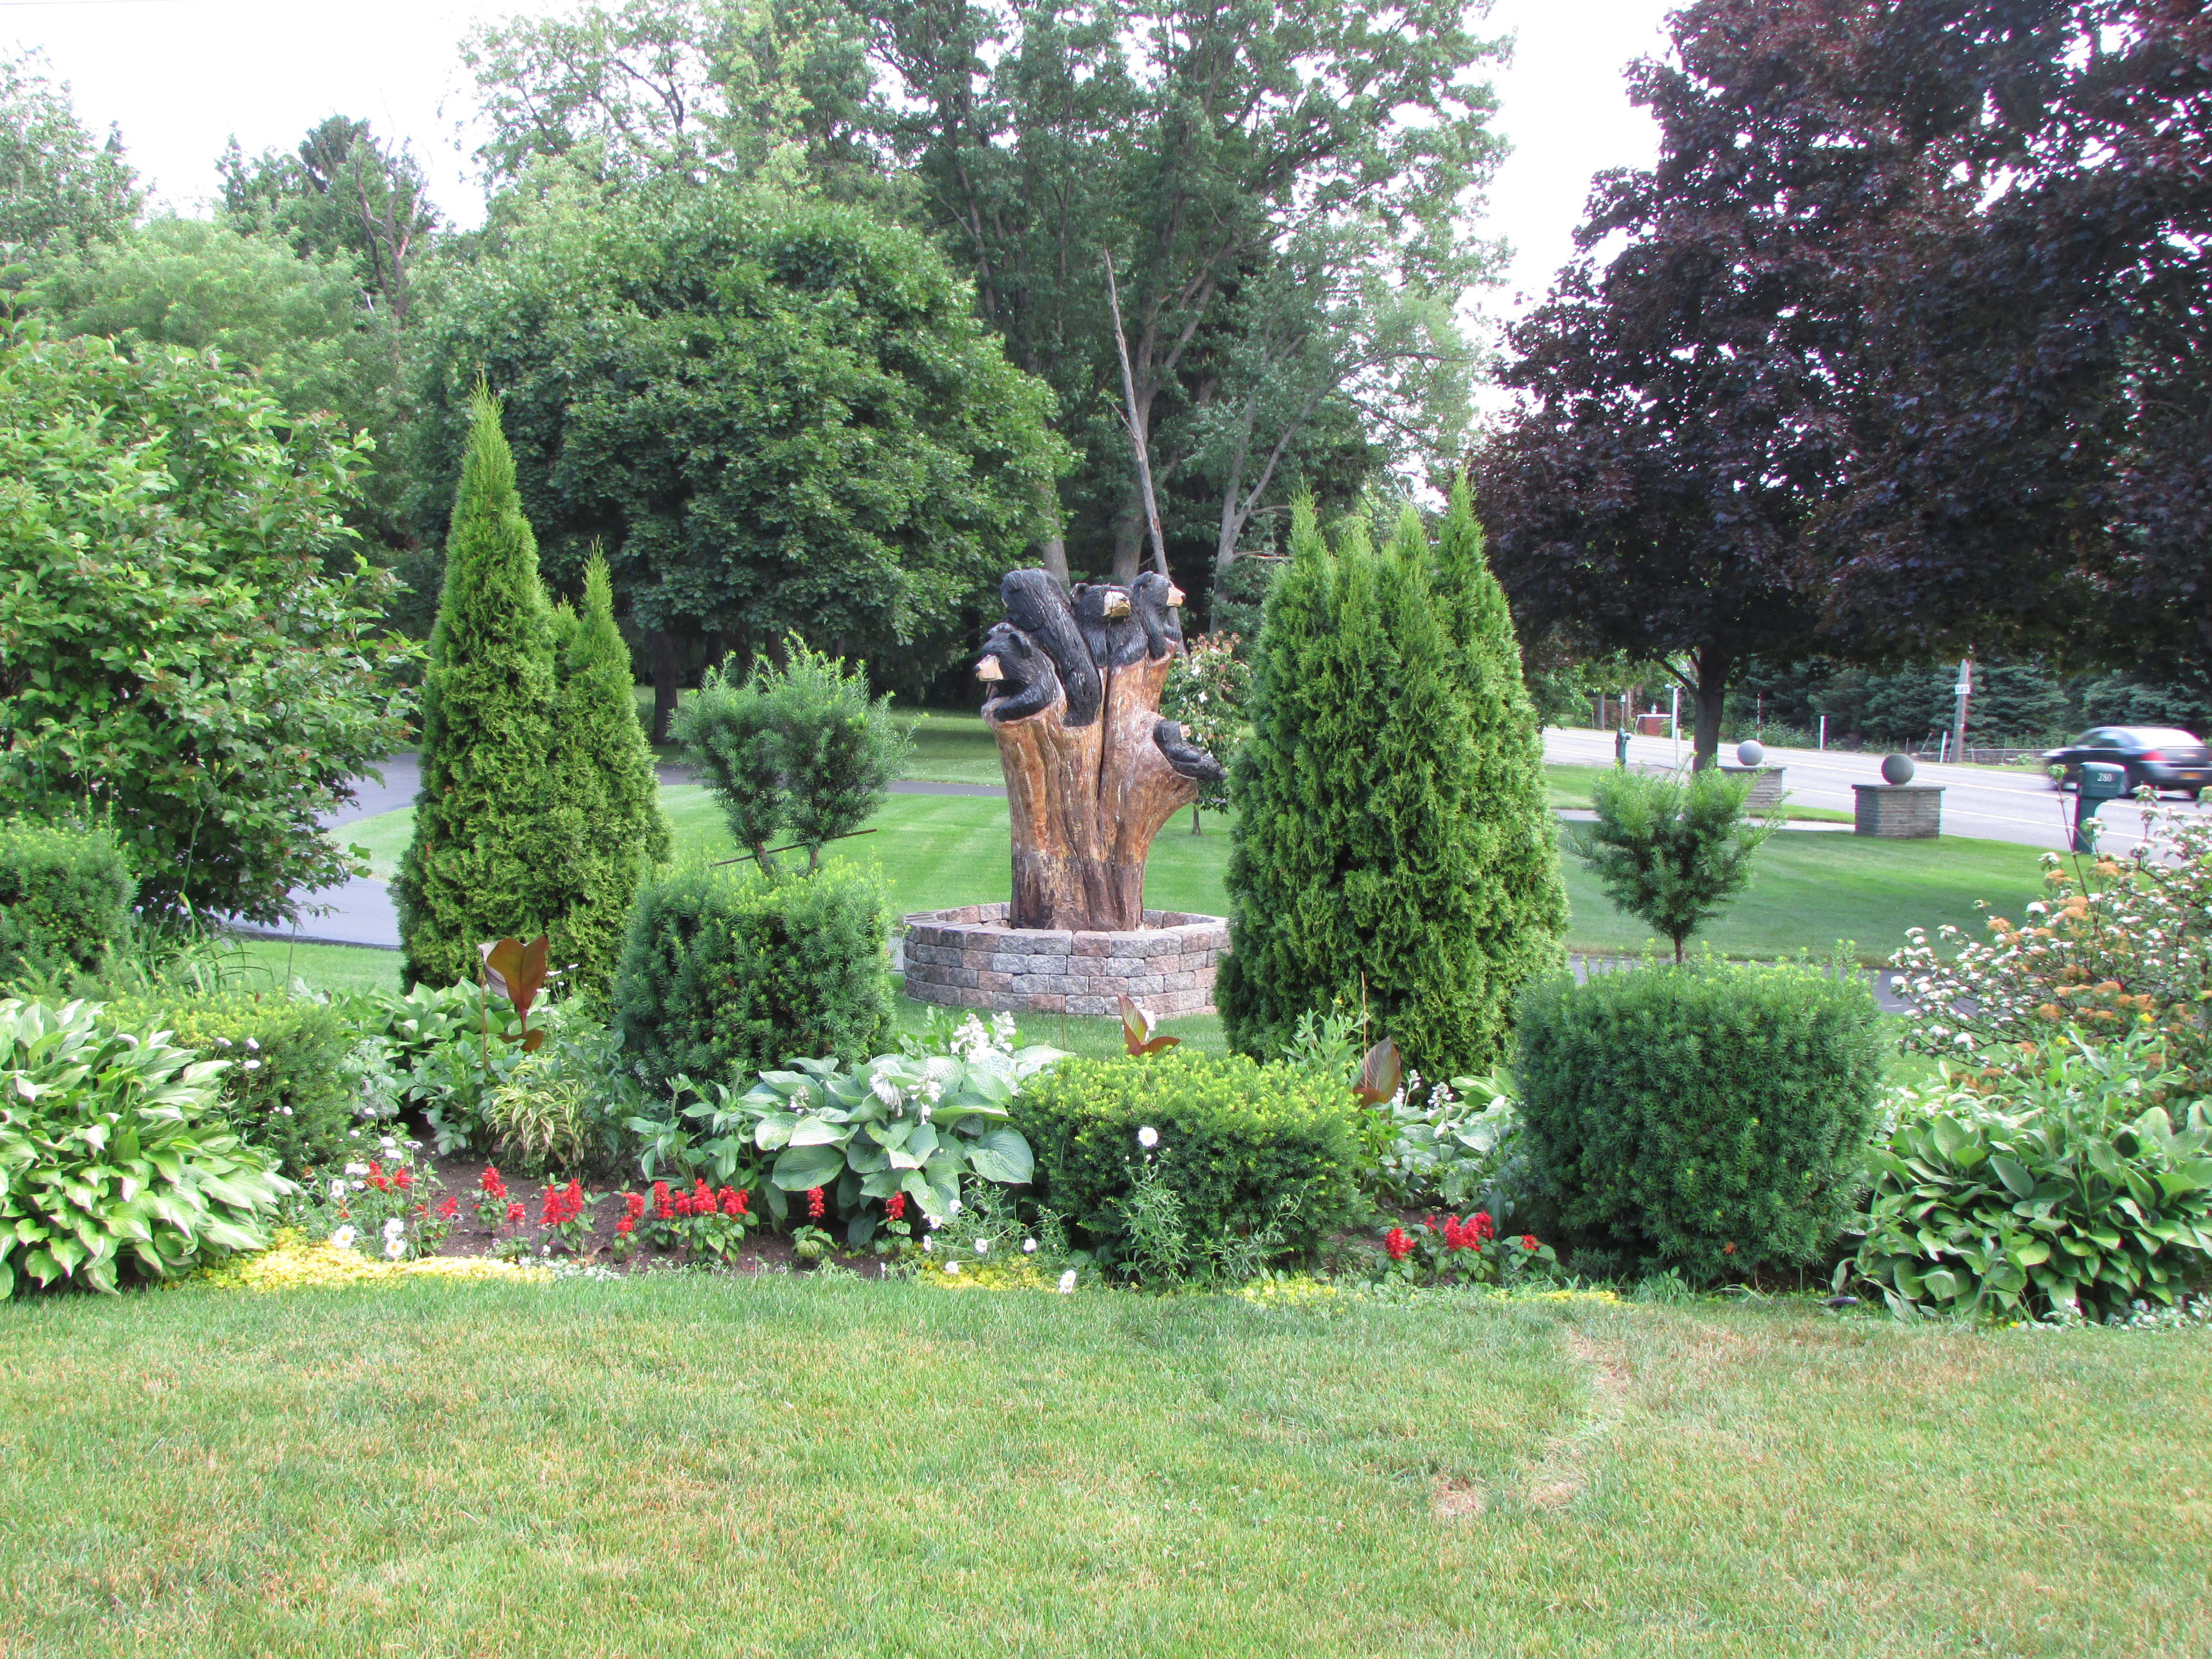 A look at the center of the border with my neighbor’s carved bears. Notice the pattern of planting here. There are two spreading yew in the front, three upright yew (starting to become topiary) in the middle, and two arborvitae in the background framing the bears; deciduous bushes also bookend this planting. The different heights, shapes, and textures of the evergreens with their different needles, as well as the leaf shapes and colors of the annuals, perennials and deciduous bushes provide visual interest in this part of the garden.
 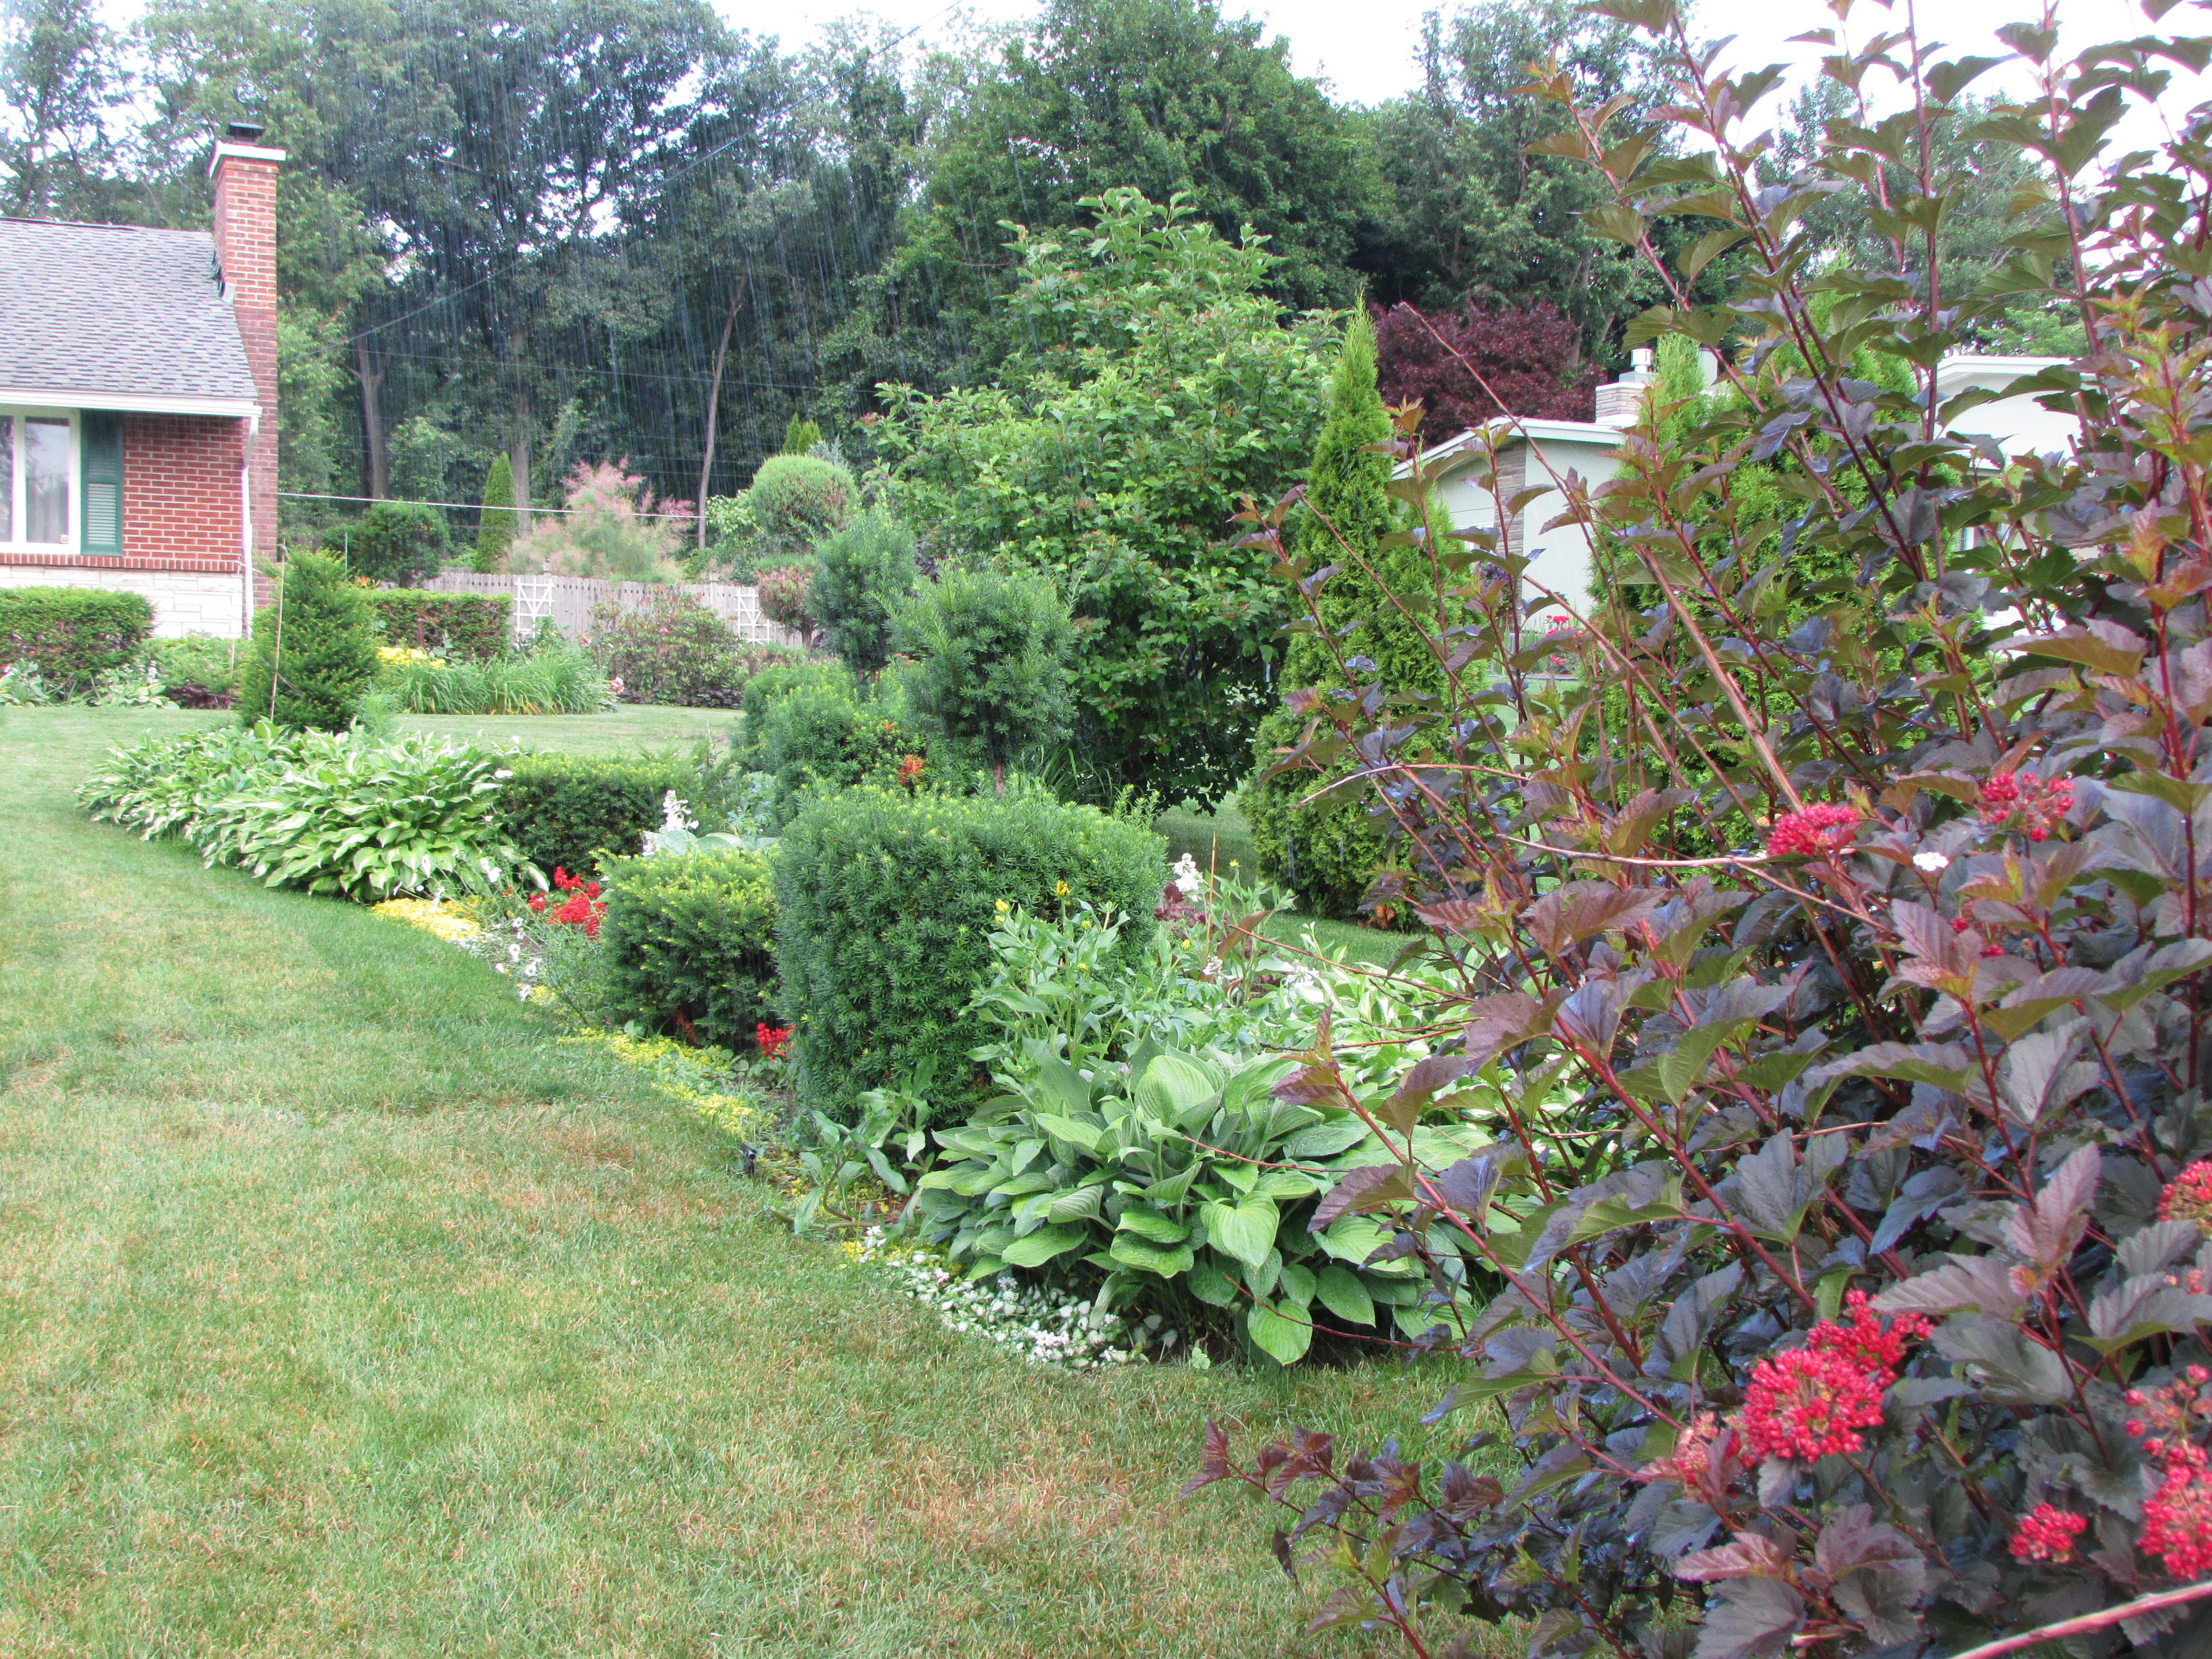 Looking from the road back toward the house.
 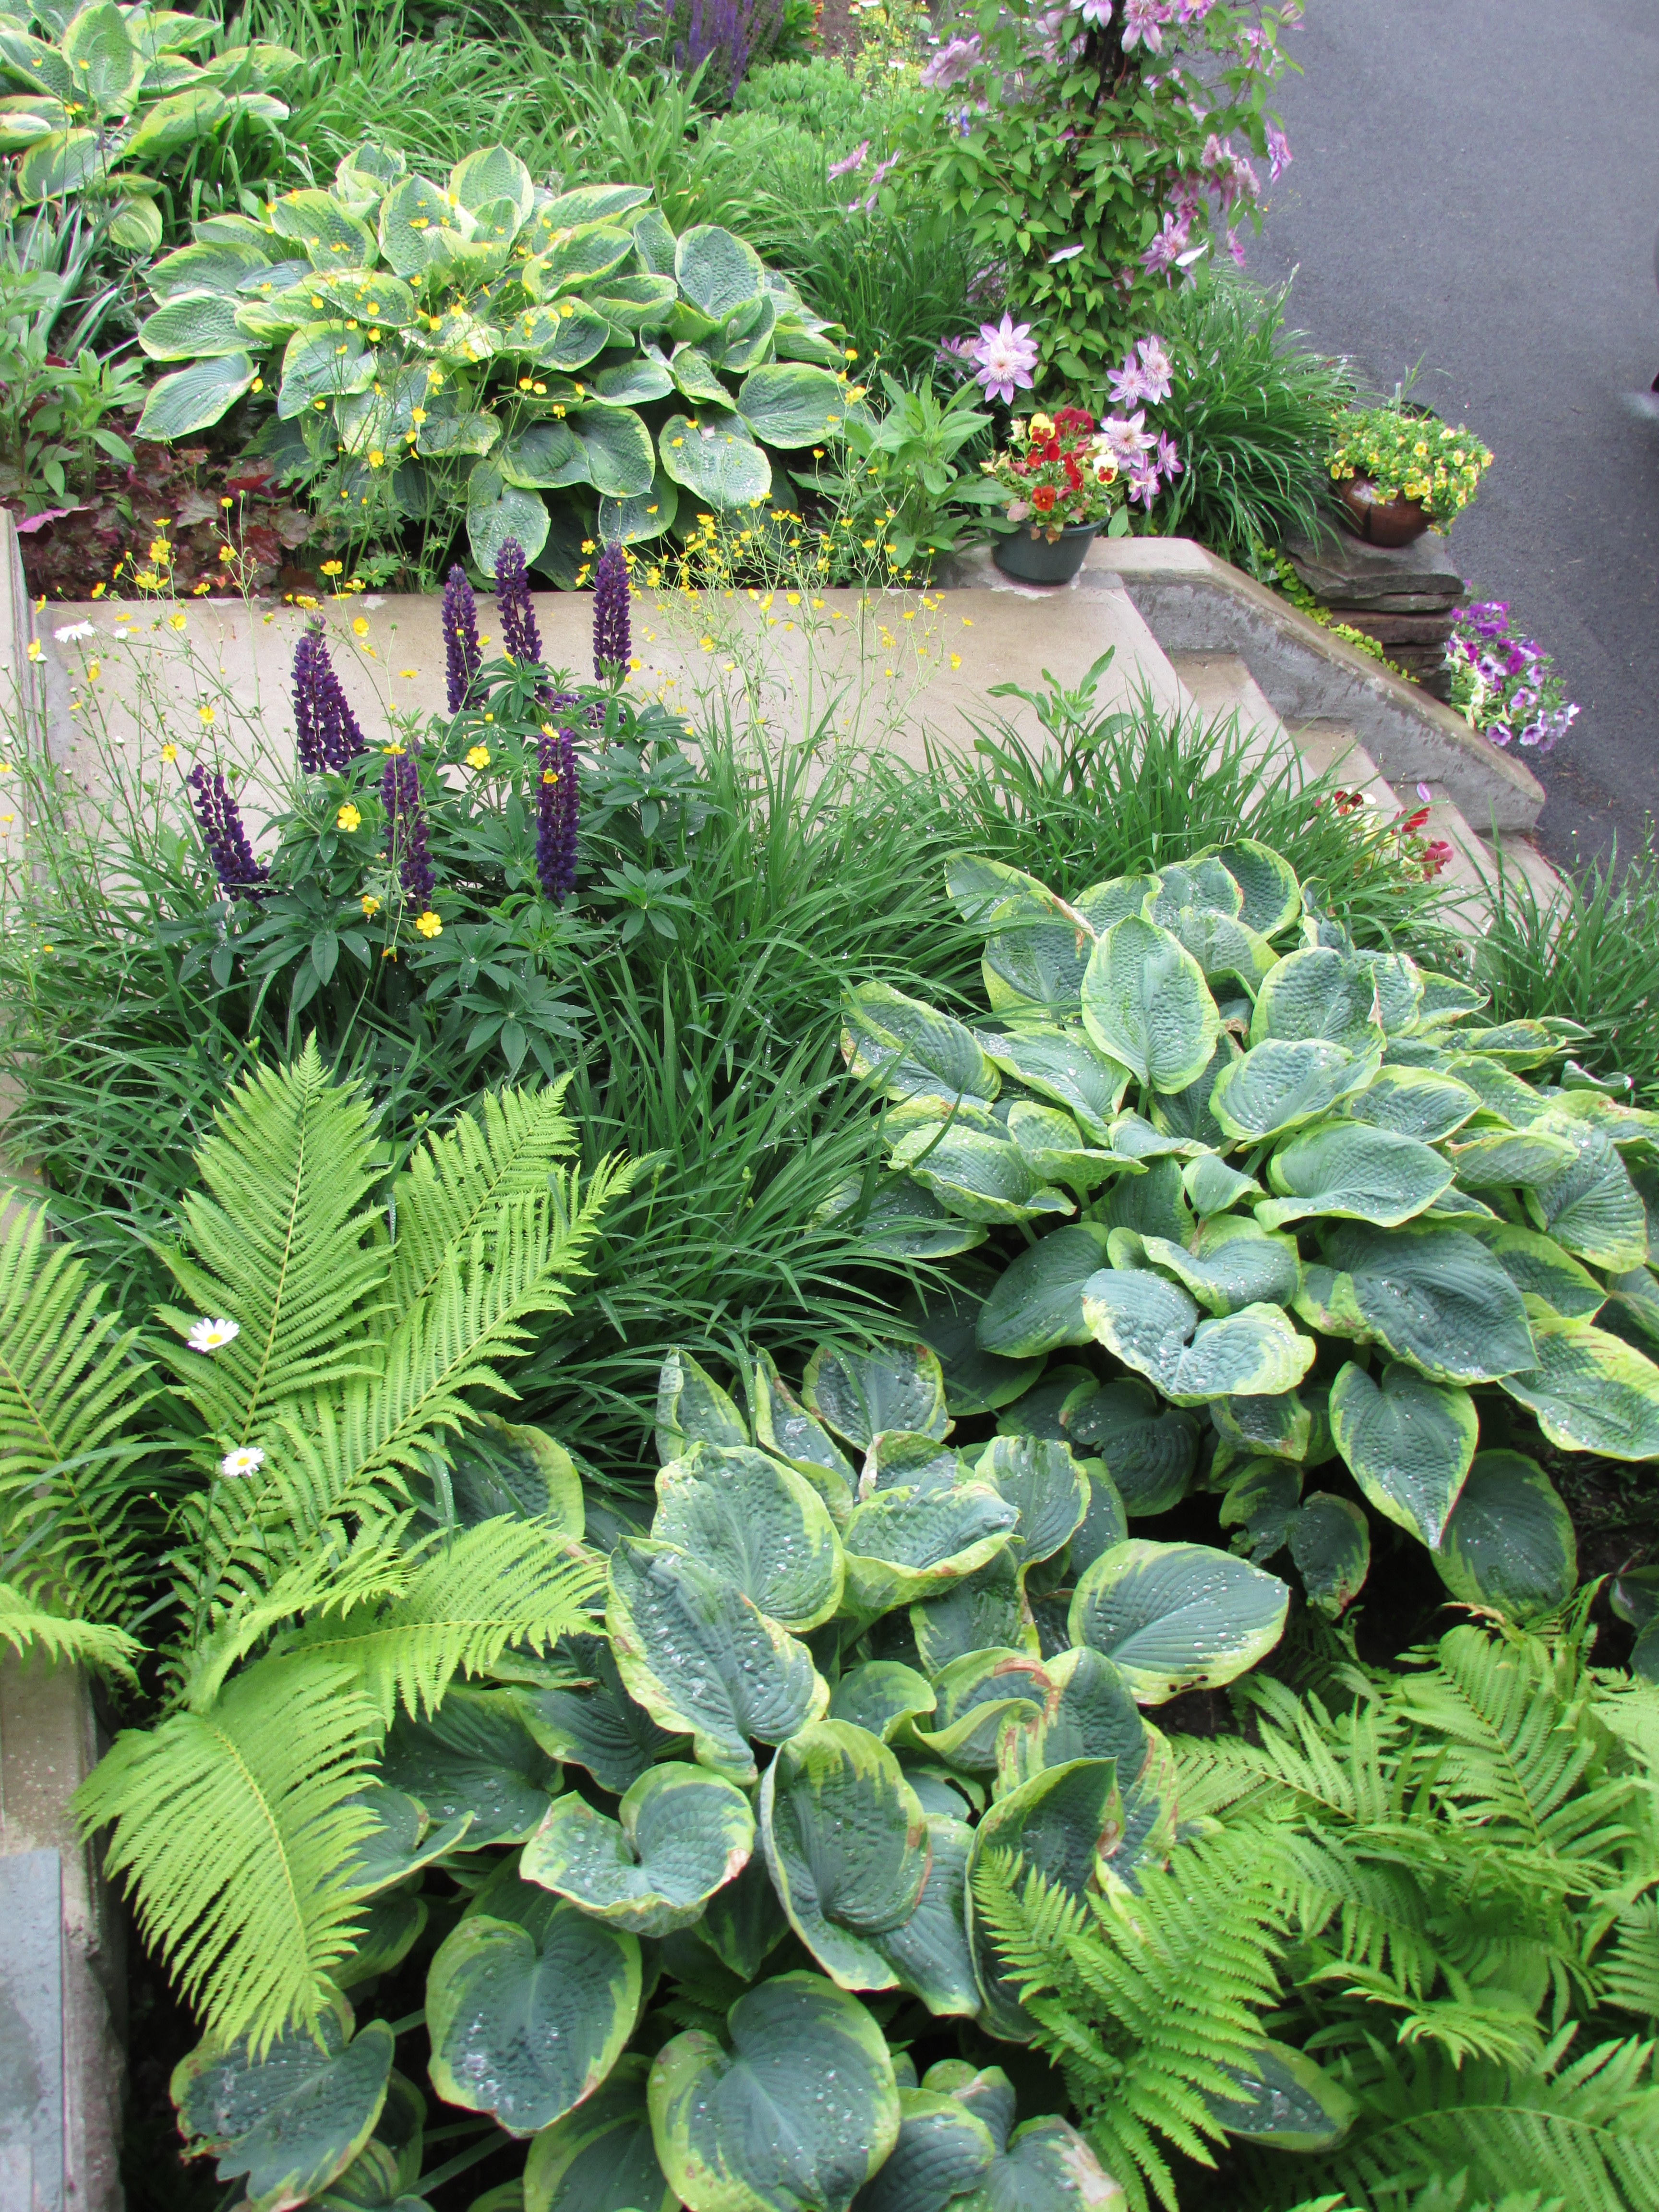 A quick stop by the front steps. Here is a perfect example of mixing color and textures (leaf shapes) of plants in a garden. There is repeated planting of things that are fern like (the ferns), large-leaved the hosta, grassy the daylilies, and the long thin, almost almond-shaped individual leaves that make up the multi leafed leaves of the lupine. Yellow buttercups with their airy stems also add another bit of texture and plant height along the front sidewalk. Different colors of green and gold tones are also seen in this photo.
< Now we’re behind the house. Three topiary, that I started from upright yew, are the first things to greet you when entering the back garden.
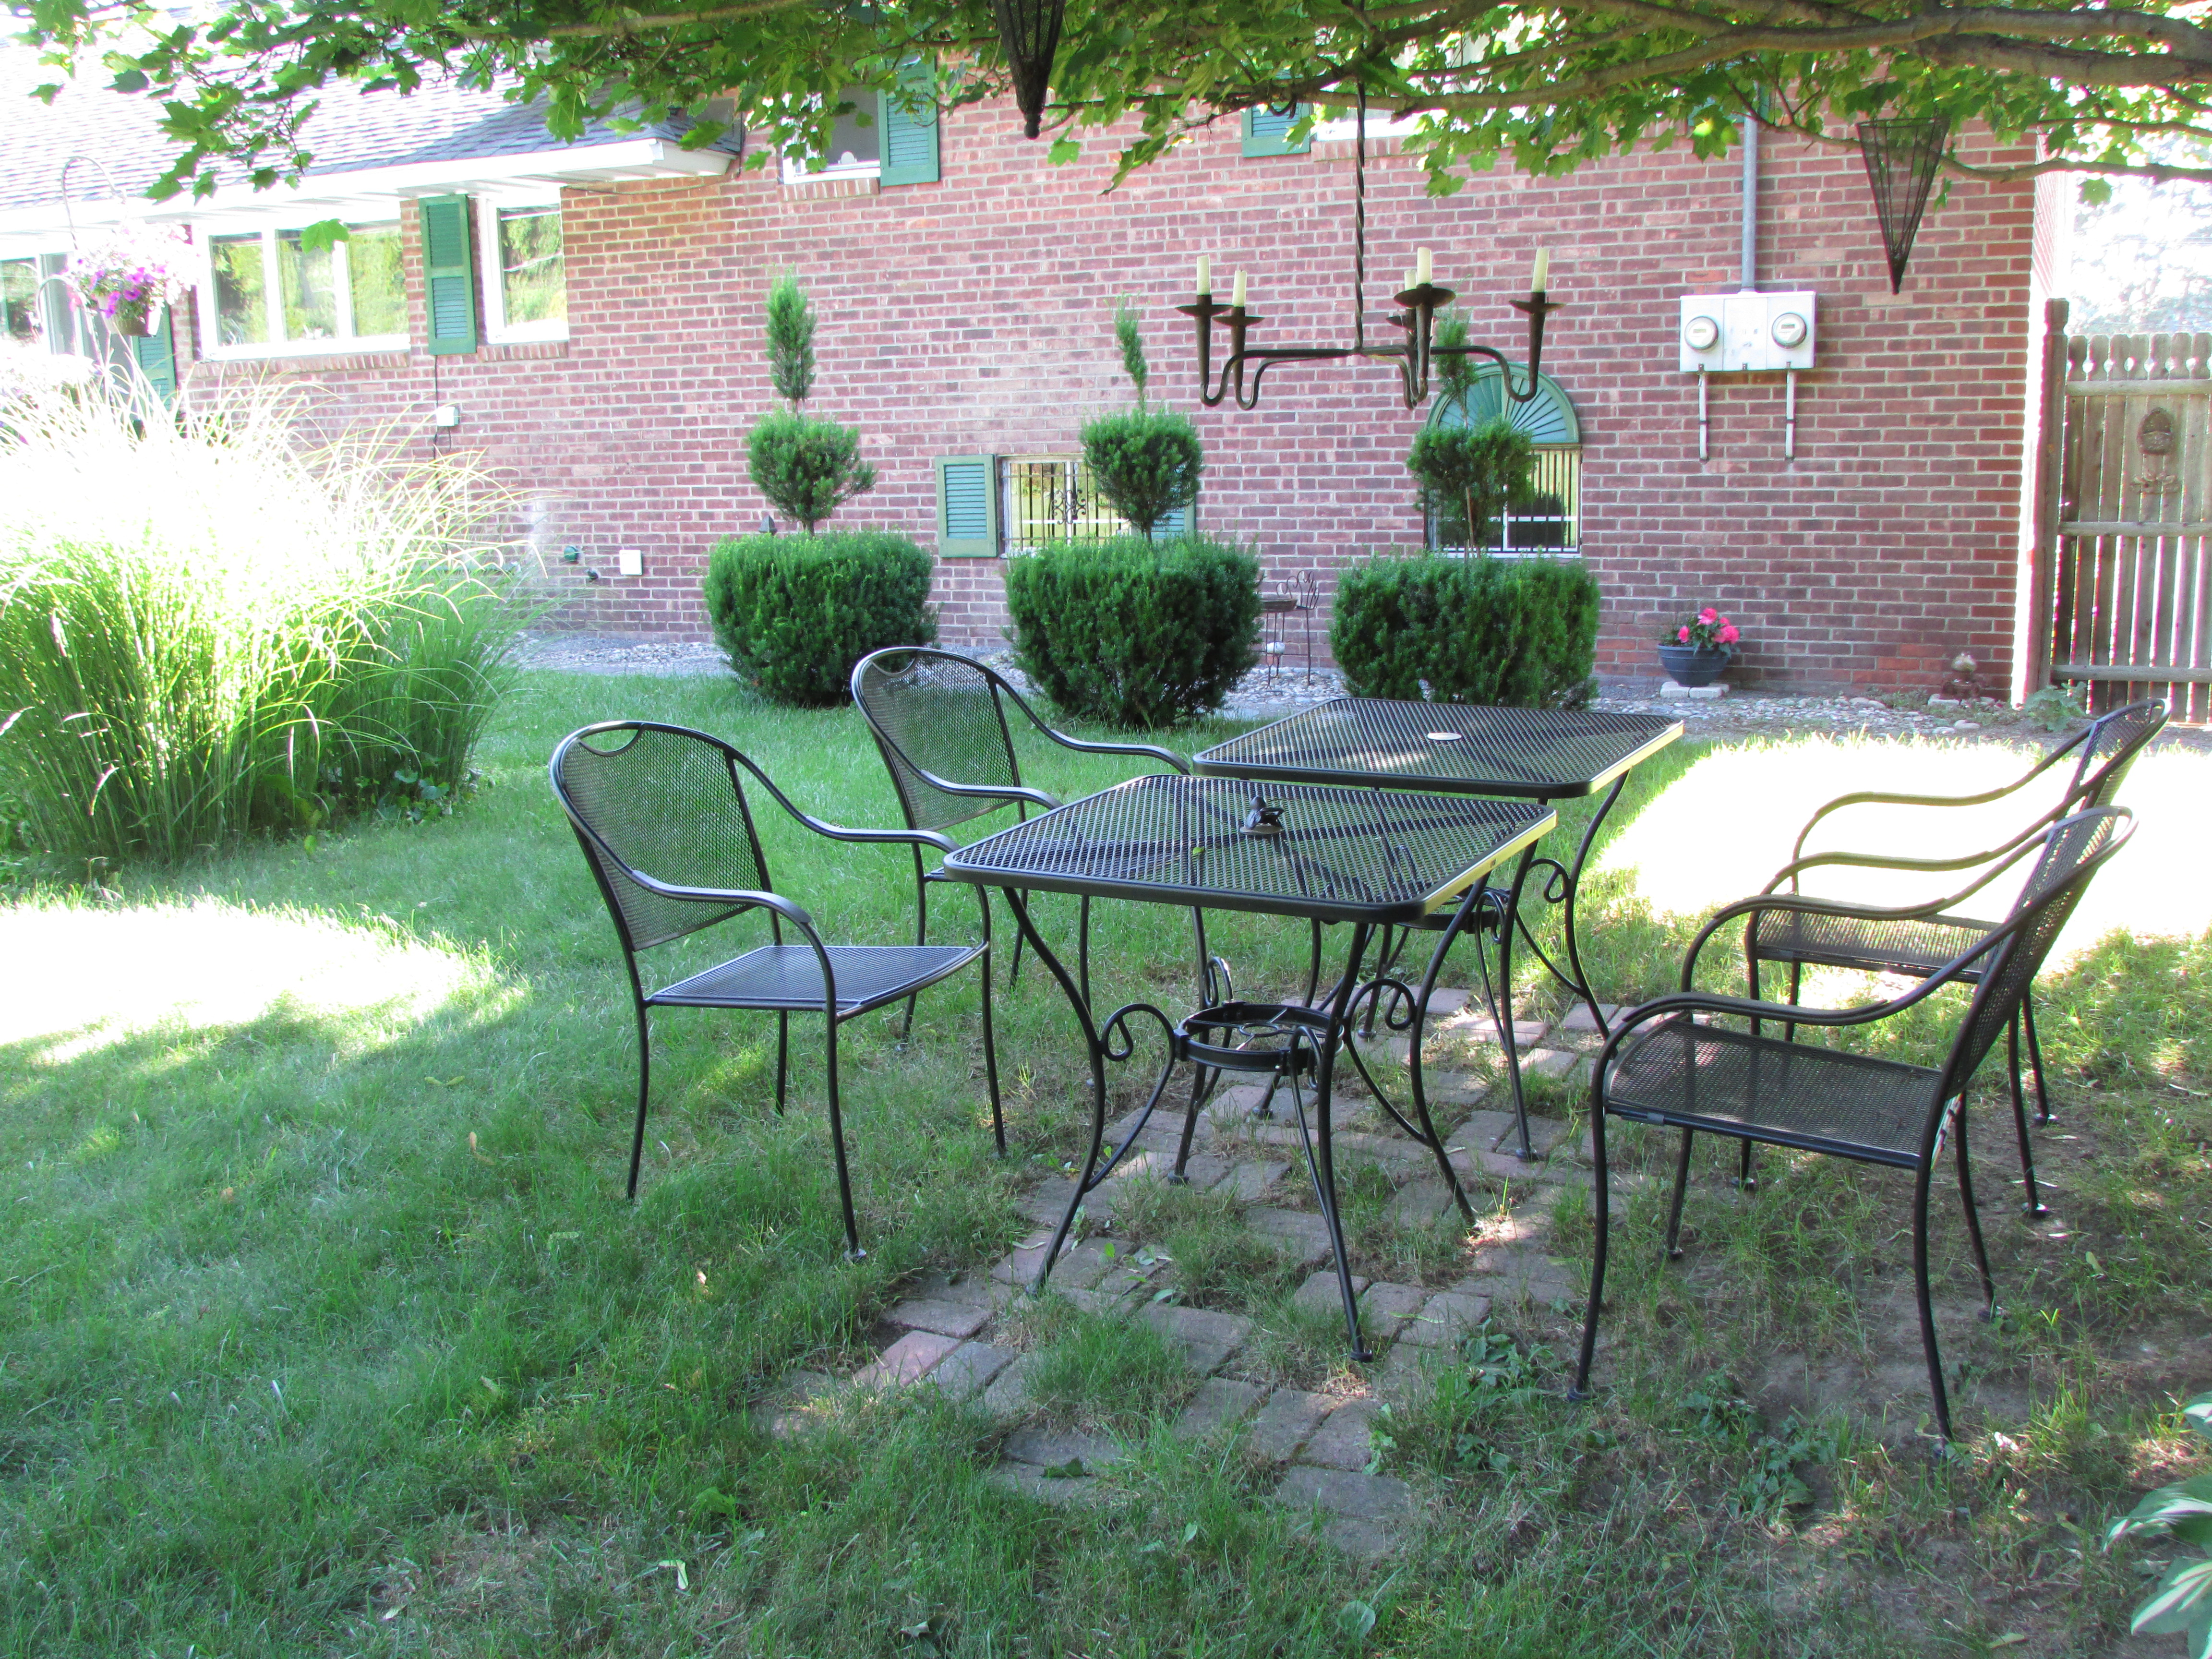 The picnic tables under the tree. The perfect place to eat, drink and relax on a warm Summer day or early evening. Notice the chandelier and pair of wire cones hung from the tree, and the bricks embedded in the grass which form a carpet of sorts.
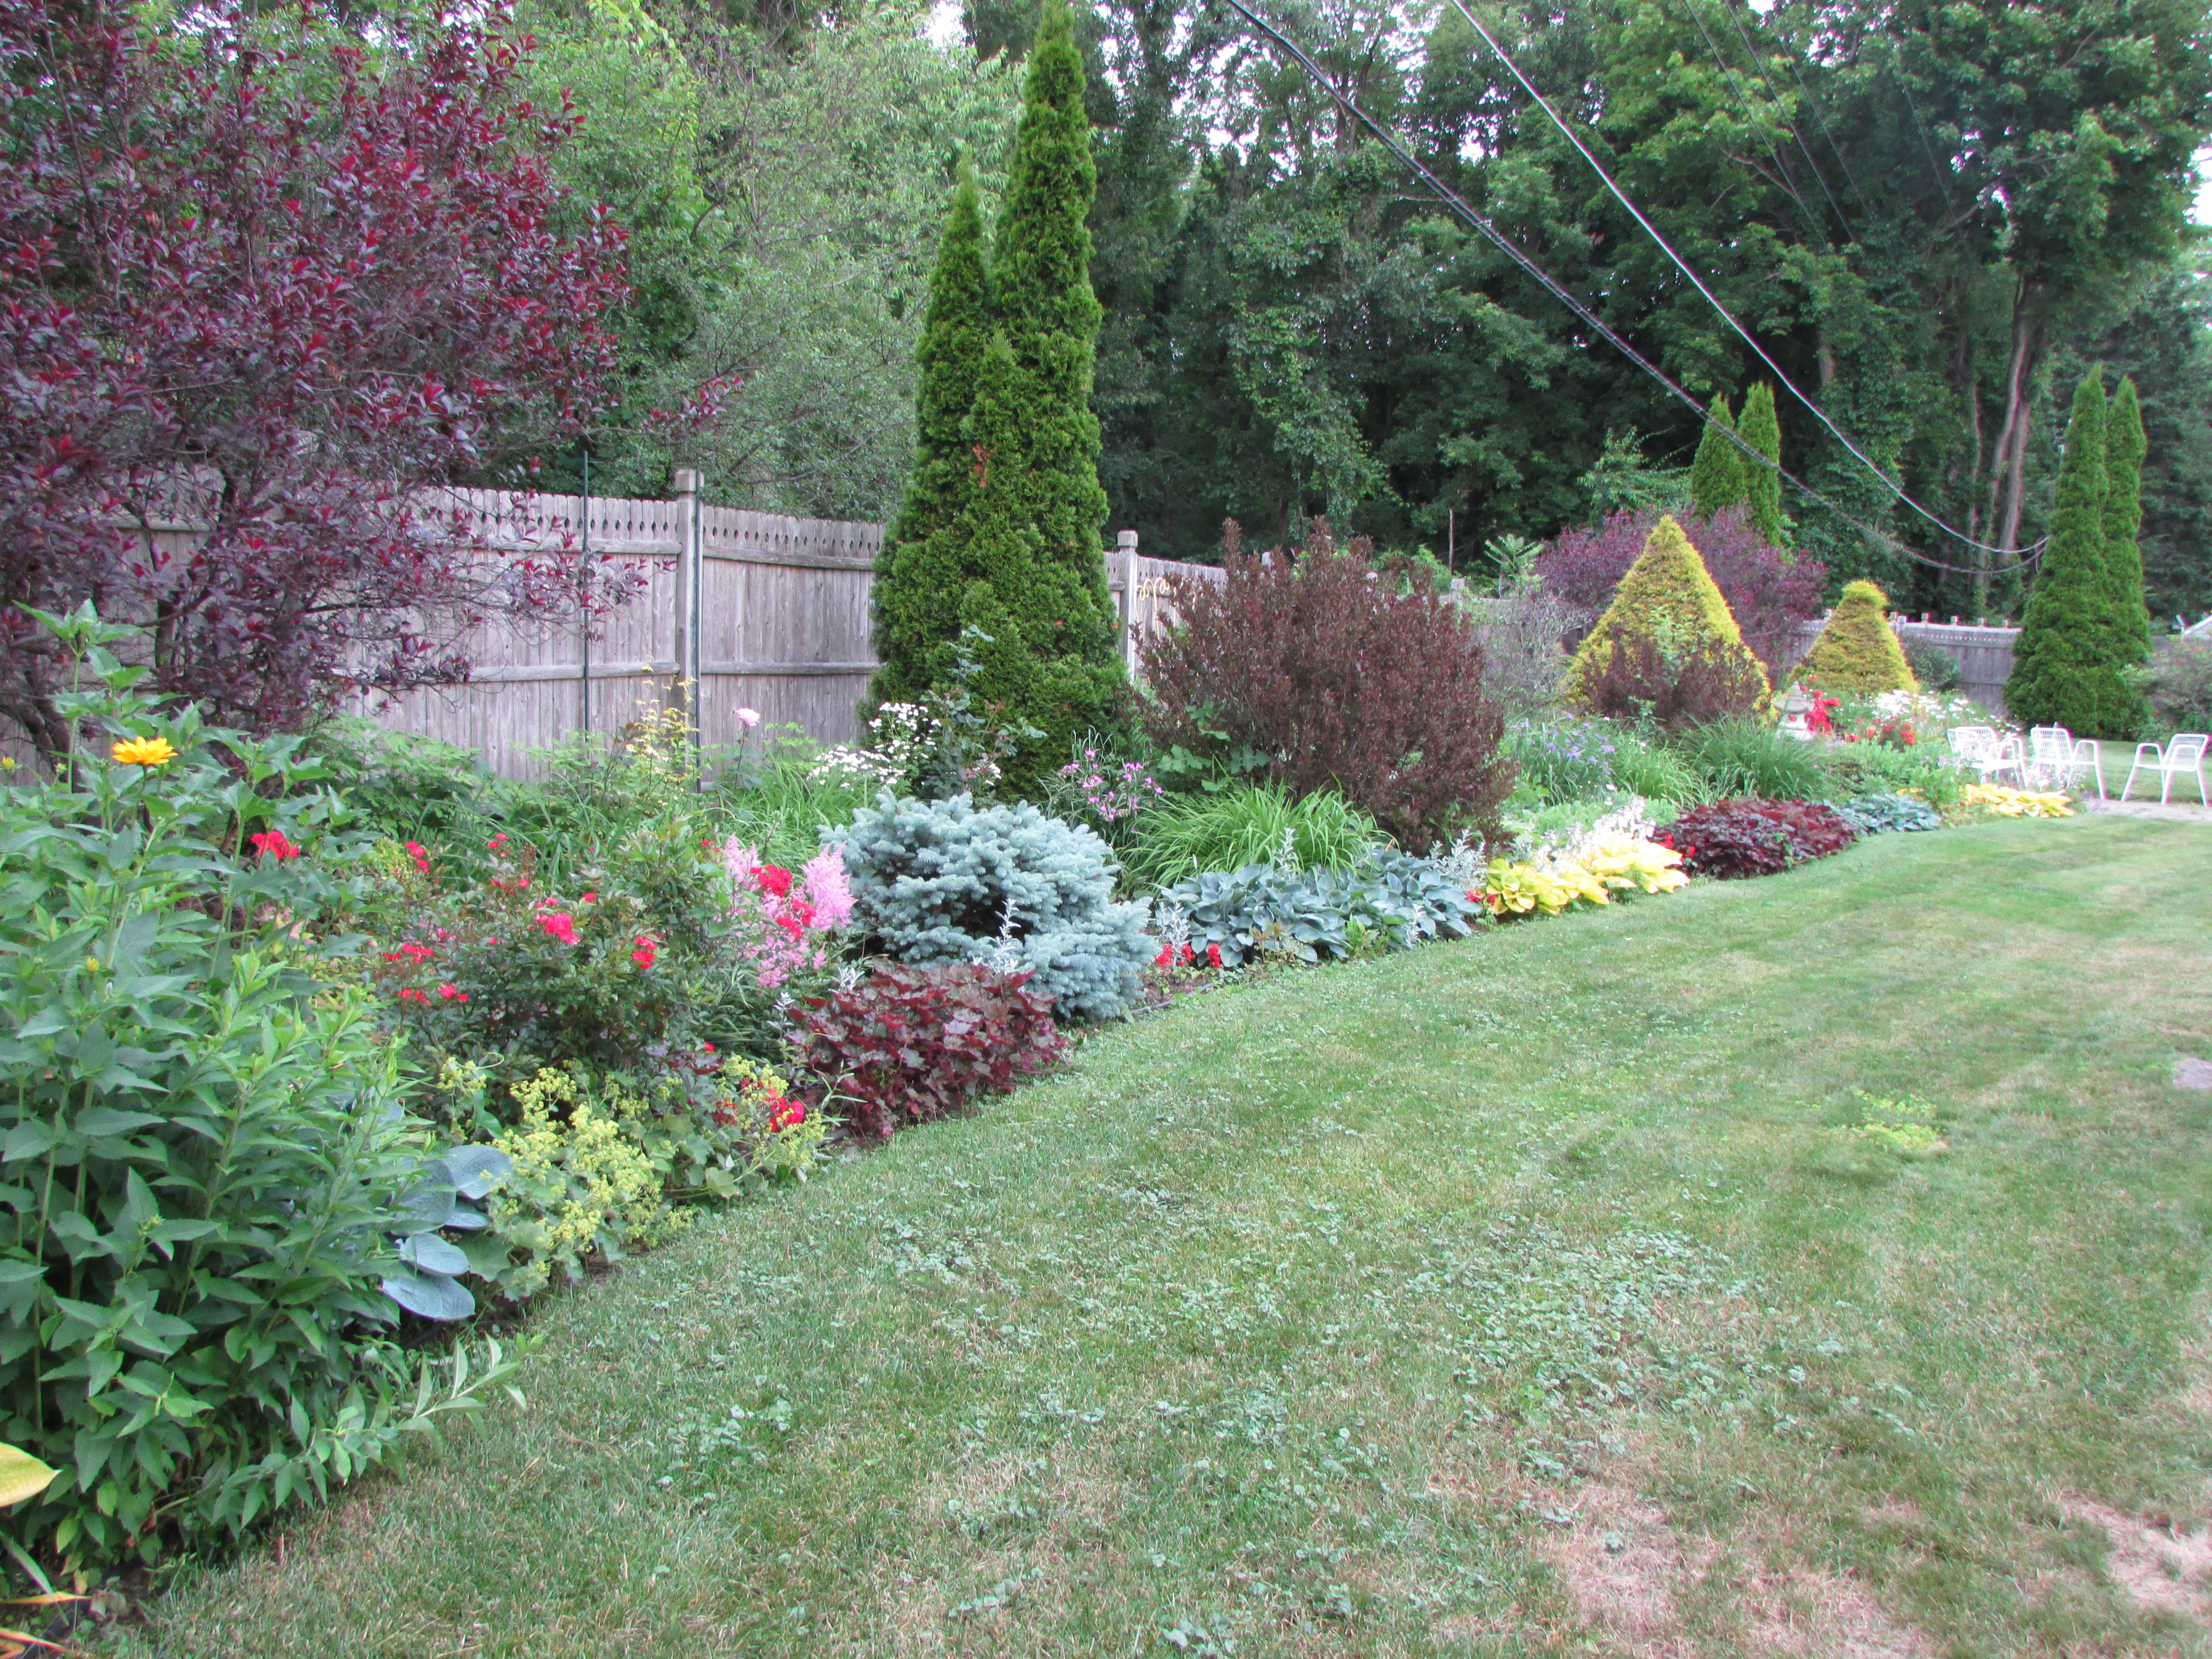 Now we’re up by the long border which runs across the back of my property; it’s 14 to 16 feet deep and 125 feet long. Earlier in this post I mentioned that the June garden was all about the foliage tapestry with its colors green, blue-green, chartreuse, burgundy and gray. This photo shows how I worked those colors across the long border trying to use them at ground level, in the middle of the bed, and up high.
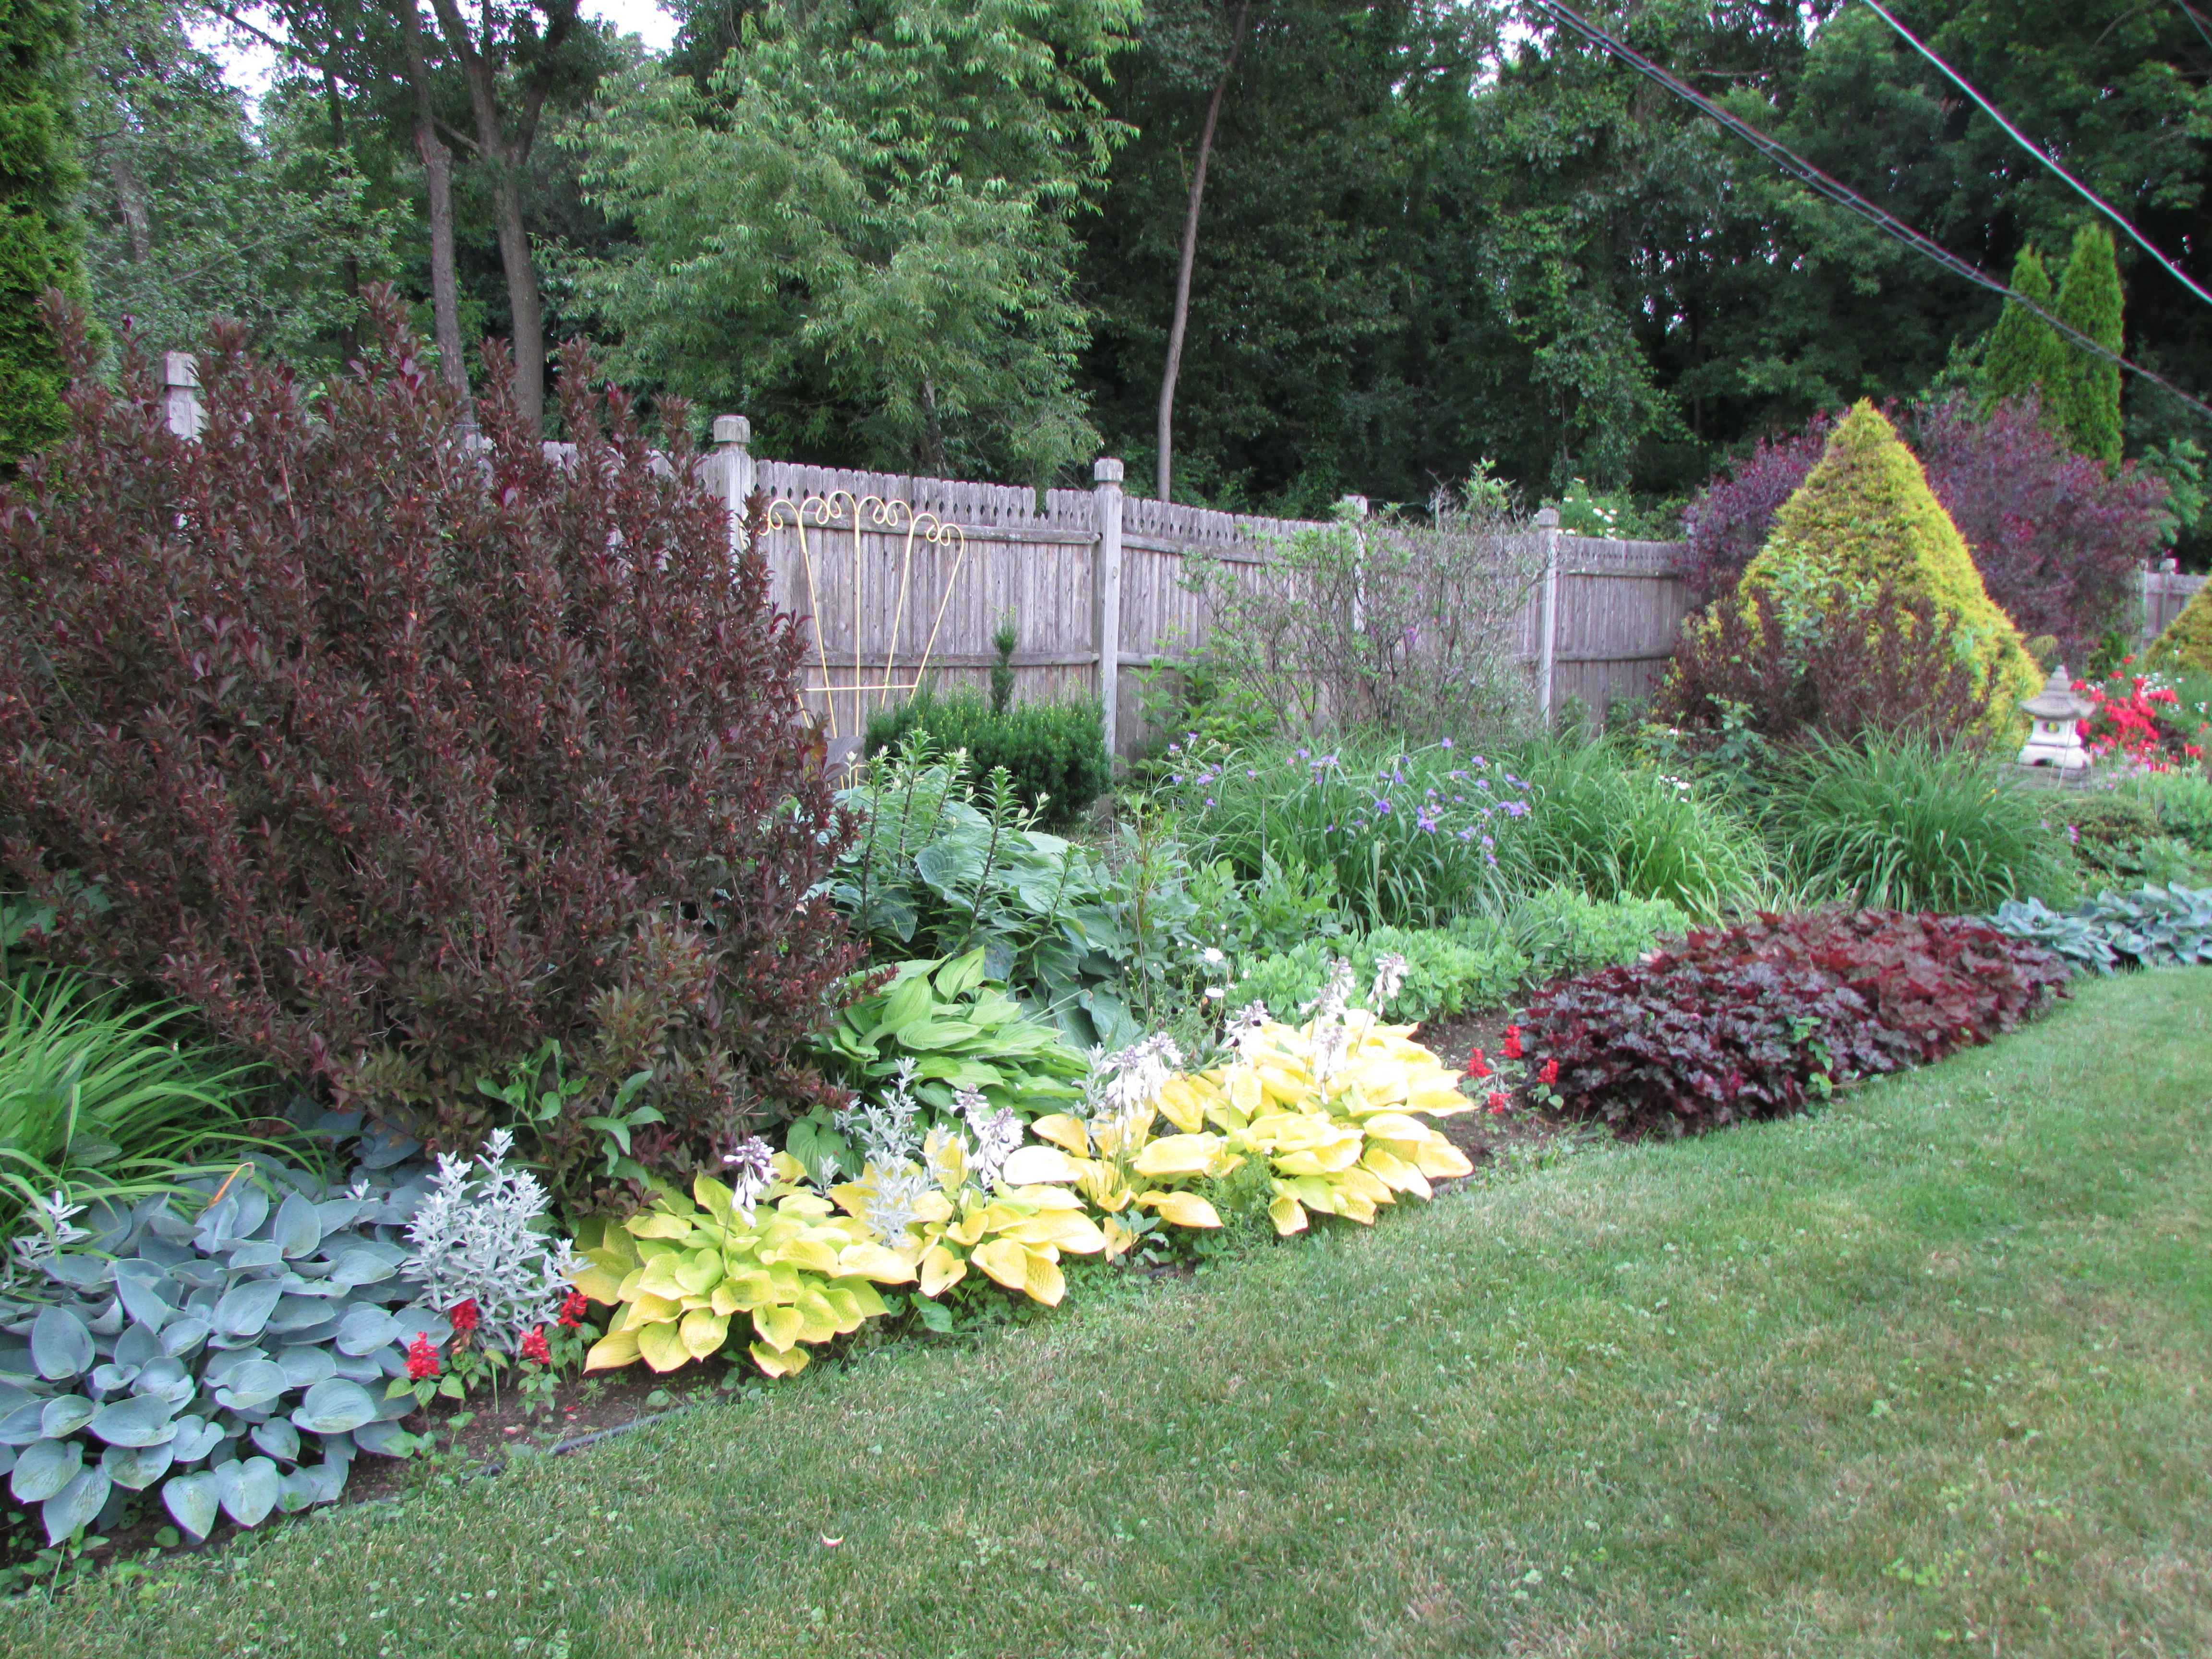
 Here are two closeups of part of the back border. You can see how things are planted in mass, and as specimens. As said before, the garden is really a colorful leaf tapestry this time of the year.
  An unknown variety of red bush rose is seen in the right-center foreground. It came from my maternal grandmother’s garden. She probably started it from a slip that she got from a friend. My mother also has the same red rose growing in her garden that she started from her mother’s bushes over fifty years ago. I started my red roses from slips that came off of my mother’s bushes. We are three generations of plants people loving the same rose.
 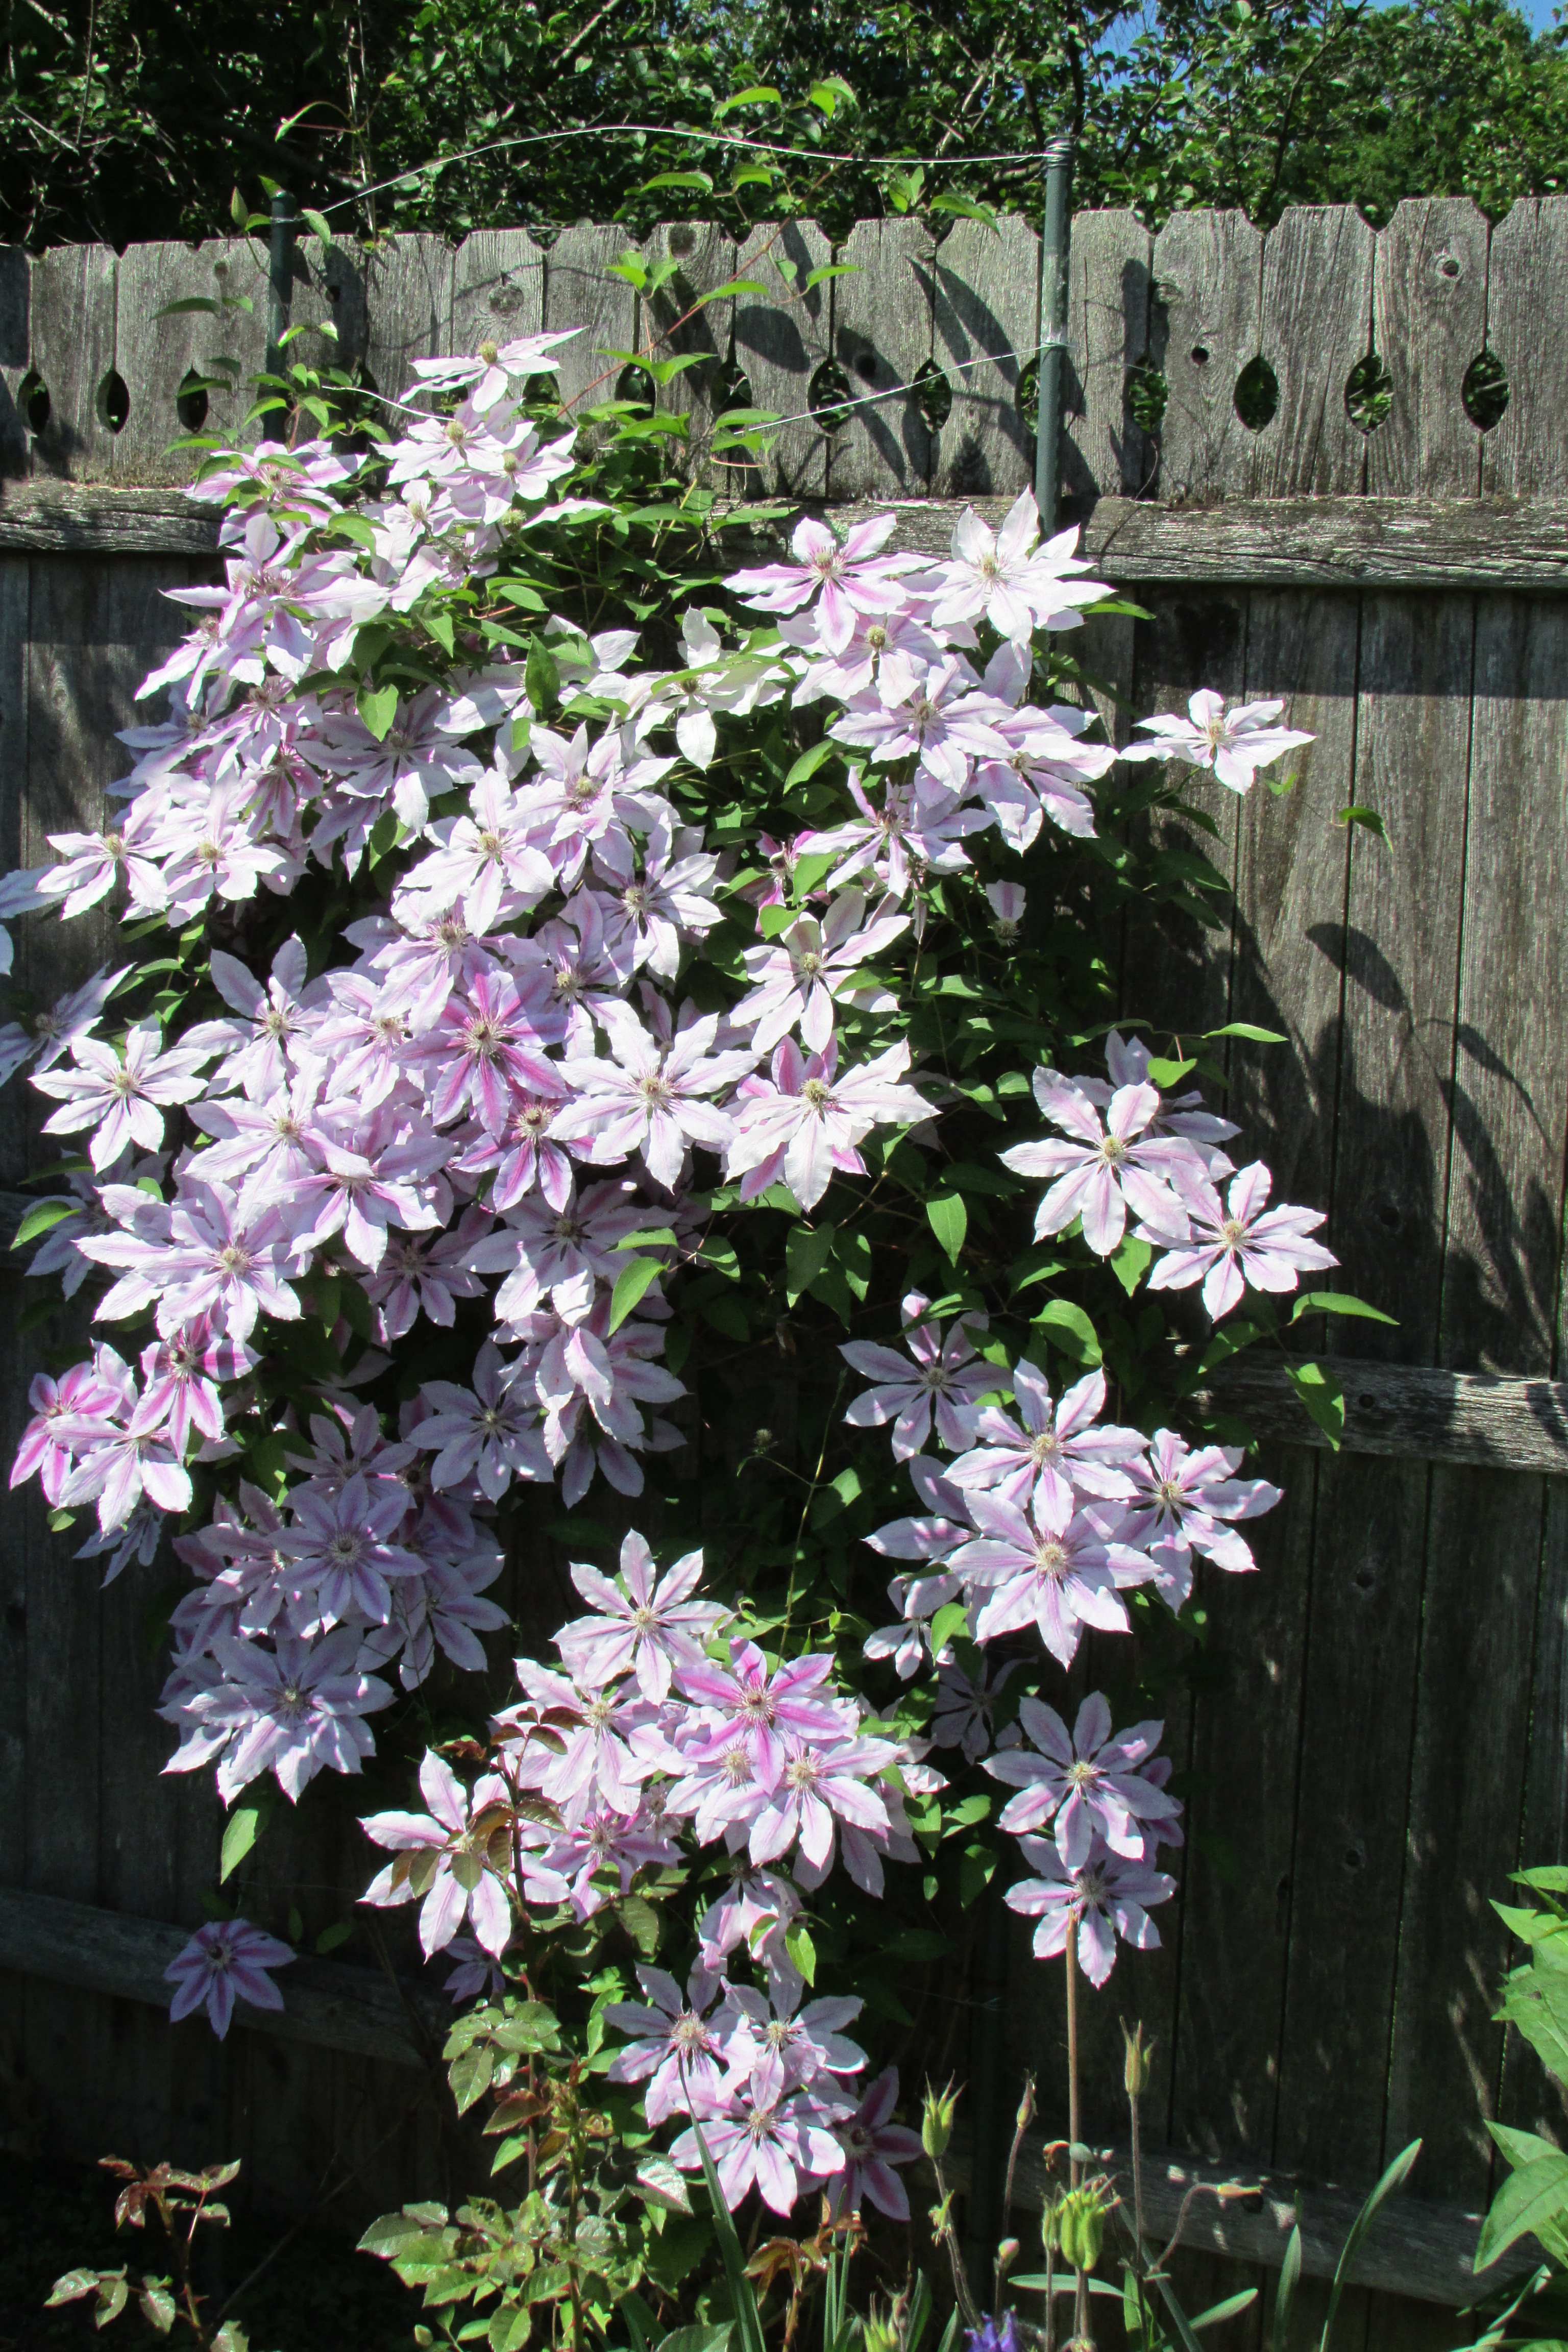 One of my many clematis that grow on simple trellises that I made using Sturdy Sticks and Galvanized wire.
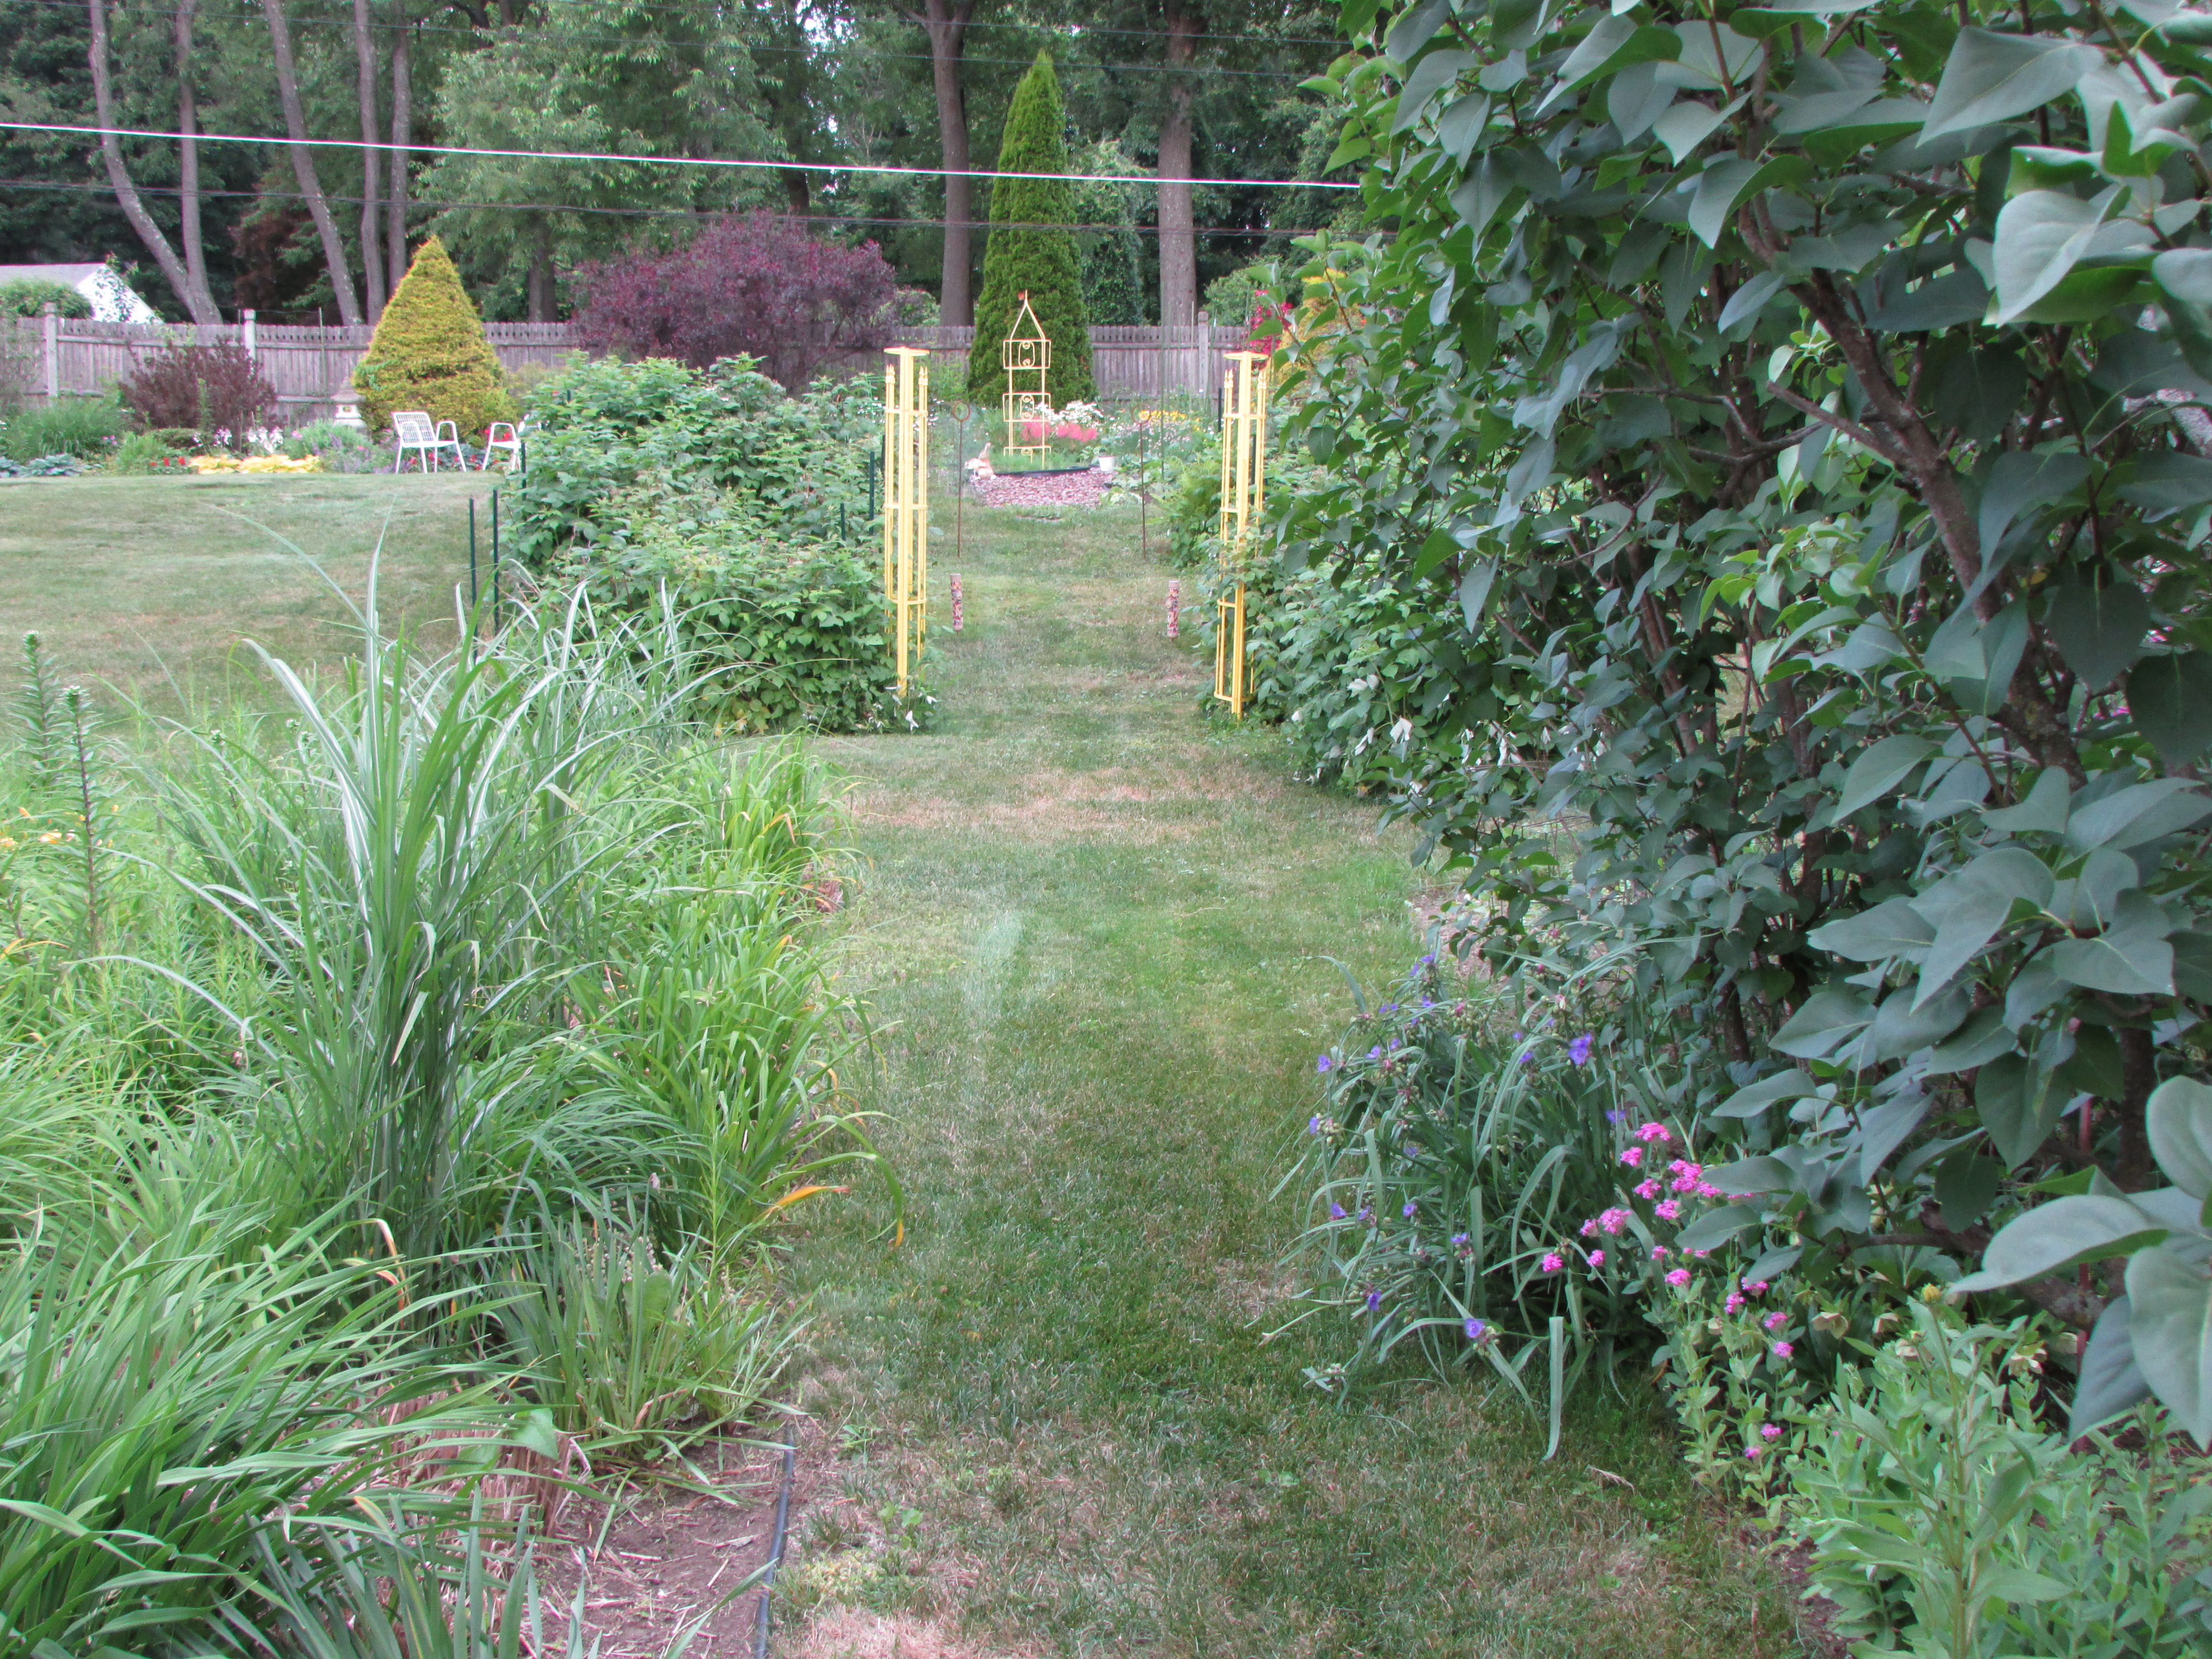 A view of the long walk, standing close to the house, looking westward. Three separate plantings of a variety of ornamental Miscanthus grass called Morning Light are seen in the left foreground. I was supposed to divide the three clumps this past Spring, but did not have the time. Luckily for me I did not, as this past Winter with its 18 degree below zero Fahrenheit nights, killed off most of the root system of the three clumps. Small portions of each of the clumps did survive, so I have something to divide and hopefully replant this coming Fall.
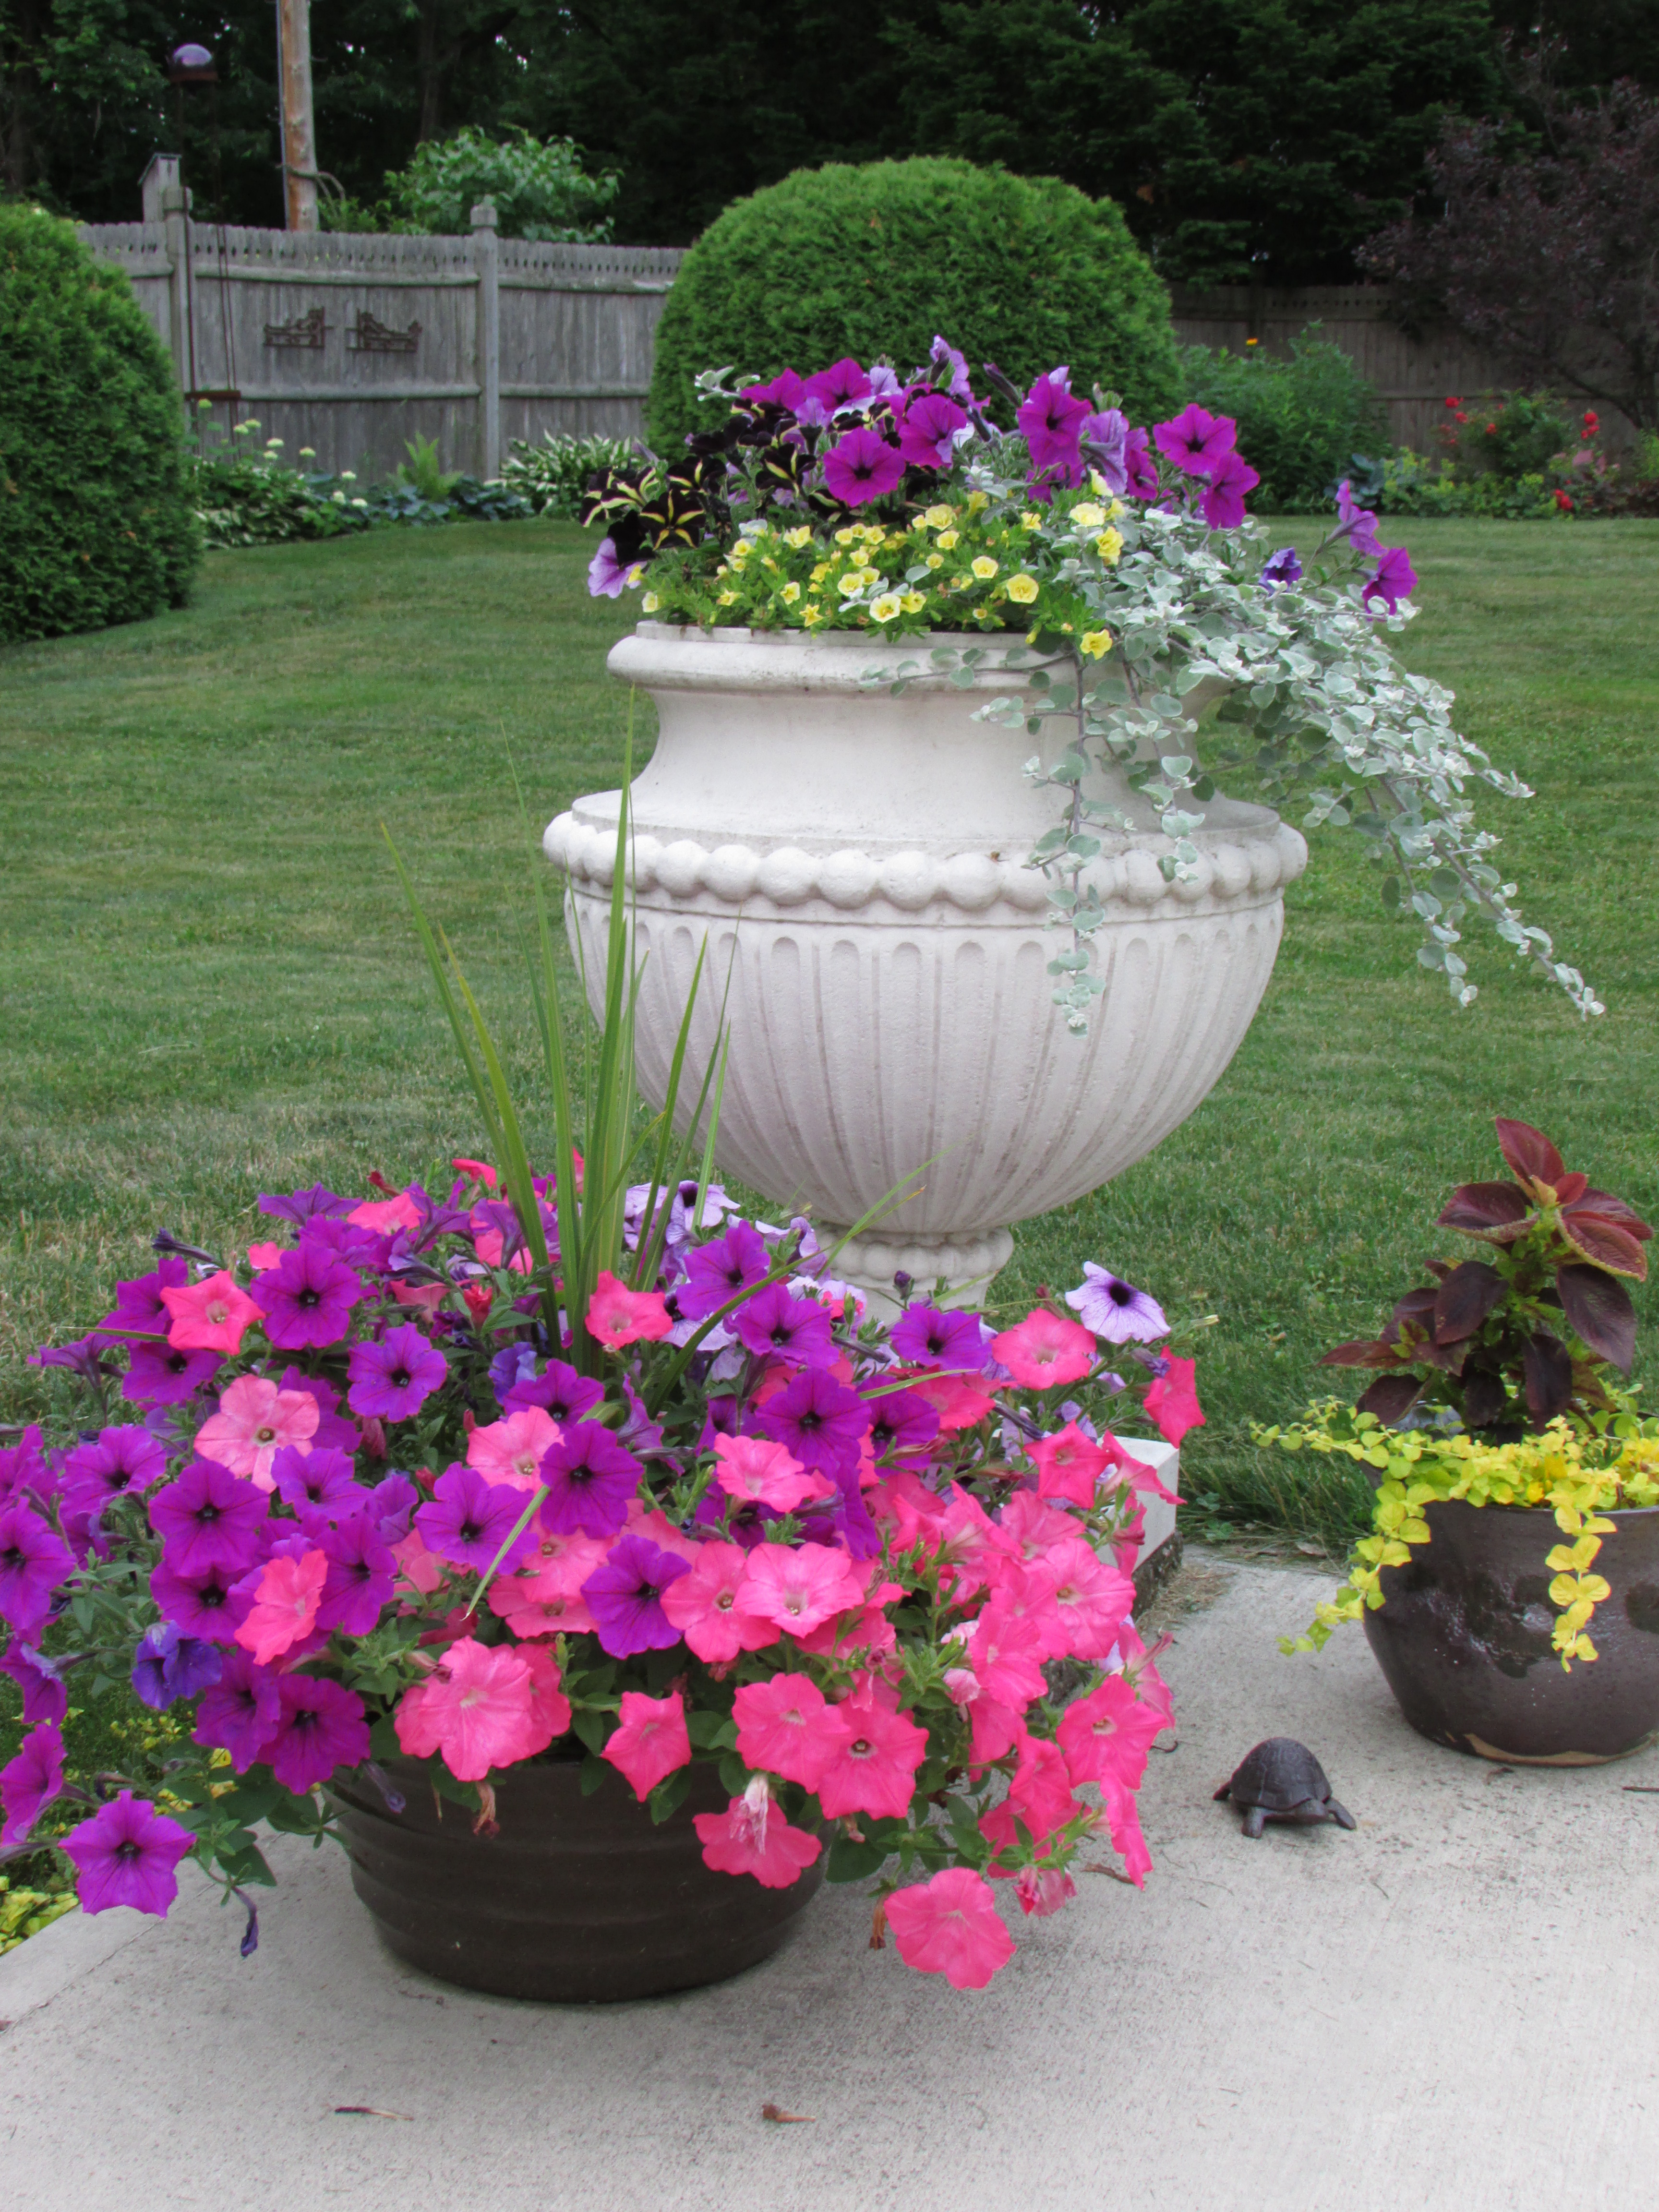
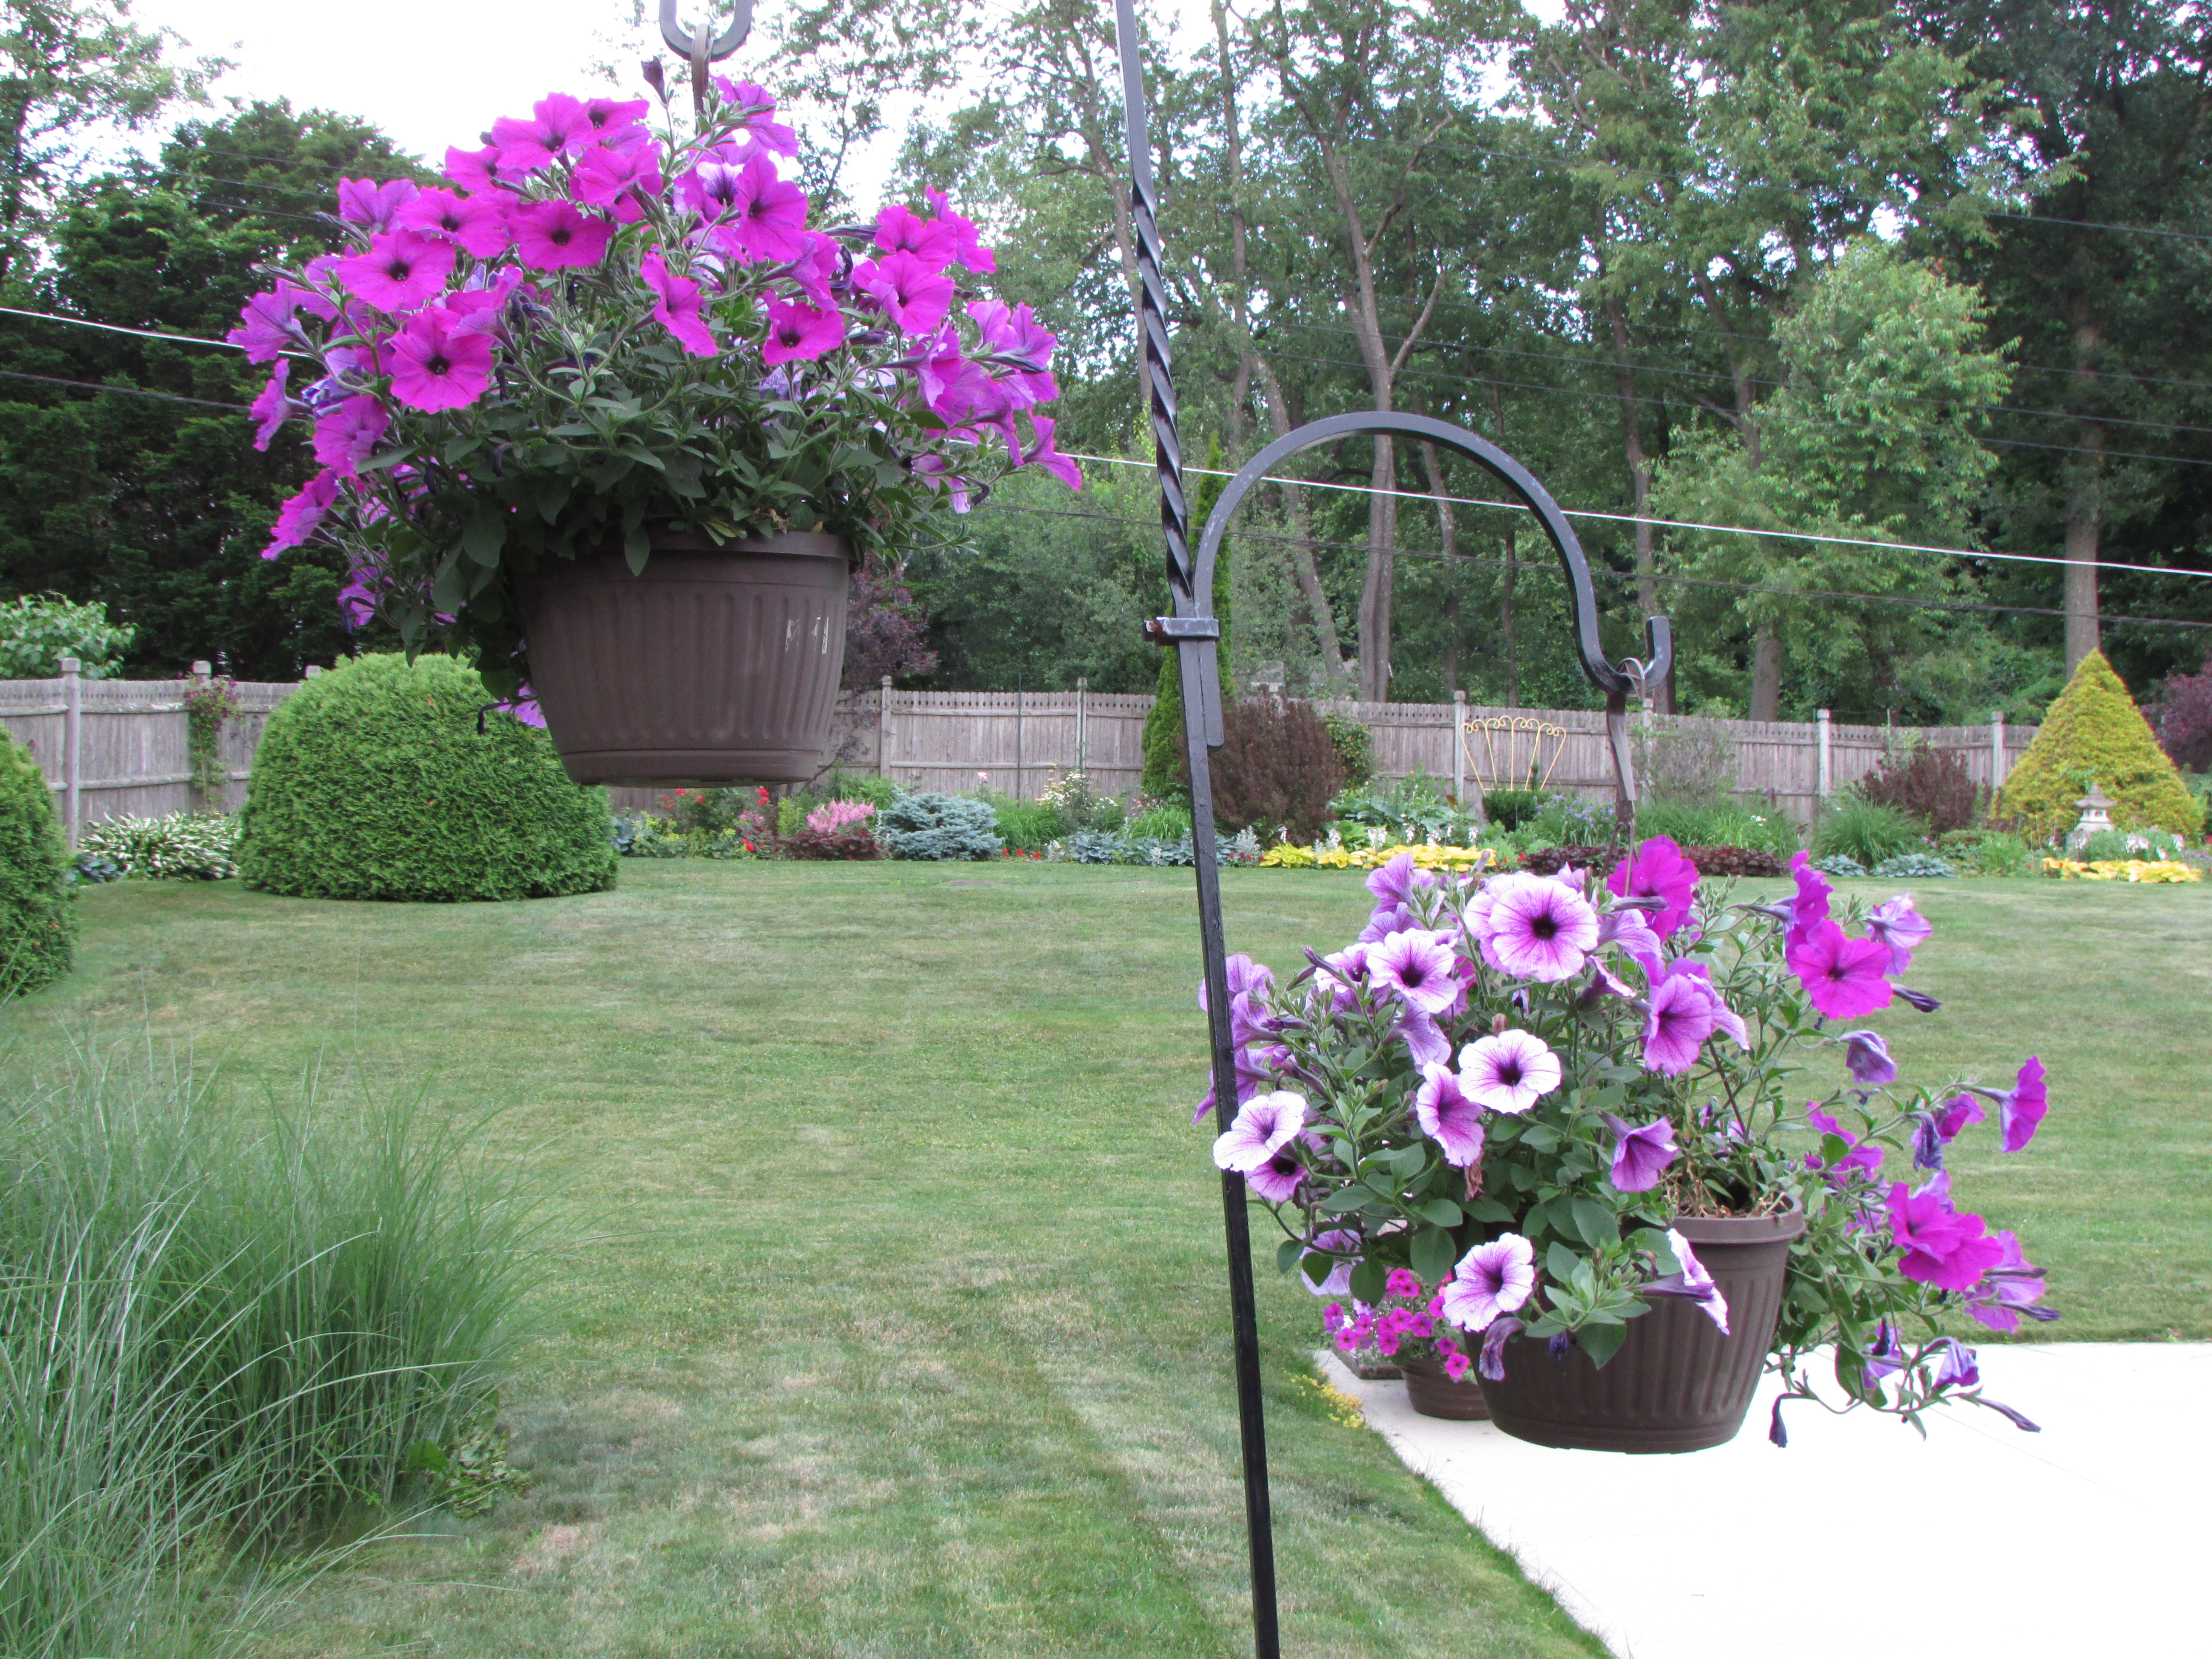
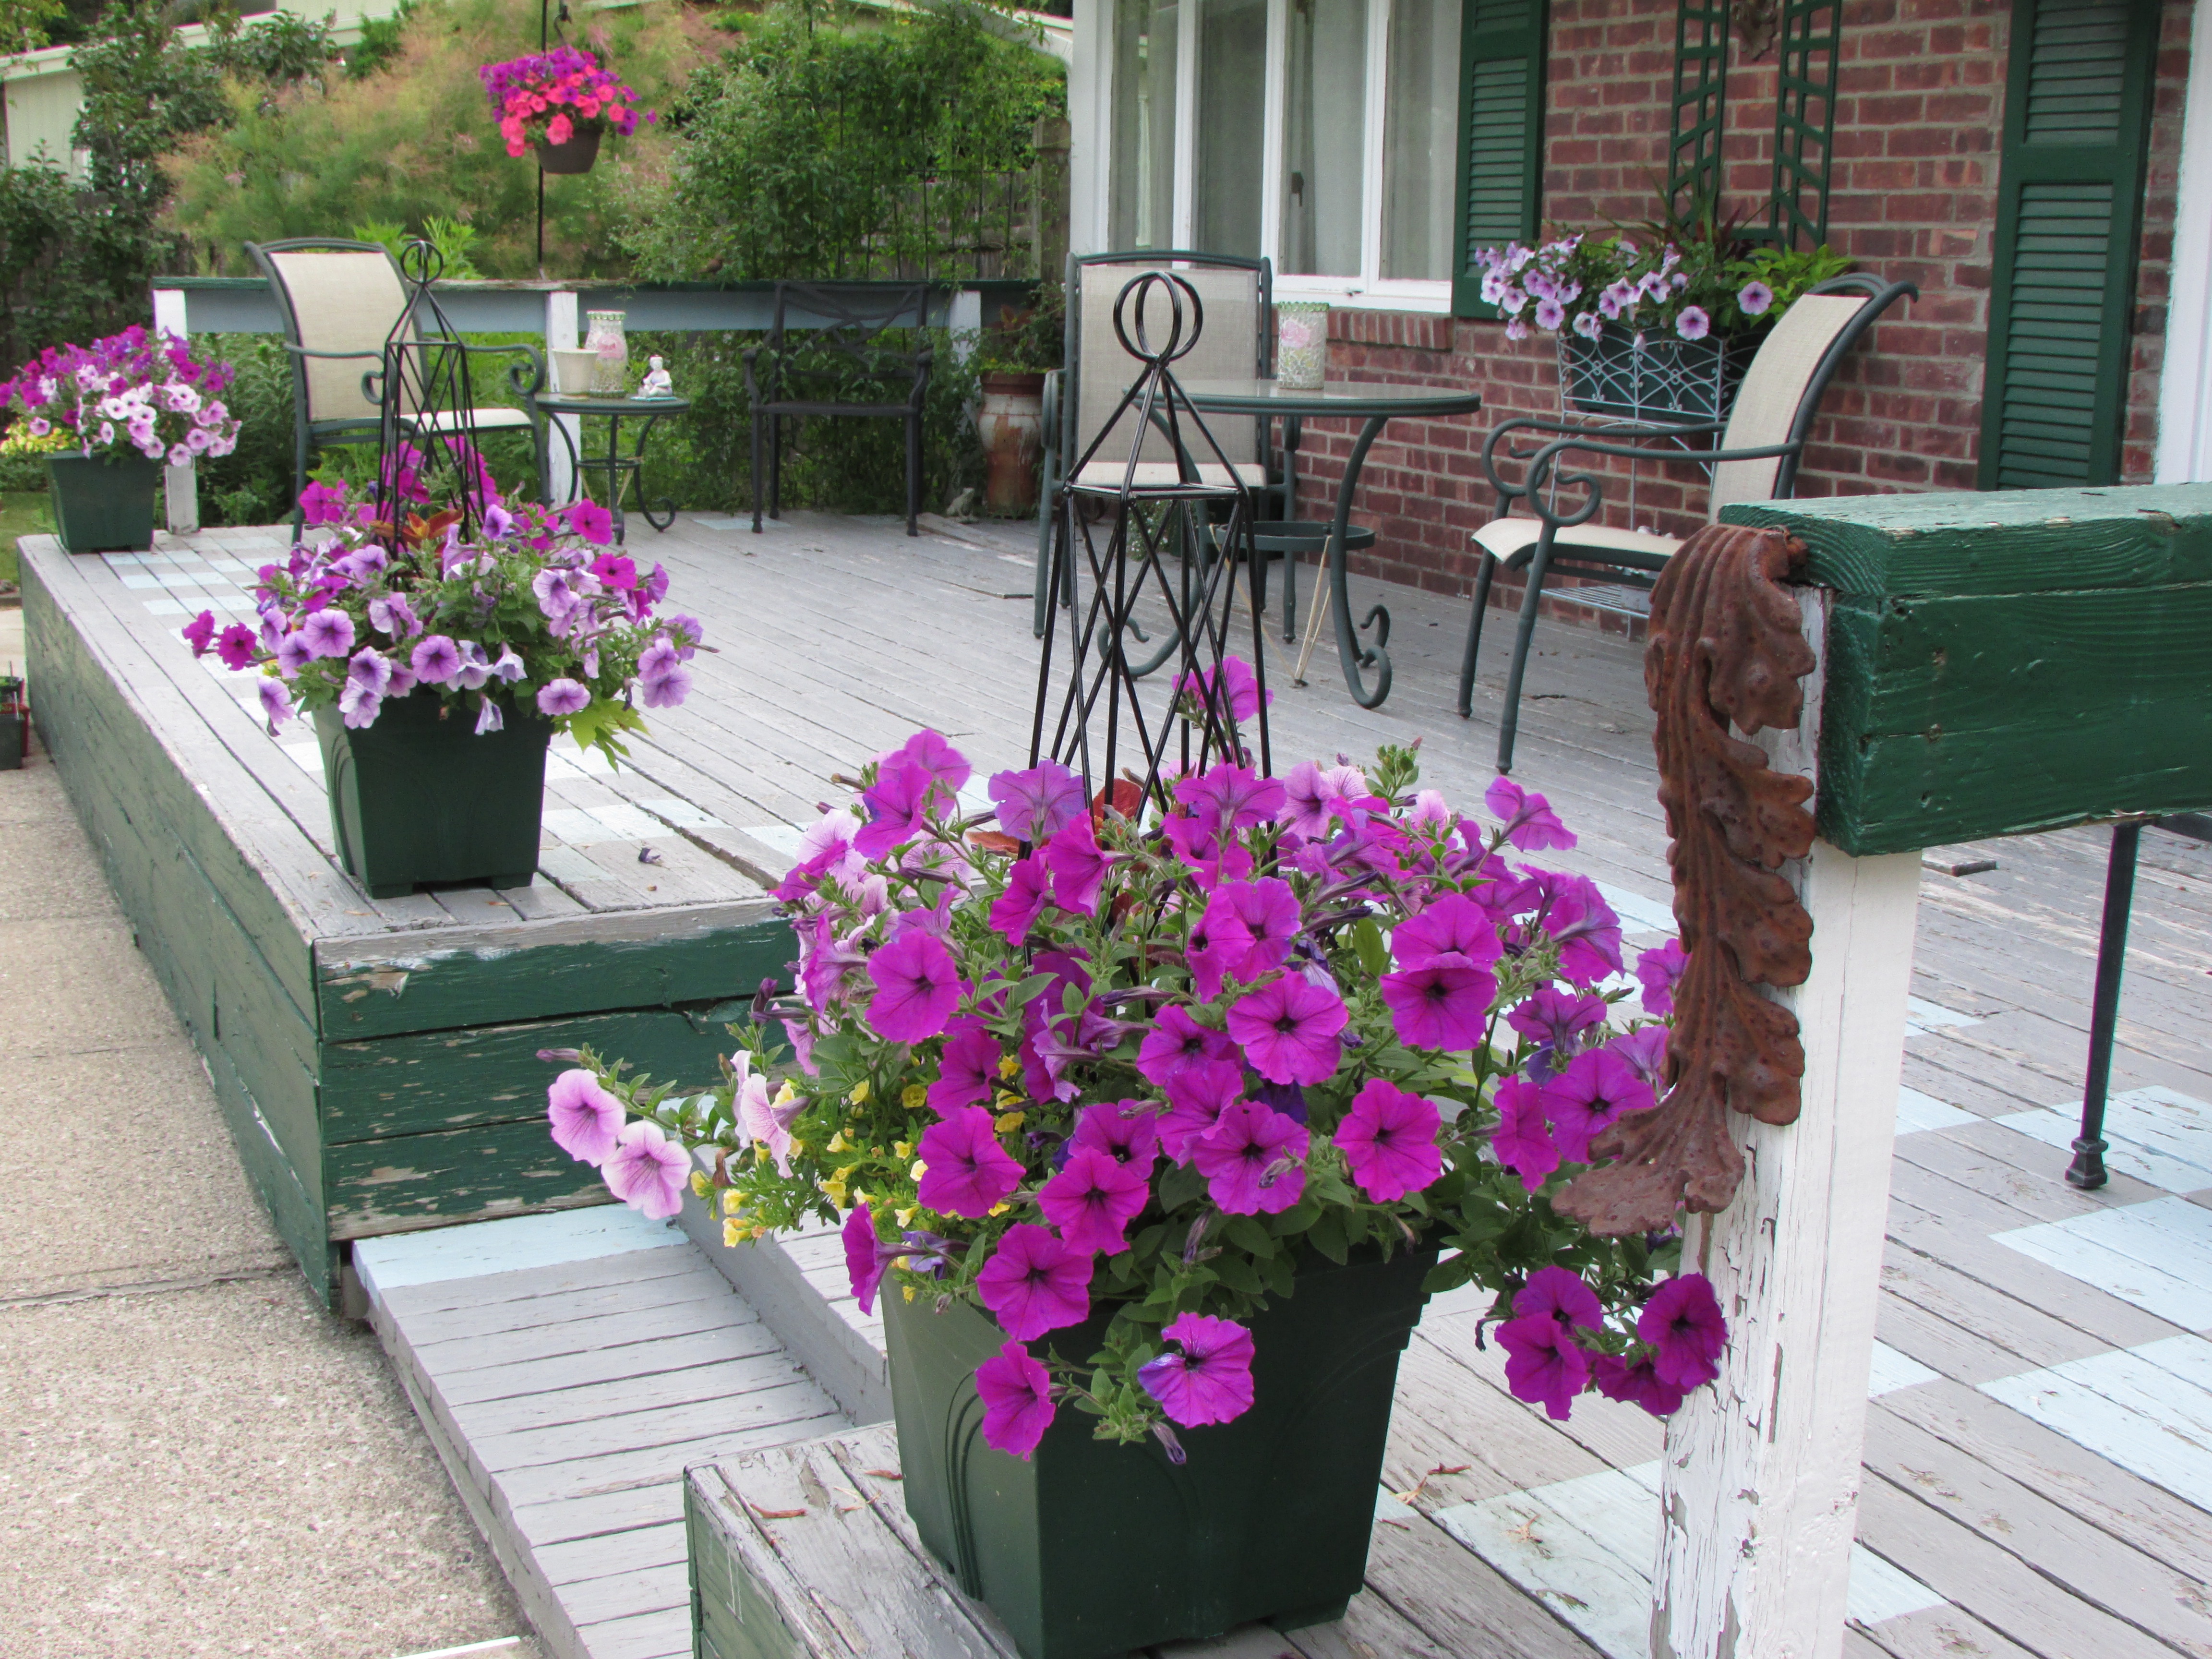 Planters, hanging baskets and assorted pots seen by my back deck.
 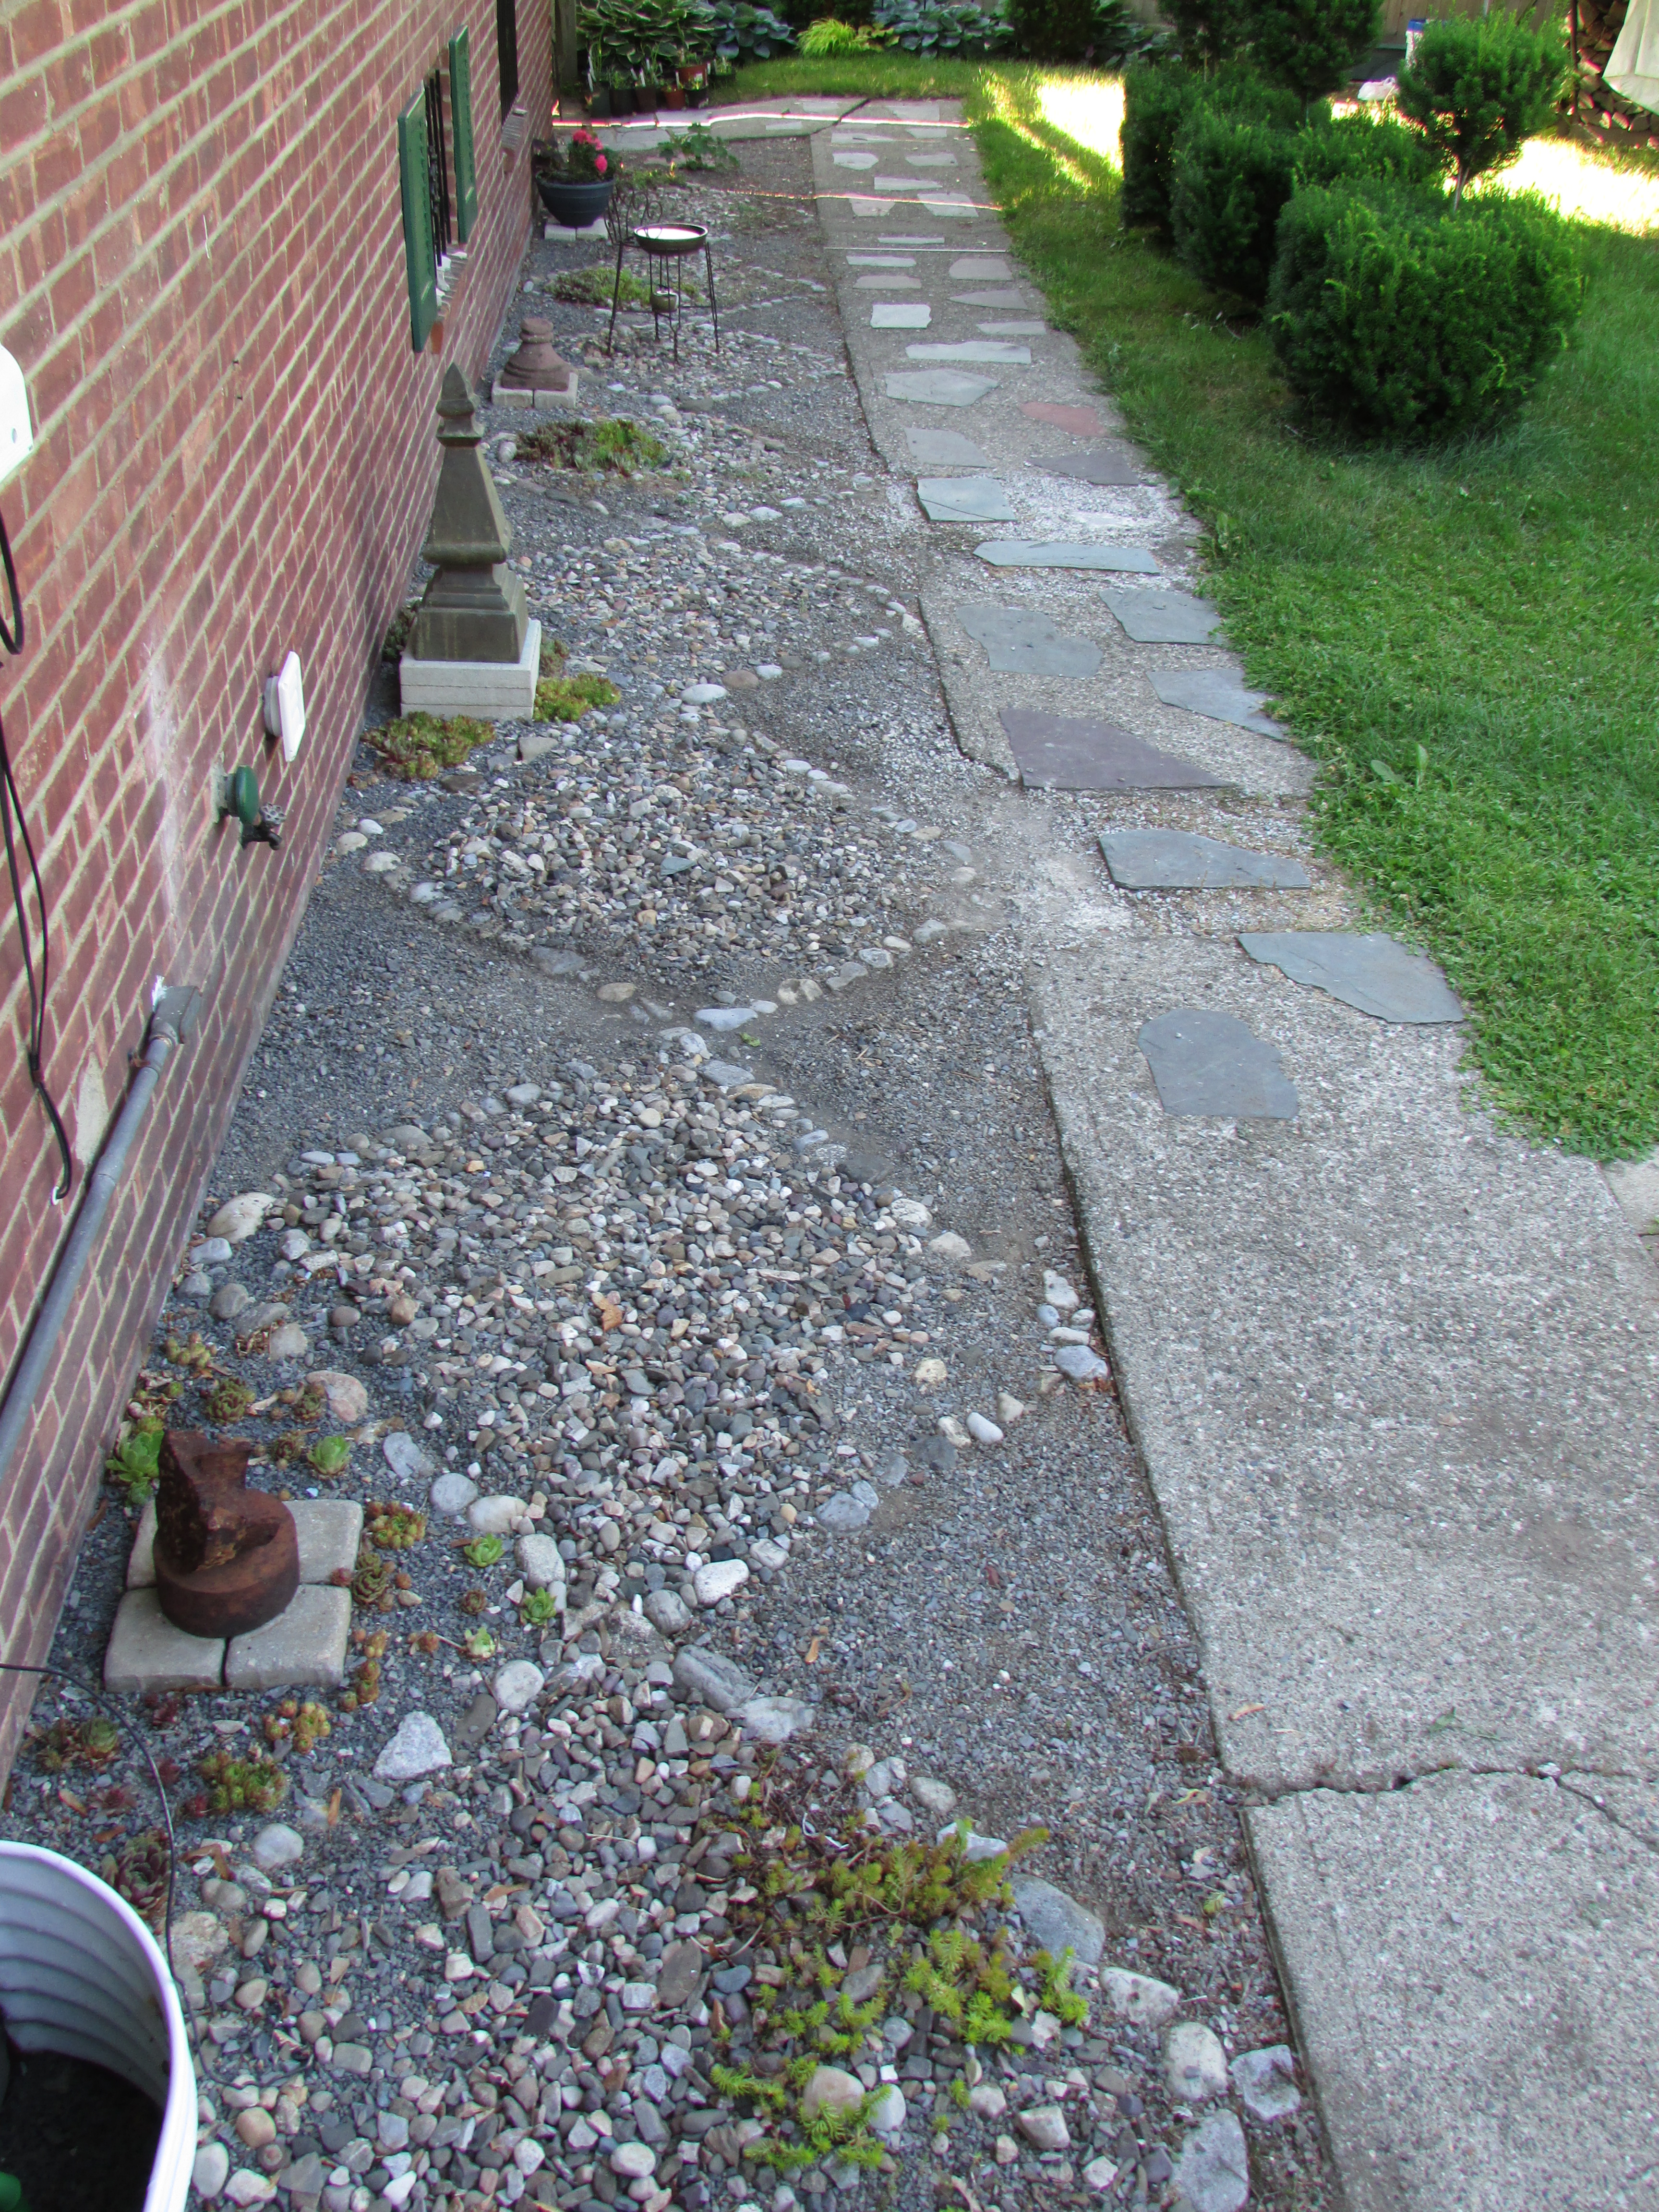 The last photo on the garden tour is of the “Rock Garden” that I made behind my house. When I first moved in, twenty-four years ago, there was just crushed stone over sand behind the house, it must have been a 1950’s way of doing drainage by the foundation. I always hated the look. About fifteen years ago, I embedded Delaware Stones in the crushed stones and formed the triangle patterns; which I filled in with other smaller stones. Surprisingly the stones have mostly stood in place, and each Spring I toss back a few stones that have migrated from their spots. In the Spring I weed the “Rock Garden” once, sprinkle Preen on the stones, and it stays relatively weed-free throughout the growing season.
I hope you liked my little tour, if you have a moment, look at my part post titled A Garden Tour of my Property, It might be Spring, but You should be thinking Winter Interest when Planning Your Garden. You don’t have to read the post, just scroll down throw the photos of the garden. You will be able to see the bones of my Winter Garden, and compare it to what I have in June.
Companion Posts…
When Designing a Perennial Garden it’s ALL about the Shapes of Leaves 1-15-2011,
How to Plant (Design) a Garden, Mass versus Specimen Planting 2-17-2011,
Colored Foliage adds the WOW FACTOR to a Garden 2-22-2011,
Stagger Plant Heights when Planning (Designing) a Garden 2-23-2011,
Starting a Rose Bush and other plants from a Cuttings (Slip) 6-17-2011,
My Peonies don’t / won’t Bloom 5-16-2011,
An Easy to Make and Inexpensive Trellis for Clematis, Morning Glories and other Vines 5-12-2014,
Designing / Laying out Flower Beds 5-4-2013,
Growing a Topiary from an Upright Yew 6-15-2011,
Hostas (Plantation Lily) Planting Dividing and Maintenance 8-14-2011,
Looking at Evergreens in the Garden 1-31-2012,
Foundation Planting, Laying out Foundation Plants in Front of your House 9-28-2013,
Planting Foundation Plants across the Front of your House 10-21-2013,
Planting a Garden Room on your Property 2-17-2013,
Some Ideas about using Garden Ornaments, they add the Finishing Touch to a Garden 6-29-2013.


This is phenomenally beautiful, as well as a phenomenal accomplishment. It truly looks like something from a city park devoted to landscape plants, rather than the work of one person. Sometime I’d like to see an aerial schematic in order to understand the flow of everything.
Don’t give up on Bells of Ireland; i used to successfully (and easily) grow them from seed. They weren’t finicky at all so give them another try. You might also consider hollyhocks, aquilegia oka Columbine and nasturtiums. All parts of the latter are edible and they grow like crazy with the proper conditions. I’ve also had good luck with Sweet Williams grown from cuttings.
You’re inspiring me again. I’m feeling very proud just to have planted some urns and made a couple of ivy topiaries. My garden used to be spectacular (not quite as great as yous, however0, but it’s hard to start all over practically from scratch. 😦 Yours is really an unbelievable space that speaks volumes about your aesthetic and person. Thank you for sharing it.
Hi there Teresa, thanks for you glowing praise. The garden has gone through a few phases, and did not always look like it does today. If you have a moment look at this post I wrote a few years ago when the garden looked like a bowl of fruit salad. A lot of wild color and no defined taste. If I had it to do over again, I probably would have it a bit different, but I do love it as it is. All of the posts I write on this blog cover the many things I’ve learned along the way by making mistakes, and going on oh too many garden tours of estates within a few hours of my home. In a way I’ve tried to have an estate garden on 3/4 acre.
Last year when I was having gutters put on the back of the house, I caught the gutter man taking pictures of my property. He said it looked like a place where Martha Stewart would live. I laughed and thought, if I had Martha’s staff of garden people helping me, and her money and land, how fabulous it could be. But with my staff of three doing the garden work (Me, Myself and I), I think is looks pretty good ;-}
As other beds and parts of the garden are weeded and come into flower, I will have more photos to show. Happy Summer to you!
Really looks nice.
Hi there pbmgarden…maybe the place will look really nice when the weeds, not shown in the photographs, have been pulled. But with warm and humid days and nights and running around and other things life has to offer, my quest of so called garden perfection will have to wait ;-}
I am in all time with daffodils 🙂 What a beautiful garden it is. Wow this must be a product of some amazing effort behind. Blissful!
Fred!!
I don’t even know where to begin! Wonderful gardens you have created! I think that some of my plants really took a beating this past winter, so I was so happy to see your beautiful space!
How long have you been living at Whimsey Hill House? I know gardens don’t just happen overnight, but sometimes it is so hard to be patient! 🙂 I am planning a garden for a Cape Cod sort of house and your gardens have inspired me with some new ideas. Thank you so much for sharing not only your photos, but your knowledge. You are very talented!
Thanks for your recommendation of using a detangeling comb for rug tassels – worked GREAT!
Hi Shirley, thank you for your comment ;-} It is so rare that a person comes back and gives a testimonial.
I have just discovered your blog this evening and have been loving exploring so many of your posts! I had to smile when I read this reader’s comment…when our sons were growing up, a frequent task was to brush the fringes on our oriental rugs. They still give us a hard time about that chore today. I’m sure neither of them will ever own a tasseled rug! ;-)).
Hi there Evelyn, don’t worry if they don’t buy rugs with fringe, their kids will be totally attracted to them. You know, it takes a generation for something to cool. What Mom and Dad had will not interest them, but what you and your husband have will interest their kids. Also, no matter how they try to not be like you and your husband, a part of you both is in them that they can’t get rid of, no matter how hard they try. Keep the rugs in good order, and when you are done with them, pass them on to their kids, they will just love what Grand Dad and Grand Ma had. Thanks for your comment ;-}